Table of Contents
Advertisement
Advertisement
Table of Contents

Related Manuals for Bristan Artisan Evo


Summary of Contents for Bristan Artisan Evo
- Page 1 Installation Instructions and User Guide Artisan Evo Digital Electronic Mixer Shower Models Covered: ARDE SHCDIVM C Please keep this booklet for future reference. Installer, when you have read these instructions please ensure you leave them with the user.
-
Page 2: Table Of Contents
Welcome to your new Bristan Digital Electronic Mixer Shower, featuring a contemporary design, wireless electronic controller and digital mixing unit. Bristan’s Digital Electronic Mixer Shower has been designed to be easy to install and use. It has also been designed and tested in the UK to all of the relevant British Standards. -
Page 3: Important Safety Information
Important Safety Information Please read these instructions thoroughly and retain for future use. All products manufactured and supplied by Bristan are safe provided they are installed, used correctly and receive regular maintenance in accordance with these instructions. If you are in any doubt about your ability to install this product safely you must employ the services of an experienced qualified plumber/electrically qualified person. -
Page 4: Specification
12 lpm Commercial Prior to Installation All products manufactured and supplied by Bristan are safe provided they are installed, used correctly and recieve regular maintenance in accordance with these instructions. This product has been tested to the Water Regulations Advisory Scheme (WRAS) and satisfies the requirements of the Water Supply (Water Fittings) Regulations 1999 and current bylaws. -
Page 5: Product Features
Eco ( ), Low ( ), Medium ( ), and Note: Artisan Evo is designed for only one High( controller; it is not possible to add a second controller Need help? Give us a call on 0330 026 6273 and speak to one of our trained advisors. -
Page 6: Dimensions (Mm)
Dimensions (mm) 1068 Installation Requirements Positioning the Mixing Valve The Mixing Valve can be positioned on either a wall surface or flat on the floor. (Refer to the diagrams for the correct orientation of the Mixing Valve). The Mixing Valve can be installed in either DO NOT INSTALL HORIZONTALLY an airing cupboard, loft space or under ON THE WALL! - Page 7 Installation Requirements Positioning the Mixing Valve Vertically up on the wall Flat on the floor Vertically down on the wall Wireless Installation Water Requirements Considerations This fitting needs to be installed in accordance with the following Installation As with any wireless/radio product: Requirements and Notes (IRN) to ensure Metallic lined materials or metal they meet the requirements of the Water...
- Page 8 Installation Requirements Water Requirements than 20mm or twice the diameter of the inlet pipe to the fitting, whichever is the greater. For backflow protection in premises or installations up to, and including Fluid * As this shower unit is already supplied Category 3 and 5.
-
Page 9: Installation
Installation Requirements Electrical Requirements Important: You must switch off the power at the consumer unit, isolate the electrical circuit and verify the earth before making any electrical connections. The Mixing Valve must only be connected to a 230-240V AC supply. This product must be connected to a fused spur with double-pole isolation and a 3A fuse. - Page 10 Note: The pump must be a Bristan Twin- supplys to the Mixing Valve for servicing End Negative Head Pump - ST NHPUMP and/or maintenance work.
- Page 11 Installation Wiring of Connection Unit: Plumbing Connections Warning: This appliance must be earthed. The filter washers supplied must be fitted into both inlets. The wires in the mains lead are coloured in accordance with the following code: The connecting pipework must present 1/2 BSP connectors to the male thread on the inlet connections.
- Page 12 Installation Fitting the Wireless Controller Wall Bracket Remove the locking ring and wall bracket from the wireless controller by twisting the locking ring clockwise. Wall Bracket Position the wall bracket onto the finished wall surface and mark the fixing holes. Drill holes at the marked positions on the wall surface using a...
- Page 13 Installation IMPORTANT: When working near a basin, bath or shower insert plug or cover waste to prevent losing small parts. Take care not to drop tools/equipment into basin, bath or shower during installation. Position the fixing bracket against the wall, ensuring it’s straight.
-
Page 14: Commissioning
Commissioning Wireless Initialisation & If the Mixing Valve LED stays “Yellow”, the Pairing of the remote control Wireless Connection is not configured to mixing valve correctly. Proceed with the Initialise (2) and Pairing (3) steps. For the wireless communication to Additionally, it may also be necessary work, the Remote Control needs to be to perform the Initialisation and Pairing... - Page 15 Commissioning 3.4. Power down the Mixing Valve. 2.2. Enter Engineering Mode: press and Remove the cover from the Mixing Valve, hold both the Temp up and Temp set switch 4 at SW1 to “off” and replace down buttons together for more than the cover.
- Page 16 Commissioning Turn on the water supplies to the Mixing 46ºC Valve and open the stop / service valves SW1-1 ON to the mixing valve. SW1-2 ON Check that there are no leaks around the SW1-3 OFF connections to the inlets and outlet. 48ºC SW1-1 OFF Purge Procedure...
-
Page 17: Operation
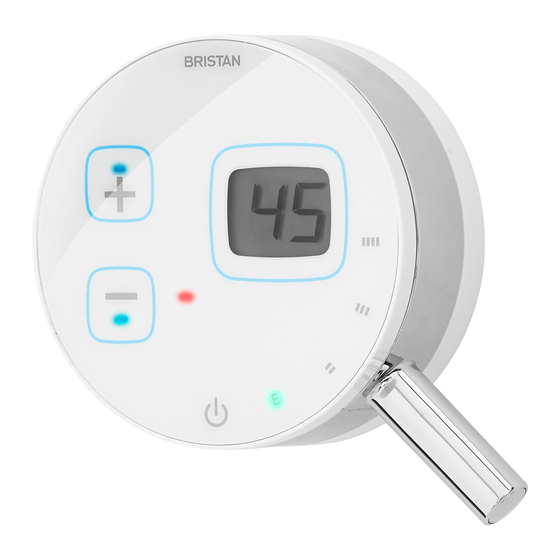
Commissioning Basic Functional Testing Prior to using the shower the following tests should be carried out to ensure the Mixing Valve is working correctly. Power on the Mixing Valve. Check the display on the Remote Control is working. Check Flow Control. Operate the lever to all flow positions and check for increased flow. - Page 18 Operation Important: Children should be supervised to ensure that they do not play with the appliance. Operating the controls Temperature Control Cold Low Battery Warning Light Flow Control Eco Water Saving Mode Low Flow Medium Flow High Flow Memory Function Only available on Chrome variants.
-
Page 19: Maintenance
Operation To Store a Memory Setting To Recall a Memory Setting 1. Turn Shower On by moving Flow Lever 1. Turn Shower On by moving Flow Lever anti-clockwise from the Off position. anti-clockwise from the Off position. 2. Select desired Temperature by using 2. - Page 20 Maintenance Cleaning the Showerhead NRV & Filter Maintenance Your Bristan showerhead has rub-clean The Mixing Valve is supplied with a nozzles for easy cleaning. Simply rub Non-Return Valve fitted into each inlet. your fingers across the rubber spray jets The filter washers which seal the inlet...
- Page 21 Maintenance Battery Replacement Battery Disposal Spent batteries should not be disposed of with normal household waste. Contact your local authority for information on waste disposal and recycling. Disposal and Recycling This symbol on the product or packaging indicates that this product should not be To replace the batteries the following disposed of with your other household should be carried out;...
-
Page 22: Troubleshooting
Main unit is powered off. Refer to ‘Wireless Initialisation & Pairing of the Wireless Controller to the Mixing Valve’ in Commissioning Section Call Bristan Customer Services on 0330 E2 displayed Main unit has developed a fault. 026 6273. Hot water is isolated or has Check the hot water supply is not insufficient flow. -
Page 23: Spares
Spares Part No. Description Parts List ARDE WCM C Controller Memory Chrome memory Controller x1, Fixings (Chrome) incl. fixings EMV WSO Mixing Valve incl. Mixing Valve x1, Fixings x4 fixings NRV 08400A Non-Return Valve NRV x1 B36125- Top Bracket Assembly Wall Bracket x1, Fixing Kit x1, Screw x1, BRACKET-ASS Wall Plug x1... - Page 24 Email: enquire@bristan.com A Masco Company At Bristan, we want to make things as easy as possible for our customers. That’s why we offer solid guarantees on all our products, effective from the date of purchase, to give you peace of mind.
Need help?
Do you have a question about the Artisan Evo and is the answer not in the manual?
Questions and answers