Table of Contents
Advertisement
Advertisement
Table of Contents

Related Manuals for Aqualisa Aquarian Thermo


Summary of Contents for Aqualisa Aquarian Thermo
- Page 1 Aquarian ® Thermo shower valve Aquarian Thermo installation instuctions page 1...
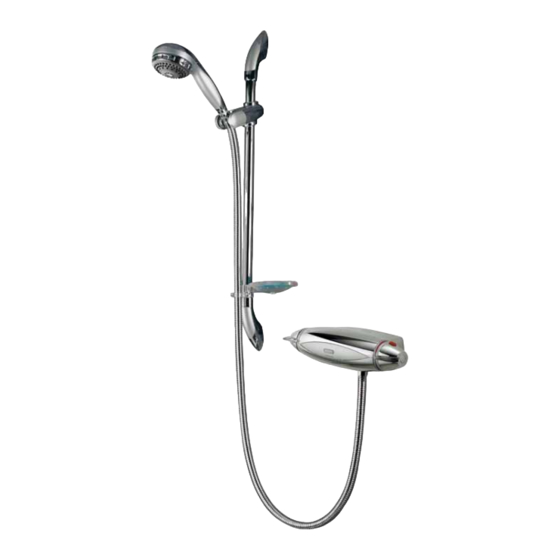
- Page 2 Shower systems Aquarian Thermo Surface mounted valve Chrome E99.01T White E99.20T White/chrome E99.21T Aquarian Thermo (E99.01T) with Varispray adjustable height head (99.40.01) Aquarian Thermo installation instuctions page 2...
- Page 3 Components Literature not shown Aquarian Thermo installation instuctions page 3...
- Page 4 Where plastic pipe is to be used, the tube insert must not increase the tube diameter or extend the cut off length by more than 2mm. The Aquarian Thermo is designed for conventional supplies with HOT on the Left and COLD on the Right as viewed from the front.
- Page 5 Pressures The Aquarian Thermo shower valve is designed to control static pressure up to 10 bar. Where pressures are likely to exceed 10 bar, a pressure reducing valve (PRV) must be fitted into the incoming mains supply. A setting of 3 bar is recommended. It should be noted that daytime pressures approaching 8 bar can rise above the stated maximum overnight.
- Page 6 The Aquarian Thermo is supplied with universal fixings. In most cases for hollow wall fixing it will be necessary to first install a suitable sound fixing surface within the cavity area before fixing the valve.
- Page 7 Run a thin bead of silicone sealant in the mastic groove of the back plate. Using a silicone based lubricant, lubricate the projecting pipe ends before carefully pushing the shower valve into position fully home. Secure using the screws provided. Aquarian Thermo installation instuctions page 7...
- Page 8 Fix using the centrally located locking screw taking care not to overtighten. Remove the paper backing from the badge and push firmly into position in the recess in the shroud assembly. Aquarian Thermo installation instuctions page 8...
- Page 9 The Aquarian Thermo is supplied with universal fixings. In most cases for hollow wall fixing it will be necessary to first install a suitable sound fixing surface within the cavity area before fixing the valve.
- Page 10 Fit the flow regulator into the cold port fully home, with the central O’ ring facing the incoming flow. A small length of 15mm pipe may used to facilitate the installation of this regulator. Aquarian Thermo installation instuctions page 10...
- Page 11 Align the fixing screws with the screw holes, and fix into place ensuring not to overtighten the fixing screws. Locate the bottom outlet blanking cap (supplied in the screwpack) into the lower shroud and click into position. Aquarian Thermo installation instuctions page 11...
- Page 12 The Aquarian Thermo is designed for conventional supplies with HOT on the Left and COLD on the Right as viewed from the front. However, the Aquarian Thermo can be adapted for use with reversed supplies, but it will be necessary to contact Aqualisa customer services on 01959 560010 to purchase reversed graphics to enable this operation.
- Page 13 Refit the adapted cartridge assembly to the backplate and refit the shrouds as previously instructed. The shower controls will now be reversed so the on/off control is now on the right and the temperature control on the left as viewed from the front. Aquarian Thermo installation instuctions page 13...
- Page 14 Commissioning The Aquarian Thermo is pre-set to a safe maximum shower temperature. During use, the action of the stop button may be overridden by depressing it as the temperature control is rotated. Should it be necessary to reset the maximum temperature position, please observe the following procedures.
- Page 15 Run through the Aquarian Thermo operation with the purchaser and hand them this guide. Complete and post the Aquarian Thermo guarantee card or register online at www.aqualisa.co.uk. Cleaning Your Aquarian Thermo shower valve should be cleaned using only a soft cloth and washing up liquid. DO NOT USE ABRASIVE CLEANERS. Cleaning the filters As this condition is not covered by our standard warranty terms, it is suggested that the cartridge be removed and the filters checked by a competent person.
- Page 16 The flow regulator has not Fit the flow regulator been fitted Poor flow rate Twisted hose Check and clear as Debris in shower head necessary Debris in filters Debris in cold inlet flow regulator Aquarian Thermo installation instuctions page 16...
- Page 17 Highest point Cold feed must be below to cylinder underside of Central cistern heating boiler Connect ‘A’ or ‘B’ Supply Hot water cylinder Typical combination boiler installation Pressure reducing valve if required Supply Aquarian Thermo installation instuctions page 17...
- Page 18 Brochure Hotline: 0800 652 3669 Website: www.aqualisa.co.uk Email: enquiries@aqualisa.co.uk Please note that calls may be recorded for training and quality purposes The company reserves the right to alter, change or modify the product specifications without prior warning ® Registered Trademark Aqualisa Products Limited...
- Page 19 Digital Showers Mixer Showers Power Showers Smart Showers Shower Towers From Top Shower Brands Mira Showers Aqualisa Showers Triton Showers Gainsborough Showers Shower Pumps can upgrade your showering experience even more Stuart Turner Shower Pumps Salamander Shower Pumps Grundfos Shower Pumps...
Need help?
Do you have a question about the Aquarian Thermo and is the answer not in the manual?
Questions and answers