
Related Manuals for Shimano STEPS E7000 SERIES


Summary of Contents for Shimano STEPS E7000 SERIES
- Page 1 UM-79E0A-001-00 Shimano Total Electric Power System User's manual E7000 Series Original instructions...
-
Page 3: Table Of Contents
CONTENTS IMPORTANT NOTICE ..................3 Important safety information .................3 To ensure safety ...................3 Features of SHIMANO STEPS E7000 Series ............7 Assist mode ........................8 Start your STEPS ...................9 Names of parts ................... 12 Specifications..................... 13 Charging the battery ................... 14 About the charger LED lamp ....................17 About the battery LED lamps .................... - Page 4 Exit ..........................41 Settings (EW-EN100) ................... 42 RD protection reset ......................42 Adjust ..........................42 Connection and communication with devices ..........43 About wireless functions ..................... 44 Troubleshooting ..................45 Battery LED lamp error indications ..................45 Error messages on the cycle computer ................... 46 Troubleshooting ........................
-
Page 5: Important Notice
• Use the Shimano specifi ed charger and observe the specifi ed User's manuals in other languages are charging conditions when charging the specifi ed battery. Not available at : doing so may cause overheating, bursting, or ignition of the http://si.shimano.com... - Page 6 Handling the battery Handling the battery • If any liquid leaking from the battery gets into your eyes, • Do not leave the battery in a place exposed to direct immediately wash the affected area thoroughly with sunlight, inside a vehicle on a hot day, or other hot clean water such as tap water without rubbing your eyes, places.
- Page 7 • Contact the place of purchase for updates of the product • The use of a genuine Shimano battery is recommended. If software. The most up-to-date information is available using a battery from another manufacturer, make sure to on the Shimano website.
- Page 8 Label • Some of the important information contained in this user's manual is also indicated on the battery charger label. FCC compliance information This device complies with Part 15 of the FCC Rules. Operation is subject to the following two conditions: (1) This device may not cause harmful interference, and (2) This device must accept any interference received, including interference that may cause undesired...
-
Page 9: Features Of Shimano Steps E7000 Series
Features of SHIMANO STEPS E7000 Series • Hi-End MTB assistance components. • Powerful propulsion and silent drive unit. • Smooth and natural power assistance and riding experience. • Support optimal suspension design afforded by compact drive unit construction. Shorter chain stay frame gives rider easier handling. -
Page 10: Assist Mode
„ Assist mode You can select an assist mode for each particular application. [BOOST] [TRAIL] [ECO] Steep slopes and precipitous mountain Gentle ascending slopes and level • Long distance riding on level roads ground ground • Level parks with signals When the battery level is running low, the level of assistance is lowered to increase the traveling range. -
Page 11: Start Your Steps
Start your STEPS Charge the battery. It is possible to charge the battety even while it is mounted on the bicycle. For detals, see “Charging the battery while installed on the bicycle.” <Down-tube mount type battery> Example : BT-E8010 Light On <Integrated battery>... - Page 12 Turn on the power. To turn off the power, repeat this procedure. <Down-tube mount type battery> BT-E8010 / BT-E8014 <Integrated battery> NOTE When turning the power ON/OFF, do not place your foot on the pedal.
- Page 13 Select your preferred assist mode. The bicycle is equipped with either SC-E7000 or EW-EN100. * When the power is turned on, assist mode is set to [OFF]. < SC-E7000 > Assist mode display [BOOST] [TRAIL] [WALK] [ECO] [OFF] Long press Y Short press X <...
-
Page 14: Names Of Parts
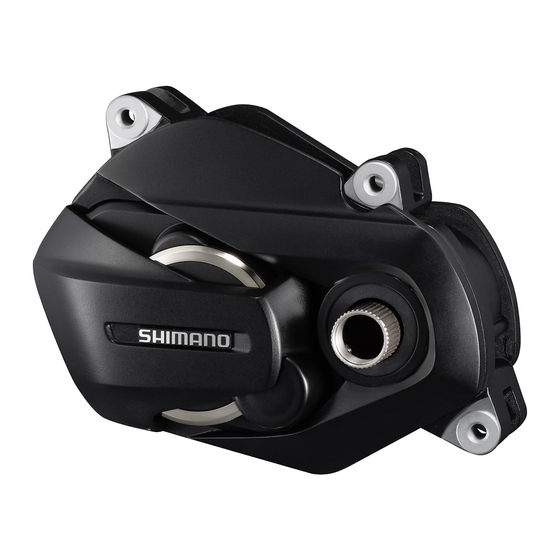
Names of parts Cycle computer/Junction [A]: SC-E7000 EW-EN100 Assist switch: SW-E7000 SW-M8050 Drive unit: DU-E7000 Battery (external type)/ Battery mount (external type): BT-E8010 BT-E8014 BM-E8010 Battery charger: EC-E6000 EC-E6002+SM-BCC1 Battery (built-in type)/ Battery mount (built-in type): BT-E8020 BM-E8020 E-TUBE(EW-SD50) When using electronic gear shifting Shifting switch: SW-E7000 SW-M8050... -
Page 15: Specifications
For the Operating temperature 0 - 40˚C Nominal capacity latest information on range: During charging manuals, see the website (http://si.shimano.com). Storage temperature -20 - 70˚C Rated voltage 36 V DC Storage temperature -20 - 60˚C Drive unit type... -
Page 16: Charging The Battery
The charging time will vary depending on the battery level and the battery charger being used. Refer to the battery charger user's manual for the designated charging time. The use of a genuine Shimano battery is recommended. If using a battery from another manufacturer, make sure to carefully read the instruction manual for the battery before use. - Page 17 When charging the battery alone Connect the battery charger’s power plug to the outlet. BT-E8010/BT-E8014 Battery Charging port Insert the charging plug into the battery's charging port. • Charge the battery on a flat surface indoors. Charging plug BT-E8020 Battery Charging plug Charging port...
- Page 18 Charging the battery while installed onto the bicycle Insert the battery charger power plug into the outlet. Insert the charging plug into the charging port on the battery mount or the battery. * Place the battery charger main body on a steady surface such as the floor before charging. * Stabilize the bicycle to ensure that it does not collapse during charging.
-
Page 19: About The Charger Led Lamp
„ About the charger LED lamp After charging has started, the LED lamp on the charger EC-E6000 lights up. Charger LED lamp Charging Lit up Charging error Blinking Battery disconnected Turned EC-E6002 Charger LED lamp „ About the battery LED lamps You can check the current charging status on the LED lamp on the battery. -
Page 20: Handling And Charging The Battery
Battery level indication The current battery level can be checked by pressing the battery's power button. Battery level indication*1 Battery level 100% - 81% 80% - 61% 60% - 41% 40% - 21% 20% - 1% (When battery is not installed on bicycle) 0%, Power off / Shutdown (When battery is installed on bicycle) : No light... -
Page 21: Installing / Removing The Battery
„ Installing / removing the battery Installation of the battery CAUTION • Hold the battery firmly and be careful to prevent dropping when installing. The battery may fall out while riding if not properly locked in place. • Pay attention to the following to prevent the battery from falling while riding the bicycle. - Make sure the battery is locked securely on the battery mount. - Page 22 BT-E8020 This procedure is an example using a frame whose battery is removed/installed from below. Insert the battery from bottom side. Slide the battery. • Push in the battery until there is a click. Removing CAUTION • Hold the battery firmly and be careful to prevent dropping when removing or carrying it. BT-E8010/BT-E8014 Insert the Key.
- Page 23 Remove the battery • Slide the battery, then remove it carefully. • You can remove the battery only when the key is in the unlocked position. BT-E8020 • This procedure is an example using a frame whose battery is removed/installed from below. •...
- Page 24 Unlock the battery. (1) Insert the key into the key cylinder in the battery mount. (2) Turn the key. (3) Push the key in. The battery is unlocked. The plate spring holds the battery in place, preventing it from falling out. Key cylinder Remove the battery.
-
Page 25: Operation
Operation „ Turning the power ON / OFF • The power cannot be turned on while charging. • If the bicycle has not moved for over 10 minutes, the power will automatically turn off (automatic power off function). NOTE Do not place your foot on the pedals when turning ON/OFF. This may cause a system error. It is possible to forcibly power off BT-E8010/BT-E8020 by holding down the power button for 6 seconds. - Page 26 Display when Power is ON SC-E7000 This screen appears when the power is turned ON. EW-EN100 The LED lamp (outer side) turns ON. LED lamp (outer side)
-
Page 27: Basic Operation
„ Basic operation This section describes how to use the cycle computer and switch units. • The functions assigned to switches when riding can be changed from those described here. For details, please contact your place of purchase or a local bicycle dealer for assistance. Cycle computer and switch units SC-E7000/SW-M8050 SC-E7000/SW-E7000... - Page 28 Junction [A] (EW-EN100) EW-EN100 is used instead of cycle computer. It is attached to the brake outer casing or brake hose and located near the handle bar. Button Junction [A] Press: change the assist mode each time you press it. Button Press and hold (about 2 seconds): turn the light ON/OFF NOTE...
-
Page 29: Cycle Computer Basic Screen
„ Cycle computer basic screen SC-E7000 Displays the status of the power assisted bicycle, traveling data. Battery level indicator Displays the current battery level. Gear position (Only displays when electronic gear shifting is in use) Displays the currently set gear position. Assist mode display Displays the current assist mode. - Page 30 Battery level indicator You can check the battery level on the cycle computer while riding. SC-E7000 Display Battery level 81 - 100% 61 - 80% 41 - 60% 21 - 40% 1 - 20%* * The battery level indicator blinks when remaining battery capacity is low.
-
Page 31: Changing Assist Mode
„ Changing assist mode SC-E7000 Press Assist-X or Assist-Y to switch assist modes. Assist [BOOST]: Assist boost [BOOST] [TRAIL]: Assist trail [ECO]: Assist eco [TRAIL] [OFF]: Assist off [WALK] [WALK]: Walk assist [ECO] * If there is no assist switch, you can also hold down A to switch to assist mode. -
Page 32: Switching To [Walk] Mode (Walk Assist Mode)
„ Switching to [WALK] mode (walk assist mode) • The use of the walk assist mode function is prohibited by law in some regions. • The walk assist function operates at a maximum of 6 km/h. During electronic gear shifting, the assist level and speed are controlled by the gear position. -
Page 33: Current Gear And Traveling Data Display (Sc-E7000)
Walk assist mode operation Continue to press Assist-Y while in walk assist mode. Assist • Walk assist will function only while Assist-Y is pressed. • If a switch unit is connected to EW-EN100, the LED (inner side) will flash blue when walk assist starts. To cancel [WALK] mode, release Assist-Y and Assist-X. - Page 34 [DST] [CLK] Display item Description [DST] Traveling distance [ODO] [CAD] [ODO] Cumulative distance [RNG] [MAX] [RNG] Travelable distance *1*3 [TME] Travelable time *2 [TME] [AVG] [AVG] Average speed *2 [MAX] Maximum speed *2 [CAD] Your crank rotation speed *2 [CLK] Current time *2 When [RNG] is displayed, the battery level is not displayed.
-
Page 35: About The Setting Menus
About the setting menus „ Accessing the setting menu Stop your bicycle. < Basic screen > Hold down A to display the menu list screen. Assist < Setting menu screen > Select a menu item. [Clear] [Exit] (1) Press Assist-X or Assist-Y to move the cursor on setting menu. - Page 36 Configurable items Details [Clear] Clear settings [Clock] Clock setting [Light] Turning the light on/off [Beep] Turning the beep noise on/off [Unit] Switching between km and miles [Language] Language setting [Font color] Font color setting Adjusting the electronic gear [Shift timing]*1 shifting unit [RD protection * 1 Not used.
- Page 37 „ Clock Configure the "Clock" setting. First set the "hour" and then set the "minute." In step 2 and 4 in below procedure, you can change the values quickly by holding down Assist-X or Assist-Y. Enter the [Clock] menu. (1) Launch the setting menu. (2) Press Assist-X or Assist-Y to select [Clock], then press Press Assist-X or Assist-Y to adjust the time.
- Page 38 „ Light Configure the battery-powered light setting. Enter the [Light] menu. (1) Launch the setting menu. (2) Press Assist-X or Assist-Y to select [Light], then press A. Press Assist-X or Assist-Y to select the required setting. Assist Configurable items Details [ON] Keep light always on [OFF]...
- Page 39 „ Beep The beep noise can be turned on/off. Even if [Beep] is set to [OFF], a beep will sound when there is a misoperation, system error, etc. Enter the [Beep] menu. (1) Launch the setting menu. (2) Press Assist-X or Assist-Y to select [Beep], then press A.
- Page 40 „ Unit Distance units (km/miles) can be switched. Enter the [Unit] menu. (1) Launch the setting menu. (2) Press Assist-X or Assist-Y to select [Unit], then press Press Assist-X or Assist-Y to select the required setting. Assist Configurable items Details [km] Displayed in km [mile]...
- Page 41 „ Language Configure the language setting. Enter the [Language] menu. (1) Launch the setting menu. (2) Press Assist-X or Assist-Y to select [Language], then press A. Press Assist-X or Assist-Y to select the required setting. Assist Configurable items [English] [Français] [Deutsch] [Nederlands] [Italiano]...
- Page 42 „ Font color The font color can be changed. Enter the [Font color] menu. (1) Launch the setting menu. (2) Press Assist-X or Assist-Y to select [Font color], then press A. [White] Press Assist-X or Assist-Y to select the required setting. Assist [Black] Configurable items...
- Page 43 „ RD protection reset In order to protect the system from falls etc., if the bicycle is subjected to a strong impact, the RD Protection function will operate and the connection between the motor and the link will be momentarily severed so that the rear derailleur can no longer operate.
-
Page 44: Settings (Ew-En100)
Settings (EW-EN100) The setting function can not be used while riding the bicycle. „ RD protection reset In order to protect the system from falls etc., if the bicycle is subjected to a strong impact, the “RD Protection function” is enabled. -
Page 45: Connection And Communication With Devices
For information on how to install E-TUBE PROJECT, check the support website. NOTE • SM-PCE1/PCE02 is needed to connect SHIMANO STEPS E7000 Series to a PC. SM-JC40/JC41 will be needed in the following situations. • There are no free E-TUBE ports on the cycle computer (for example, if using an electronic gear shifter) •... -
Page 46: About Wireless Functions
ANT connection When SHIMANO STEPS turns on, communication can be received. Switch the external device to connection mode and then connect it. -
Page 47: Troubleshooting
Troubleshooting „ Battery LED lamp error indications System errors and similar warnings are indicated by the battery LED lamps through various lighting patterns. Error indication Lighting Indication condition Recovery type pattern *1 Make sure that the cable is not loose or improperly Communication error connected. -
Page 48: Error Messages On The Cycle Computer
„ Error messages on the cycle computer Warnings This disappears if the error is fixed. List of warnings Operational restrictions Display Code while warning is Remedy preconditions displayed Temperature of the Stop using the assist function until the temperature of drive unit is higher Power assistance may the drive unit drops. - Page 49 Errors If an error message is displayed on the entire screen, follow one of the procedures below to reset the display. • Press the power button of the battery. • Remove the battery from the holder. NOTE If resetting the battery power does not solve the problem or the same problem occurs frequently, contact the place of purchase.
- Page 50 Operational restriction when Display Code Remedy preconditions an error is being displayed Part of the cycle computer’s Power assistance is not E043 Contact the place of purchase or bicycle dealer. firmware may be provided during riding. damaged. Error indications (EW-EN100) If an error occurs, both LEDs of the EW-EN100 blink rapidly at the same time as shown below.
-
Page 51: Troubleshooting
„ Troubleshooting Assist function Symptom Cause / Possibility Remedy Check the battery charge. If the battery is Is the battery sufficiently charged? nearly spent, recharge it. Are you riding on long slopes in summer weather or riding for a long time carrying a Turn off the power, wait for a while and heavy load? then check once more. - Page 52 Symptom Cause / Possibility Remedy Are the tires inflated to a sufficient pressure? Use a pump to add air. Set the assist mode to [BOOST]. If you still Is the assist mode set to [OFF]? do not feel that assistance is being given, contact the place of purchase.
- Page 53 Symptom Cause / Possibility Remedy Check the connection for any foreign Is the charging plug of the charger securely objects before reinserting the charging inserted into the battery? plug. If there is no change, contact the place of purchase. The LED on the charger If the battery is fully charged, the LED on the battery charger turns off, but this is not does not illuminate.
- Page 54 Symptom Cause / Possibility Remedy Check if the electric wire connector is The gear position is not The gear position is only displayed when disconnected. If you are not sure, contact displayed. using the electronic gear shifting unit. the place of purchase. Change the setting.
- Page 56 The number that is on the key is required should you need to purchase spare keys. Enter the key number in the box below and keep in a safe place. Key number Please note: specifications are subject to change for improvement without notice. (English) © Sep. 2018 by SHIMANO INC. ITP...
Need help?
Do you have a question about the STEPS E7000 SERIES and is the answer not in the manual?
Questions and answers