
Related Manuals for Garmin GDL 82


Summary of Contents for Garmin GDL 82
- Page 1 GDL 82 Mooney M20( ) Series STC Installation Manual 190-01810-10 December 2017 Revision 1...
- Page 2 Garmin. Garmin hereby grants permission to download a single copy of this manual and of any revision to this manual onto a hard drive or other electronic storage medium to be viewed and...
- Page 3 RECORD OF REVISIONS Revision Revision Date Description 12-12-2017 Initial Release GDL 82 Mooney M20( ) Series STC Installation Manual 190-01810-10 Rev. 1 Page ii...
- Page 4 All information depicted in screen shots, including software file names, versions, and part numbers, is subject to change and may not be up to date. GDL 82 Mooney M20( ) Series STC Installation Manual 190-01810-10 Rev.
-
Page 5: Table Of Contents
6 RETURN TO SERVICE ........................47 6.1 Instructions for Continued Airworthiness (ICA) ................47 6.2 Aircraft Weight and Balance ......................47 6.3 Airplane Flight Manual Supplement (AFMS) ................49 GDL 82 Mooney M20( ) Series STC Installation Manual 190-01810-10 Rev. 1 Page iv... - Page 6 Figure 4-1: GDL 82 Unit Installation, Option 1 Example ............. 24 Figure 4-2: Bonding Strap Example ....................24 Figure 4-3: GDL 82 Unit Installation, Option 2 & 3 Example ............25 Figure 4-4: GDL 82 Circuit Breaker Installation Example ............26 Figure 4-5: ADS-B OUT Fail Annunciator Installation Example ..........
- Page 7 Table 1-2: Reference Documents ..................... 2 Table 1-3: Power Requirements ....................... 4 Table 1-4: Physical Characteristics ....................4 Table 3-1: Materials for GDL 82 Installation .................. 9 Table 3-2: Pre-Installation Check Procedures................10 Table 3-3: Coaxial Cable Specifications ..................13 Table 3-4: Typical Cable Connector Loss ..................
-
Page 8: Description
This STC and the data contained in this manual are the basis of airworthiness approval only for the installation of equipment listed in Table 1-1, and the interfaces between the Garmin GDL 82 and equipment listed in this manual. -
Page 9: References
190-01284-00 Instructions for Continued Airworthiness & Maintenance Manual, 190-01810-11 GDL 82 Mooney M20() Series STC Master Drawing List GDL 82 Mooney M20( ) Series STC 005-01008-A1 AFMS for the Garmin GDL 82 Mooney M20 Series 190-01810-12 GDL 82 Pilot’s Quick Start Guide... -
Page 10: System Overview
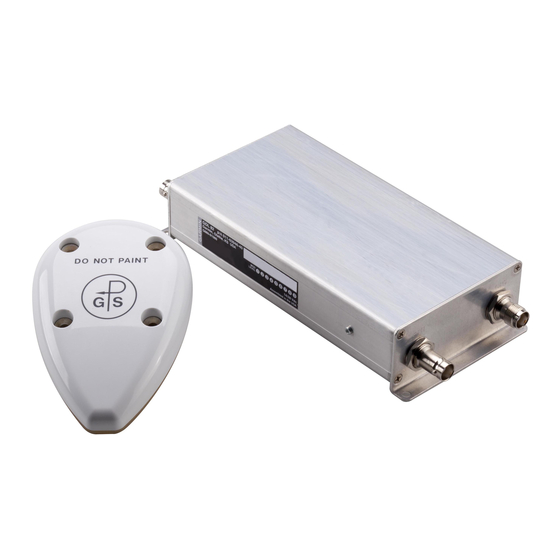
XPDR 1.2 System Overview The GDL 82 is a remote-mounted unit that contains 978 MHz and 1030 MHz transmitters, and a 1090 MHz receiver. It is installed in-line with the existing transponder and L-Band antenna. The GDL 82 transmits ownship ADS-B Out data via the UAT data link using the existing transponder’s L-Band antenna. -
Page 11: Technical Specifications
The GDL 82 System Interface Diagram is shown in Figure 1-1. GDL 82 Bottom L-Band Antenna Coax Coax Transponder GPS Antenna Power/Ground Coax OPTIONAL (GDL 82 with GPS only) Failure Discrete Annunciator RS-232 Anonymous GPS Source Discrete GPS Time Mark... -
Page 12: Figure 1-2: Gdl 82 Unit Dimensions And Center Of Gravity
Figure 1-2: GDL 82 Unit Dimensions and Center of Gravity GDL 82 Mooney M20( ) Series STC Installation Manual 190-01810-10 Rev. 1 Page 5 of 49... -
Page 13: Limitations
LIMITATIONS 2.1 Installation Limitations This STC approves the GDL 82 unit to be installed on the existing equipment shelf located in the aft section of the fuselage behind the cargo hold or underneath the instrument panel, attached to the tubular structure. -
Page 14: Overview
Sound mechanical and electrical methods and practices are required to achieve optimum system performance. Options for the GDL 82 installation in a Mooney M20( ) series aircraft are depicted in Figure 3-1, Figure 3-2, and Figure 3-3. These options reflect location of existing L-Band antenna and type of transponder (panel mounted or remote). -
Page 15: Figure 3-2: Gdl 82 Installation Option 2
Figure 3-2: GDL 82 Installation Option 2 Figure 3-3: GDL 82 Installation Option 3 GDL 82 Mooney M20( ) Series STC Installation Manual 190-01810-10 Rev. 1 Page 8 of 49... -
Page 16: Garmin Supplied Materials
3.1 Garmin Supplied Materials Garmin supplied materials required for the GDL 82 installation are listed in Table 3-1. Other commercially available materials required for installation of GDL 82 are shown in Section 4. Table 3-1: Materials for GDL 82 Installation... -
Page 17: Pre-Installation: Existing Transponder System Check
3.3 Pre-Installation: Existing Transponder System Check The existing Mode A/C (ATCRBS) transponder to be interfaced to the GDL 82, must meet the following: • The transponder complies with TSO-C74(). • The installation of the transponder was previously FAA-Approved. • The existing transponder’s altitude source (altitude serializer/encoder) must comply with TSO- C10(), TSO-C106() or TSO-C88() and have prior FAA approval. - Page 18 14 CFR §91.215. Placards and/or an entry in the aircraft’s AFMS specifying the limitation must be made. GDL 82 Mooney M20( ) Series STC Installation Manual 190-01810-10 Rev. 1...
-
Page 19: Antennas
NOTE The GDL 82 will introduce no more than 1.5dB of loss in the transmission line between the transponder and L-Band antenna. The GDL 82 should be located as close to the L-Band antenna as practical to minimize the length of coaxial cable between the GDL 82 unit and L-Band antenna. -
Page 20: Table 3-3: Coaxial Cable Specifications
2. As far away as practical from landing gear doors, access doors, or other openings that can affect its radiation pattern. 3. At least 20 inches from any other transponder, TAS/TCAS, DME or 1030/1090 MHz antenna. GDL 82 Mooney M20( ) Series STC Installation Manual 190-01810-10 Rev. 1... -
Page 21: Table 3-5: L-Band Antennas
GPS antenna that meet minimum performance specifications are listed in Table 3-6. Installation instructions for the Garmin GA 35, GA 36 or GA 37 GPS antennas can be found in the GA 35, GA 36, GA 37 Antenna Installation Instructions, 190-00848-00. The GPS antenna must be installed on a ground plane that is electrically bonded to the airframe ground with a direct current (DC) resistance less than or equal to 2.5 milliohms with connector disconnected. -
Page 22: Table 3-7: Gps Db Loss Allowance
VHF COM transceiver antenna cable can decrease or eliminate the harmonic interference and is available from Garmin (P/N 330-00067-00). On the selected frequencies, as listed in section 5.3.2, the ELT can be a source of VHF COM transmitter interference with GPS signal. The ELT antenna cable must be disconnected from the ELT unit to verify. -
Page 23: Electrical Load Analysis
3.5.2 Aircraft without Existing Electrical Load Analysis As an alternative to adding the GDL 82 to an existing ELA (Section 3.5.1), an ELA can be determined by load measurement, under different operating conditions, using the tabulation form provided below and the following steps. - Page 24 0.5A, or better precision. The aircraft electrical system is adequate for a GDL 82 installation if maximum demand, as documented on the tabulated ELA form (Figure 3-4 and Figure 3-5), does not exceed 80% of the alternator capacity as installed.
- Page 25 12. With all equipment used continuously in the emergency landing phase, ammeter current reading must be recorded in tabulated ELA form (COLUMN 5, Figure 3-5). Measurements must be taken with the landing lights ON and OFF. GDL 82 Mooney M20( ) Series STC Installation Manual 190-01810-10 Rev. 1...
-
Page 26: Figure 3-4: Electrical Load Tabulated Form, Sheet 1 Of 2
Operating Circuit/System Breaker Time 10 min 10 min 60 min (Calculated) 10 min Number Figure 3-4: Electrical Load Tabulated Form, Sheet 1 of 2 GDL 82 Mooney M20( ) Series STC Installation Manual 190-01810-10 Rev. 1 Page 19 of 49... -
Page 27: Figure 3-5: Electrical Load Tabulated Form, Sheet 2 Of 2
Figure 3-5: Electrical Load Tabulated Form, Sheet 2 of 2 GDL 82 Mooney M20( ) Series STC Installation Manual 190-01810-10 Rev. 1 Page 20 of 49... -
Page 28: Figure 3-6: Battery Capacity Analysis Example
( �� ) 540 A-min − (75 A-min + 100 A-min) 10 A 365 A-min 10 A = 36.5 min Figure 3-6: Battery Capacity Analysis Example GDL 82 Mooney M20( ) Series STC Installation Manual 190-01810-10 Rev. 1 Page 21 of 49... -
Page 29: Installation
1. Located adjacent to added switch, annunciator, and/or circuit breaker, 2. Readable in all cockpit lighting conditions. 3. Not easily erased, damaged, or obscured. GDL 82 Mooney M20( ) Series STC Installation Manual 190-01810-10 Rev. 1 Page 22 of 49... -
Page 30: Gdl 82 Unit Installation
NOTES 1 THE RESISTANCE BETWEEN THE GDL 82 UNIT AND THE EXISTING TUBULAR STRUCTURE ASSEMBLY MUST BE LESS THAN 2.5 mΩ WITH ALL GDL 82 CONNECTORS DISCONNECTED AND MUST BE VERIFIED WITH A MILLIOHM METER. FOLLOW SECTION 5 OF SAE ARP 1870, AEROSPACE SYSTEMS ELECTRICAL BONDING AND GROUNDING FOR ELECTROMAGNETIC COMPATIBILITY AND SAFETY, FOR PROCEDURES ON ELECTRICAL BOND PREPARATION. -
Page 31: Figure 4-1: Gdl 82 Unit Installation, Option 1 Example
GROUND REFERENCE. REFER TO SAE ARP 1870 SECTION 5 WHEN SURFACE PREPARATION IS REQUIRED TO ACHIEVE ELECTRICAL BOND. THE BONDING STRAP LENGTH MUST NOT EXCEED SIX INCHES. SEE BELOW FOR AIRFRAME BONDING EXAMPLE.. Figure 4-1: GDL 82 Unit Installation, Option 1 Example Table 4-1: Airframe Bonding Hardware... -
Page 32: Figure 4-3: Gdl 82 Unit Installation, Option 2 & 3 Example
WITHIN THE RACK ASSEMBLY WEIGHT LIMIT AS DETERMINED BY THE AIRCRAFT MANUFACTURER. 2 THE RESISTANCE BETWEEN THE GDL 82 UNIT AND THE EXISTING RACK ASSEMBLY MUST BE LESS THAN 2.5 mΩ WITH ALL GDL 82 CONNECTORS DISCONNECTED AND MUST BE VERIFIED WITH A MILLIOHM METER. FOLLOW SECTION 5 OF SAE ARP 1870, AEROSPACE SYSTEMS ELECTRICAL BONDING AND GROUNDING FOR ELECTROMAGNETIC COMPATIBILITY AND SAFETY, FOR PROCEDURES ON ELECTRICAL BOND PREPARATION. -
Page 33: Circuit Protection
TYPE AS SPECIFIED IN THE AIRCRAFT MANUFACTURER’S PARTS CATALOG. 2 GDL 82/TRANSPONDER CIRCUIT BREAKER MUST BE LABELED AS SHOWN. THE PLACARD OR LABEL FOR ADDED GDL 82 UNIT MUST MAINTAIN THE FONT SIZE AND COLOR OF EXISTING CIRCUIT BREAKER LABELS AND MUST BE VISIBLE UNDER ALL LIGHTING CONDITIONS. -
Page 34: Ads-B Out Fail Annunciator And Anonymous Mode Switch
The ADS-B OUT FAIL annunciator indicates that the ADS-B out transmission is not operational. The anonymous mode allows the GDL 82 to transmit a temporary address instead of the aircraft assigned ICAO 24-bit address, when the interfaced Mode A/C transponder is tuned to the VFR Code (1200). -
Page 35: Figure 4-6: Uat Anonymous Mode Switch Installation Example
FONT SIZE AND COLOR OF EXISTING PLACARDS OR LABELS, AND MUST BE VISIBLE UNDER ALL LIGHTING CONDITIONS. 3 NUT (ITEM 3) AND WASHERS (ITEM 2 AND 4) ARE PART OF THE SWITCH (ITEM 1). Figure 4-6: UAT Anonymous Mode Switch Installation Example GDL 82 Mooney M20( ) Series STC Installation Manual 190-01810-10 Rev. 1... -
Page 36: Electrical
Airframe Ground NOTE At GDL 82, connect shield grounds to the connector backshell – the shield termination leads must be less than 3.0”. Connect other end of the shield per the remote equipment installation requirements. If no shield termination requirement exists for the remote equipment, terminate shields as short as possible, not to exceed 3.0”. - Page 37 (AMBER) (TEST) LAMP VOLTAGE FROM A/C POWER P823 EXISTING XPDR TRANSPONDER P824 EXISTING L-BAND ANTENNA, BOTTOM P822 GPS/SBAS ANTENNA GDL 82 WITH GPS/SBAS ONLY GDL 82 Mooney M20( ) Series STC Installation Manual 190-01810-10 Rev. 1 Page 30 of 49...
-
Page 38: Figure 4-7: Gdl 82 Wiring Interconnect
EXPOSURE. LABEL AND PLACE IN ACCESSIBLE LOCATION. THERE IS NO NEED FOR THE GROUND WIRE BETWEEN THE GDL 82 AND GNS 400W/500W SERIES GPS SOURCE. IF THE SPECIFIED RS-232 PORT ON THE GTN 6XX/7XX OR GNS 400W/500W SERIES NAVIGATORS IS ALREADY USED FOR ANOTHER PURPOSE, ANY RS-232 PORT ON THESE NAVIGATORS MAY BE CONNECTED IN LIEU OF THE SPECIFIED PORT. -
Page 39: Figure 4-8: Shield Termination
The chosen size of shrink tube must accommodate the number of conductors present in the cable. Figure 4-8: Shield Termination 5. Repeat steps 1 through 4 as needed for the remaining shielded cables. GDL 82 Mooney M20( ) Series STC Installation Manual 190-01810-10 Rev. 1... -
Page 40: Figure 4-9: Jackscrew Backshell Assembly
Second ring terminal (if needed) 7. Insert the panhead shield terminal screw into the tapped holes on the shield block. Figure 4-9: Jackscrew Backshell Assembly GDL 82 Mooney M20( ) Series STC Installation Manual 190-01810-10 Rev. 1 Page 33 of 49... -
Page 41: Figure 4-10: Option 1 Wire Harness Routing Example
NOTES 1 THE DIRECT CONNECTION TO A GPS ANTENNA IS ONLY AVAILABLE WITH THE GDL 82 WITH INTERNAL GPS. GPS SOURCE DATA CAN ALSO BE PROVIDED VIA RS-232 FROM AN APPROVED EXISTING GARMIN NAVIGATOR. SEE SECTION 1.2 FOR APPROVED EXTERNAL GPS SOURCES. -
Page 42: Figure 4-11: Options 2 And 3 Wire Harness Routing Example
NOTES 1 THE DIRECT CONNECTION TO A GPS ANTENNA IS ONLY AVAILABLE WITH THE GDL 82 WITH INTERNAL GPS. GPS SOURCE DATA CAN ALSO BE PROVIDED VIA RS-232 FROM AN APPROVED EXISTING GARMIN NAVIGATOR. SEE SECTION 1.2 FOR APPROVED EXTERNAL GPS SOURCES. -
Page 43: System Configuration And Checkout
GDL 82. Once continuity and power checks are complete, power should be disconnected from the aircraft. The GDL 82 unit can be installed after completion of the continuity and power checks. The GDL 82 should be installed and secured in a similar fashion as shown in Figure 4-1 and Figure 4-3. -
Page 44: Figure 5-1: Usb-A And Usb-B Connectors
Figure 5-1: USB-A and USB-B Connectors NOTE When the GDL 82 unit is connected to the PC (via USB) and the GDL 8X Install Tool is active, the GDL 82 will automatically be placed in Configuration Mode. To reset the GDL 82 into... -
Page 45: Table 5-1: Gdl 82 Configuration Settings
The Configuration / System page displays configuration data and allows the installer to change the installation configuration. Once the configuration options are selected, power-cycle the GDL 82 unit to apply the settings. The configuration settings can be saved to a plain text file for logging purposes by selecting the Save Configuration To File button. -
Page 46: Table 5-2: External Gps Source Configuration Settings
GPS PVT data via RS-232. Required navigator software version and configuration setting are shown in Table 5-2. Interfacing a GDL 82 to a navigator other than that listed in Table 5-2 requires separate airworthiness approval. For the Garmin GPS navigators, the GPS/WAAS engine software must be 5.0 (or later) to meet the ADS-B Out position source requirements specified in 14 CFR 91.227. -
Page 47: Ground Checks (Configuration Mode)
Series STC (Garmin document 190-01810-11), for troubleshooting, if needed. 5.3.2 Internal GPS/SBAS Receiver The GPS checkouts described in this section are applicable for installations of the GDL 82 unit with internal GPS/SBAS receiver (Garmin P/N 011-03946-40). GDL 82 and transponder should be powered on while all other avionics be turned off at the start of this test. - Page 48 GPS reception. If the GPS solution does not improve, check the GPS antenna installation. Special care should be taken to ensure there is no interference with the GDL 82 system that is installed in the aircraft equipped with non-aviation radios. If interference is found, it may be addressed by relocating the antennas, rerouting cables, using filters to attenuate unintentional harmonic frequency transmissions, or using various other techniques for elimination of the interference.
- Page 49 5.3.5 Discrete Inputs and Output Discrete input and output checks verify that optional external switches and/or annunciator are correctly interfaced to the GDL 82. Wiring should be verified to ensure there is no ground shorted if the check does not perform correctly.
-
Page 50: Ground Checks (Normal Mode)
• EMC Check NOTE The GDL 82 must be disconnected from the GDL 8X Install Tool and USB to be in Normal Mode and continue with the regulatory and ADS-B Out ground check procedures. NOTE It may take the GPS source several minutes to acquire a GPS signal. - Page 51 An EMC check must be performed after all interfaces between GDL 82 and external equipment connected to it have been verified to function properly. The EMC check verifies the GDL 82 is not producing unacceptable interference to the other avionics systems, and other avionics systems are not producing unacceptable interference to the GDL 82.
- Page 52 Verify there are no guidance errors. c. Verify no audio tones interfere with the station ID. 8. Repeat steps 6 through 8 until every applicable system listed in the form has been checked. GDL 82 Mooney M20( ) Series STC Installation Manual 190-01810-10 Rev. 1...
-
Page 53: Figure 5-2: Example Emc Source / Victim Matrix
Figure 5-2: Example EMC Source / Victim Matrix GDL 82 Mooney M20( ) Series STC Installation Manual 190-01810-10 Rev. 1 Page 46 of 49... -
Page 54: Return To Service
GDL 82 Option 1 installation example shown in Figure 3-1. Figure 6-2 shows the example arm and moment values for the GDL 82 Option 2 & 3 installation example shown in Figure 3-2 and Figure 3-3, respectively. -
Page 55: Figure 6-1: Option 1 Weight & Balance Example
Figure 6-1: Option 1 Weight & Balance Example Figure 6-2: Option 2 & 3 Weight and Balance Example GDL 82 Mooney M20( ) Series STC Installation Manual 190-01810-10 Rev. 1 Page 48 of 49... -
Page 56: Airplane Flight Manual Supplement (Afms)
Manual (AFM) or Pilot’s Operating Handbook (POH), along with any operating limitations of the aircraft. Section 1.4 of the Airplane Flight Manual Supplement for the Garmin GDL 82 Mooney M20 Series, 190- 01810-12, is intended to specify the installation configuration for the GDL 82 system. It is the responsibility of the installer to mark in the appropriate boxes in the AFMS with indelible ink using the following information for guidance.
Need help?
Do you have a question about the GDL 82 and is the answer not in the manual?
Questions and answers