Advertisement
Quick Links
6888931 0701
Installation and
Operating Instructions
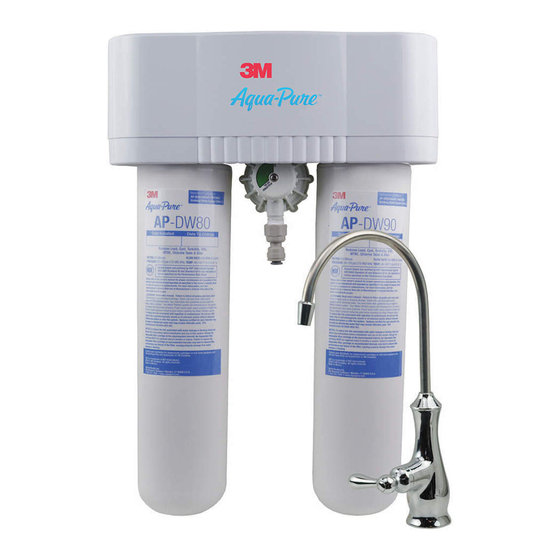
AP-DWS1000 Drinking Water Appliance Owner's Manual
•
Do not use with water that is microbiologically
unsafe or of unknown quality without adequate
disinfection before or after the system.
•
Installation must comply with state and local
plumbing codes.
•
Systems certified for cyst reduction may be
used on disinfected water that may contain
filterable cysts.
•
System must be protected from freezing. Drain
filter when room temperature drops below
40°F (4.4°C).
•
Do not install on line pressure above 125 psi
(862 kPa).
•
Do not install on hot water line. Maximum
temperature allowed is 100°F (38°C).
Teflon is a registered trademark of E.I. DuPont.
Installation Precautions
•
The filter must be installed with the inlet and
outlet ports as labeled. Make sure not to
reverse connections.
•
Do not use wicking or sealer for fitting connections
into head of filter. Use Teflon
•
Do not use torch or other high temperature
sources near filter or plastic cartridge.
•
Do not install near electric wires or water pipes
which will be in the path of drill when selecting
the position to mount bracket.
•
Do not install in direct sunlight.
•
Allow a minimum of 2" (5cm) clear space
under filter to facilitate cartridge change.
•
Mount filter in such a position as to prevent it
from being struck by other items.
®
tape for connections.
Advertisement

Summary of Contents for aqua-pure AP-DWS1000
-
Page 1: Operating Instructions
6888931 0701 Installation and Operating Instructions AP-DWS1000 Drinking Water Appliance Owner’s Manual Installation Precautions • Do not use with water that is microbiologically • The filter must be installed with the inlet and unsafe or of unknown quality without adequate outlet ports as labeled. - Page 2 • Mounting hardware • Installation, Operation and Maintenance Manual NOTE: Model AP-DWS1000 LF (Less Faucet) does not include tubing to connect filter system to a drinking water faucet. The filter system’s outlet connection will accept 1/4” plastic or copper tubing.
- Page 3 1. Install Drinking Water System Faucet (Refer to Figure 4, Page 7) Note: The drinking water system faucet should be located on a flat surface, conveniently located near the sink, so that it empties into the sink. Most sinks have pre-drilled holes designated for sprayers, soap dispensers, and other accessories.
- Page 4 3. Install Feedwater Valve (Refer to Figure 5, Page 7) Warning: Make sure cold water valve is turned off under the sink. A. Most sinks use 3/8” copper tubing. Connect the saddle valve as shown in Figure 5, Page 7. The back saddle bracket can be reversed for smaller pipe sizes (7/16”...
- Page 5 Special Section Procedure For Drilling Hole Through Porcelain/Enamel/Ceramic Sinks With Sheet Metal or Cast Iron Base Recommended tools: Variable Speed Drill Porcelain Cutter Tool Set (9/16” Size) Plumber’s Putty Note: It is important to understand this procedure. 1. The glassy layer of porcelain/enamel/ceramic must be scored through to the metal base creating a disk. 2.
- Page 6 Push in grey collet to release tubing. Push tubing straight in as far as it will go. Tubing is secured in. Pull tubing straight out. AP-DWS1000 Parts List (Figure 2) 69968-31 Self-piercing water valve 36897-82* 1/4" inlet yellow tubing (price per ft.) 55851-02 DW-80 &...
- Page 7 Installation Overview (Figure 3) Standard Installation Overview 1. Install DWS Faucet 2. Mount System 3. Install Feedwater Valve 4. Making Connections Stainless Bezel 5. Test System Rubber Washer 6. Flush Filter Countertop Plastic Backing Spacer Star Washer Hex Nut 17" (43.2 cm) Minimum FILTER 1 FILTER 2...
- Page 8 Install Drinking Water System Faucet (Figure 4) Stainless Bezel Stainless Bezel Stainless Bezel Stainless Bezel Rubber Washer Rubber Washer Rubber Washer Rubber Washer Countertop Countertop Countertop Plastic Backing Spacer Plastic Backing Spacer Star Washer Star Washer Hex Nut Hex Nut Install Feedwater Valve (Figure 5)
- Page 9 Making Connections (Figure 6) FROM FEEDWATER VALVE FROM FAUCET FILTER 1 FILTER 2...
- Page 10 Cartridge Change Instructions (Refer to Corresponding Diagrams Below) 1. Turn water supply off at saddle valve or at undersink cold water line and remove protective shroud from bracket. 2. Reset shutoff meter by pushing in knob and turning to the right until the arrow on the top of the meter body is approximately lined up to 625 gallons.
- Page 11 CUNO Incorporated 400 Research Parkway Meriden, CT 06450 U.S.A. Toll Free: 1-800-222-7880 Worldwide: 203-237-5541 Fax: 203-238-8701 © 2002 CUNO Incorporated www.aquapure.com • www.cuno.com...


Need help?
Do you have a question about the AP-DWS1000 and is the answer not in the manual?
Questions and answers