Advertisement
Quick Links
Angle Adjustment and Rotation Type
Wall-Mount Bracket Installation Guide
Product Image
Components
Only use the supplied components for the bracket installation.
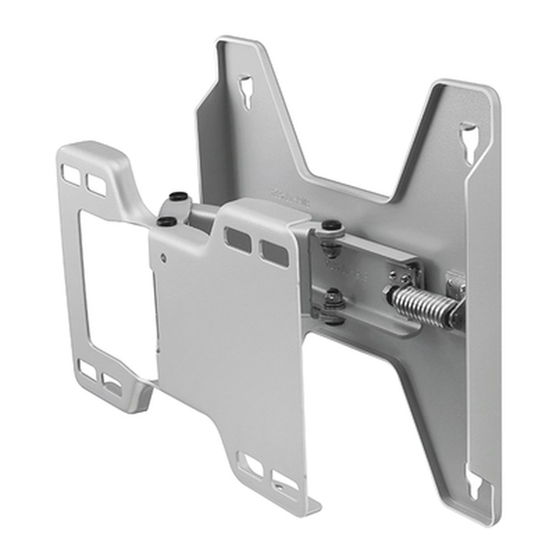
Angle Adjustment Bracket
Safety Instructions
Be sure to contact an authorized service center when installing your set.
Contact a qualified technician at your dealer for
moving or replacing the product after the installation.
1. Be sure to keep the product away from children. There can be serious damage on the head when hit by the edge of the product.
2. Be careful when you adjust the angle or rotate the set. The product can be damaged if it is too close to touch the wall.
(Attach some sponges to 4 corners of the product to avoid the product or wall damage.)
3. Do not install the product in a place with high temperature and high humidity. Avoid to install the product on the wall which can-
not bear the weight.
4. Since there is a danger of electric shock, do not insert your fi ngers into the TV stand installation hole while installing the TV.
5. Make sure to cover the TV stand installation hole with the hole cover supplied with the TV before completing the wall installation.
WMN4070SD-eng-wall mount.indd 1
WMN4070SD
ⓐ
Screw
: 7
Assembling Tool
Wire Fixing Tool : 1
1
Do not hang on or give sudden impacts to the product.
Accessories
Anchor : 7
L23, WHT
ⓑ
Screw
: 4
LFD
RH, M8,
2011-06-22
6:04:17
Advertisement

Related Manuals for Samsung WMN4070SD


Summary of Contents for Samsung WMN4070SD
-
Page 1: Safety Instructions
Components Only use the supplied components for the bracket installation. Angle Adjustment Bracket Accessories RH, M8, ⓐ Screw : 7 Anchor : 7 L23, WHT ⓑ Screw : 4 Assembling Tool Wire Fixing Tool : 1 Safety Instructions Be sure to contact an authorized service center when installing your set. Contact a qualified technician at your dealer for Do not hang on or give sudden impacts to the product. moving or replacing the product after the installation. 1. Be sure to keep the product away from children. There can be serious damage on the head when hit by the edge of the product. 2. Be careful when you adjust the angle or rotate the set. The product can be damaged if it is too close to touch the wall. (Attach some sponges to 4 corners of the product to avoid the product or wall damage.) 3. Do not install the product in a place with high temperature and high humidity. Avoid to install the product on the wall which can- not bear the weight. 4. Since there is a danger of electric shock, do not insert your fi ngers into the TV stand installation hole while installing the TV. 5. Make sure to cover the TV stand installation hole with the hole cover supplied with the TV before completing the wall installation. WMN4070SD-eng-wall mount.indd 1 2011-06-22 6:04:17... - Page 2 How to Tighten Anchors or Screwsⓐ Make a hole in the wall with the drill of 6X50. (WMN-2370 : 5X40) Clean up the hole. Insert the supplied anchor to the hole. Match the angle adjustment bracket to the holes on the wall and tighten Tighten the angle adjustment bracket by using anchors the screwsⓐ. and screwsⓐ orderly from ① to ⑦. (Turn the rotating part ※ Use the drill with the required size when making a of the bracket to the right or left to install the bracket more hole in the wall. easily.) Be sure to follow the directions for the installation If it cannot be installed on the assigned area, install at the to avoid safety problems. nearest place. C heck the solidity of the wall before the installation. Strengthen the wall and install the bracket if the wall is not firm enough. The supplied screws and anchors are for installing on concrete walls. For the wall of plaster, marble, or steel, use the appropriate screws. Remove the screws on the product. Tighten the 4 screwsⓑ on the back panel by using the assembling tool. Be sure that 5 mm of each screw is left to be unscrewed. (About 5 mm space is required to hang on the angle adjustment bracket.) Supplied Holder-Ring ※ When installing the LFD, assemble the LFD using the holder-ring injection mold supplied with the LFD. M ount the product on the wall bracket. Be sure to check on the left and right side to see if it is properly fixed. Be careful when installing the product or adjusting the angle as fingers can be caught in the holes. Be sure the wall bracket is securely fixed to the wall. Falling down the product may cause physical damage. WMN4070SD-eng-wall mount.indd 2 2011-06-22 6:04:18...
- Page 3 Pull the wall bracket fixing part forward. Two people are required to install the product on the assigned area of the wall bracket. WMN4070S Fix the TV set to the wall bracket and tighten again with 4 screwsⓑ by using the assembling tool. (Torque : 10 ~15 Kg) For managing the power cord and other cables for peripheral equipments, bundle the wires by using the supplied wire fixing tool. Be sure the wires are not unbundled or came off when rotating or operating. ※ Insert the cables and pull the angle adjustment bracket forward. Arrange the wires by using the hole to avoid the interference with wires when rotating the set. Check the operation 2 ~ 3 times and fix the wall molding if it works properly. WMN4070SD-eng-wall mount.indd 3 2011-06-22 6:04:18...
-
Page 4: Product Specifications
Hold the left and right side of the product when you want to adjust the left and right angle. -20°~20° Hold the top center to adjust the up and down angle. ※ You can adjust the angle vertically within a range of -20°~20° -10° ~ 10° and horizontally within a range of -20° ~ 20°. The adjustable angle range may be vary depending on -10°~10° the model. Product Specifications 197.4 [ Set Fixing Part ] [ Screw Fixing Part ] Product Standards WMN4070SD Width (mm) Height (mm) Dept (mm) Weight (Kg) Bracket VESA Standard 200 X 200 Information in this document is subject to change without notice. WMN4070SD-eng-wall mount.indd 4 2011-06-22 6:04:18...