
Related Manuals for Uniden SDS100


Summary of Contents for Uniden SDS100
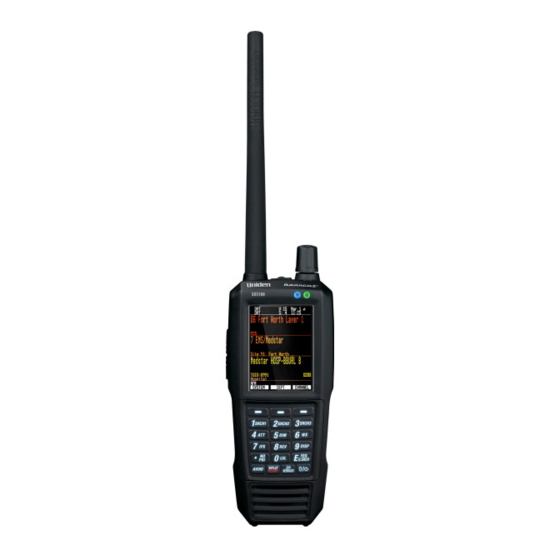
- Page 1 SDS100 Owner’s Manual Version 2 ©2018 Uniden America Corporation Printed in Vietnam UOl UB383ZZZ(O)
- Page 2 SanDisk Corporation. HomePatrol is a registered trademark of Uniden America Corporation, Irving, Texas. At Uniden, we are always improving our products. This manual may not contain the latest improvements to this model. Check our Owner’s Manual downloads at www.uniden.com for the latest updates.
-
Page 3: Table Of Contents
CONTENTS USING THIS MANUAL . . . . . . . . . . . . . . . . . . . . . . . . . . . . . . . . . . . . . . . . . . . . . . . . . . . 1 IMPORTANT INFORMATION . - Page 4 START/STOP RECORDING . . . . . . . . . . . . . . . . . . . . . . . . . . . . . . . . . . . . . . . . . . . . . . . . . . 14 AVOIDING CHANNELS, DEPARTMENTS, SITES, AND SYSTEMS .
- Page 5 PROGRAMMING SYSTEMS . . . . . . . . . . . . . . . . . . . . . . . . . . . . . . . . . . . . . . . . . . . . . . . . . 34 CREATING OR EDITING A SYSTEM .
-
Page 7: Using This Manual
USING THIS MANUAL This manual describes the functions and features of your scanner. It assumes that you know the basic structure of radio systems and how they work. Just as a car owner’s manual does not teach you how to drive, this manual does not teach you about radio systems. There are many resources for learning about radio systems, including wiki articles, forum discussions, and YouTube videos. -
Page 8: Important Information
MODIFICATION NOTICE Changes or modifications to this product not expressly approved by Uniden, or operation of this product in any way other than as detailed by this Users Guide, could void your authority to operate this product. -
Page 9: General Precautions
Liquid Exposure Warning Uniden does not represent this unit to be waterproof. It is water resistant to JIS level 4. To reduce the risk of damage to this product, minimize exposure of this unit to rain or moisture. This product... - Page 10 Une version française de ce guide d’utilisation est disponible sur le site Web d’Uniden au : www.uniden.com. • Sur le site d’Uniden, sélectionnez “ Support”, puis “ Owner’s Manuals”.
-
Page 11: Introduction
You can adjust the selection range from 0 to 50 miles. The database is updated weekly from RadioReference, the most comprehensive repository of radio system available. Updating the radio database in your SDS100 is as simple as connecting it to your PC and running the included Sentinel software. -
Page 12: Record Transmissions
RECORD TRANSMISSIONS With your scanner, you can record transmissions. When you begin recording, your scanner adds the Replay recording buffer to the recording. These recording sessions are saved and can be replayed on demand. Rename and delete sessions through the Review Recordings submenu. -
Page 13: Main Features
HomePatrol Database – Includes all known radio systems in the US and Canada. The database is updatable with the Sentinel software and Uniden updates the main database weekly. Water Resistant (JIS4) – Resistant to dust and damage caused by splashing water from any direction (when all jack covers are in place). - Page 14 Close Call RF Capture Technology – Lets you set the scanner so it detects and provides © information about nearby radio transmissions. Close Call Do-not-Disturb checks for Close Call activity in between channel reception so active channels are not interrupted. Broadcast Screen –...
-
Page 15: Included With Your Scanner
INCLUDED WITH YOUR SCANNER Accessories included in the box are: • AC Adapter • USB Cable • Hand Strap • MicroSD Card (installed) • Lithium Ion Battery Pack • SMA-BNC Antenna Adapter • SMA type Antenna • Belt Clip • Printed Material... -
Page 16: Basic Usage Information
You can power the scanner by connecting to either the USB micro or mini connector, but only the mini connector can be used for charging. The included AC adapter is rated at 2A and can power or charge the SDS100 The scanner’s charge indicator is red during charge and green when complete. -
Page 17: Trunking Sites
Monitor settings in the Profile Editor to select your preference. MANAGE DATABASES Uniden updates the Database used in your scanner every week. You can decide how often you want to update the databases on your scanner. When you update them through Sentinel, it checks the website for the most current database and saves it in Sentinel. -
Page 18: Updating The Database
For information about what is included in each update, see: • http://info.uniden.com/UnidenMan4/SDS100FirmwareUpdates UPDATING THE DATABASE To update the scanner’s database, connect it to your PC using the supplied USB cable. Select Mass Storage. Next, in Sentinel, select UPDATE/Update Master HPDB. -
Page 19: Scanning
Scanning is performed in a mixture of FLQK order and SQK order. The scanner does not scan all Systems in one Favorites List and then move to the next List. For each Favorites List with a quick key, starting with 0, the scanner scans each 0 SQK in FLQK order and then move to the next set of SQKs for each list. -
Page 20: Start/Stop Recording
START/STOP RECORDING While scanning, press Func then Replay/Reccord. Resets to Off when you turn off the scanner. AVOIDING CHANNELS, DEPARTMENTS, SITES, AND SYSTEMS Temporary Avoids are cleared when you cycle power. You must manually clear permanent avoids. Channel Avoid When the Channel is in the display or in Channel Hold mode: To Temporary Avoid, press Avoid once. -
Page 21: Setting Up Your Scanner
SETTING UP YOUR SCANNER FIRST STEPS To get your scanner ready for use, follow these quick steps: Install the battery pack and plug the included cable into the scanner’s USB mini port and the other end into a PC. Turn on the scanner by pressing for about 2 seconds. -
Page 22: Button Operation
Button Operation • Press and hold to turn the scanner on or off. Power/Light • Tap to turn on/off the display backlight. Note that when the display backlight is off, nothing is visible on the display. Avoid • Press once to temporarily avoid the current channel or frequency (in direct tune mode). - Page 23 Button Operation 4 / ATT • Press to enter the digit 4 in any numeric entry mode. • In Channel hold mode, press Func then 4 to toggle attenuation on/ off for the current channel • In Channel hold mode, press Func then hold 4 for 3 seconds to toggle global attenuation on/off.
-
Page 24: Understanding Location, Range, And Services
UNDERSTANDING LOCATION, RANGE, AND SERVICES All radio systems in your scanner’s database are tagged with location information. A geotag has latitude, longitude, and range. This tag describes a circle centered at the latitude/longitude that fully encompasses the entity (i.e. city, town, state, etc.) served by the radio system. Taking a look at some of the systems in the Fort Worth, TX area, you can see that each system has its own little circle. -
Page 25: Setting Location/Range
The scanner selects channels from systems that overlap the thick circle. So, the system down south that covers Burleson is included even though only part of it is covered, but Haslet, way up north, is not included. Each location method uses a different range. In addition to the 10-mile Zip Code radius, the scanner uses: •... -
Page 26: Enter Zip/Postal Code
Enter Zip/Postal Code This sets the center of a zip/postal code as your location (not your exact location) and a default scan range of 10 miles. Select your country (USA or Canada) and press E/yes. Enter your zip code or see Data Naming, to enter a postal code. You can also press the Zip button to enter your zip/postal code. -
Page 27: Use Location
Use Location This will set the location as current for scanning the Database and any Favorites List with Location Control enabled. At Confirm? Press E/yes or ./no. Delete Location You can only delete saved locations. The last location set will be retained for use when scanning the Database. -
Page 28: Quick Navigation Concepts
QUICK NAVIGATION CONCEPTS ASSIGNING QUICK KEYS Quick Keys let you quickly turn on/off favorites lists, systems within a favorites list, and departments and sites within systems. There are three levels of quick key as described below. FAVORITES LIST QUICK KEYS Favorites Lists Quick Keys (FLQK) quickly enable or disable entire Favorites Lists for scanning. -
Page 29: Startup Keys
STARTUP KEYS You can program each of your Favorites Lists with a Startup Key (0-9) so that when you power up the scanner and press the key number, just those Favorites List(s) assigned to the key will be enabled for scan. Systems are not affected. Assign a startup key when programming Favorites Lists. -
Page 30: Menu Reference
MENU REFERENCE The scanner’s menu gives you access to all the scanner’s setting as well as programming. The table below provides a quick description of most of the scanner’s menu tree. For procedures that need more explanation, the table will indicate where in this manual to look for that explanation. To access the menu, press on the scanner’s left side. - Page 31 Main Menu Sub Menu Setting or Sub-sub Setting menu Select USA or Canada then enter your zip Set Your Location Enter Zip Code code or the first 3 digits of your postal code. The scanner will select things to scan based on the zip code location.
- Page 32 Main Menu Sub Menu Setting or Sub-sub Setting menu The scanner displays a list of all service types. Scroll to a service Select Service Types type and press E to toggle that service type on or off. Note that if no channels in the currently scanned database or favorites list(s) include a particular service type, that service type will have --- displayed instead of on or off.
- Page 33 Main Menu Sub Menu Setting or Sub-sub Setting menu Hold on the frequency Set Delay Time the set amount of time after the transmission ends to wait for replies. Negative value forces search resume after set time, even if transmission continues.
- Page 34 Main Menu Sub Menu Setting or Sub-sub Setting menu Set Avoid option lets Search with Scan you stop avoiding (i.e. include the search during scan), temporarily avoid, or permanently avoid. Set Hold Time option determines how long the scanner spend in the custom search before resuming normal scanning.
- Page 35 Main Menu Sub Menu Setting or Sub-sub Setting menu Scroll to select the Set CC Alert Set Alert Tone alert tone to sound when there is a Close Call hit. Then, scroll to select the volume level for the alert (Auto uses the current volume setting).
- Page 36 Main Menu Sub Menu Setting or Sub-sub Setting menu Select how the scanner responds to weather Weather Alert alerts: • Alert Only the scanner responds to any alert received when it detects the 1050 Hz alert tone • SAME 0-4 the scanner only responds to an alert if it matches the selected stored SAME settings.
- Page 37 Main Menu Sub Menu Setting or Sub-sub Setting menu Set the values for Tone Set Tone A and Tone B. For a single short tone, only set Tone A. For a single long tone, only set Tone B. To search for tones leave both settings at 0.
- Page 38 Main Menu Sub Menu Setting or Sub-sub Setting menu Rotate to set the key beep volume. AUTO Settings Adjust Key Beep sets the level to match the current volume setting. Follow the menus to set the date, time, time Set Clock zone, and daylight savings time.
-
Page 39: Managing Favorites Lists
MANAGING FAVORITES LISTS Favorites Lists hold all your custom Systems, Sites, Departments, and Channels. Certain system, department, and channel options are only available for specific types of systems. Each option is tagged with the type(s) it applies to as follows: •... -
Page 40: Programming Systems
Notes: • Any Avoided Channel will not be added. • When adding channels from the Full Database, only channels that are inside the set range, and from the selected Service Types are added. • When adding channels from a Favorites List that has Use Location Control is set to Yes, only channels that are inside the set range, and from the selected service types are added. - Page 41 Setting Description Applicable Systems Toggles between ID Search mode PMDEL ID Search (stop on all unavoided channels) and ID Scan (stop only on programmed channels) mode. Sets the fleet map for the system. Edit Fleet Map Sets the system to apply trunked PMDEL Priority ID Scan channel priority for the system.
- Page 42 Option Description Applicable Systems Set whether attenuation is applied PMDEL Set Attenuator for the site. Set the avoid status for the site. PMDEL Set Avoid Select whether to use a circle PMDEL Set Location Information or rectangles to define the site location, then enter the appropriate parameters to define the site location.
- Page 43 Setting Description Applicable Systems Edit the frequency used by the Edit Frequency channel. Set whether the channel is analog Set Audio Type or digital. Assign a channel number tag for PMDELC Set Channel Number Tag quick channel navigation. Set the modulation method used for Set Modulation the channel Set whether the channel is RF...
-
Page 44: Customizing The Display
CUSTOMIZING THE DISPLAY The SDS100 gives you considerable control over what items are shown on the display as well as what colors are used for each item. To customize the display, select MENU → Display Options → Customize then select the display you want to customize: •... -
Page 45: Simple Display Mode
SIMPLE DISPLAY MODE Conventional and Trunked mode share the same color scheme, but different display items are available for each mode. DETAIL DISPLAY MODE... -
Page 46: Search/Tone-Out/Weather Mode
SEARCH/TONE-OUT/WEATHER MODE You can individually set colors for Search/Close Call mode, Weather Mode, and Tone-Out mode, but they share the same general layout. You can only set display option items for Search mode. AVAILABLE ITEMS The below tables outline what display items are available. Note that not all items are possible for all display fields. - Page 47 Volume V:15 Squelch S:15 Battery voltage Batt:x.xxV Digital Error count Err:xx G-ATT P25 Status P25-2 mm/dd Time xx:xx Modulation Icon Area Item Sample Priority Scan Close Call CC (icon) WX PRI Broadcast Screen Repeater Find Volume Offset Modulation P-Ch...
-
Page 48: Using Discovery Mode
USING DISCOVERY MODE Trunking Discovery mode allows you to monitor a trunked radio system, logging system activity and recording the audio for channel identification. Conventional Discovery mode lets you monitor a range of frequencies, logging frequencies with activity and recording the audio for frequencies that are not already known to be in use in your area so that you can more easily identify the users. -
Page 49: Reviewing A Discovery Session
Menu Item Description Sets how much audio the scanner records for each hit. Once the Set Record Duration record duration has been met, the frequency or TGID is considered “discovered.” Sets how long the scanner will monitor a hit before resuming scan Set Time-Out Timer automatically. -
Page 50: Using Analyze Features
USING ANALYZE FEATURES The SDS100 includes some analysis features that can help you find out more information about systems you are scanning. SYSTEM STATUS This function displays the signal strength, decode quality, and how busy the system is in an easy- to-decipher display. - Page 51 Once all LCNs are found, you can save the LCNs to the system. If you abort before all LCNs are found, you can still save the LCNs that were found up to that point. Note that LCN finder works best on systems with moderate activity. Too much traffic or too little traffic make LCN finder take longer to complete for most systems.
-
Page 52: Appendix
APPENDIX TROUBLESHOOTING Problem Solution Scan Mode, Nothing to • Make sure you Set Your Location to scan the Database. Scan • Make sure Favorites Lists are enabled in Set Scan Selection. • Make sure Service Types are enabled for the Channels you want to hear. -
Page 53: Service Types
Frequency Range Mode Step (kHz) Band 76.0000 87.9500 VHF TV Broadcast 5 – 6 88.0000 107.900 FM Broadcast 108.0000 136.9916 8.33 Commercial Aircraft 137.0000 143.9875 12.5 Military Land Mobile 144.0000 147.9950 2 Meter Amateur Band 148.0000 150.7875 12.5 Military Land Mobile 150.8000 161.9950 VHF High Band... - Page 54 Service Type Description EMS-Tac Ambulance on-scene communications, tactical operations and secondary channels. EMS-Talk Ambulance talk-around, car-to-car and supervisor operations. Federal All federal government operations (except corrections, traditional law enforcement patrol and fire/EMS operations). Fire Dispatch Fire dispatch, including combined fire/ambulance dispatch. Fire-Tac Fireground, tactical and on-scene communications, including combined fire/ambulance operations.
-
Page 55: Removing The Micro Sd Card
REMOVING THE MICRO SD CARD Carefully remove the SD Card by removing the back cover, then removing the battery pack. Slightly press down and slide the SD card holder right, then lift out the card. Gently install the SD Card the same way it was removed. REFORMATTING THE MICRO SD CARD SD cards should only be formatted using the special SD Card Formatter (https://www.sdcard.org/ downloads/formatter_4/). -
Page 56: Weather Channels
WEATHER CHANNELS Channel Frequency Channel Frequency 162.550 162.450 162.400 162.500 162.475 162.525 162.425 SAME EVENT CODES Standard Event Code Warning Watch Advisory Advisory Administrative Message Admin Message Avalanche Watch Avalanche Avalanche Warning Avalanche Biological Hazard Warning Biological Boil Water Warning Boil Water Blizzard Warning Blizzard... - Page 57 Standard Event Code Warning Watch Advisory Advisory Flash Freeze Warning Flash Freeze Freeze Warning Freeze Hurricane Statement Hurricane Hazardous Material Warning Hazardous Hurricane Watch Hurricane Hurricane Warning Hurricane High Wind Watch High Wind High Wind Warning High Wind Iceberg Warning Iceberg Industrial Fire Warning Industrial Fire...
-
Page 58: Ctcss Frequencies
Standard Event Code Warning Watch Advisory Advisory Volcano Warning Volcano Wild Fire Watch Wild Fire Wild Fire Warning Wild Fire Winter Storm Watch Winter Storm Winter Storm Warning Winter Storm Unrecognized Watch Unrecognized Unrecognized Emergency Unrecognized Unrecognized Statement Unrecognized Unrecognized Warning Unrecognized Continuous Tone Coded Squelch System (CTCSS) and Digital Coded Squelch (DCS) are two methods used to prevent interference by other radio communications. -
Page 59: Reverse List
REVERSE LIST Range (MHz) Offset (MHz) Range (MHz) Offset (MHz) 29.5200 - 29.5800 + 0.1 450.0000 - 454.9875 29.6200 - 29.6800 - 0.1 455.0000 - 459.9875 52.0100 - 52.9900 460.0000 - 464.9875 53.0100 - 53.9900 465.0000 - 469.9875 143.7500 + 4.375 470.0000 - 472.9875 143.9000 + 4.25... -
Page 60: Warranty Information
WARRANTOR: UNIDEN AMERICA CORPORATION (Uniden) ELEMENTS OF WARRANTY: Uniden warrants, for one year, to the original retail owner, this Uniden Product to be free from defects in materials and craftsmanship with only the limitations or exclusions set out below. WARRANTY DURATION: This warranty to the original user shall terminate and be of no further effect 12 months after the date of original retail sale.
Need help?
Do you have a question about the SDS100 and is the answer not in the manual?
Questions and answers
I have several favorite lists. How can I get to one with the push of a button?
You can access a favorite list on the Uniden SDS100 using Quick Keys. Quick Keys allow you to activate systems, favorites lists, and departments easily. To set it up, go to the menu, scroll to location settings, and enter your zip code. You can then create and organize favorites lists for different areas or services. Once set, you can quickly activate a favorite list by pressing the assigned Quick Key.
This answer is automatically generated