
Related Manuals for Miele PW 413


Summary of Contents for Miele PW 413
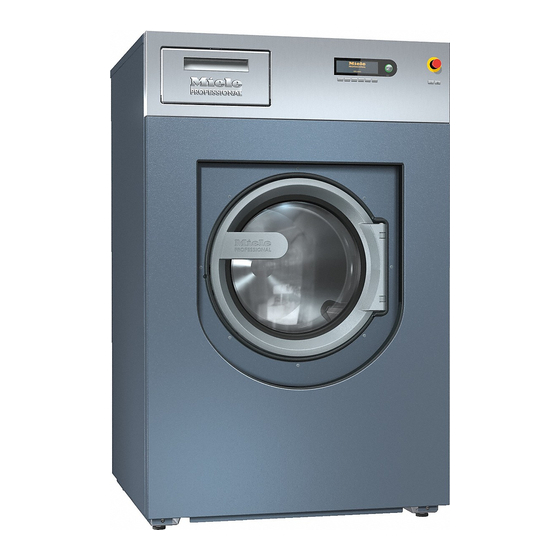
- Page 1 Operating and Installation instructions Washing Machine PW 413 PW 418 To prevent accidents and machine damage, read en-US,CA these instructions before installation or use. M.-Nr. 10 662 350...
-
Page 2: Disposal Of Your Old Machine
Caring for the environment Disposal of packaging material Energy saving tips The cardboard box and packing materials Energy and water consumption protect the machine during shipping. They – Water consumption and energy usage are have been designed to be biodegradable determined by the size of the load. -
Page 3: Table Of Contents
Contents Caring for the environment .................... 2 Disposal of your old machine....................2 IMPORTANT SAFETY INSTRUCTIONS ................ 7 Notes on using chlorine bleach.................. 13 Antichlorine treatment .................... 13 Description of the machine (with detergent compartment) .......... 15 Models with detergent dispenser drawer (WEK) ..............15 Operating the washing machine .................. 16 Control panel ........................ - Page 4 Contents Mop program........................37 Information on Mops...+ finish program ................. 39 Information on Mops finish program ................ 39 Mop loads (cotton) ...................... 40 Mop loads (microfiber) .................... 40 Cleaning cloth programs ..................... 41 Information on Cloths standard program ............... 43 Information on Cloths...+ finish program................
- Page 5 Contents Continuing program after "Dispensing system fault" message .......... 59 Dispensing quantities ......................60 Commissioning the dispenser pumps................. 60 Dispenser calibration......................60 Problem solving guide ...................... 62 Opening the door and drain valve in an emergency ............62 Service interval and BGR display ................... 64 Fault messages ......................
- Page 6 Medium water pressure....................... 99 Heat ............................. 99 Customer details ......................... 99 Currency ..........................100 Technical data........................ 101 PW 413 machine data ....................... 101 Electrical connection .................... 101 Installation dimensions.................... 101 Weight and floor load .................... 101 Emission levels ...................... 101 Product safety ...................... 101 PW 418 machine data .......................
-
Page 7: Important Safety Instructions
IMPORTANT SAFETY INSTRUCTIONS This washing machine complies with current safety requirements. Inappropriate use can, however, lead to personal injury and damage to property. To avoid the risk of accidents and damage to the machine, please read these instruc- tions carefully before using it for the first time. They contain important information on its safety, installation, use and maintenance. - Page 8 IMPORTANT SAFETY INSTRUCTIONS Preventing problems Do not use chemical cleaning agents such as those used for dry cleaning in this ma- chine. Danger of fire or explosion. When washing with high temperatures please be aware that the porthole glass can get hot.
- Page 9 Do not make any alterations to the machine, unless authorized to do so by Miele. The machine must be isolated from the power supply when cleaning and maintaining the machine and in the event of a fault.
- Page 10 IMPORTANT SAFETY INSTRUCTIONS For hard-wired machines, a quick means of disconnect must be provided on site. The isolator must be located in the immediate vicinity of the washing machine and be easily recognizable, accessible without hindrance and easy to operate.
- Page 11 IMPORTANT SAFETY INSTRUCTIONS Correct use The maximum dry laundry weight for the PW 413 is 31 lb (14 kg) and for the PW 418 it is 44 lb (20 kg). See the "Program chart" for the maximum recommended loads for individual programs.
- Page 12 IMPORTANT SAFETY INSTRUCTIONS Color run and dye removers contain sulphur compounds which can cause damage such as corrosion. Use these products only if the manufacturer expressly states that they are suitable for use in a washing machine. The stainless steel surfaces must not come into contact with liquid cleaning and disin- fecting agents which contain chlorine or sodium hypochlorite.
-
Page 13: Notes On Using Chlorine Bleach
IMPORTANT SAFETY INSTRUCTIONS Chlorine and component damage Frequent use of chlorine products increases the risk of damage to components. Notes on using chlorine bleach The use of agents containing chlorine, such as sodium hypochlorite and chlorine bleach in powder form, can damage the protective upper surface of stainless steel and cause corro- sion to components. - Page 14 Before disposing of a washing machine, render the door lock inoperable so that children cannot lock themselves in the machine by mistake and endanger their lives. Miele cannot be held liable for damage caused by failure to comply with these safety in- structions and warnings.
-
Page 15: Description Of The Machine (With Detergent Compartment)
Description of the machine (with detergent compartment) Models with detergent dispenser drawer (WEK) ⑥ ① ② ⑯ ⑦ ⑧ ⑨ ⑧ ⑩ ⑪ ⑬ ⑫ ⑮ ③ ④ ⑭ ⑤ Display Hot water connection see "Control panel" 2 x hard water connection Emergency shut-off switch (Optional) see "Control panel"... -
Page 16: Operating The Washing Machine
Operating the washing machine Control panel Display When the machine is switched on, the welcome screen appears briefly followed by the first program or the last program started. Function buttons These buttons can be allocated specific functions depending on the status of the machine. These appear in the display above the buttons and are highlighted when selected. -
Page 17: Function Buttons
Operating the washing machine Function buttons Stop/Finish When a program has started, the right-hand function button acts as a stop button. After pressing the button the selected program is stopped, if pressed again the program is cancelled. Block plus. The program block in question (e.g. -
Page 18: Preparing For Use
Preparing for use Commissioning The machine should be commissioned by a Miele service tech- nician or an authorized Miele dealer only. Open the site non-return valves for water and, if applicable, for steam. Switch the machine on at the site mains switch. -
Page 19: Max. Load
Preparing for use Max. load (dry laundry) PW 413 PW 418 max. 31 lb (14 kg) max. 44 lb (20 kg) Maximum load weights are given in the program chart. Loading the washing machine Switch on the washing machine with the button. Pull the door handle to open the drum door. ... -
Page 20: Washing With Detergent Compartment
Washing with detergent compartment Adding detergent using the detergent dispenser com- partment. For standard wash programs add powder detergent for the main wash to the compartment and if desired, add detergent for a pre-wash to the compartment. Add fabric softener to the front of the compartment. -
Page 21: Bleaching Agent
Washing with detergent compartment Bleaching agent Only use bleach on textiles marked with the Δ symbol on the wash care label. Liquid bleaching agents must only be dispensed through the desig- nated dispenser compartment. The agent will then be dispensed au- tomatically during the 2nd rinse. -
Page 22: Washing Without Detergent Compartment
Washing without detergent compartment Dispensing quantities Please follow the detergent manufacturer's instructions. Always follow the instructions of the chemical manufacturer when using cleaning agents and special application chemicals. Only use such chemicals for the purpose and in the situation specified by the manufacturer in order to avoid the danger of adverse chemical reactions and material damage. -
Page 23: Dispenser Calibration
Washing without detergent compartment Dispenser calibration Dispenser calibration is used to measure the throughput of individual dispenser pumps. To go directly to Press and hold multifunction button 2 and switch the machine on Dispenser calibra- using Power On . tion when the ma- Dispensing calibration Main menu ... - Page 24 Washing without detergent compartment Dispensing calibration Dispensing pump 1 100 ml P: No Press multifunction button 0/1 . Stop the pump by pressing the 0/1 button, or it will stop automatically after 60 seconds. Measure the amount of liquid dispensed into the measuring vessel. ...
-
Page 25: Washing
Washing Detergent dispensing Detergent dis- Avoid dispensing more than the required amount as this can cause pensing excessive foaming. – Only use low foaming detergents. – Dispense according to the detergent manufacturer's recommenda- tions. The amount to dispense will depend on: –... - Page 26 Washing Tip: When the program button is pressed again, the additional func- tions will appear in the last line. Additional func- tions Selecting Pre- Confirm your program selection by pressing the program button wash, Starch stop (e.g. 4). and Without spin The following (for example) will appear on the display: additional func- Cottons Universal...
- Page 27 Washing 4 Cottons Universal 13,0/13,0 kg 86 °F Main Wash Rinse 1025 rpm + -+ Press the -+ button. Cottons Universal 13,0/13,0 kg 86 °F Main Wash Disinfection 1025 rpm The load display is selected. Press the OK button to confirm.
- Page 28 Washing 4 Cottons Universal 13,0 /13,0 kg °F Main Wash Rinse 1025 rpm Change the temperature by pressing – or +. Press the OK button to confirm your changes. Spin speed Before the program starts, the spin speed can be set in 25 rpm incre- ments from 300 to the maximum spin speed.
-
Page 29: Starting A Program
Washing Maximum spin PW 413 PW 418 speeds 1025 rpm 950 rpm The maximum spin speeds depend on the selected programs. Starting a program Press the "START" button. The wash program will start. Once the program has started, progress is shown on the display. -
Page 30: Opening The Door After The Program Has Finished
Washing Opening the door after the program has finished At the end of the program, when the drum has stopped rotating and no water is left in the machine, the following (for example) appears on the display: Cottons Hygiene Program finished Door can be opened. - Page 31 Washing Mops Standard Program finished, machine still hot Wait until the laundry has cooled down. The door can then be opened. If no further wash programs are planned: Switch off the machine with the "Power off" button 0. ...
-
Page 32: Program Chart - Basic Version
Type of fabric Cotton, linen and mixed fiber fabrics, for example 1:10 - 1:9 bed linen and toweling PW 413 Program se- + Pre-wash 104°F (40°C), optional 28 - 31 lb (13 - quence Main wash 194°F (90°C), Cool down can be se- 14 kg) -
Page 33: Cottons Universal / Eco Short 122 °F (50 °C)
122°F / 50°C 1:10 - 1:9 Type of fabric Lightly soiled cotton, linen and mixed fiber fab- PW 413 rics, for example bed linen and toweling 28 - 31 lb (13 - 14 Program se- + Pre-wash 86°F (30°C), optional... -
Page 34: Minimum Iron Program
Load ratio/Load size Type of fabric Normally soiled synthetic fabrics, for example mixed fiber fabrics 1:20 PW 413 - 14 lb Program cycle + Pre-wash 86 °F (30 °C), optional (6.6 kg) Main wash 140 °F (60 °C) (selectable range cold PW 418 - 19 lb to 140 °F / 60 °C) (9 kg) -
Page 35: Separate Rinse Program
Program chart - BASIC VERSION Separate rinse program Separate rinse Type of fabric Fabrics that only need to be rinsed and spun Program cycle 1 rinse Final spin Separate spin program Separate spin Type of fabric Items which only need to be spun Program cycle Final spin Separate drain program... -
Page 36: Clean Machine" Program
Program chart - BASIC VERSION "Clean machine" program For cleaning the detergent dispenser drawer, drum, suds container and the drainage system. If you use low temperature or disinfection programs on a regular basis, or to remove coarse soiling, the Clean machine program should be carried out frequently. Clean machine Type of fabric No load... -
Page 37: Program Chart - Mopstar
Program cycle Pre-spin Pre-rinse + 2nd pre-rinse, optional Main wash 140 °F (60 °C) (selectable: cold to 1:10 194 °F / 90 °C), Cool down available PW 413 - 28 lb 2 rinses (13 kg) Final spin PW 418 - 39 lb Mop thermal disinfec- 194 °F (90 °C) (18 kg) - Page 38 140 °F (60 °C) / 194 °F (90 °C) Type of fabric For washing new mops 1:10 Program cycle Main wash 140 °F (60 °C) (selectable range cold PW 413 - 28 lb to 194 °F / 90 °C), Cool down available (13 kg) 2 rinses PW 418 - 39 lb Final spin (18 kg)
-
Page 39: Information On Mops
Type of fabric Cotton, viscose, polyester and microfiber mops Program cycle Program as for Mops chemo-thermal disinfec- 1:10 tion*, then: PW 413 - 28 lb Finishing agent, damp (13 kg) or activate block: PW 418 - 39 lb Damp, wet, dripping wet (18 kg) -
Page 40: Mop Loads (Cotton)
(720 g) mops mops mops mops mops mops mops PW 413 PW 418 Tip: More microfiber mops can be washed per load as they are lighter. Mop loads (microfiber) Mop size/weight 15 3/4" (40 cm) 19 11/16" (50 cm) 4.2 oz (20 g) mops 6 oz (170 g) mops... -
Page 41: Cleaning Cloth Programs
Main wash cold to 140 °F (60 °C), 10 min. 2 rinses Final spin Cloths thermal disinfec- 194 °F (90 °C) 1:20 tion* ** PW 413 Type of fabric Cotton, viscose, polyester and microfiber clean- 0.5 oz (16 g) per cloth approx. 415 cloths ing cloths = 14.6 lb (6.6 kg) 0.7 oz (22 g) per cloth... - Page 42 Cotton, viscose, polyester and microfiber clean- ing cloths 1:20 Program cycle Program as for Cloths thermal disinfection, then: Finishing agent, damp PW 413 0.5 oz (16 g) per cloth or activate block: approx. 415 cloths Damp, wet, dripping wet = 14.6 lb (6.6 kg) 0.7 oz (22 g) per cloth...
-
Page 43: Information On Cloths Standard Program
104 °F (40 °C) / 140 °F (60 °C) Load ratio/Load size Type of fabric Polishing pads 1:50 Program cycle Pre-rinse PW 413 - 5.7 lb + 2nd pre-rinse, optional (2.6 kg) Main wash 104 °F (40 °C) (selectable range: cold PW 418 - 8 lb to 140 °F / 60 °C) (3.6 kg) 3 rinses... -
Page 44: Curtains Program
Curtains program Curtains 104 ° (40 °C) Load ratio/Load size Type of fabric Synthetic and artificial fibers 1:25 - 1:20 PW 413 - 12.8 lb Program cycle + Pre-wash 86 °F (30 °C), optional (5.8 kg) Main wash 104 °F (40 °C) PW 418 - 17.6 lb 3 rinses (8 kg) -
Page 45: Separate Drain Program
Program chart - MOPSTAR Separate drain program Separate drain Type of fabric Program cycle Drainage "Clean machine" program For cleaning the detergent dispenser drawer, drum, suds container and the drainage system. If you use low temperature or disinfection programs on a regular basis, or to remove ... -
Page 46: Program Chart - Sluice
Program cycle 2 pre-rinse cycles Pre-wash 140 (60 °C), 5 min. Disinfection 149 °F (65 °C), 10 min. 3 rinses 1:10 Final spin PW 413 - 28 lb Sluice 160 °F (71 °C) (13 kg) PW 418 - 39 lb Type of fabric Heavily soiled underwear, toweling and bed linen (18 kg) -
Page 47: Sluice Program
Program chart - SLUICE Sluice program Sluice sensitive 149 °F (65 °C) Stage Liquid Thermostop Tempera- Temperature Programmed ratio * ture holding time wash time (wash time 2) approx. Pre-rinse 1 Cold 5 min. Pre-rinse 2 Cold 4 min. Pre-wash 140 °F 5 min. (60 °C) 1-minute spin Disinfection 149 °F 10 Min. -
Page 48: Disinfection Programs
+ Pre-wash 104 °F (40 °C), optional Disinfection 140 °F (60 °C), 20 min. 2 rinses Final spin 1:10 Chemo-thermal disinfec- 104 °F (40 °C) PW 413 - 28 lb tion (13 kg) PW 418 - 39 lb Type of fabric Cotton and mixed fiber up to 104 °F (40 °C) (18 kg) Program cycle +... -
Page 49: Clean Machine" Program
Cotton, linen and mixed fiber fabrics, for example bed linen and toweling 1:10 Program se- + Pre-wash 104 °F (40 °C), optional PW 413 - 28 lb quence Main wash 194 °F (90 °C), Cool down can be se- (13 kg) lected PW 418 - 39 lb 2 rinses (18 kg) -
Page 50: Minimum Iron Program
Load ratio/Load size Type of fabric Normally soiled synthetic fabrics, for example mixed fiber fabrics 1:20 PW 413 - 14 lb Program cycle + Pre-wash 86 °F (30 °C), optional (6.6 kg) Main wash 140 °F (60 °C) (selectable range cold PW 418 - 19 lb to 140 °F / 60 °C) (9 kg) -
Page 51: Program Chart - Laundromat
104 ° (40 °C) Type of fabric Normally soiled cotton, linen and mixed fiber fab- 1:10 rics, for example bed linen and toweling PW 413 - 28 lb (13 kg) Program cycle + Pre-wash 86 °F (30 °C), optional PW 418 - 39 lb Main wash 104 °F (40 °C) (18 kg) - Page 52 Type of fabric Heavily soiled cotton, linen and mixed fiber fab- rics, for example bed linen and toweling 1:10 PW 413 - 28 lb Program cycle Pre-wash 86 °F (30 °C), optional (13 kg) Main wash 140 °F (60 °C) PW 418 - 39 lb 2 rinses (18 kg)
-
Page 53: Comforter Programs
The maximum loads are set out in the table below. The loads given are approximate only and vary depending on the size and thickness of the comforters. Type Quantity* PW 413 3 pillows or 1 pillow + 1 comforter PW 418 4 pillows or 2 pillows +1 comforter or 2 comforters * One comforter roughly equals two pillows. -
Page 54: Additional Functions
Additional functions Start time Setting a start A later wash start time can be set for a program using the "Start time time" button. Select the wash program. Once a program has been selected, the following (for example) will appear on the display: Mops Standard 13,0/13,0 kg... -
Page 55: Cancelling The Start Time
Additional functions Press the "Start time" or "Back" button. Cancelling the start time The changes will not be saved. With Pre-wash Selecting pre- In programs with a pre-wash option, a pre-wash can be added for wash heavily soiled laundry before the program has started. Press the +... -
Page 56: Without Spin
Additional functions Adding directly to The "Starch stop" stage has been reached. the drum Prepare the starch according to manufacturer's instructions, open the door and add the starch. Close the door. The following message will appear on the display again: Mops Standard ... -
Page 57: Canceling A Program
Additional functions Canceling a program This function allows you to cancel the program. Press the "Stop/Finish" button twice in succession. The program will be canceled. If the program has been canceled while there is still water in the ma- chine or during spinning, the following will appear on the display: Mops Standard Program finished. -
Page 58: Cancelling A Locked Program
+ Communication module The machine can be connected to a PC (personal computer) using the communication module. The slot for the module is located at the back of the machine. An editor program is available from Miele. -
Page 59: Optional Modules
Optional modules Liquid dispensing (optional for machines with detergent compartment) Dispenser pump Siphon tube Hose connection socket (suction side) Hose connection socket (pressure side) Outlet (in case of hose leakage) Suction inlet opening Display indicator level checker. When the dispenser is empty the pump and the machine switch themselves off. -
Page 60: Dispensing Quantities
Optional modules Dispensing quantities Please follow the detergent manufacturer's instructions. Always follow the instructions of the chemical manufacturer when using cleaning agents and special application chemicals. Only use such chemicals for the purpose and in the situation specified by the manufacturer in order to avoid the danger of adverse chemical reactions and material damage. - Page 61 Optional modules Dispensing calibration Dispensing pump 1 100 ml Tip: The dispensing amount can be set from 0 to 9999 ml in 1 ml steps. Press multifunction button 0/1 The dispensing tube will fill up. Press the 0/1 button to stop the process. ...
-
Page 62: Problem Solving Guide
Problem solving guide Opening the door and drain valve in an emergency Power failure dur- Switch off the machine. ing the washing Switch the machine off at the on-site power switch. process Close the on-site non-return valves for water or steam. ... - Page 63 Problem solving guide Caution! Rotating drum and risk of scalding. Before inserting the Torx wrench, make sure that the machine is disconnected, the drum has stopped and there is no water in the machine. Turn the release element with a T 40 Torx wrench two whole revolu- ...
-
Page 64: Service Interval And Bgr Display
Problem solving guide The door can now be opened. Service interval If the following message appears after "Power On" in the machine and BGR display display, either a service or the annual BGR check must be carried out. Maintenance interval ... - Page 65 Call Technical Service if restart w/o success. Check on-site drain system and press "START". A defective drain valve must only be repaired by Miele Technical Service. Dispensing system fault Fill dispensing container ??. Press Start. ...
-
Page 66: Technical Service
Insert the card into the card reader correctly. Technical service In the event of a any faults please call Miele Technical Service. When contacting your dealer or the Technical Service Department, please quote the model and serial number of your machine, both of... -
Page 67: Frequently Asked Questions
Problem solving guide With the help of the following guide, minor faults in the performance of the machine, some of which may result from incorrect operation, can be resolved without contacting Miele Technical Service. This will save time and money. -
Page 68: An Unsatisfactory Wash Result
Frequently Asked Questions An unsatisfactory wash result Problem Possible cause and solution Liquid detergent does not Liquid detergents usually contain no bleaching agents. give the required result. They do not remove fruit, coffee and tea stains. Use a general purpose powder detergent containing a ... -
Page 69: General Problems With The Washing Machine
Frequently Asked Questions General problems with the washing machine Problem Possible cause and solution The machine vibrates dur- The machine feet are not level. ing the spin cycle. Level the machine and adjust the feet. Large amounts of deter- The water pressure is too low. -
Page 70: Possible Reasons For Increased Levels Of Foaming
Frequently Asked Questions Possible reasons for increased levels of foaming Problem Possible cause and solution Excessive foaming Detergent type Only use detergent suitable for use in industrial washing machines. Domestic detergent is not suitable. Too much detergent Dispense detergent in accordance with the instructions ... -
Page 71: Stretching Of Large Items
Frequently Asked Questions Stretching of large items Problem Possible cause and solution Stretching of large items Please contact Miele Technical Service. during spinning Stretching of large items can occur during spinning. -
Page 72: Cleaning And Care
Cleaning and care Cleaning and care Clean and care for the machine after use if possible. Do not use a pressure washer or hose to clean the machine. Clean the machine casing, control panel and plastic parts only with a mild, non-abrasive detergent or a soft damp cloth. -
Page 73: Cleaning The Detergent Dispenser Drawer And Siphon
Cleaning and care Cleaning the detergent dispenser drawer and siphon After use, the detergent dispenser drawer should be cleaned with warm water to remove any detergent residues. If the machine is not going to be used for a longer time, leave the ... - Page 74 Cleaning and care Cleaning the drip Open the flap on the dispenser drawer on the right side to an angle channel and of 45°. siphon If the drip channel and associated drain connection are blocked, clean them. Check the grille of the vapor vent on the rear of the machine for ...
-
Page 75: Installation And Connection
Installation and connection Installing the washing machine The washing machine must be installed by Miele Service or by an authorized dealer. Follow the instructions on the installation plan. This washing machine is only intended for items of laundry that have not been proofed with dangerous or inflammable substances. -
Page 76: Facilitating Maintenance
Installation and connection Facilitating maintenance For ease of future maintenance and servicing, the minimum distance to the wall must be observed to enable access. You must observe the minimum clearances and distance from the wall. Minimum distance to the wall approx. 16" / 400 mm to allow for main- tenance. -
Page 77: Installation On A Base
Installation and connection Installation on a base When installed on a raised base, the machine must be secured to the base and the base must be secured to the floor. When installed on a concrete base, the machine must be secured to the base. Shipping struts Remove the shipping struts. -
Page 78: Water Connection
70 bar (7,000 kPa) overpressure and for water temperatures of a minimum of 194 °F / 90 °C. This also applies for associated connection fittings. Miele original re- placement parts fulfil these requirements. Tip: The hot water supply must not exceed a maximum temperature of 158 °F / 70 °C. -
Page 79: Dispensing Agent Connection To The Liquid Dispensing Mixing Compartment
Installation and connection Dispensing agent connection to the liquid dispensing mixing compartment Connections 1 and 2 are provided for viscous detergents. These connection sockets are sealed and need to be drilled out with an 1/3" / 8 mm drill bit. Use caution when drilling through the outer wall (1) only, as there is a deflecting wall (2)10 mm behind it. -
Page 80: Electrical Connection
Installation and connection Electrical connection The electrical connections must be carried out by a certified electri- cian in accordance with national codes and regulations. Tip: Open the machine lid to access the connection points. If you install a residual current device (RCD), it must be Type B. The machine electrical systems comply with standards EN 60335-1 and EN 50571. -
Page 81: Control Panel
For selecting an individual wash program quickly. These buttons can be programmed to select your own favorite wash programs. Start button Optical interface PC Testing and transmission point for Miele Service. Power on button Power off button Emergency shut-off (Not part of all machine versions, see Availability of emergency... - Page 82 Control panel / Information on next / previous line Save See "Access to supervisor level" Water intake Program locked If a program is locked, after 1 minute it can no longer be stopped and cancelled with the finish button. ...
-
Page 83: General Information
General information Overview of function levels Operator Supervisor Access with "Settings" button and password. Access with Power on. Program start for all programs Menu options in main menu Program start only after insertion of coins or Language Time/Date with pre-paid card Choice of user language for the Setting the time/date duration of a program... -
Page 84: Access To Supervisor Level / Changing The Password
Access to supervisor level / changing the password Password The supervisor level is accessed by entering a four-digit password from the character set provided. It can only be selected before the program starts or once the program is finished. Press the button until the symbol changes to . ... -
Page 85: Change Password
Access to supervisor level / changing the password Change password You can change the password with this menu option. Select supervisor level / main menu. Supervisor level Main menu Settings Change password Select "Change password" and confirm your entry with the OK but- ... -
Page 86: Language / Time, Date
Language / Time, Date Main menu options – Language – Time/Date – Dispensing – Settings – Change password Language option Select the required language. Select the language menu option. Supervisor level Main menu Language english (USA) Time/Date : 11:43 12.9.2015 ... -
Page 87: Time, Date Option
Language / Time, Date Time, Date option This menu option is used to set the current date and time. In the event of a power outage these are retained for approx. 6 weeks. After this time they will need to be reset. Select the Time of day, Date menu option: ... -
Page 88: Dispensing Option
Dispensing option Dispensing option This menu option allows you to change individual dispensing settings. Supervisor level Main menu Dispensing Settings Select "Dispensing". The following will appear on the display: Supervisor level Dispensing 1 Mops Standard °F ... - Page 89 Dispensing option Dispensing phase 1 User defined Dispensing Dispensing pump: Options: – Dispensing 1 to 6 Dispenser pump: – No – D1 to D13 Dispensing phase 1 User defined Dispensing amount 0 ml Dispensing delay: ...
-
Page 90: Settings Option
Settings option Access the settings option. Supervisor level Main menu Settings Change password Use the arrow buttons to access the following content: Supervisor level Settings Memory function : Buzzer ... -
Page 91: Memory Function
Settings option – Currency Save the specified parameters. Specify the parameters. Press the "Save" button to save the specified parameters. The parameters are saved and the display switches back to the sub- menu. Tip: If you press or no button is pressed within 30 seconds, the settings are not saved and the display returns to the main menu. - Page 92 Settings option Hours unit Options: – auto – h – timer – tim – uur – time – hr Length unit Options: – auto – mm – inches Mass unit Options: – auto – kg – l Volume unit Options: –...
-
Page 93: Buzzer
Settings option – giri/min – kierr/min – r/min – omdr/min – v/min – o/min Buzzer If "Yes" is programmed, the buzzer is activated along with program stop signal 1 and 2, the block end signal and the fault stop signal. The buzzer frequency increases with the fault stop signal. -
Page 94: Contrast Setting
Settings option Contrast setting Display contrast can be altered from 1 to 10 so the display can be optimized for specific working conditions. The contrast changes as soon as you alter the setting. Options: – 1 to 10 Time of day You can select either the 24-hour or 12-hour clock for the display. -
Page 95: Dispenser Calibration
Settings option Dispenser calibration Dispenser calibration is used to measure the throughput of individual dispenser pumps. To go directly to Press and hold multifunction button 2 and switch the machine on "dispenser cali- with "Power on". bration" when the Settings Dispensing calibration ... -
Page 96: Dispensing Throughput (D1 To D13)
Settings option Dispensing calibration Dispensing pump 1 P: No 100 ml Press multifunction button 0/1. Stop the pump by pressing button 0/1, or the pump will stop auto- matically after 60 seconds. Measure the required amount into the measuring vessel. ... -
Page 97: Dispensing Correction Factor (D1 To D13)
Settings option Dispensing correction factor (D1 to D13) The correction factor can be used if an adjustment is made to liquid dispensing. If, for example, the dispensing agent for dispenser pump D 1 has been altered (to a higher concentration), a rapid adjustment can be made with the correction factor. -
Page 98: Dispenser Level Reminder (D1 To D13)
Settings option Dispenser level reminder (D1 to D13) Programming is required for the relevant input if a level reminder is re- quired. Supervisor level Settings Dispenser empty signal Password use Select "Dispenser level reminder". ... -
Page 99: Password
Settings option Password The use of a password can be deselected. Set whether or not you want to use a password. Options: – Yes – No However, if a password has already been assigned and the operator then selects "No", they will be prompted to enter the current pass- word when they press . -
Page 100: Currency
Settings option – Fire service/rescue services – Café – Industrial laundry – Small business – Hotel/guesthouse – Industry – Youth hostel – Hospital – Stables – School – Dry cleaners – Apartments – Other: – Surname and first name – Street and house number –... -
Page 101: Technical Data
Technical data PW 413 machine data Electrical connection Connection voltage See data plate Frequency See data plate Power rating See data plate Rated current See data plate Fuse rating See data plate Heat See data plate Installation dimensions Casing width (without add-on components) 31.3"... -
Page 102: Pw 418 Machine Data
Technical data PW 418 machine data Electrical connection Connection voltage See data plate Frequency See data plate Power rating See data plate Rated current See data plate Fuse rating See data plate Heat See data plate Installation dimensions Casing width (without add-on components) 36.3"... - Page 104 Technical Service & Support Phone: 800-991-9380 Miele Professional Fax: 800-220-1348 proservice@mieleusa.com Technical Service Phone: 1-888-325-3957 Fax: 1-800-803-3366 serviceprofessional@miele.ca Germany Manufacturer Miele & Cie. KG Carl-Miele-Straße 29 33332 Gütersloh Alteration rights reserved / Publication date: 0217 M.-Nr. 10 662 350 / 00 ...