
Related Manuals for Xterra TRX2500


Summary of Contents for Xterra TRX2500
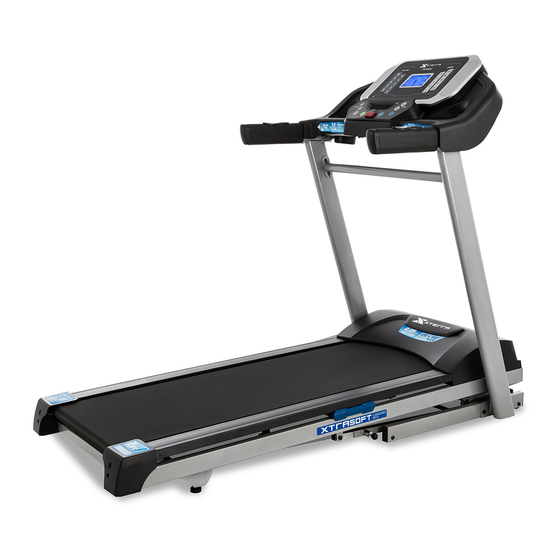
- Page 1 FITNESS TRX2500 Treadmill OWNER’S MANUAL PLEASE CAREFULLY READ THIS ENTIRE MANUAL BEFORE OPERATING YOUR NEW TREADMILL...
-
Page 2: Table Of Contents
Table Of Contents Product Registration Important Safety Instructions Important Operation Instructions TRX2500 Assembly Instructions Operation of Your Console General Maintenance Manufacturer’s Limited Warranty ATTENTION THIS TREADMILL IS INTENDED FOR RESIDENTIAL USE ONLY AND IS WARRANTED FOR THIS APPLICATION. ANY OTHER APPLICATION VOIDS... -
Page 3: Product Registration
Treadmill has been manufactured by one of the leading fitness manufacturers in the world. XTERRA Fitness will do all we can to make your ownership experience as pleasant as possible for many years to come. If you have questions, or if parts are missing or damaged, or you require customer service, call (870)336-4286. -
Page 4: Important Safety Instructions
User Weight Limit: 300 lbs. Failure to follow all guidelines may compromise the effectiveness of the exercise experience, expose yourself (and possibly others) to injury, and reduce the longevity of the equipment. SAVE THESE INSTRUCTIONS - THINK SAFETY! TRX2500 Treadmill... -
Page 5: Important Operation Instructions
The green colored rigid ear-lug, or the like, extending from the adapter, must be connected to a permanent ground such as a properly grounded outlet box cover. Whenever the adapter is used, it must be held in place by a metal screw. TRX2500 Treadmill... -
Page 6: Safety Tether Cord
If the end of the Velcro strap (that you need to grab to remove it) happens to be under the treadmill deck, reach under the deck to grab it, but do not tilt the treadmill up to gain access to the strap end. TRX2500 Treadmill... -
Page 7: Trx2500 Assembly Instructions
Remove only the hardware for the step you are currently assembling to avoid confusion and mix ups. Pull the carton over the treadmill parts and lay it on a level surface. TRX2500 Assembly Pack Checklist ASSEMBLY PACK CHECKLIST # 80. Ø8 × 1.5T_ #99. - Page 8 TRX2500 Assembly Instructions Remove Deck From Box Take Treadmill Frame Base out of the carton and place it on level and clean ground. Left and Right Uprights Hardware Step 2 #90. 13mm Wrench #99. 5/16”x1/2” Hex Head Bolts (8pcs) #100. Ø 5/16” × Ø 18 × 1.5T Flat Washers (8pcs) You may need assistance holding the Uprights for this step.
- Page 9 TRX2500 Assembly Instructions Console Attachment Hardware Step 3 #102. Combination M5 Allen Wrench & Phillips Head Screw Driver #125. 5/16” × 3/4” Button Head Socket Bolts (4pcs) #100. Ø 8 × 1.5T Split Washers (4pcs) Connect the Computer Cable (Middle) (54) and Computer Cable (Upper) (53).
-
Page 10: Folding Instructions
2. Make sure to tighten all screws after all components have been assembled. Folding Instructions 1. Pull Release Pin to lower deck from folded position until it locks. 2. Pull Release Pin and raise deck into locking position to fold. TRX2500 Treadmill... -
Page 11: Operation Of Your Console
Operation of Your Console TRX2500 Console Power Up Power the treadmill on by plugging it into an appropriate wall outlet, then turn on the power switch located at the front of the treadmill below the motor hood. Ensure that the safety key is installed, as the treadmill will not operate without it. -
Page 12: Quick Start Operation
Pulse value displays anytime the upper display is receiving a pulse signal. Calorie Display Displays the cumulative calories burned at any given time during your workout. Note: This is only a rough guide used for comparison of different exercise sessions, which cannot be used for medical purposes. TRX2500 Treadmill... -
Page 13: Program Operation
START button to start directly, or press the ENTER key to enter the set time parameter. Time to defaults: 30: 00 (5: 00 ~ 99: 00), each increase or decrease the value of 1:00, set directly press the START button to start. TRX2500 Treadmill... - Page 14 Preset Program Profiles Key: Speed Incline TRX2500 Treadmill...
- Page 15 Preset Program Profiles Program Profile Detail Chart TRX2500 Treadmill...
-
Page 16: Heart Rate
80% or 60%, respectively, of your MHR on a schedule approved by your physician. Consult your physician before participating in any exercise program. TRX2500 Treadmill... -
Page 17: Rate Of Perceived Exertion
RPE will support this. If you are feeling tired and sluggish, it is be- cause your body needs a break. In this condition, your pace will feel difficult. Again, this will show up in your RPE and you will train at the proper level for that day. TRX2500 Treadmill... -
Page 18: General Maintenance
ATTENTION Damage to the running belt resulting from improper tracking / tension adjustments is not covered under the XTERRA Fitness warranty. General Cleaning Dirt, dust, and hair can block air inlets and accumulate on the running belt. Please vacuum underneath your treadmill on a monthly basis to prevent excess build-up of dirt that can get sucked up and get into the inner workings under the motor cover. - Page 19 Drag the garment the length of the entire belt 1-2 times. Remove the garment. Do not lubricate with anything other than XTERRA Fitness approved lubricant. Your treadmill comes with one tube of “Lube” and extra tubes can be ordered directly from: www.xterrafitness.com.
-
Page 20: Error Messages
5. Set the maximum incline value of 10, then press the Enter key to confirm. It will automatically enter into the calibration display. 6. Press the START/STOP key to start the calibration. It will return to the standby screen automatically after the calibration is complete. TRX2500 Treadmill... - Page 21 User Notes: TRX2500 Treadmill...
-
Page 22: Manufacturer's Limited Warranty
Effective July 12, 2017- Treadmill LIMITED WARRANTY XTERRA Fitness Inc. warrants all its home use treadmill parts for a period of time listed below, from the date of retail sale, as determined by a sales receipt or in the absence of a sales receipt, eighteen (18) months from the original factory shipping date. XTERRA Fitness’s responsibilities include providing new or remanufactured parts, at XTERRA Fitness’s option, and technical support to our independent... - Page 23 TRX2500 Treadmill...
- Page 24 3000 Nestle Road Jonesboro, AR 72401 - Phone:870-336-4286 - Fax:870-935-7611 www.xterrafitness.com ©2017 All Rights Reserved. TRX2500 Owner’s Manual...
Need help?
Do you have a question about the TRX2500 and is the answer not in the manual?
Questions and answers
Qué significa lober