Ruckus Wireless r500 Quick Setup Manual
Hide thumbs
Also See for r500:
- Quick setup manual (4 pages) ,
- Reference manual (238 pages) ,
- User manual (193 pages)
Table of Contents
Advertisement
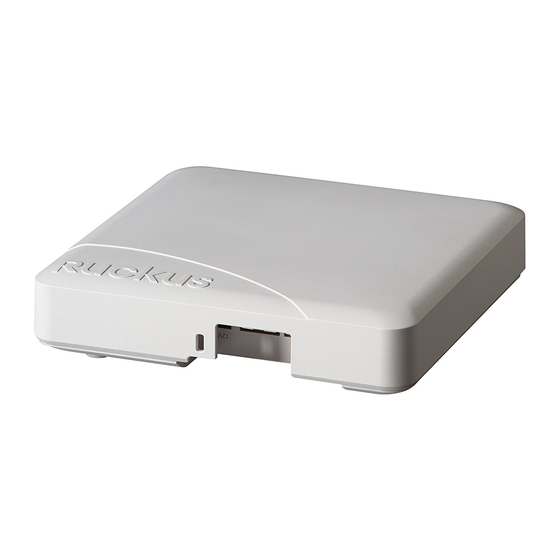
R500 Access Point
Quick Setup Guide
This Quick Setup Guide provides step-by-step instructions
on how to set up your Ruckus Wireless R500 Dual Band
802.11ac Multimedia Wi-Fi Access Point. After completing
the steps described in this Guide, you will be able to place
the Access Point (AP) at your site and provide wireless
network access to users.
Note: The R500 requires a minimum of ZoneFlex (ZF)
firmware version 9.8.1 or later or SmartCell Gateway
(SCG) firmware version 2.5.1 or later.
B
Y
B
EFORE
OU
EGIN
Before deploying Ruckus Wireless products, please check for
the latest software and the release documentation.
•
User Guides and Release Notes are available at
http://support.ruckuswireless.com/documents
•
Software Upgrades are available at
http://support.ruckuswireless.com/software
•
Open Source information is available at
http://opensource.ruckuswireless.com
•
Software License and Limited Warranty are available at
http://support.ruckuswireless.com/warranty
P
C
ACKAGE
ONTENTS
•
R500 Access Point
•
Two wall-mount anchor kits, including two 1" No. 8 steel
panhead Phillips sheet metal screw screws, one 5mm M2.5 x
1.06 Torx security screw, and wall-mount anchors
•
One external T-bar bracket (two unassembled parts)
•
One unit removal pin
•
Regulatory flyer
•
Product warranty statement
•
Declaration of Conformity, if required
•
This Quick Setup Guide
Copyright © 2014 Ruckus Wireless, Inc.
Published July 2014, Part Number 800-70564-001 Rev A
S
1: C
TEP
MENTS
•
A computer running Windows 7 (procedures for other OS's
are similar)
•
Two Cat 5e Ethernet cables
•
No. 2 Phillips screwdriver and T8 Torx driver for wall mount-
ing anchor kit
•
An AC power adapter (sold separately), or
•
An 802.3af or 802.3at -compliant Power over Ethernet (PoE)
switch or PoE injector
IMPORTANT!
refer to the ZoneDirector Quick Setup Guide and connect the
AP to your local network.
S
2: C
TEP
Figure 1: Top view
.
1
After removing your Ruckus Wireless AP from its pack-
.
age, place it next to your computer.
2
Using an Ethernet cable, connect your computer's net-
.
work port to one of the two ports on the AP.
3
Using an AC adapter (sold separately), connect the AP
.
12VDC port to a protected power source.
Alternatively, connect the PoE port to a PoE injector or
switch for both power and network connections.
4
Verify that the Power LED on the external enclosure is a
steady green.
Figure 2: Bottom view
T
S
R
OLLECT
OOLS AND
ETUP
EQUIRE
If the AP is deployed with a ZoneDirector, then
AP
Y
C
ONNECT THE
TO
OUR
OMPUTER
PoE Port
12VDC Port
-
S
3: P
Y
TEP
REPARE
OUR
S
ETUP
Note: The following procedures assume Windows 7 as the
operating system. Procedures for other OS's are similar.
1
On your Windows 7 computer, configure your network
adapter from the Local Area Connection settings as fol-
lows:
•
Start > Control Panel > Network and Sharing
Center > Change Adapter Settings
2
Edit the TCP/IPv4 address settings as follows:
•
Local Area Connection > Properties > Internet
Protocol Version 4 (TCP/IPv4) > Properties
The TCP/IPv4 Properties dialog box appears.
Important!
Write down all of the currently active settings so
you can restore your computer to its current configuration
later (when this process is complete).
3
Select Use the following IP address (if it is not already
selected) and then make the following entries:
•
IP address: 192.168.0.22 (or any address in the
192.168.0.x network)
•
Subnet mask: 255.255.255.0
•
Default gateway: 192.168.0.1
Leave the DNS server fields empty.
4
Click OK to save your changes.
Your changes are put into effect immediately.
S
4: L
I
TEP
OG
NTO THE
As specified earlier, the AP should be directly connected to
your computer (through one of the Ethernet ports) and
powered on, ready for setup.
1
On your computer, open a Web browser window.
2
In the browser, type this URL to connect to the AP:
https://192.168.0.1
3
Press <Enter> to initiate the connection. When a secu-
rity alert dialog box appears, click OK/Yes to proceed.
4
When the Ruckus Wireless Admin login page appears,
enter the following:
•
Username: super
•
Password: sp-admin
5
Click Login.
C
AP
OMPUTER FOR
AP
Page 1 of 4
Advertisement
Table of Contents

Related Manuals for Ruckus Wireless r500


Summary of Contents for Ruckus Wireless r500
- Page 1 IMPORTANT! If the AP is deployed with a ZoneDirector, then This Quick Setup Guide provides step-by-step instructions on how to set up your Ruckus Wireless R500 Dual Band refer to the ZoneDirector Quick Setup Guide and connect the • Local Area Connection > Properties > Internet AP to your local network.
- Page 2 PTIONAL OUNTING NSTRUCTIONS The R500 can be mounted to a T-bar, wall or ceiling a using Default AP Settings (For Your Reference) Move the AP to its permanent location (accessible to the enclosed mounting kits. Refer to the following sections: both power and network connections).
- Page 3 Mounting on a Recessed Drop-Ceiling T-Bar Mounting on a Flush Drop-Ceiling T-Bar Hold the R500 in place and gently push the locking tab (B in Figure 5) until its clasp grips the other edge of the T- • Mounting an AP using the Integrated Bracket bar.
- Page 4 Mounting Template Page 4 of 4 Copyright © 2014 Ruckus Wireless, Inc. Published July 2014, Part Number 800-70564-001 Rev A...
- Page 5 (2) this device must accept any interference received, including interference that may cause undesired operation. Caution: Changes or modifications to this equipment that have not been approved by Ruckus Wireless may void the user's authority to operate this equipment.
- Page 6 Addition information can be obtained from the FCC Knowledge Database, Publication Number 443999. https://apps.fcc.gov/oetcf/kdb/index.cfm 3. External antenna: Use only the antennas which have been approved by Ruckus Wireless. The non-approved antenna(s) may produce unwanted spurious or excessive RF transmitting power which may lead to the violation of FCC limit and is prohibited.
- Page 7 Hereby, Ruckus Wireless declares that this Radio LAN is in compliance with the essential requirements and other relevant provisions of Directive 1999/5/EC. Español Por medio de la presente Ruckus Wireless declara que el Radio LAN cumple con los requisitos esenciales y cualesquiera [Spanish] otras disposiciones aplicables o exigibles de la Directiva 1999/5/CE.
- Page 8 Härmed intygar Ruckus Wireless att denna Radio LAN står I överensstämmelse med de väsentliga egenskapskrav och [Swedish] övriga relevanta bestämmelser som framgår av direktiv 1999/5/EG. Íslenska Hér með lýsir Ruckus Wireless yfir því að Radio LAN er í samræmi við grunnkröfur og aðrar kröfur, sem gerðar eru í [Icelandic] tilskipun 1999/5/EC. Norsk Ruckus Wireless erklærer herved at utstyret Radio LAN er i samsvar med de grunnleggende krav og øvrige relevante...
Need help?
Do you have a question about the r500 and is the answer not in the manual?
Questions and answers