
Related Manuals for satmap active 20


Summary of Contents for satmap active 20
- Page 1 Full User Guide A20 v 1.0 satmap.com Software v3.0.11065 Software v3.0.11065 (June 2017) © Satmap Systems Ltd 2017...
-
Page 2: Table Of Contents
Add POI in a Specific Folder ......... 54 6.25 Data Save Options ...... 19 4.4.1 To access TRIP LOG Screen ..........75 11.6 POI Details Screen ............55 6.26 List Mode ......... 20 4.4.2 Convert Trail to Track © Satmap Systems Ltd... - Page 3 ..........87 13.7 Edit Description 17.4 Quad Lock Vehicle Mount.......98 ........87 13.8 Edit Location by Map ........98 17.5 Active 20 Carry Case ..........88 13.9 Edit Visibility ............98 17.6 Lanyard............ 88 13.10 Edit Colour ........98 17.7 Spare LiPol Power Pack 18. Services...
-
Page 4: Basic Layout
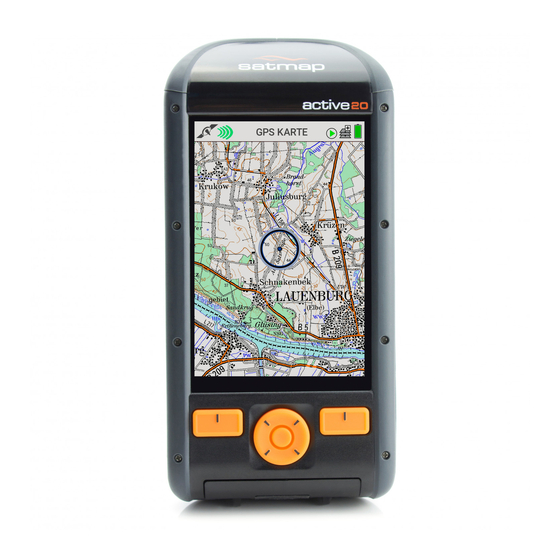
Side/front press keys HVGA (320x480) enable one-handed Screen operation. Buttons are variable (depending on the screen shown) and can be set to activate with 1-click or 2-click operation . Weatherproof, Toughened Impact Casing 9 Function Rocker pad microUSB Software v3.0.11065 © Satmap Systems Ltd 2017 Insert SD Card... -
Page 5: Map Screen Layout
Trail orientation that will was the last option Map orientation next appear if the selected. Primary Screens Trail Up front left button is Use to scroll through the selected. primary screens North Up Software v3.0.11065 © Satmap Systems Ltd 2017... -
Page 6: Introduction
SD cards that plug we have ongoing updates and developments. We straight into the Active 20. Simple to use, there is no continually strive to improve our product and value computer or other equipment needed. -
Page 7: Care For Your Active 20
These tips are intended to provide you with sugges- change, resulting is a different triangulation value. tions on getting the most from your Active 20, ensur- ing you have many years of accurate and reliable Understanding this variability in the accuracy is important when enjoying outdoor sports in the GPS and digital map use. -
Page 8: Extreme Weather Care Tips
In the case of water ingress: The Active 20 unit is waterproof to IP68 standard. If you wish to provide your Active 20 with an extra Once indoors, remove the battery pack and any SD Which means that it has been tested to 1.5m of still degree of impact protection you may wish to MapCard that may be fitted. -
Page 9: Overview
After switching on the unit, the GPS STATUS screen will load up. The bars at the bottom of the screen The Active 20 can be powered by a Lithium Polymer indicate how many satellites are in range of the rechargeable battery, or three AA batteries. The Active 20. -
Page 10: Mapcard Insertion
3.7 Start & Stop Icons On the Right Hand Side of the Status Bar the Stop/ To view your trail recorded by the Active 20 on a Record icon indicates that data logging is either Insert computer: paused or recording. -
Page 11: Nine Primary Screens
Nine Primary Screens Nine Primary Screens (GPS MAP/PLANNING → POSITION INFO → TRIP LOG → MAIN MENU → COMPASS → Wi-Fi NETWORKS → DATA SHARE → GPS STATUS) Use the lower right button Primary Screens to scroll through the primary screens which give you access to the main GPS features. You can also move the rocker pad left/right to scroll through these options. -
Page 12: Screen 1: Gps Map
Control), allows screen data to be set to To access your screenshot: update once every 4 or 8 seconds. Primary Screens. Scroll through the 8 Primary Connect your Active 20 to the computer via a USB Toggle Screens cable. Open either a Windows Explorer / Finder icon or SatSYNC. -
Page 13: Toggleable Maps
The toggle function can also be added OS 1:25 000 Please note: Most detailed maps have a "ceiling", to existing map cards (see satmap.com for further scale mapping and will disappear from the screen when zoomed details on this service). -
Page 14: Data Boxes
32. Bearing to POI 33. Nearest POI Dist 34. POI ETA 2 or 4 35. POI Time Data Boxes 36. POI VMG 37. Route Name 38. Route Distance 39. Route X-Track Err 40. Route Done 4 Data Boxes 41. WP Name Software v3.0.11065 © Satmap Systems Ltd 2017... -
Page 15: Dynamic Elevation
Active Route mode. With a pre-planned route loaded onto your Active 20 and "Activated" the elevation graph will show you the profile of the route ahead. A red spot will indicate your location on the profile. The "ahead" direction will be indicated by the graph to the right of the spot. -
Page 16: Map Orientation
Note: The 4 data box option is not available in the Trail Up (Low) mode as it would obscure the locator circle. Note: Trail Up is not available in advanced power saving mode. (The screen refreshes more frequently in Trail Up, drawing more power). Software v3.0.11065 © Satmap Systems Ltd 2017... -
Page 17: Screen 2: Planning
GPS lock. This is useful as a ‘rangefinder’. • Bearing from your last known location – format options given in Compass Settings. Note: This data overlay is not configurable by the user, Software v3.0.11065 © Satmap Systems Ltd 2017... -
Page 18: Screen 3: Position Info
Clear GoTo button is pressed. This is a particularly useful and quick way of setting a simple, single-leg route. Especially when zoomed in to view map detail, and when in Track Up mode, the Software v3.0.11065 © Satmap Systems Ltd 2017... -
Page 19: Screen 4: Trip Log
Note: Trip log data is not stored in hibernate mode. starting the next trip. Using the Start/Stop button allows you to pause data logging during a journey, e.g. pausing for a lunch break. Software v3.0.11065 © Satmap Systems Ltd 2017... -
Page 20: Convert Trail To Track
Note: At the bottom of the elevation profile screen there ROUTE PLAN is a list of all the trip data attached to each waypoint on screen the route. Software v3.0.11065 © Satmap Systems Ltd 2017... -
Page 21: Screen 5: Main Menu
MAIN MENU screen gives access to some of Settings. to SETTINGS MENU. More detail the Active 20’s main functions and settings. later in the user guide The upper half of the MAIN MENU screen shows the title of the Active Map, ie. the loaded MapPack Primary Screens (Page Forward). -
Page 22: Screen 6: Compass/Pointer
Bearing (GPS MAP → MAIN MENU → COMPASS) indication given here The Active 20 has a 3-axis electronic compass and a GPS "heading" compass. It switches between Orange the two at a preset speed. Having both ensures you have the correct bearings at all times whether... -
Page 23: Pointer Screen
Note: You need at least 1 POI or route on the map for the Pointer to work. (It does not work if you only have one Grid, AOI or LOI). There are 3 types of ‘target’ to select from using the Target type button. Software v3.0.11065 © Satmap Systems Ltd 2017... -
Page 24: Screen 7: Wi-Fi Networks
From time to time a the status of the "application" software. Platform Upgrade may be released. This is a larger The Wi-Fi connectivity on the Active 20 serves 2 and longer download than the Application software, purposes : Installed Version: This is the version that is currently and handls more basic functions of the GPS unit running on your device. -
Page 25: Screen 8: Shared Data
"Share" in the Route Edit screen. Please wait". Operation: Selection of this screen will initiate a scan for nearby Active 20's. Other Bluetooth devices will not be visible on this screen. Main List: The list will display the User Lists your Routes marked... - Page 26 SETTINGS / Bluetooth screen. Refresh: This button will rescan for nearby Active 20's - and typically takes about 10 seconds. You may see the list move about & reorder, depending on new devices in range and signal strength. Bluetooth Off Software v3.0.11065...
-
Page 27: Screen 9: Gps Status
The GPS indicator caption at the bottom of the screen either says ‘Acquiring GPS’ or gives Primary Screens accuracy to within a certain distance. PLANNING Go to screen and scroll through primary screens Software v3.0.11065 © Satmap Systems Ltd 2017... -
Page 28: Power Off Screen
"stand-by" mode. The primary benefit of this to allow a very fast restart and GPS re-aquisition. Typically useful over a lunch break, for instance. After the specified period, the GPS will do a full "Power Off". In Hibernate mode, the Active 20 will Power not log any further data until the button is repressed and a GPS lock is restored. -
Page 29: Main Menu: Settings Menu
20. Set Trip Data Return to last map screen 21. Volume Control Select 22. Buttons Control 23. Panning Speed Either press Select or centre press the rocker pad to 24. Cycling select the highlighted option 25. Data Save Options 26. List Mode Cancel / Back 27. Software Updates Return to MAIN MENU 28. Screen Data Options 29. Time Offset Software v3.0.11065 © Satmap Systems Ltd 2017... -
Page 30: Touch Screen Settings
Buttons) On) or Button Control only : Off Exit Screen Off This controls the exit from screen-off mode. On : Allows the screen to wake by simply touching it OFF : Requires a button press to turn the screen back on. Software v3.0.11065 © Satmap Systems Ltd 2017... -
Page 31: Setting Profiles
Profile and press Important: Any changes to Settings generally will be Copied Profile reflected in the Active Profile. Active Profile Rename any Profile except "Default" Active Profile canot be deleted Profiles-2 Software v3.0.11065 © Satmap Systems Ltd 2017... -
Page 32: Power Control
Note: Allowing the unit to power off will cause it to lose GPS lock. However, if the unit is in hibernate mode, then it will be able to acquire a lock very quickly after powering on. Software v3.0.11065 © Satmap Systems Ltd 2017... -
Page 33: Hibernate Settings
GPS unit. This occasionally is nessessary in the event of some type of Software Upgrades where you will be requested to restart the Active 20 unit. Software v3.0.11065 © Satmap Systems Ltd 2017... -
Page 34: Wi-Fi Settings
Platform Upgrade may be released. This is a larger (MAIN MENU → WiFi Networks and longer download than the Application software, The Wi-Fi connectivity on the Active 20 serves 2 Installed Version: This is the version that is currently and handls more basic functions of the GPS unit purposes : running on your device. -
Page 35: Bluetooth Settings
Shared Data hops to the SHARED DATA screen to the main SETTINGS screen. At this point which allows you to see and fetch other Active 20 any connected LE devices will disconnect, and users' route data. Bluetooth data sharing and data logging will cease. - Page 36 Active should "see" it on the Active 20. This data may then be Bluetooth devices screen. If not, displayed in the 2 & 4 data boxes please press Refresh and the name that appear on the GPS MAP screen.
- Page 37 Use the rocker pad to navigate the numbers and set the values. Data Output. HRM and cadence data will be stored on the Active 20. After your activity, save your data for later upload. This is done via the TRIPLOG / Menu / Convert options.
-
Page 38: Elevation Settings
Done, Back or Map to continue with the GPS use. (MAIN MENU / Settings /Elevation) Setting Elevation from Pressure. Overview. The Active 20 gives you 3 work effectively, elevation from the options for calculating elevation values. barometric altimeter needs All are useful, but they do have some calibrated at intervals. - Page 39 TRIP LOG for display and upload. 2/4/6/8 Hour Intervals Manual: Using Map/GPS Precise Calibration: Known Elevation Trip Elevation data View your Elevation data Set Your Known Height Software v3.0.11065 © Satmap Systems Ltd 2017...
-
Page 40: Backlight Settings
Note: With the Sun Filter your screen loses some intricate map details in order to enhance the visibility of the map in sunlight. Normal Red Filter Sun Filter Software v3.0.11065 © Satmap Systems Ltd 2017... -
Page 41: Data Box Settings
2 data box and 4 data box layouts. Pressing the Default button restores the factory settings for this item. Select items for the 2 Data Box Layout Data Boxes Toggle Data Boxes 4 Data Box Layout Software v3.0.11065 © Satmap Systems Ltd 2017... -
Page 42: Data - 4 Box Layout (Upper)
SETTINGS MENU, press (front left button). On the GPS MAP screen, use the lower left side button to toggle between having 2 data boxes, 4 data boxes or none. Lower Data box selections Software v3.0.11065 © Satmap Systems Ltd 2017... - Page 43 (altitude) lost. Reset, when Stats were running, not Paused/ 28. GoTo ETA Stopped. Estimated Time of Arrival at GoTo 19. Local pressure. The air pressure at your point. location. 10. Trip Distance. Total distance whilst Stats were running Software v3.0.11065 © Satmap Systems Ltd 2017...
- Page 44 Degrees, minutes decimal; Degrees, POIs also refer to any reference point of an 41. WP Name minutes, seconds decimal; British Grid. LOI and AOI (usually the point at the start of Name of next waypoint. the name). Software v3.0.11065 © Satmap Systems Ltd 2017...
-
Page 45: Gps Settings
(GPS MAP → MAIN MENU → Settings → GPS Note: this mode is suitable for outdoor activity The Active 20 has an electronic compass (good navigation. when stationary) and a GPS compass (good when settings) ` in motion), and switches between the two at a... -
Page 46: Static Position Hold
If you are having unexplained GPS accuracy issues with your unit, the Satmap tech team may advise you to switch on this feature and e-mail the resulting log file to Satmap for analysis and fault finding if required. Software v3.0.11065... -
Page 47: Memory Status
'SD Card is Read-Only'. (Make the SD Card writable by sliding the small switch on side of the card upwards. This will also remove the warning icon that appears on the screen). Software v3.0.11065 © Satmap Systems Ltd 2017... -
Page 48: Units And Set Speed
Target Speed from 1 kph (0.6 mph) to 100 kph (62.5 mph). Press Done or centre press the rocker pad to return SETTINGS MENU. Pressing the Default button restores the following settings: Units: Kilometres and meters Target Speed: 10 kph (6.2 mph / 5.4 kn) Software v3.0.11065 © Satmap Systems Ltd 2017... -
Page 49: Compass Settings
• Press Done or centre press the rocker pad to settings: return to SETTINGS MENU. Compass Display Degrees Grid Magnetic Angle Manual Bearing Display Manual or Automatic Enter values for Manual Show Grid Bearings selection Software v3.0.11065 © Satmap Systems Ltd 2017... -
Page 50: Calibrate Compass
In this instance, it is probably better to rely on the gPS compass whilst in motion, or simply detach the Active 20 from the mount if a station compass reading is required. Software v3.0.11065... -
Page 51: Set Trip Data
Showing too many inactive routes could also 'freeze' Auto Clear Trail Data your unit. Only show a few short inactive routes, or to reduce RAM consumption, choose the Show Inactive Routes SP option. Auto Reset Log Keep Log on New Route Software v3.0.11065 © Satmap Systems Ltd 2017... -
Page 52: Alert Settings
GPS MAP PLANNING to the screens. Use the rocker pad to toggle between settings. One Click (Always show): one click activates button instantly. The screen button icons will stay displayed always. Useful for new new users. Software v3.0.11065 © Satmap Systems Ltd 2017... -
Page 53: Pan And Zoom Speed
Panning Speed Options most road bike (700C) wheels, but will need to be adjusted for other types of bikes with different size Display wheel speed on GPS wheels and tyres. MAP screen data Boxes Software v3.0.11065 © Satmap Systems Ltd 2017... -
Page 54: Data Save Options
Garmin GPS units. The smallest amount of storage space is used when GPX Only is selected. Once completed, your activity files can be seen and transferred from you Active 20 using either a Windows/Mac browser or SatSYNC. Preferred Data Location Select either Internal Storage, or •... -
Page 55: List Mode
The options include : • Wraparound • Drag, and • Flick The best way to undersand how the options work is to try them out, and see which one you prefer! Software v3.0.11065 © Satmap Systems Ltd 2017... -
Page 56: Software Updates
MAIN MENU: Settings Menu (... cont) 6.27 Software Updates (MAIN MENU → Settings → Software Updates) This screen controls frequency with which the unit checks the Satmap servers for fresh software updates. A Wi-Fi connection is typically needed for these updates unless SatSYNC is used. Options include : •... -
Page 57: Screen Data Options
User Name. Off: Names not shown on maps. • Press Done or centre press the rocker pad to return to SETTINGS MENU. Enter User Name Press Done in Text Box to complete Software v3.0.11065 © Satmap Systems Ltd 2017... -
Page 58: Languages
SETTINGS MENU. 6.32 About (GPS MAP → MAIN MENU → Settings → About) This screen gives details of the software version installed on your unit and Satmap contact details. Press Done to return to the SETTINGS MENU To check for the latest software updates, please: 1. -
Page 59: Main Menu: Routes Menu
Go to CREATE ROUTE Inactive routes may be hidden or have just their (section 8.01) start points displayed. Back. MAIN MENU Return to Note: Showing your inactive routes will take up Route listing operating memory. Software v3.0.11065 © Satmap Systems Ltd 2017... -
Page 60: Following A Route
CREATE ROUTE screen where you will be able to Inactive route plot routes by laying down a series of waypoints. Zoom in for greater accuracy in placing waypoints. "Choose Info Type" box Figure 8.00b Software v3.0.11065 © Satmap Systems Ltd 2017... - Page 61 The start point of a route has an icon with a forward arrowhead in a yellow bubble. The end of a route has an icon with a chequered flag in a yellow bubble. Software v3.0.11065 © Satmap Systems Ltd 2017...
-
Page 62: Route Edit Screen
Edit button or centre press rocker pad to access alpha-numeric keypad for labelling. Note: This button changes depending on the option selected. Other options include Copy, Move, Delete, Reverse. Back ROUTES MENU Return to Software v3.0.11065 © Satmap Systems Ltd 2017... -
Page 63: Edit Title
There is an on-screen statement which says either Currently Forward Currently Reverse Currently Alternative ways to reverse the route are via the Reverse ROUTE PLAN screen or the ROUTE CARD screen. or Currently Forward Reverse Route option Software v3.0.11065 © Satmap Systems Ltd 2017... -
Page 64: Edit Route Map
• Edit Location by Map Highlight Delete and press Delete or centre press • Delete the rocker pad to instantly delete the waypoint. Press Back to go back to the ROUTE EDIT menu. Waypoint edit options Software v3.0.11065 © Satmap Systems Ltd 2017... -
Page 65: Edit Active Route Colour
ROUTES MENU 7.13 Copy (MAIN MENU → ROUTES MENU → (folder/route) → Copy) Press to create a copy of the current Copy route which will appear in the same folder. Software v3.0.11065 © Satmap Systems Ltd 2017... -
Page 66: Route Map Screen
Edit screen button. You can also view the start of a route by pressing Start To return to the PLANNING screen, either press Back or centre press the rocker pad. Software v3.0.11065 © Satmap Systems Ltd 2017... -
Page 67: Route Plan Screen
Accelerated scrolling: This is useful if you have a route with many waypoints and want to access Back information about a particular waypoint. Press and Go to previous screen hold the rocker pad left/right until you reach the specific waypoint. Software v3.0.11065 © Satmap Systems Ltd 2017... -
Page 68: Route Card Screen
Scroll through the list quickly by holding the rocker pad up/down. Keep the rocker pad pressed up/down until Reverse the sequence of waypoints you reach the leg you are looking for. Back Go to ROUTES MENU Software v3.0.11065 © Satmap Systems Ltd 2017... -
Page 69: Routes Folders
Another way to access other folders is to centre press the rocker pad on the folder name. This will reveal a Choose Folder drop-down box with options ROUTE CARD screen to select a specific folder. (This applies to any folder menu). Software v3.0.11065 © Satmap Systems Ltd 2017... -
Page 70: Keypad
Use Shift to access upper case and More for more characters. Press Done Done Back OOI when finished and then to return to the Option depends on the context Folders. Software v3.0.11065 © Satmap Systems Ltd 2017... -
Page 71: Choose Information Window
To cancel the gray screen, press either of the front OOIs buttons. 'Nearby' is defined by an OOI reference point at a radius of: 245m (804ft) at 1:50 000 122.5m (402ft) at 1:25 000 49m (160ft) at 1:10 000 Software v3.0.11065 © Satmap Systems Ltd 2017... -
Page 72: Objects Of Interest (Ooi's)
• Add LOI by Map Back (Recommended option) • Add Grid by Map Go back to • Add IOI MAIN MENU Respects individual settings of each OOI. Use 'Default' visibility to allow visibility to be editable for individual OOIs. Software v3.0.11065 © Satmap Systems Ltd 2017... -
Page 73: Ooi Folders
Folder folder . (This applies to any folder menu). Note: Sub folders can only be created via SatSYNC. (Please refer to the SatSYNC User Guide for detailed information). Software v3.0.11065 © Satmap Systems Ltd 2017... -
Page 74: Pois (Points Of Interest)
POI on the keypad screen. When a POI is created it is called 'POI 1' by default (or similar, depending on the number of existing POIs). Use the rocker pad to rename your POI. Software v3.0.11065 © Satmap Systems Ltd 2017... -
Page 75: Add Poi By Grid Reference
This will add the POI to the last visited folder. Note: Folders are created using SatSYNC and must contain at least one OOI or route to be visible on the unit. (See SatSYNC User Guide for more information). Software v3.0.11065 © Satmap Systems Ltd 2017... -
Page 76: Edit Poi Menu
• Edit Location by Grid • Edit Warning Radius • Edit Visibility • Edit POI Icon • Delete • Move to SD Card** • Copy to SD Card** Buttons: Next Move down to next option Software v3.0.11065 © Satmap Systems Ltd 2017... -
Page 77: Rename Poi
Done when complete to go back to with more than 128 characters cannot be edited). EDIT POI menu. Locator circle displays a copy of the POI icon being edited Edit POI location by map Software v3.0.11065 © Satmap Systems Ltd 2017... -
Page 78: Edit Warning Radius
(Subsequently this option becomes Copy from SD Card). The screen will go to the OOI Folders and a copy of the POI will appear in the Card folder, as well as in the Internal Storage folder. Set visibility for POIs Software v3.0.11065 © Satmap Systems Ltd 2017... -
Page 79: Aois (Areas Of Interest)
The area is shown as you create the AOI. You will be able to change the colour and pattern options of the AOI. The name of the AOI appears in the designated area. Buttons: Software v3.0.11065 © Satmap Systems Ltd 2017... -
Page 80: Aoi Details Screen
The highlighted green 'eye' icon indicates the AOI is visible on the map. When invisible, the 'eye' icon is highlighted in red with a red line through it. AOI reference point (default icon and AOI name) AOI reference point Software v3.0.11065 © Satmap Systems Ltd 2017... -
Page 81: Edit Aoi Menu
The last two options on the list become available only • Edit Colour when an SD card has been inserted and is not write- • Edit Pattern protected. • Delete • Move to SD Card** • Copy to SD Card** Software v3.0.11065 © Satmap Systems Ltd 2017... -
Page 82: Rename Aoi
POI icon Note: This is only respected if the global visibility is set AOI to 'Default' (GPS MAP → MAIN MENU → OOI Menu reference → 'Visibility - Default'). point (section 15.03) EDIT AOI Software v3.0.11065 © Satmap Systems Ltd 2017... -
Page 83: Edit Colour
AOI. When Delete is selected the screen will go back to the OOI Folders. Pressing Cancel will take you back to the EDIT AOI menu. Edit AOI fill style Software v3.0.11065 © Satmap Systems Ltd 2017... -
Page 84: Lois (Lines Of Interest)
The line and its length are shown as you create the LOI. The name of the LOI appears in the designated area and you will be able to change the colour of the LOI. Software v3.0.11065 © Satmap Systems Ltd 2017... -
Page 85: Loi Details Screen
The highlighted green 'eye' icon indicates the LOI is visible on the map. When invisible, the 'eye' icon is highlighted in red with a red line through it. LOI reference point (default icon and AOI name) Software v3.0.11065 © Satmap Systems Ltd 2017... -
Page 86: Edit Loi Menu
SD card has been inserted and is not write- • Edit Location by Map protected. • Edit Visibility • Edit Colour • Delete • Move to SD Card** • Copy to SD Card** Software v3.0.11065 © Satmap Systems Ltd 2017... -
Page 87: Rename Loi
The 'Edit Description' option is only available if the existing description has 128 characters or less (e.g. externally imported descriptions from geocaches etc. with more than 128 characters cannot be edited). POI icon LOI reference point (section 16.03) Edit LOI location Software v3.0.11065 © Satmap Systems Ltd 2017... -
Page 88: Edit Visibility
LOI. When either Delete Cancel is selected, the screen will go back to the EDIT LOI menu. Set LOI colour Software v3.0.11065 © Satmap Systems Ltd 2017... -
Page 89: Grids
More than one grid can be placed on the map. Zoom in/out Visibility can only be set for individual AOIs, not for the entire grid. Back Go back to the OOI Menu Software v3.0.11065 © Satmap Systems Ltd 2017... -
Page 90: Add Grid In A Specific Folder
(Used for grid reference, elevation, and distance and point bearing from current location on AOI details screen). (Default icon and AOI This is the arbitrary reference point in a particular name) AOI within the grid, indicated by the AOI name. Software v3.0.11065 © Satmap Systems Ltd 2017... -
Page 91: Edit Grid Menu
• Delete • Move to SD Card* • Copy to SD Card* The last two options on the list become available only when an SD card has been inserted and is not write- protected. Software v3.0.11065 © Satmap Systems Ltd 2017... -
Page 92: Rename Grid
When either Delete Cancel is selected, the screen will go back to the OOI Folders. GRIDs in OOI folders Software v3.0.11065 © Satmap Systems Ltd 2017... -
Page 93: Edit Aois Within A Grid
Note: Only individual AOIs within a grid can be made Name visible or invisible. An entire grid cannot be made visible or invisible, unless you set the visibility options Edited of a folder containing the grid. within a grid Name Grid Name Software v3.0.11065 © Satmap Systems Ltd 2017... -
Page 94: Iois (Items Of Interest)
(Please refer to the SatSYNC 1.5 User Guide provided Therefore there are no options to adjust visibility as on the CD or downloadable from satmap.com). This an IOI does not appear on the map, and no date or employs the use of a tab delimited plain text file time 'stamp' is shown. -
Page 95: Edit Ioi Screen
• Delete • Move to SD Card* • Copy to SD Card* The last two options on the list become available only when an SD card has been inserted and is not write- protected. Software v3.0.11065 © Satmap Systems Ltd 2017... -
Page 96: Rename Ioi
IOI. Pressing Delete will delete the IOI and take you back to the OOI Folders. Pressing Cancel will take you back to the EDIT IOI menu. Software v3.0.11065 © Satmap Systems Ltd 2017... -
Page 97: Goto And Marker
Next use the button to move to the next row. Set GoTo by Grid reference Software v3.0.11065 © Satmap Systems Ltd 2017... -
Page 98: Accessories
Active 20, closed with a Velcro top for and bars between 25-40mm. Quad Lock say "The fast access, and an elasticated front mesh for Bike Mount can be mounted in seconds using additional storage. -
Page 99: Services
18.6 Site-Centred Mapping Such details provide a useful backdrop when you (Select areas only) are using the Active 20 internationally. If you do not have the World Base Map on your unit (applicable to For customers who want non-standard map earlier units), it is available as an upgrade. - Page 100 • Name routes and waypoints Network customers can create routes on their • Add comments to a route or individual waypoints computer, download them onto their Active 20 via within a route SatSYNC*, and share them with other users. This •...
-
Page 101: Tips
(Satellite lock times • Use a GoTo point as a rangefinder: GoTo Set a vary). The Active 20 can acquire a lock on the point on your destination to calculate the straight move, e.g. whilst driving. However, this can cause line distance from your current location to the a delay in the time to get a lock. -
Page 102: Troubleshooting
Start). Check the snail trail is on by going to 873 0101. Please also check our FAQs on MAP > POSITION INFO via centre press > Turn Trail www.satmap.com. On. Here you can also adjust the size of the dots. Software v3.0.11065 © Satmap Systems Ltd 2017... -
Page 103: Glossary
Available as a 2 or 4 box layout. SatSYNC to import them to the Active 20. AOI. An Area of Interest. Consists of a series of Descents. - Page 104 1:50 000 Ordnance Survey map. which has a different internal format. In the manual Ordnance Survey (OS). Mapping provider for these are also referred to as mapcards since they are pre-loaded with digital mapping. Software v3.0.11065 © Satmap Systems Ltd 2017...
- Page 105 GPS lock and you are stationary. towards the geographic North Pole. uBLOX Max M8. This is the version of high- precision GPS chipset installed in the Active 20. Toggle function. Allows users to select which map they want to view at a particular point without UTC (also GMT and Zulu Time).
- Page 106 Satmap Systems is not liable for damages and injuries caused by improper use or fitting of the device. Subject to technical changes and errors. Satmap does not disclaim any statutory rights relating to faulty or misdescribed goods that cannot be disclaimed under applicable law. Translations into languages other than English are provided for information only.
- Page 107 Full User Guide A20 v 1.0 satmap.com Software v3.0.11065 Software v3.0.11065 (June 2017) © Satmap Systems Ltd 2017...
Need help?
Do you have a question about the active 20 and is the answer not in the manual?
Questions and answers