Table of Contents
Advertisement
Advertisement
Table of Contents

Related Manuals for satmap ACTIVE 10


Summary of Contents for satmap ACTIVE 10
- Page 1 The Ultimate Sports GPS Full User Guide satmap.com Software v1.50...
-
Page 2: Table Of Contents
6.03 TRIP LOG Screen 8.02a Edit Title 1.00 Introduction 6.04 Convert Trail to Track 8.02b Edit Comments 2.00 Care for your Active 10 6.05 Convert Trail to LOI/AOI 8.02c Reverse Route 2.00 Safety & Care Tips 6.06 Geotag Photos with Trip Log Data 8.02d Edit Route Map... - Page 3 19.01 GoTo – Set By Coords 24.00 Glossary 86-89 16.04a Rename LOI Marker – Set By Coords 16.04b Edit Description 19.02 GoTo – Route 16.04c Edit Location by Map 16.04d Edit Visibility 16.04e Edit Color © Satmap Systems Ltd © Satmap Systems Ltd...
-
Page 4: (Ii) Basic Layout
Width 3 in / 7.5cm activate with 1-click 9 Function Height 5.1 in / 13cm or 2-click operation Joystick Depth 1.4 in / 3.5cm (section 7.16). Weight 6.2 oz / 175g Mini USB © Satmap Systems Ltd... -
Page 5: (Iii) Map Screen Layout
Map orientation is showing, it means the orientation that Use to scroll through Trail Up was the last will next appear if Trail Up the primary screens option selected. the front left button North Up is selected. © Satmap Systems Ltd... -
Page 6: Introduction
The unit is supplied with a world base map, 1.00 Introduction and individual maps are sold separately on Satmap is the creator of the Active 10 — an SD cards that plug straight into the Active 10. award-winning rugged sports GPS, purpose-... -
Page 7: Safety & Care Tips
This is due to the fact that the position is potentially dangerous, may damage the of the satellites relative to the ground can Active 10, or result in partial or complete loss change, resulting is a different triangulation of warranty. -
Page 8: Extreme Weather Care Tips
• Joystick: If your joystick is worn down or Active 10, do not switch it back on until it has ripped, this can cause water to leak into the been completely dried out or the dust has unit. Please send your Active 10 back to been removed. -
Page 9: Overview
3.00 Overview 3.00 Battery Power 3.01 Switching On and Off 3.02 Keyboard Lock The Active 10 can be powered by a Lithium When first installed, the software allows users Power Off? screen has a padlock Polymer rechargeable battery (section 20.03) to select the operating language. -
Page 10: Care For Your Active
6.03). When the unit has a lock, the record down (saves from accidental deletion of files). icon has a solid green arrowhead. The record To view your trail recorded by the Active 10 on icon is shown as ‘empty’ when there is no a computer: 3.04 Base Mapping... -
Page 11: Six Primary Screens
Data and trail logging Satellite acquisition screen screen to get to PLANNING mode). Signal indicator Satellites’ atomic Elevation clock time data Maximum Average Signal to Elevation Signal profile to Noise Noise Ratio Ratio (SNR) Log data ROUTES MENU © Satmap Systems Ltd... -
Page 12: Gps Map Screen
For best results in achieving a satellite lock; To avoid this, lock your keypad (section 3.02). • The Active 10 should be pointed at clear A successful satellite lock (a ‘fix’) is indicated sky. The unit can also acquire a lock through at the top left of the screen by the red cross glass, i.e. -
Page 13: Toggleable Maps
The toggle function can also be added to existing map cards (see satmap.com for further details on this Toggle maps gray button appears when service). -
Page 14: Map Orientation
Note: The 4 data box option is not available in Note: Trail Up is not available in advanced the Trail Up (Low) mode as it would obscure power saving mode. (The screen refreshes the locator circle. more frequently in Trail Up, drawing more power). © Satmap Systems Ltd... -
Page 15: Map Packs
After about five seconds the screen will revert to the previous screen. If you have consolidated more than one map on a card (map consolidation service offered by Satmap), you can access the different maps by moving the joystick left/right on the Map Packs screen. -
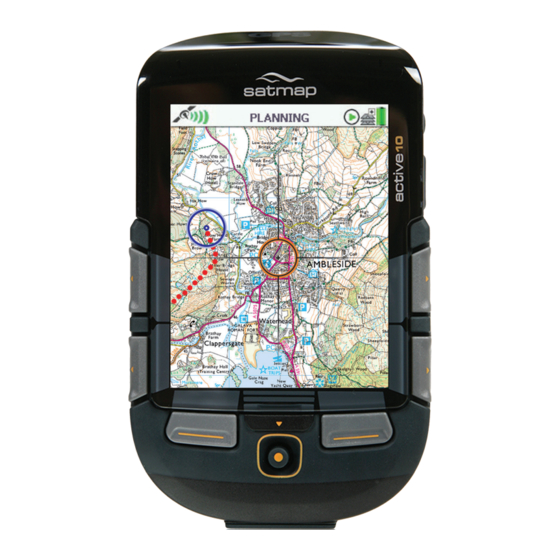
Page 16: Planning Screen
Zoom in/out • Altitude for this location – elevation above Primary Screens sea level, obtained from base maps (UK) or Go to MAIN MENU (section 6.01) and scroll from map cards (non-UK). through primary screens (section 4.00) © Satmap Systems Ltd... -
Page 17: Main Menu Screen
6.01 MAIN MENU Screen 6.02 COMPASS Screen (GPS MAP → MAIN MENU → COMPASS) (GPS MAP → MAIN MENU) The Active 10 has an electronic compass and MAIN MENU screen gives access to a GPS compass and switches between the some of the Active 10’s main functions. -
Page 18: Pointer Screen
(section 4.00) Note: You need at least 1 POI or route on the map for the Pointer to work. (It does not work if you only have one Grid, AOI or LOI). © Satmap Systems Ltd... -
Page 19: Trip Log Screen
Note: Trip log data is not stored in hibernate (Note: remember that if Stop is showing, to maintain optimum performance. mode. it means Start was the button pressed previously and the GPS is logging data). © Satmap Systems Ltd... -
Page 20: Convert Trail To Track
Routes Menu, or Online Route Planner/Route Share Network. can be shared using the SatSYNC program 6.06 Geotag Photos with Trip Log Data (free download from www.satmap.com). This feature is only available on SatSYNC. The terms trail, route track are used to... -
Page 21: Gps Status Screen
To access the GPS STATUS screen from the GPS MAP Primary screen, keep pressing the Screens button (front right button) until you GPS STATUS reach the screen. © Satmap Systems Ltd... -
Page 22: Settings Menu Screen
• Volume Control joystick to select the highlighted option • Buttons Control Cancel • Screen Data Options Return to MAIN MENU • Time Offset • Languages Back • About Return to MAIN MENU © Satmap Systems Ltd... -
Page 23: Power Control
GPS lock will be maintained and the unit will continue to log your position. • To instantly re-activate the screen, press any button, except when the screen is locked. In this case, use the power button. © Satmap Systems Ltd... -
Page 24: Advanced Power Control
Note: Trip log data is not stored in this mode. • Use the joystick, moving left/right to select from hours. • Press Done or center press the joystick to return to SETTINGS MENU. © Satmap Systems Ltd... -
Page 25: Backlight
Sun Filter option. This gives your screen a higher contrast and increases the levels of red, green and blue, so it is easier to view Normal Red Filter Sun Filter your map in very bright sunlight. © Satmap Systems Ltd... -
Page 26: Screen Data Capture
Beep Alert Count setting (section 7.15). To access your screenshot: • Connect your Active 10 to the computer via a USB cable. • Open SatSYNC. • Screenshots are found in the root folder of the Internal Storage Card. -
Page 27: Data Box Layout
2 data box and 4 data box layouts. Default Pressing the button restores the following settings: Choose Data for Left Box Heading Choose Data for Right Box Elevation 4 Data Box Layout © Satmap Systems Ltd... -
Page 28: Data Box Layout (Upper)
To reach the screen from SETTINGS MENU, press (front left button). • On the GPS MAP screen, use the lower left side button to toggle between having 2 data boxes, 4 data boxes or none. Figure 7.07 © Satmap Systems Ltd... -
Page 29: Options For 2 & 4 Data Boxes
Bearing to nearest POI/LOI/AOI. metric. See Units and Set Speed (section Route Done Nearest POI* Distance Distance to nearest 7.11). Percentage of route travelled so far. POI/LOI/AOI. GoTo ETA Estimated Time of Arrival at GoTo point. © Satmap Systems Ltd... -
Page 30: Options For 2 & 4 Data Boxes
Maximum height (altitude) attained. total until the Trip Log is reset. Min Altitude Stopped Time Minimum height (altitude) attained. Time spent not moving. See Time Moving summary above. Trip Distance Time Moving Total trip distance. See summary above. © Satmap Systems Ltd... -
Page 31: Gps Settings
± 50m. set the last 2 digits of each number set to 0. GPS Used as Heading at The Active 10 has an electronic compass (good when stationary) and a GPS compass (good when in motion), and switches between the two at a preset speed. -
Page 32: Memory Status
Only'. (Make the SD Card writable by sliding Pressing the Default button sets the opt in the small switch on side of the card upwards. option for all warnings. This will also remove the warning icon that appears on the screen). © Satmap Systems Ltd... -
Page 33: Units And Set Speed
SETTINGS MENU. return to SETTINGS MENU. Figure 7.11 Pressing the Default button restores the following settings: Units Kilometers and meters Target Speed 10 kph (6.2 mph / 5.4 kn) © Satmap Systems Ltd... -
Page 34: Compass Settings
Grid Magnetic Angle return to SETTINGS MENU. Manual Grid Magnetic Angle Bearing Display • Use the joystick, moving left/right to switch Show Grid Bearings Manual and Automatic. between Press Done to select Automatic. © Satmap Systems Ltd... -
Page 35: Calibrate Compass
The GPS compass requires forward motion to provide a heading; it will not work when GPS Settings static. See (section 7.09) to control when the GPS compass overrides the 'GPS electronic compass at a preset speed: Used as Heading at'. © Satmap Systems Ltd... -
Page 36: Set Trip Data
Showing too many inactive routes could also 'freeze' your Auto Reset Log unit. Only show a few short inactive routes, Keep Log on New Route or to reduce RAM consumption, choose the Show Inactive Routes SP option. © Satmap Systems Ltd... -
Page 37: Volume Control
Key Click Sound: multifunctional, with variable keys depending Hidden Map Buttons: One Click on the screen displayed. You are able to Button Handling: Right Handed customize the operating of your unit and tailor © Satmap Systems Ltd... -
Page 38: Screen Data Options
• Use the joystick, moving left/right to switch between; POIs, waypoints and route names shown on maps. Figure 7.18 Off: Names not shown on maps. • Press Done or center press the joystick to SETTINGS MENU. return to © Satmap Systems Ltd... -
Page 39: Languages
SETTINGS MENU. 7.20 About (GPS MAP → MAIN MENU → Settings → About) This screen gives details of the software version installed on your unit and Satmap contact details. Press Done to return to the SETTINGS MENU. Note: If your unit has platform 21 or higher, it includes hibernate mode, plus the ability to manipulate folders using SatSYNC. -
Page 40: Routes Menu Screen
15.6km). A track is a route derived from a trail quickly by holding the joystick up/down. Keep that has already been made. the joystick pressed up/down until you reach the file you are looking for. Figure 8.00 © Satmap Systems Ltd... -
Page 41: Active And Inactive Routes
Active route Inactive routes may be hidden or have just their start points displayed (section 7.14). Inactive route Note: Showing your inactive routes will take up operating memory. Figure 8.00b © Satmap Systems Ltd... -
Page 42: Create New Route
To remove Done waypoints, position the green cross over a Route Start Press when route is finished, unless you have waypoint and press the Remove Waypoint ‘closed’ the route. button. Route End © Satmap Systems Ltd... -
Page 43: Route Edit Screen
Either press Edit button or center press joystick to access alpha-numeric keypad for labeling. Note: This button changes depending on the option selected. Other options include Copy, Move, Delete, Reverse. Back Return to ROUTES MENU (section 8.00) © Satmap Systems Ltd... -
Page 44: Edit Title
Operate the keypad to input comments describing the route (section 9.00) and press Done when finished. The screen will return to ROUTE EDIT screen. Currently Reverse Currently Forward Figure 8.02c © Satmap Systems Ltd... -
Page 45: Edit Route Map
Delete and press Delete or center • Edit Location by Grid press the joystick to instantly delete the • Edit Location by Map waypoint. Press Back to go back to the • Delete ROUTE EDIT menu. © Satmap Systems Ltd... -
Page 46: Edit Active Route Color
SD Card folder. ROUTES MENU (section 8.00). 8.02h Copy (GPS MAP → MAIN MENU → ROUTES MENU → (folder/route) → Copy) Press Copy to create a copy of the current route which will appear in the same folder. © Satmap Systems Ltd... -
Page 47: Route Map Screen
Edit button (section 8.02). You can also view the start of a route by pressing Start. To return to the PLANNING screen, either press Back or center press the joystick. © Satmap Systems Ltd... -
Page 48: Route Plan Screen
• Maximum Altitude ‘track’, i.e. a converted trail, the comment field • Minimum Altitude contains date, time, speed etc. as recorded by • Approximate Time the Active 10. ROUTE PLAN screen is accessed from Buttons: ROUTE MAP screen by pressing the Profile button. -
Page 49: Route Card Screen
Keep the PLANNING screen (section 6.00) joystick pressed up/down until you reach the leg you are looking for. Reverse Reverse the sequence of waypoints Back Go to ROUTES MENU (section 8.00) © Satmap Systems Ltd... -
Page 50: Routes Folders
Another way to access other folders is to center press the joystick on the folder name. This will reveal a Choose Folder drop-down box with options to select a specific folder. (This applies to any folder menu). © Satmap Systems Ltd... -
Page 51: Keypad
Option depends on the context and up/down). Press Select or center press the joystick for character selections. Use Shift to access upper case and More for more characters. Press Done when finished and then Back to return to the Folders. © Satmap Systems Ltd... -
Page 52: Position Info
Trail Off: no tracking dots deactivate an active route or GoTo point. To clear the GoTo point, center press the joystick Trail On Trail Small Clear GoTo. (Also see section and select (with large dots) 19.00). © Satmap Systems Ltd... -
Page 53: Choose Information Type Window
OOI, the screen turns gray and an overlay 245m (804ft) at 1:50 000 shows the Choose Information Type window. 122.5m (402ft) at 1:25 000 To cancel the gray screen, press either of the 49m (160ft) at 1:10 000 front buttons. © Satmap Systems Ltd... -
Page 54: Ooi Menu
Respects individual settings of each OOI. • Add AOI by Map Use 'Default' visibility to allow visibility to be • Add LOI by Map editable for individual OOIs. • Add Grid by Map • Add IOI © Satmap Systems Ltd... -
Page 55: Ooi Folders
Choose Folder drop-down box and select a specific folder (section 8.04). (This applies to any folder menu). Note: Sub folders can only be created via SatSYNC. (Please refer to the SatSYNC User Guide for detailed information). © Satmap Systems Ltd... -
Page 56: Pois (Points Of Interest)
Create a POI by either Back pressing the top left '+' button or center press Go back to OOI Menu the joystick in the desired location. Use the lower left 'x' button to remove POIs. © Satmap Systems Ltd... -
Page 57: Add Poi By Grid Reference
POI is visible on the map. When invisible, the Figure 14.05 'eye' icon is highlighted in red with a red line Follow the steps as described in section 14.01 through it (section 11.00). ('Add POI by Map') to create your POI on the map. © Satmap Systems Ltd... -
Page 58: Edit Poi Menu
• Edit Location by Map inserted and is not write-protected. • Edit Location by Grid • Edit Warning Radius • Edit Visibility • Edit POI Icon • Delete • Move to SD Card** • Copy to SD Card** © Satmap Systems Ltd... -
Page 59: Rename Poi
Pressing descriptions from geocaches etc. with more Next will move between rows (except with Figure 14.06c than 128 characters cannot be edited). OSGB). Select Done when complete to go back to the EDIT POI menu. © Satmap Systems Ltd... -
Page 60: Edit Warning Radius
Make a copy of the POI onto the EDIT POI menu. SD card. Highlight Copy to SD Card either press Copy or center press the joystick. Figure 14.06f (Subsequently this option becomes Copy © Satmap Systems Ltd... -
Page 61: Aois (Areas Of Interest)
'+' button or by to be visible on the unit. (See SatSYNC User center pressing the joystick. Use the lower left Guide for more information). 'x' button to remove points. © Satmap Systems Ltd... -
Page 62: Aoi Details Screen
The highlighted green 'eye' icon indicates the AOI is visible on the map. When invisible, the 'eye' icon is highlighted in red with a red line through it (section 11.00). reference point (default icon and AOI name) © Satmap Systems Ltd... -
Page 63: Edit Aoi Menu
SD card has been • Edit Location by Map inserted and is not write-protected. • Edit Visibility • Edit Color • Edit Pattern • Delete • Move to SD Card** • Copy to SD Card** © Satmap Systems Ltd... -
Page 64: Rename Aoi
Select takes you back to 15.03) the edit menu. Figure 15.04c Note: This is only respected if the global visibility is set to 'Default' (GPS MAP → MAIN MENU → OOI Menu → 'Visibility - Default'). © Satmap Systems Ltd... -
Page 65: Edit Color
AOI. When Delete selected the screen will go back to the Folders. Pressing Cancel will take you back EDIT AOI to the menu. © Satmap Systems Ltd... -
Page 66: Lois (Lines Of Interest)
'+' button to be visible on the unit. (See SatSYNC User or by center pressing the joystick. Use the Guide for more information). lower left 'x' button to remove points. © Satmap Systems Ltd... -
Page 67: Loi Details Screen
The highlighted green 'eye' icon indicates the LOI is visible on the map. When invisible, the 'eye' icon is highlighted in red with a red line through it (section 11.00). reference point (default icon and AOI name) © Satmap Systems Ltd... -
Page 68: Edit Loi Menu
SD card has been • Edit Location by Map inserted and is not write-protected. • Edit Visibility • Edit Color • Delete • Move to SD Card** • Copy to SD Card** © Satmap Systems Ltd... -
Page 69: Rename Loi
The 'Edit Description' option is only available point if the existing description has 128 characters (section or less (e.g. externally imported descriptions 16.03) from geocaches etc. with more than 128 characters cannot be edited). Figure 16.04c © Satmap Systems Ltd... -
Page 70: Edit Visibility
Highlight Delete, then press Delete or center Figure 16.04e press the joystick to access a screen showing the option to delete the LOI. When either Delete Cancel is selected, the screen will go back to the EDIT LOI menu. © Satmap Systems Ltd... -
Page 71: Grids
Go back to the OOI Menu (section 15.04e/15.04f). The grid appears on PLANNING screen once created. More than one grid can be placed on the map. Visibility can only be set for individual AOIs, not for the entire grid. © Satmap Systems Ltd... -
Page 72: Grid Details Screen
• Area (meters squared) • Elevation* reference • Description of grid point Refers to the arbitrary reference point of the (Default AOI within the grid (usually top left corner of icon and an AOI within a grid). AOI name) © Satmap Systems Ltd... -
Page 73: 17.04 Edit Grid Menu
• Rename • Copy • Delete • Move to SD Card* • Copy to SD Card* The last two options on the list become available only when an SD card has been inserted and is not write-protected. © Satmap Systems Ltd... -
Page 74: Rename Grid
Highlight Delete, then press Delete or center press the joystick to access a screen showing Figure 17.04b the option to delete the grid. When either Delete Cancel is selected, the screen will go back to the Folders. © Satmap Systems Ltd... -
Page 75: Edit Aois Within A Grid
Grid Note: Only individual AOIs within a grid can be Name made visible or invisible. An entire grid cannot be made visible or invisible, unless you set the visibility options of a folder containing the grid. © Satmap Systems Ltd... -
Page 76: Add Ioi In A Specific Folder
SatSYNC. (Please refer to the SatSYNC 1.5 User Guide provided on the 18.03 IOI Details Screen CD or downloadable from satmap.com). This (GPS MAP → MAIN MENU → OOI Menu → employs the use of a tab delimited plain text OOI Folders →... -
Page 77: Edit Ioi Screen
• Edit Description • Delete • Move to SD Card* • Copy to SD Card* The last two options on the list become available only when an SD card has been inserted and is not write-protected. © Satmap Systems Ltd... -
Page 78: Rename Ioi
Delete the option to delete the IOI. Pressing will delete the IOI and take you back to the Folders. Pressing Cancel will take you back to the EDIT IOI menu. © Satmap Systems Ltd... -
Page 79: Goto - Set By Coords
Clear Marker GoTo – Clear buttons are (PLANNING → POSITION INFO via center active once a point/marker has been set. press → Set Marker/Set GoTo) (Also accessible from the POSITION INFO Figure 19.01 screen section 10.00). © Satmap Systems Ltd... -
Page 80: Accessories
20.02a Carry Cases (Standard & Deluxe) 20.01 Mounts The Standard Carry Case has a padded For mounting the Active 10 GPS unit onto a compartment for the Active 10, closed with a bike or in a vehicle: Velcro top for fast access, and an elasticated Figure 20.01a... -
Page 81: Proshield
Available in black rechargeable batteries. orange, sand or green. The low profile means the Active 10 can fit 20.02e ZAGG invisibleSHIELD into your pocket without the need for a Carry The ZAGG invisibleSHIELD is a clear and Case. -
Page 82: General Service
Many of our customers are finding that the Not all maps are toggleable. It is also possible Active 10 is so useful they are taking it 21.02 World Base Map to customize existing maps and make them everywhere with them. -
Page 83: Online Route Planner & Route Share Network
• Name routes and waypoints on their computer, download them onto their • Add comments to a route or individual Active 10 via SatSYNC*, and share them with waypoints within a route other users. This software is available online • Download routes onto the Active 10 via SatSYNC* for select countries only (please see below). - Page 84 (Satellite lock times • Make a back-up file copy of any maps the POI using the keypad and press Done. vary). The Active 10 can acquire a lock on that you purchase: A back-up may be done Select an icon from the POI icon selection the move, e.g.
-
Page 85: Troubleshooting
(TRIP LOG > Start). Check the snail trail is on by going to GPS MAP > POSITION INFO via center press > Turn Trail On (section 10.00). Here you can also adjust the size of the dots. © Satmap Systems Ltd... - Page 86 Abbreviation for ascended height. When a signal is available (which is only in use SatSYNC to import them to the Active 10. the south of England and mainland Europe), Ascents this signal improves the accuracy of signals Positive changes in elevation.
- Page 87 The system enables a GPS receiver to Shown as a gray highlighted line on the map measure distance and bearing from any other determine its time, location, speed and (only if you have made it visible). point on the map. distance. © Satmap Systems Ltd...
- Page 88 Google Earth. about that point (e.g. hotel, restaurant, Soft keys viewpoint, historical site, etc). Trail Buttons with functions that vary depending on The path taken, leaving behind a snail trail. the screen displayed. © Satmap Systems Ltd...
- Page 89 (especially relevant to aircraft), currents (watercraft) and terrain (walkers/ cyclists who have planned on walking at a certain speed) have taken effect. It is the forward component of velocity. © Satmap Systems Ltd...
- Page 90 Disclaimer: Satmap Systems is not liable for damages and injuries caused by improper use or fitting of the device. Subject to technical changes and errors. Satmap does not disclaim any statutory rights relating to faulty or misdescribed goods that cannot be disclaimed under applicable law.
- Page 91 The Ultimate Sports GPS Phone (UK): +44 (0)845 873 0101 Phone (US): 1-888-226-5430 satmap.com Email: info@satmap.com...
Need help?
Do you have a question about the ACTIVE 10 and is the answer not in the manual?
Questions and answers