
Related Manuals for satmap active12


Summary of Contents for satmap active12
- Page 1 Full User Guide satmap.com Software v2.0.xxxx...
-
Page 2: Table Of Contents
4.4.4 Geotag Photos with Trip Log Data.....19 Following a Route ..........52 Primary Screen 5: MAIN.MENU .....20 11.17 Copy to SD Card ..........70 Create New Route ...........53 Primary Screen 6: COMPASS/POINTER ..21 12.. AOIs.(Areas.of.Interest)......71 © Satmap Systems Ltd © Satmap Systems Ltd... - Page 3 Xpedition : Online Mapping & Route Planner ..93 14.7 Copy ..............84 20.. Tips............94 14.8 Delete ..............84 Troubleshooting ..........95 14.9 Move to SD Card ..........84 Glossary ............96 14.10 Copy to SD Card ..........84 © Satmap Systems Ltd © Satmap Systems Ltd...
-
Page 4: Basic Layout
Width 3 in / 7.5cm activate with 1-click 9 Function Height 5.1 in / 13cm or 2-click operation . Joystick Depth 1.4 in / 3.5cm Weight 6.2 oz / 175g Mini USB © Satmap Systems Ltd © Satmap Systems Ltd 2014... -
Page 5: Map Screen Layout
Use to scroll through Trail Up was the last will next appear if Trail Up the primary screens option selected. the front left button North Up is selected. © Satmap Systems Ltd © Satmap Systems Ltd 2014... -
Page 6: Introduction
Introduction outdoors! Satmap Systems is the creator of the Active We have over 350 maps to choose from. 12 — an award-winning rugged sports GPS The unit is supplied with a world base map,... -
Page 7: Care.for.your.active.12
Satmap, it is extremely important metallized glass (such as a car windshield), etc. that you only use Satmap products to charge You may also notice a variable performance the battery (i.e. Satmap Wall Charger, Car Charger, etc.) Failure to do so is potentially... -
Page 8: Extreme Weather Care Tips
You will need to send your Active 12 back pocket, where there is a risk of a pool of to Satmap for repair if parts have been lost water collecting at the bottom of the pocket or worn down. Failure to do so may result in and damaging the unit. -
Page 9: Overview
Settings > Power Control > Automatic Screen unit should get a lock within three minutes. If Turn Off > Select ‘Off after 3 minutes’ it takes much longer, please contact Satmap. Hibernate mode allows rapid satellite lock as Change the Power Saving Mode to the unit remembers the satellites’... -
Page 10: Map Card Insertion
SatSYNC is a free software available for Stop/Record Icon When a single bar remains, it is coded red. download from satmap.com. It allows you to After some further time (depending on the connect your Active 12 to a computer via a power source and activity), an on-screen standard USB connection. -
Page 11: Eight.primary.screens
(your position on the map) Access to main functions Built-in electronic compass Nearby Active 12 units that Satellite acquisition screen with direction indicator may have shareable data, showing name & unique ID. © Satmap Systems Ltd © Satmap Systems Ltd 2014... -
Page 12: Primary Screen 1: Gps.map
Blue pointer appears once you start Zoom In / Out data to be set to update once every 4 seconds. moving to indicate direction of travel. Map scale is continuously displayed during zooming © Satmap Systems Ltd © Satmap Systems Ltd 2014... -
Page 13: Toggleable Maps
Please note: Most detailed maps have a products. The toggle function can also be "ceiling", and will disappear from the screen added to existing map cards (see satmap.com when zoomed out above this ceiling. This is for further details on this service). -
Page 14: Map Orientation
Note: Trail Up is not available in advanced the Trail Up (Low) mode as it would obscure power saving mode. (The screen refreshes the locator circle. more frequently in Trail Up, drawing more power). © Satmap Systems Ltd © Satmap Systems Ltd 2014... -
Page 15: Map Packs Screen
If you have multiple layers on your MapCard Buttons: (e.g. you may also have consolidated more than one map on a MapCard (a service offered Back by Satmap), you can access the different maps Return to POSITION INFO title by moving the joystick left/right on the... -
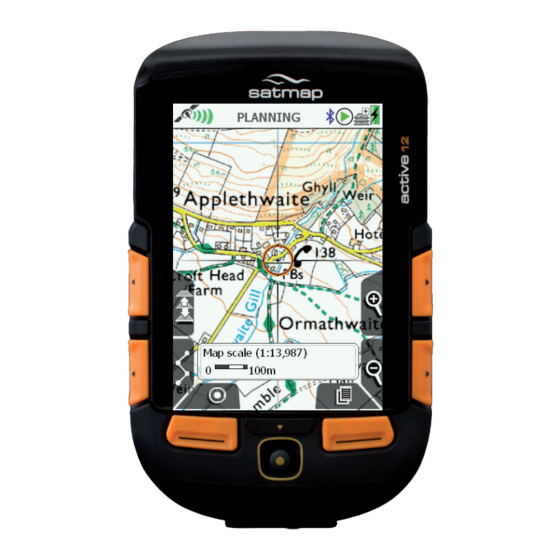
Page 16: Primary Screen 2: Planning
• Altitude for this location – elevation above sea level, obtained from base maps (UK) or from map cards (non-UK). • Distance from your last known location, i.e. © Satmap Systems Ltd © Satmap Systems Ltd 2014... -
Page 17: Primary Screen 3: Position.info
MapPacks present on the SD card. or POI reference. Maps - Flicks you back into your previous map screen (GPS MAP or PLANNING). Primary Screens - Pages forward to the TRIP LOG screen. © Satmap Systems Ltd © Satmap Systems Ltd 2014... -
Page 18: Primary Screen 4: Trip.log
GPS is logging data). Note: If you transit between trips and press Start without resetting the log, the transit is shown as The unit’s data logging functions are intended © Satmap Systems Ltd © Satmap Systems Ltd 2014... -
Page 19: Convert Trail To Track
SatSYNC to geotag your photos). be found in the Routes Menu like a route. A track is likely to have many more waypoints © Satmap Systems Ltd © Satmap Systems Ltd 2014... -
Page 20: Primary Screen 5: Main.menu
Spot Button (map screens). Return to MAP/ PLANNING map screens Routes Menu. Go to ROUTES MENU. Create, View, Activate, Edit and Delete routes functionaliy. Settings. Go to SETTINGS MENU © Satmap Systems Ltd © Satmap Systems Ltd 2014... -
Page 21: Primary Screen 6: Compass/Pointer
Spot Button (map Screens) Screens Return to map screens (GPS MAP / PLANNING) Pointer Go to POINTER screen Primary Screens (page Forward) Go to TRIP LOG screen and scroll through primary screens © Satmap Systems Ltd © Satmap Systems Ltd 2014... -
Page 22: Pointer Screen
Note: You need at least 1 POI or route on the map for the Pointer to work. (It does not work if you only have one Grid, AOI or LOI). © Satmap Systems Ltd © Satmap Systems Ltd 2014... -
Page 23: Primary Screen 7: Shared.data
ROUTES menu, press Edit, then Share / Unshare. Press Fetch to get a route. Select an Active 12 to view their shareable routes. © Satmap Systems Ltd © Satmap Systems Ltd 2014... - Page 24 Refresh: This button will rescan for nearby Active 12's - and typically takes about 10 seconds. You may see the Bluetooth Off list move about & reorder, depending on new devices in range and signal © Satmap Systems Ltd © Satmap Systems Ltd 2014...
-
Page 25: Primary Screen 8: Gps.status
Once you have a lock, your current coordinates Primary Screens and elevation are shown. As a guide, a Go to PLANNING screen and scroll through minimum of four satellites are needed to primary screens acquire a lock. © Satmap Systems Ltd © Satmap Systems Ltd 2014... -
Page 26: Power.off.screen
Power Button one more time, this will Hibernate options send you back to previous working screen, and will place a small yellow padlock icon on the status bar. Thereafter, pressing any button will display the Unlock? screen © Satmap Systems Ltd © Satmap Systems Ltd 2014... -
Page 27: Main.menu:.settings.menu
• Cycling to select the highlighted option • Screen Data Options Cancel / Back • Time Offset MAIN MENU Return to • Enter User Name • Languages SETTINGS Menu -2 • About © Satmap Systems Ltd © Satmap Systems Ltd 2014... -
Page 28: Power Control
GPS lock will be maintained and the unit will continue to log your position. • To instantly re-activate the screen, press any button, except when the screen is locked. In this case, use the power button. © Satmap Systems Ltd © Satmap Systems Ltd 2014... -
Page 29: Advanced Power Control
• Use the joystick, moving left/right to select Normal or Advanced. • Press Done or centre press the joystick to return to SETTINGS MENU. Advanced Power Control - For Power Saving © Satmap Systems Ltd © Satmap Systems Ltd 2014... -
Page 30: Bluetooth
- and connect to Low to BT LE fitness sensors. This version of the BLUETOOTH screen Energy sensors. software allows Bluetooth Smart connection © Satmap Systems Ltd © Satmap Systems Ltd 2014... - Page 31 Please Note; Bluetooth allows can be purchased from the only one of each type of sensor Satmap website, or from other to be selected at any one time. outlets. You can have a HRM and a Sp/ Cad sensor selected, but not two Please Note;...
- Page 32 These TCX files can woodland or the urban jungle). contain location and speed data, along with a wide variety of fitness related data items. Set your Wheel Circumference in mm. © Satmap Systems Ltd © Satmap Systems Ltd 2014...
-
Page 33: Elevation
Select Recalibration frequency Auto calibration setting have drifted due to weather change: © Satmap Systems Ltd © Satmap Systems Ltd 2014... - Page 34 3 types of elevation data for comparison, however, only one set Trip Elevation data of elevation data can be saved in the View your Elevation data Set Your Known Height TRIP LOG for display and upload. © Satmap Systems Ltd © Satmap Systems Ltd 2014...
-
Page 35: Backlight
This gives your screen a higher contrast and increases the levels of red, green and blue, so it is easier to view your map in very bright sunlight. Normal Red Filter Adjust brightness Sun Filter © Satmap Systems Ltd © Satmap Systems Ltd 2014... -
Page 36: Screen Data Capture
Internal Storage Otherwise it is saved to the of your unit). Export • Select the screenshot and press download it to your computer. © Satmap Systems Ltd © Satmap Systems Ltd 2014... -
Page 37: Data Boxes
2 data box and 4 data box layouts. Default Pressing the button restores the following settings: Choose Data for Left Box Heading Choose Data for Right Box Elevation 4 Data Box Layout © Satmap Systems Ltd © Satmap Systems Ltd 2014... -
Page 38: Data Box Layout (Upper)
(front left button). • On the GPS MAP screen, use the lower left side button to toggle between having 2 data boxes, 4 data boxes or none. Lower Data box selections © Satmap Systems Ltd © Satmap Systems Ltd 2014... -
Page 39: Options For 2 & 4 Data Boxes
GoTo ETA Percentage of route travelled so far. POI/LOI/AOI. Estimated Time of Arrival at GoTo point. POI* ETA Time of arrival at nearest POI/LOI/AOI. GoTo Time How long to reach GoTo point. © Satmap Systems Ltd © Satmap Systems Ltd 2014... - Page 40 (section 6.03). This will be a cumulative Maximum height (altitude) attained. total until the Trip Log is reset. Min Altitude Stopped Time Minimum height (altitude) attained. Time Moving Time spent not moving. See summary above. © Satmap Systems Ltd © Satmap Systems Ltd 2014...
-
Page 41: Gps Settings
Select Correct Position Format for Country OSGB grid references are given to 10 figures. If you are working to 6-figure grid references, set the last 2 digits of each number set to 0. © Satmap Systems Ltd © Satmap Systems Ltd 2014... -
Page 42: Memory Status
Only'. (Make the SD Card writable by sliding option for all warnings. the small switch on side of the card upwards. This will also remove the warning icon that appears on the screen). © Satmap Systems Ltd © Satmap Systems Ltd 2014... -
Page 43: Units And Set Speed
SETTINGS MENU. Pressing the return to Default button restores the following settings: Units: Kilometres and meters Target Speed: 10 kph (6.2 mph / 5.4 kn) © Satmap Systems Ltd © Satmap Systems Ltd 2014... -
Page 44: Compass Settings
Enter values for Manual • Use the joystick, moving left/right to switch selection between Manual and Automatic. Press Done to select Automatic. If you want to set your Grid Magnetic Angle © Satmap Systems Ltd © Satmap Systems Ltd 2014... -
Page 45: Calibrate Compass
See GPS Settings (section 7.09) to control when the GPS compass overrides the 'GPS electronic compass at a preset speed: Used as Heading at'. © Satmap Systems Ltd © Satmap Systems Ltd 2014... -
Page 46: Set Trip Data
'freeze' your unit. Auto Reset Log Only show a few short inactive routes, or to Keep Log on New Route reduce RAM consumption, choose the Show Inactive Routes SP option. © Satmap Systems Ltd © Satmap Systems Ltd 2014... -
Page 47: Volume Control
You are able to sounds customize the operating of your unit and tailor it to fit your needs, i.e. how many clicks you want the buttons to operate with, and whether © Satmap Systems Ltd © Satmap Systems Ltd 2014... -
Page 48: Pan And Zoom Speed
(for bike riders) will give a nore stable and accurate reading. Set Wheel Circumference Display wheel speed on for Wheel speed data GPS MAP screen data Boxes © Satmap Systems Ltd © Satmap Systems Ltd 2014... -
Page 49: Screen Data Options
Enter User Name Press Done Off: Names not shown on maps. in Text Box to complete • Press Done or centre press the joystick to return to SETTINGS MENU. © Satmap Systems Ltd © Satmap Systems Ltd 2014... -
Page 50: Languages
MAIN MENU: Settings Menu (... cont) 6.22 Languages contact Satmap support and an Upgrader SD card will be mailed to you. (GPS MAP → MAIN MENU → Settings → Languages) Please Note: The 1st relase sofware for the Languages Active 12 is Version 2.0.xxxx Select your preferred language: All Active 12 GPS have "Platform 29", or... -
Page 51: Main.menu:.routes.menu
Keep the joystick pressed up/down until you reach the file you are looking for. Route listing © Satmap Systems Ltd © Satmap Systems Ltd 2014... -
Page 52: Active And Inactive Routes
Inactive routes may be hidden or have just their start points displayed. Note: Showing your inactive routes will take up "Choose Info operating memory. Type" box Figure 8.00b © Satmap Systems Ltd © Satmap Systems Ltd 2014... -
Page 53: Create New Route
Zoom in and out green cross over a waypoint and press the Route Start Done Remove Waypoint button. Press when route is finished, unless you have Route End ‘closed’ the route. © Satmap Systems Ltd © Satmap Systems Ltd 2014... -
Page 54: Route Edit Screen
Note: This button changes depending on the option selected. Other options include Copy, Move, Delete, Reverse. Back Return to ROUTES MENU © Satmap Systems Ltd © Satmap Systems Ltd 2014... -
Page 55: Edit Title
Operate the keypad to input comments describing the route and press Done when finished. The screen will return to the ROUTE EDIT screen. Currently Reverse Currently Forward Reverse Route option © Satmap Systems Ltd © Satmap Systems Ltd 2014... -
Page 56: Edit Route Map
• Edit Location by Map Waypoint edit Highlight Delete and press Delete or centre options • Delete press the joystick to instantly delete the Back waypoint. Press to go back to the ROUTE EDIT menu. © Satmap Systems Ltd © Satmap Systems Ltd 2014... -
Page 57: Edit Active Route Colour
SD Card folder. MENU. 7.13 Copy (MAIN MENU → ROUTES MENU → (folder/ route) → Copy) Press Copy to create a copy of the current route which will appear in the same folder. © Satmap Systems Ltd © Satmap Systems Ltd 2014... -
Page 58: Route Map Screen
Edit button. You can also view the start of a route by pressing Start. PLANNING To return to the screen, either press Back or centre press the joystick. © Satmap Systems Ltd © Satmap Systems Ltd 2014... -
Page 59: Route Plan Screen
Accelerated scrolling: This is useful if you have a route with many waypoints and want to access information about a particular waypoint. Press and hold the joystick left/right until you reach the specific waypoint. © Satmap Systems Ltd © Satmap Systems Ltd 2014... -
Page 60: Route Card Screen
Keep the joystick PLANNING screen pressed up/down until you reach the leg you are looking for. Reverse Reverse the sequence of waypoints Back Go to ROUTES MENU © Satmap Systems Ltd © Satmap Systems Ltd 2014... -
Page 61: Routes Folders
Another way to access other folders is to centre press the joystick on the folder name. Choose Folder This will reveal a drop-down box with options to select a specific folder. (This applies to any folder menu). © Satmap Systems Ltd © Satmap Systems Ltd 2014... -
Page 62: Keypad
Option depends on the context joystick for character selections. Use Shift to access upper case and More for more Done characters. Press when finished and then Back to return to the Folders. © Satmap Systems Ltd © Satmap Systems Ltd 2014... -
Page 63: Choose.information.type.window
Choose Information Type window. 245m (804ft) at 1:50 000 To cancel the gray screen, press either of the 122.5m (402ft) at 1:25 000 front buttons. 49m (160ft) at 1:10 000 © Satmap Systems Ltd © Satmap Systems Ltd 2014... -
Page 64: Ooi Menu
Respects individual settings of each OOI. • Add AOI by Map Use 'Default' visibility to allow visibility to be • Add LOI by Map editable for individual OOIs. • Add Grid by Map • Add IOI © Satmap Systems Ltd © Satmap Systems Ltd 2014... -
Page 65: Ooi Folders
(This applies to any folder menu). Note: Sub folders can only be created via SatSYNC. (Please refer to the SatSYNC User Guide for detailed information). © Satmap Systems Ltd © Satmap Systems Ltd 2014... -
Page 66: Pois.(Points.of.interest)
Create a POI by either pressing the top left '+' button or centre press Back the joystick in the desired location. Use the Go back to OOI Menu lower left 'x' button to remove POIs. © Satmap Systems Ltd © Satmap Systems Ltd 2014... -
Page 67: Add Poi By Grid Reference
'eye' icon is highlighted in red with a red line Follow the steps as described in section 14.01 through it. ('Add POI by Map') to create your POI on the map. © Satmap Systems Ltd © Satmap Systems Ltd 2014... -
Page 68: Edit Poi Menu
• Edit Location by Grid • Edit Warning Radius • Edit Visibility • Edit POI Icon • Delete • Move to SD Card** • Copy to SD Card** © Satmap Systems Ltd © Satmap Systems Ltd 2014... -
Page 69: Rename Poi
(except with OSGB). than 128 characters cannot be edited). Done Select when complete to go back to the Edit POI location by map EDIT POI menu. © Satmap Systems Ltd © Satmap Systems Ltd 2014... -
Page 70: Edit Warning Radius
Make a copy of the POI onto the menu. SD card. Highlight Copy to SD Card either press Copy or centre press the joystick. Set visibility Copy (Subsequently this option becomes for POIs © Satmap Systems Ltd © Satmap Systems Ltd 2014... -
Page 71: Aois.(Areas.of.interest)
(See SatSYNC User Guide centre pressing the joystick. Use the lower left for more information). 'x' button to remove points. The area is shown as you create the AOI. You © Satmap Systems Ltd © Satmap Systems Ltd 2014... -
Page 72: Aoi Details Screen
AOI is visible on the map. When invisible, the 'eye' icon is highlighted in red with a red line through it. reference point (default icon and AOI name) AOI reference point © Satmap Systems Ltd © Satmap Systems Ltd 2014... -
Page 73: Edit Aoi Menu
• Edit Location by Map inserted and is not write-protected. • Edit Visibility • Edit Colour • Edit Pattern • Delete • Move to SD Card** • Copy to SD Card** © Satmap Systems Ltd © Satmap Systems Ltd 2014... -
Page 74: Rename Aoi
15.03) Note: This is only respected if the global EDIT AOI visibility is set to 'Default' (GPS MAP → MAIN MENU → OOI Menu → 'Visibility - Default'). © Satmap Systems Ltd © Satmap Systems Ltd 2014... -
Page 75: Edit Colour
AOI. When Delete selected the screen will go back to the Folders. Pressing Cancel will take you back to the EDIT AOI menu. © Satmap Systems Ltd © Satmap Systems Ltd 2014... -
Page 76: Lois.(Lines.of.interest)
'+' button or by visible on the unit. (See SatSYNC User Guide centre pressing the joystick. Use the lower left for more information). 'x' button to remove points. © Satmap Systems Ltd © Satmap Systems Ltd 2014... -
Page 77: Loi Details Screen
The highlighted green 'eye' icon indicates the LOI is visible on the map. When invisible, the 'eye' icon is highlighted in red with a red line through it. reference point (default icon and AOI name) © Satmap Systems Ltd © Satmap Systems Ltd 2014... -
Page 78: Edit Loi Menu
SD card has been • Edit Location by Map inserted and is not write-protected. • Edit Visibility • Edit Colour • Delete • Move to SD Card** • Copy to SD Card** © Satmap Systems Ltd © Satmap Systems Ltd 2014... -
Page 79: Rename Loi
The 'Edit Description' option is only available if reference the existing description has 128 characters or point less (e.g. externally imported descriptions from (section geocaches etc. with more than 128 characters 16.03) cannot be edited). Edit LOI location © Satmap Systems Ltd © Satmap Systems Ltd 2014... -
Page 80: Edit Visibility
Set LOI colour press the joystick to access a screen showing the option to delete the LOI. When either Delete Cancel is selected, the screen will go back to the EDIT LOI menu. © Satmap Systems Ltd © Satmap Systems Ltd 2014... -
Page 81: Grids
Go back to the OOI Menu created. More than one grid can be placed on the map. Visibility can only be set for individual AOIs, not for the entire grid. © Satmap Systems Ltd © Satmap Systems Ltd 2014... -
Page 82: Add Grid In A Specific Folder
• Description of grid point Refers to the arbitrary reference point of the (Default AOI within the grid (usually top left corner of an icon and AOI within a grid). AOI name) © Satmap Systems Ltd © Satmap Systems Ltd 2014... -
Page 83: Edit Grid Menu
• Move to SD Card* • Copy to SD Card* The last two options on the list become available only when an SD card has been inserted and is not write-protected. Buttons: © Satmap Systems Ltd © Satmap Systems Ltd 2014... -
Page 84: Rename Grid
When either Delete Cancel is selected, the screen will GRIDs in OOI go back to the Folders. folders © Satmap Systems Ltd © Satmap Systems Ltd 2014... -
Page 85: Edit Aois Within A Grid
Note: Only individual AOIs within a grid can be Name Grid made visible or invisible. An entire grid cannot Name be made visible or invisible, unless you set the visibility options of a folder containing the grid. © Satmap Systems Ltd © Satmap Systems Ltd 2014... -
Page 86: Iois.(Items.of.interest)
15.4 IOI Details Screen SatSYNC 1.5 User Guide provided on the (GPS MAP → MAIN MENU → OOI Menu → CD or downloadable from satmap.com). This OOI Folders → Select IOI → Show Details) employs the use of a tab delimited plain text... -
Page 87: Edit Ioi Screen
• Move to SD Card* • Copy to SD Card* The last two options on the list become available only when an SD card has been inserted and is not write-protected. © Satmap Systems Ltd © Satmap Systems Ltd 2014... -
Page 88: Rename Ioi
IOI. Pressing Delete will delete the IOI and take you back to the Folders. Pressing Cancel will take you back to EDIT IOI menu. © Satmap Systems Ltd © Satmap Systems Ltd 2014... -
Page 89: Main.menu.:.goto.and.marker
Marker: active once a point/marker has been set. (PLANNING → POSITION INFO via centre POSITION INFO (Also accessible from the press → Set Marker/Set GoTo) screen). Set GoTo by Grid reference © Satmap Systems Ltd © Satmap Systems Ltd 2014... -
Page 90: Accessories
The Bike Mount has a robust, flexible fitting The Lanyard is 1.3m long, branded with the and is designed for using the Active 12 GPS Satmap logo, and is adjustable to fit most unit on a bike. It can be attached to the handle Bike Mount Vehicle Mount requirements. -
Page 91: Zagg Invisibleshieldtm
This smaller battery gives you a battery life of approximately 4-7 hours in Normal Power Mode, 9-13 hours in Advanced Power Mode Solor charger bundle and 55-66 hours in Hibernate Mode. © Satmap Systems Ltd © Satmap Systems Ltd 2014... -
Page 92: Services
GB maps. 18.6 Site-Centreed Mapping (Select areas only) 18.3 Specialized Custom Map Service For customers who want non-standard map If Satmap does not have the map data, we © Satmap Systems Ltd © Satmap Systems Ltd 2014... -
Page 93: Xpedition : Online Mapping & Route Planner
• Netherlands: Kadaster 1:50,000 • Italy: Kompass/OpenCycleMap 1:50,000 • Austria: BEV 1:50,000 & 1:25,000 Organise Routes Please refer to the 1.5 SatSYNC User Guide provided on the CD or downloadable from our website. © Satmap Systems Ltd © Satmap Systems Ltd 2014... -
Page 94: Tips
• To set the time on your unit: Go to MAIN drain the batteries. MENU > Settings > Time offset and move the joystick to select the appropriate hour differential (+/- GMT). © Satmap Systems Ltd © Satmap Systems Ltd 2014... -
Page 95: Troubleshooting
Start). Check the snail trail is on FAQs on www.satmap.com. by going to GPS MAP > POSITION INFO via centre press > Turn Trail On. Here you can also adjust the size of the dots. © Satmap Systems Ltd © Satmap Systems Ltd 2014... -
Page 96: Glossary
It is the most accurate it is available (see Trip Log). Otherwise the set time standard and is used to control the speed is used. For example if you have no lock frequency of GPS satellite signals. © Satmap Systems Ltd 2014... - Page 97 6400 mil-radians rather than 360 of Interest) in a large square/grid formation. degrees allows greater accuracy. Used to split an area into searchable pieces by overlaying a 10 x 10 square grid onto a map © Satmap Systems Ltd © Satmap Systems Ltd 2014...
- Page 98 (known as a ‘track’). and TUC (Temps Universel Coordonné). our website. Older maps can also be converted to enable toggling via the Toggleable Map UTM. The Universal Transverse Mercator Service. © Satmap Systems Ltd © Satmap Systems Ltd 2014...
- Page 99 Set of coordinates that identify a point on the map and make up a route ('route points'). Waypoints are usually placed at turns in the path or where the path changes. © Satmap Systems Ltd © Satmap Systems Ltd 2014...
- Page 100 Disclaimer: Satmap Systems is not liable for damages and injuries caused by improper use or fitting of the device. Subject to technical changes and errors. Satmap does not disclaim any statutory rights relating to faulty or misdescribed goods that cannot be disclaimed...
- Page 101 Phone (UK): +44 (0) 845 873 0101 satmap.com Email: info@satmap.com...
Need help?
Do you have a question about the active12 and is the answer not in the manual?
Questions and answers