Miller Millermatic 251 Technical Manual
Welding range 30 to 300 amps
Hide thumbs
Also See for Millermatic 251:
- Owner's manual (56 pages) ,
- Owner's manual (56 pages) ,
- Owner's manual (56 pages)
Table of Contents
Troubleshooting

Related Manuals for Miller Millermatic 251


Summary of Contents for Miller Millermatic 251
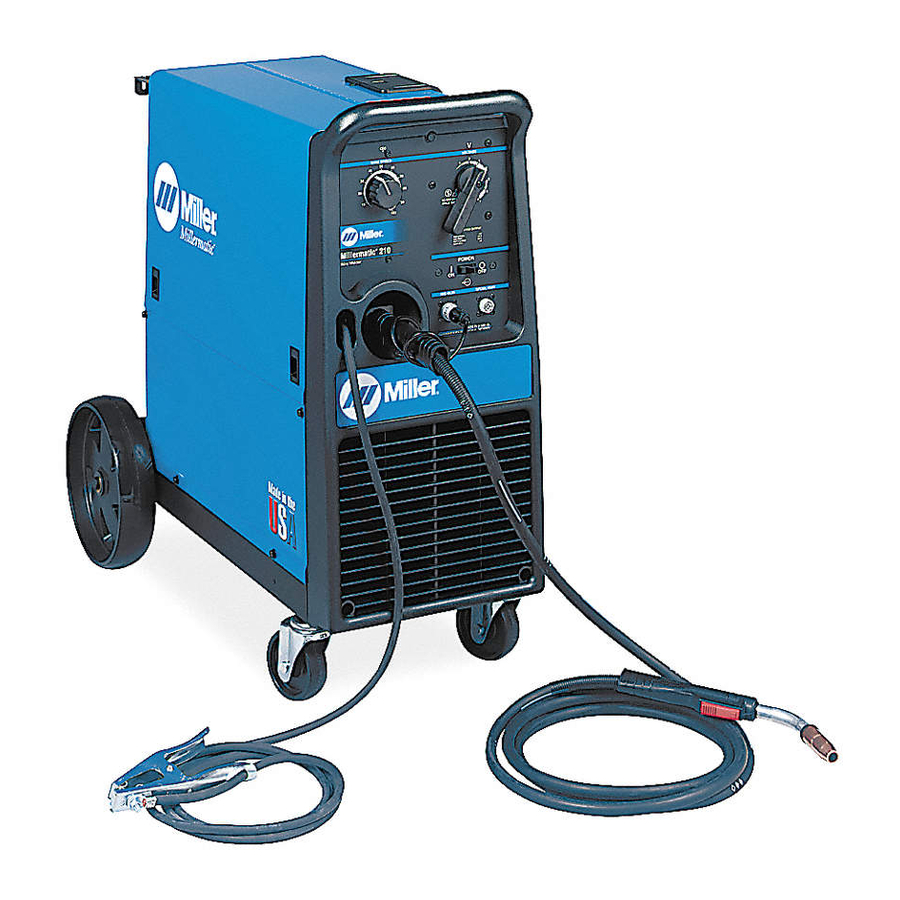
- Page 1 TM-1326B 2006−10 Eff. w/Serial Number LB170597 Processes MIG (GMAW) Welding Flux Cored (FCAW) Welding Description Arc Welding Power Source and Wire Feeder Millermatic 251 Visit our website at File: MIG (GMAW) www.MillerWelds.com...
-
Page 2: Table Of Contents
TABLE OF CONTENTS SECTION 1 − SAFETY PRECAUTIONS FOR SERVICING ......... . 1-1. -
Page 3: Section 1 − Safety Precautions For Servicing
D Do not place unit on, over, or near combustible D If using lift forks to move unit, be sure forks are surfaces. long enough to extend beyond opposite side of unit. D Do not service unit near flammables. Millermatic 251 TM-1326 Page 1... -
Page 4: California Proposition 65 Warnings
Pacemaker wearers consult your doctor before welding or going near To reduce magnetic fields in the workplace, use the following welding operations. If cleared by your doctor, then following the above procedures: procedures is recommended. TM-1326 Page 2 Millermatic 251... -
Page 5: Section 2 − Definitions
D: 39 in (991 mm) (0.6 − 1.2 mm) (0.6 − 1.2 mm) (0.8 − 1.2 mm) * While idling Operating Temperature Range − −20C to +40C Storage Temperature Range − -30C to + 50C Millermatic 251 TM-1326 Page 3... -
Page 6: Welding Power Source Duty Cycle And Overheating
The volt-ampere curves show the normal minimum and maximum voltage and amperage output capabilities of the welding power source. Curves of other settings fall between the curves shown. AMPERES ssb1.1 10/91 − 196 844 / S-0700 TM-1326 Page 4 Millermatic 251... -
Page 7: Connecting To Weld Output Terminals
Work Cable Boot Route cable through front panel opening. Slide boot onto work cable. Negative (−) Output Terminal Connect cable to terminal and cover connection with boot. Close door. Tools Needed: 3/4 in Ref. 802 474-E Millermatic 251 TM-1326 Page 5... -
Page 8: Connecting Spoolmatic) 15A Or 30A Gun
If the triggers of both welding guns are pulled at the same time, the weld output and wirefeed motor are disabled. Tools Needed: 3/4, 5/8 in 804 455-A TM-1326 Page 6 Millermatic 251... -
Page 9: Setting Gun Polarity For Wire Type
Flow Adjust Typical flow rate is 20 cfh (cubic feet per hour). Check wire manufacturer’s recommended flow rate. Rear Panel Tools Needed: 1-1/8, 5/8 in 802 028-A / Ref. 802 477-B Millermatic 251 TM-1326 Page 7... -
Page 10: Installing Wire Spool And Adjusting Hub Tension
Check label − only one is on unit. Input Voltage Jumper Links 230 VOLTS 460 VOLTS 575 VOLTS 200 VOLTS 230 VOLTS Move jumper links to match input voltage. Close and secure access door. 144 916-D 153 980-C Ref. 802 476-D TM-1326 Page 8 Millermatic 251... -
Page 11: Electrical Service Guide
Y Caution: Failure to follow these fuse and circuit breaker recommendations could create an electric shock or fire hazard. These recommendations are for a dedicated branch circuit that applies to the rated output and duty cycle of the welding power source. Millermatic 251 TM-1326 Page 9... -
Page 12: Selecting A Location And Connecting Input Power
Disconnect Device (switch shown in Section 20. Close and secure door on disconnect device. the OFF position) Rating Label Remove lockout/tagout device, and place Supply correct input power. Disconnect Device Grounding Terminal switch in the On position. TM-1326 Page 10 Millermatic 251... -
Page 13: Threading Welding Wire
Press gun trigger until wire Feed wire to check drive roll pressure. Cut off wire. Close comes out of gun. Reinstall Tighten knob enough to prevent slipping. and latch door. contact tip and nozzle Ref. 802 064-D / S-0627-A Millermatic 251 TM-1326 Page 11... -
Page 14: Using Gun/Cable Holder
3-14. Using Gun/Cable Holder Side Panel Latch Cable Holder Press latch down to release and open door. Holster (2) Wrap cable around cable holder, and place gun nozzle into holster. Ref. 802 726-A TM-1326 Page 12 Millermatic 251... - Page 15 Notes Millermatic 251 TM-1326 Page 13...
-
Page 16: Weld Parameters
3-15. Weld Parameters TM-1326 Page 14 Millermatic 251... - Page 17 201 202-A Millermatic 251 TM-1326 Page 15...
-
Page 18: Section 4 − Operation
To return to weld mode after the Run−in speed change, pull the trigger momentarily (one second). Power Switch Voltmeter Wire Feed Speed Meter Ref. 205 637 TM-1326 Page 16 Millermatic 251... -
Page 19: Voltmeter And Wire Feed Speed Meter Operation
Error Messages displays the last actual voltage for 5 See Section 6-1 for additional information seconds and then returns to preset voltage. Volt Meter Display (HL.P) on all HL.P codes. Millermatic 251 TM-1326 Page 17... -
Page 20: Section 5 − Theory Of Operation
(wider or narrower pulses meaning 24 VAC more or less voltage to motor) after comparing motor speed feedback voltage signal to selected voltage signal. Contactor W Circuit Wire Drive Pulse Width Breaker Motor PM Modulation TM-1326 Page 18 Millermatic 251... - Page 21 Senses weld current and changes Output Relay mode from start to weld. Terminal Meter Board Voltage Wire Speed Control R2 Control R3 Gun Trigger Receptacle AC Or DC Control Circuits 10-Pin φ Power Spool Gun Receptacle Weld Current Circuit Millermatic 251 TM-1326 Page 19...
- Page 22 B. Basic Training Circuit TM-1326 Page 20 Millermatic 251...
- Page 23 . This circuit is for training purposes only. It has been modified for that use and may not reflect the actual circuit for your unit. 211 408-C Millermatic 251 TM-1326 Page 21...
-
Page 24: Section 6 − Troubleshooting
SECTION 6 − TROUBLESHOOTING 6-1. Troubleshooting Table See Section 6-2 for test points and values and Section 9 for parts location. Use MILLER Testing Booklet (Part No. 150 853) when servicing this unit. Trouble Remedy Be sure line disconnect switch is On (see Section 3-12). - Page 25 Check coil voltage and connections of fan motor FM, and replace if necessary. Check coil voltage and connections of fan control relay CR1, Check continuity of coil and condition of contacts. Replace CR1 if necessary. Millermatic 251 TM-1326 Page 23...
-
Page 26: Troubleshooting Circuit Diagram For Welding Power Source
6-2. Troubleshooting Circuit Diagram For Welding Power Source See Section 6-3 For Waveform G1 See Section 6-4 For PC1 Data Fan Control Relay CR1 TM-1326 Page 24 Millermatic 251... - Page 27 10% unless specified Turn Off unit and disconnect input power before checking resistance All values for T1 are less than 1 ohm Less than 1 ohm Less than 1 ohm with contactor closed 226 707-A Millermatic 251 TM-1326 Page 25...
-
Page 28: Waveforms For Section 6-2
R2 At Minimum (Resistive Load) 5 ms 5 V 5 ms 5 V C. DC Open-Circuit Voltage, Voltage Control D. 19.9 Volts DC, 131 Amperes, Voltage Control R2 At Midrange R2 At Midrange (Resistive Load) TM-1326 Page 26 Millermatic 251... - Page 29 E. DC Open-Circuit Voltage, Voltage Control F. 29.4 Volts DC, Voltage Control R2 At R2 At Maximum Maximum (Resistive Load) 500 μs 2V G1. SCR Gate Pulses With Respect To Cathode At No Load Test Equipment Needed: Millermatic 251 TM-1326 Page 27...
-
Page 30: Main Control Board Pc1 Testing Information (Use With Section 6-5)
See Section 6-5 for specific values during testing. Main Control Board PC1 Receptacle RC5 Receptacle RC1 Receptacle RC8 Receptacle RC3 Receptacle RC7 Receptacle RC6 Factory use only Test Equipment Needed: 207 547 / 803 046 TM-1326 Page 28 Millermatic 251... -
Page 31: Main Control Board Pc1 Test Point Values
Drive motor positive +6 to 24 volts dc ±3 volts ac with respect to RC1-20 +35 volts dc to meter board Serial communication to meter board Serial communication to meter board Meter board common Not used Not used Millermatic 251 TM-1326 Page 29... - Page 32 Wire feed speed command input 0 to +5 volts dc Wire feed speed potentiometer common Voltage potentiometer common Voltage potentiometer reference +5 volts dc Wire feed speed potentiometer reference +5 volts dc Not used Not used TM-1326 Page 30 Millermatic 251...
-
Page 33: Pre-Operational Check
Clean weld output terminals. Tighten connections. Check labels; replace labels that are unreadable or damaged (see Parts List). Clean outside of entire unit. Tools Needed: Test Equipment Needed: 3/4 in 3/8 in 803 046 / Ref. 802 474-E Millermatic 251 TM-1326 Page 31... -
Page 34: Section 7 − Maintenance
Thermistor T in SCR1 protects the unit from damage due to overheating. If HL.P 002 is displayed on the meters, wait for unit to cool allowing fan motor to run before trying to weld. If unit is cool and no weld output continues, contact Factory Authorized Service Agent. TM-1326 Page 32 Millermatic 251... -
Page 35: Changing Drive Roll And Wire Inlet Guide
Incorrect Drive Roll Wire Guide Welding Wire Drive Gear Insert screwdriver, and turn screw in or out until drive roll groove lines up with wire guide. Close pressure roll assembly. Tools Needed: Ref. 800 412-A Millermatic 251 TM-1326 Page 33... -
Page 36: Removing Knob From Front Panel
Insert Allen wrench (or stiff piece of wire) into slot, and while depressing spring clip, slide knob off control shaft. To reinstall, push knob fully onto control shaft. Slide Depress Knob Spring Clip Ref. 803 346 / Ref. 803 863-B TM-1326 Page 34 Millermatic 251... -
Page 37: Section 8 − Electrical Diagrams
The following is a list of all diagrams for models covered by this manual. Model Serial Or Style Number Circuit Diagram Wiring Diagram LB170597 thru LC507658 204 321-E 200 527-C♦♦ Millermatic 251 LC507659 thru LF430260B 211 406-C 211 407-C LF430261B and following 226 707-A 226 709-A♦♦ ♦♦... - Page 38 Figure 8-1. Circuit Diagram For Millermatic 251 Eff w/LB170597 Thru LC507658 TM-1326 Page 36 Millermatic 251...
- Page 39 204 321−E Millermatic 251 TM-1326 Page 37...
- Page 40 Figure 8-2. Circuit Diagram For Millermatic 251 Eff w/LB170597 Thru LF430260B TM-1326 Page 38 Millermatic 251...
- Page 41 211 406−C Millermatic 251 TM-1326 Page 39...
- Page 42 Figure 8-3. Circuit Diagram For Millermatic 251 Eff w/LF430261B And Following TM-1326 Page 40 Millermatic 251...
- Page 43 226 707-A Millermatic 251 TM-1326 Page 41...
- Page 44 Figure 8-4. Circuit Diagram For Main Control Board PC1 Eff w/LC141473 Thru LE152375 TM-1326 Page 42 Millermatic 251...
- Page 45 Part 1 Of 2 207 548 Millermatic 251 TM-1326 Page 43...
- Page 46 Figure 8-5. Circuit Diagram For Main Control Board PC1 Eff w/LC141473 Thru LE152375 TM-1326 Page 44 Millermatic 251...
- Page 47 Part 2 Of 2 207 548 Millermatic 251 TM-1326 Page 45...
- Page 48 Figure 8-6. Circuit Diagram For Main Control Board PC1 Eff w/LE152376 And Following TM-1326 Page 46 Millermatic 251...
- Page 49 Part 1 Of 2 212 363-A Millermatic 251 TM-1326 Page 47...
- Page 50 Figure 8-7. Circuit Diagram For Main Control Board PC1 Eff w/LE152376 And Following TM-1326 Page 48 Millermatic 251...
- Page 51 Part 2 Of 2 212 363-A Millermatic 251 TM-1326 Page 49...
- Page 52 Figure 8-8. Circuit Diagram For Meter Board PC2 Eff w/LC324876 Thru LF390239B TM-1326 Page 50 Millermatic 251...
- Page 53 210 604 Figure 8-9. Circuit Diagram For Meter Board PC2 Eff w/LF390239B And Following Millermatic 251 TM-1326 Page 51...
- Page 54 PD4/T0 PD3/INT1 XTAL2 PD2/INT0 AREF PD1/TXD PD0/RXD AVCC PC5/ADC5 PB5/SCK PC4/ADC4 PB4/MISO PC3/ADC3 PB3/MOSI PC2/ADC2 SS_PB2/ PC1/ADC1 PB1/OC1 PC0/ADC0 PB0/ICP MPU1 +35V +35v Figure 8-10. Circuit Diagram For Meter Board PC2 Eff w/LF390239B And Following TM-1326 Page 52 Millermatic 251...
- Page 55 BI/RBO BI/RBO +35V FDBK VOUT ON/OFF 224 080-B Millermatic 251 TM-1326 Page 53...
- Page 56 Table 8-1. Lead List Summary For Millermatic Passport Models Eff w/LE300069 Table shows physical lead connections and should be used with circuit diagram (table replaces wiring diagram). Apply small amount of conductive electric compound (Part No. 603 978) to terminals where factory-applied compound had been present.
- Page 57 TM-1326B 2006−10 Eff. w/Serial Number LB170597 Processes MIG (GMAW) Welding Flux Cored (FCAW) Welding Description Arc Welding Power Source and Wire Feeder Millermatic 251 File: MIG (GMAW) Visit our website at www.MillerWelds.com...
-
Page 58: Section 9 − Parts List
SECTION 9 − PARTS LIST Hardware is common and not available unless listed. 803 008-C Figure 9-1. Main Assembly TM-1326 Page 56 Millermatic 251... - Page 59 +When ordering a component originally displaying a precautionary label, the label should also be ordered. ♦OPTIONAL To maintain the factory original performance of your equipment, use only Manufacturer’s Suggested Replacement Parts. Model and serial number required when ordering parts from your local distributor. Millermatic 251 TM-1326 Page 57...
- Page 60 Hardware is common and not available unless listed. 803007-E Figure 9-2. Baffle, Center w/Components TM-1326 Page 58 Millermatic 251...
- Page 61 +When ordering a component originally displaying a precautionary label, the label should also be ordered. To maintain the factory original performance of your equipment, use only Manufacturer’s Suggested Replacement Parts. Model and serial number required when ordering parts from your local distributor. Millermatic 251 TM-1326 Page 59...
- Page 62 Figure 9-3. Panel, Front w/Components (Prior to LC198564) To maintain the factory original performance of your equipment, use only Manufacturer’s Suggested Replacement Parts. Model and serial number required when ordering parts from your local distributor. TM-1326 Page 60 Millermatic 251...
- Page 63 Figure 9-4. Panel, Front w/Components (Eff w/LC198564 thru LG350555B) To maintain the factory original performance of your equipment, use only Manufacturer’s Suggested Replacement Parts. Model and serial number required when ordering parts from your local distributor. Millermatic 251 TM-1326 Page 61...
- Page 64 803 307-B Figure 9-5. Panel, Front w/Components (Eff w/LG350556B) To maintain the factory original performance of your equipment, use only Manufacturer’s Suggested Replacement Parts. Model and serial number required when ordering parts from your local distributor. TM-1326 Page 62 Millermatic 251...
- Page 65 Figure 9-6. Wire Drive And Gears (Prior to LF430261B) *Recommended Spare Parts. To maintain the factory original performance of your equipment, use only Manufacturer’s Suggested Replacement Parts. Model and serial number required when ordering parts from your local distributor. Millermatic 251 TM-1326 Page 63...
- Page 66 Figure 9-7. Wire Drive And Gears (Eff w/LF430261B) *Recommended Spare Parts. To maintain the factory original performance of your equipment, use only Manufacturer’s Suggested Replacement Parts. Model and serial number required when ordering parts from your local distributor. TM-1326 Page 64 Millermatic 251...
- Page 67 +When ordering a component originally displaying a precautionary label, the label should also be ordered. To maintain the factory original performance of your equipment, use only Manufacturer’s Suggested Replacement Parts. Model and serial number required when ordering parts from your local distributor. Millermatic 251 TM-1326 Page 65...
-
Page 68: Drive Roll And Wire Guide Kits
079 594 053 695 V-Grooved 056 192 .035 in. .035 in. 0.9 mm 079 595 053 700 V-Grooved 056 192 .045 in. .045 in. 1.2 mm 079 596 053 697 V-Grooved 056 193 Ref. S-0026-B/7-91 TM-1326 Page 66 Millermatic 251... - Page 69 Notes...
- Page 70 Notes...
- Page 71 Notes...
- Page 72 Appleton, WI 54914 USA International Headquarters−USA USA Phone: 920-735-4505 Auto-Attended USA & Canada FAX: 920-735-4134 International FAX: 920-735-4125 European Headquarters − United Kingdom Phone: 44 (0) 1204-593493 FAX: 44 (0) 1204-598066 © PRINTED IN USA 2006 Miller Electric Mfg. Co.
Need help?
Do you have a question about the Millermatic 251 and is the answer not in the manual?
Questions and answers