Leica RM2125RTS Manual
Rotary microtome
Hide thumbs
Also See for RM2125RTS:
- Instructions for use manual (68 pages) ,
- Standard operating procedure (11 pages)

Related Manuals for Leica RM2125RTS


Summary of Contents for Leica RM2125RTS
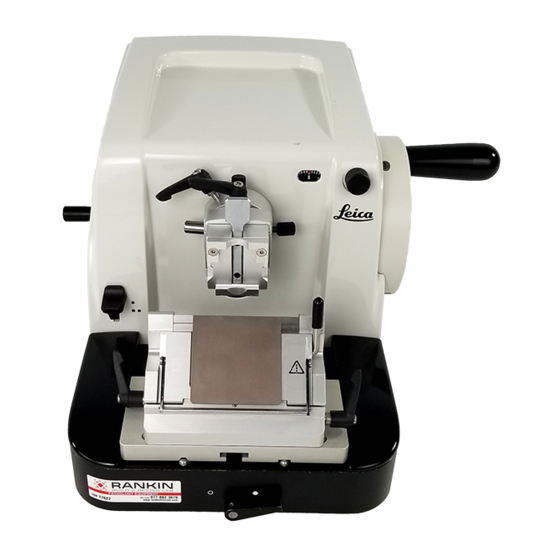
- Page 1 Leica RM2125 RTS Rotary Microtome Instructions for Use Leica RM2125 RTS V2.1, English - 10/2012 Order No. 14 0457 80101 RevB Always keep this manual with the instrument. Read carefully before working with the instrument.
- Page 3 Leica reserves the right to change technical opments, nor to provide our customers with specifications as well as manufacturing pro- additional copies, updates etc. of this manual.
-
Page 4: Table Of Contents
Table of Contents Important Information ..........................6 Symbols in the text and their meanings ..................6 Qualification of personnel ......................6 Intended use of instrument ......................6 Instrument type ..........................6 Safety ................................. 7 Safety Notes ..........................7 Warnings ............................7 Integrated safety devices...................... - Page 5 5.9.11 Overview – accessories ......................40 Cleaning and Maintenance ........................41 Cleaning the instrument......................41 Maintenance instructions ......................44 Optional accessories ..........................45 Troubleshooting ............................. 57 Possible faults ..........................57 Instrument malfunctions......................58 Warranty and Service ........................... 59 Leica RM2125 R TS...
-
Page 6: Important Information
Important Information Symbols in the text and their meanings Intended use of instrument The Leica RM2125 RTS is a manually operated Dangers, warnings and cautions rotary microtome for creating thin sections of appear in a gray box and are marked... -
Page 7: Safety
Use. safety in the operator‘s country. The protective devices located on the instrument and the accessories must not be removed or modified. Only service personnel qualified by Leica may repair the instrument and access the instrument's internal components. Warnings The safety devices installed in this instrument by the manufacturer only constitute the basis for accident prevention. - Page 8 Safety Warnings – Markings on the instrument itself • Safety notes on the instrument itself marked with a warning triangle indicate that the correct operating instructions (as defined in these instructions for use) must be followed when operat- ing or replacing the item marked. Failure to adhere to these instructions may result in an accident, personal injury, damage to the instrument or accessory equipment.
-
Page 9: Integrated Safety Devices
If the lever is pressed upwards, the hand- wheel cannot be moved any more. The two le- ver positions are marked by corresponding dots on the microtome base plate (Fig. Lever in position = handwheel locked Lever in position = handwheel released Leica RM2125 RTS... - Page 10 Safety Knife guard on the knife holder Each knife holder is equipped with a tightly mounted knife guard (3, 5). This makes it possible to cover completely the cutting edge in every knife or blade position. Lock the handwheel and cover the knife edge with the knife guard prior to any manipulation of knife or specimen, as well as prior to changing specimens and during all work breaks! Knife holder N...
-
Page 11: Instrument Components And Specifications
Coarse feed Window for wheel displaying the section thickness Select the running direction for the Knife holder N coarse feed wheel Lever for activating the mechanical trimming function Knife holder base, non-orientable Fig. 6 Leica RM2125 R TS... -
Page 12: Instrument Specifications
Instrument Components and Specifications Instrument specifications The Leica RM2125 RTS is a manually operated rotary microtome. • The specimen feed system and stroke mechanism are equipped with slack-free and maintenance-free cross roller bearings. They are housed in a polymer housing and protected against dust just like the coarse feed system. -
Page 13: Technical Data
8° Angle of rotation: ± 90° Trimming stages: 10 µm 50 µm Repositioning of knife holder base with lateral movement North-south: ± 25 mm East-west movement: ± 20 mm without lateral movement North-south: ± 25 mm Leica RM2125 R TS... -
Page 14: Startup
1 dust cover (104 R) .......................14 0212 04091 1 set of Instructions for Use RM2125RTS (+ language CD) ..........14 0457 80002 You will find this, as well as other accessories you may have ordered, packed in the top of the carton (see Fig. -
Page 15: Unpacking And Installation
The two sliding elements (8) located on the rear of the base plate make it easier to move the instrument on the table. • To move the instrument, hold it by the front of the base plate, lift it up gently and slide it Fig. 7 on the sliding elements. Leica RM2125 RTS... -
Page 16: Inserting The Specimen Clamp
Startup Inserting the specimen clamp There are two versions of the specimen holder fixture – with and without specimen orientation. Specimen orientation must be replaced only by service (see p. 50). The specimen orientation allows for simple po- sition correction of the specimen surface when the specimen is clamped into place. -
Page 17: Direct Mounting Of The Specimen Clamp On The Specimen Holder Fixture
(17) from the dovetail guide (Fig. 9.2). Again, use the Allen key No . 3. • Attach the specimen clamp (12) to the speci- men holder fixture as shown (Fig. 9.3) and fasten it using the two screws (17). Fig. 9 Leica RM2125 RTS... -
Page 18: Attaching The Knife Holder Base, Non-Orientable
Startup Attaching the knife holder base, non-orientable • Release the clamping lever (20) by rotating it counterclockwise. (Position = released) • Insert the universal knife holder base (21) using the notch (22) on the bottom into the T-piece (19) of the microtome base plate (23). • To secure the knife holder base, turn the clamping lever (20) clockwise. -
Page 19: Operation
The cutting edge is extremely sharp and can cause serious injuries! • Carefully insert knife or disposable blade into the knife holder and clamp. A detailed description for inserting the blade or knife into the individual knife holders is provided in Chapter "Operation" in 5.9.8, 5.9.9, 5.9.10. Leica RM2125 R TS... -
Page 20: Adjusting The Clearance Angle
Operation Adjusting the clearance angle • The index marks (0°, 5° and 10°) for adjust- ment of the clearance angle (27) are located on the right side of the knife holder (25). • There is also an index mark (28) on the right side of the knife holder base (21) which serves as a reference point when adjusting the clearance angle. -
Page 21: Specimen Retraction (Specimen Orientation)
There is a danger of the specimen and knife being damaged by a section that is too thick. The same applies to the "rocking mode", during which the specimen is trimmed by rocking motion (no complete rotation of the handwheel). Carry out "rocking mode" ONLY in the sectioning phase – NEVER in the retraction phase! Leica RM2125 RTS... -
Page 22: Orienting The Specimen (Only A Directional Specimen Holder Fixture)
Operation Orienting the specimen (only a directional specimen holder fixture) The specimen orientation allows for simple po- sition correction of the specimen surface when the specimen is clamped into place. • Run the specimen to the rear end position by turning the coarse feed wheel (see Fig. 6, page 11). -
Page 23: Cutting (Trimming) The Specimen
When the rear or front end position is reached, the coarse feed wheel will be difficult to rotate (if you continue turning it at this point anyway, the torque limitation will be exceeded – this is not a malfunction!). In the front end position, no more feed motion takes place. Leica RM2125 RTS... - Page 24 Operation Trimming the specimen with the coarse feed • Release the handwheel lock. To do so, pull the handle (1) of the handwheel out to the right and use the lever (2) to release the brake. Brake engaged Brake released • Bring the specimen closer to the knife by rotating the coarse feed wheel (37, Fig. 2) and trim it by simultaneously rotating the handwheel (15) until the desired specimen plane is reached.
- Page 25 Operation Trimming with the mechanical trimming function The Leica RM2125 RTS is equipped with a me- chanical trimming function that is activated via the trimming lever (35). The trimming lever has 3 click stops: 0 µm, 10 µm, and 50 µm.
-
Page 26: Sectioning
Operation Sectioning Always rotate the handwheel at a uniform speed. The rotation speed of the handwheel must be adapted to suit the hardness of the specimen. For harder specimens, use a slower speed. CAUTION: The handwheel continues turning if it has been rotated very quickly and then released –... -
Page 27: Accessories
When clamping cassettes, make sure that they are not clamped too tightly, since the cassette bodies can bend and result in sections that are too thick or thin, or the entire speci- men may fall out and become dam- aged. Leica RM2125 RTS... -
Page 28: Vee Insert (Optional)
Operation 5.9.2 Vee insert (optional) The vee insert (44) is mounted in the hole pro- vided in the lower movable jaw of the standard specimen clamp. This makes it possible to clamp round speci- mens in the standard specimen clamp. • Turn the knurled screw (40) counterclock- wise to move the lower movable jaw (14) downward. -
Page 29: Foil Clamp Type 1 (Optional)
(48) and the fixed jaw (47). • To clamp the specimen, press the movable jaw (48) against the fixed jaw (47) by screw- ing in the setscrew (52). • Insert the foil clamp in the standard speci- men clamp as shown. • Turn the knurled screw (40) clockwise until the foil clamp is clamped securely. Fig. 22 Leica RM2125 RTS... -
Page 30: Foil Clamp Type 2 (Optional)
Operation 5.9.4 Foil clamp Type 2 (optional) The foil clamp type 2 is appropriate for large foil ribbons. It is mounted in the standard specimen clamp. • To open the jaws (56) and (57), slightly loos- en the three screws (55) with an Allen key No. -
Page 31: Universal Cassette Clamp (Optional)
• Mount the cassette (61) horizontally or verti- cally as required. • To clamp the cassette, release the lever. Fig. 24 Leica / Surgipath cassettes with minimum dimensions of 39.8 x 28 mm and maximum dimen- sions of 40.9 x 28.8 mm may be clamped in the universal cassette clamp (UCC) horizontally as well as vertically. When using other – particularly thin-walled – cassettes, the cassette may become deformed or other problems may arise with the clamping system. -
Page 32: Round Specimen Holder (Optional)
Operation 5.9.6 Round specimen holder (optional) The holder for round specimens is designed to accommodate cylindrical specimens. Inserts for specimens of 6, 15 and 25 mm diameter are available. • To mount the required insert (62, 63, 64) turn the clamping ring (66) counterclockwise and remove it. • Place the required insert into the tension ring (66) and screw the tension ring onto the thread (69) by turning it clockwise. -
Page 33: Knife Holder Base
• To release the clamp, fold the clamping le- ver (39, Fig. 26) on the left of the knife holder base forward. • Move the knife holder base with knife holder laterally. Fig. 27 • To clamp, fold the lever (39) back. Leica RM2125 RTS... -
Page 34: Knife Holder N/Nz
Operation 5.9.8 Knife holder N/NZ The knife holders N and NZ are appropriate for standard steel and tungsten carbide knives, profile c and d, up to 16 cm long. The integrated height adjustment feature allows you to also use knives that have been resharpened numerous times. Mounting the knife support bar • Push knife guard (8) to the center. • Set the knife support bar (46) onto the height adjustment screws (not visible) in the position shown. - Page 35 • Loosen the clamping screws (49) by turning them counterclockwise. • Push the knife (47) to the left or right as required. • To clamp the knife (47), always tighten the clamping screw (49) first which is located on the side to which the knife has been repositioned by turning it clockwise. Leica RM2125 RTS...
-
Page 36: Knife Holder E/E-Tc
Operation 5.9.9 Knife holder E/E-TC Prior to inserting the blade, both knife The knife holder E-TC is designed holder and knife holder base must for the Leica TC-65 tungsten carbide have been installed on the instrument! blades. Inserting the blade, knife holder E and E-TC • Fold knife guard (9) downward. -
Page 37: Knife Holder E
• Remove pressure plate (80). • Fasten the new pressure plate using the 4 screws (82). When doing so, tighten the screws only far enough that the height and parallelism of the pressure plate can then be Fig. 31 adjusted. Leica RM2125 RTS... - Page 38 Operation Adjusting the rear pressure plate After each uninstallation or replacement, make sure the pressure plate sits correctly. If necessary, readjust it. The rear pressure plate (80) rests on two stud screws (83, Fig. 31), which enable height and parallel adjustment. They can be accessed through bores on the bottom of the knife holder.
- Page 39 A gap must be visible (Fig. 33/). A small screwdriver (approx. 3.0 x 70) is required to make the adjustment. • When making the adjustment, make sure that the distance between both pressure plates is approx. 0.4-0.8 mm when open (Fig. 33/). Leica RM2125 RTS...
-
Page 40: Overview - Accessories
Round specimen holder Knife holder N for steel and carbide metal knives Pressure plate, Knife holder base, interchangeable Leica RM2125 RTS non-orientable Basic instrument Knife holder E for blades Knife holder base with lateral movement Fig. 34 Instructions for Use, V 2.1 – 10/2012... -
Page 41: Cleaning And Maintenance
• Remove the specimen from the specimen clamp. • Remove section waste with a dry brush. • Remove specimen clamp and clean separately. Instrument and outside surfaces If necessary, the varnished outside surfaces can be cleaned with a mild commercial household cleaner or soap water and then be dried with a moist cloth. Leica RM2125 R TS... - Page 42 Cleaning and Maintenance Take the knife holder apart for cleaning. The Knife holder E front pressure plate can be removed for clean- ing. To do so, proceed as follows: • Fold knife guard (5) downward. • Rotate the blade clamping lever (89) down- ward. • Carefully remove the blade and dispose of it properly. • Pull out the clamping lever (89) sideways. • Remove pressure plate (86).
- Page 43 65 °C, until the liquid wax escapes. There is a burn hazard when removing the parts from the drying chamber (65 °C). Wearing safety gloves is recommended! Fig. 36 • Remove paraffin residues with a dry cloth. • After such a cleaning procedure in an oven, always be sure to lubricate the axle and spring of the clamping lever (60) (see also Chapter 6.2). Leica RM2125 RTS...
-
Page 44: Maintenance Instructions
• Have the instrument checked at least once a year by a qualified service technician autho- rized by Leica. • At the end of the warranty period, enter into a service contract. For more information, please contact your local Leica technical service center. • Clean the instrument every day. • Once a month, lubricate the following parts with the included oil No. 405 (1-2 drops are... -
Page 45: Optional Accessories
Disposable blades – high-profile, 1 pack of 50 ................ 14 0358 38926 Disposable blades – high-profile, 10 packs of 50 ..............14 0358 38383 Disposable blades Leica TC-65....................14 0216 26379 Knife 16 cm - profile c - steel ....................... 14 0216 07100 Knife 12 cm - profile c - steel ....................... - Page 46 Optional accessories Knife holder base, non-orientable Silver for knife holders N, NZ, E, and E-TC Order No..........14 0502 37962 Fig. 38 Knife holder base, can be moved laterally for RM2125 RTS, silver for knife holders N, NZ, E, and E-TC, incl.
- Page 47 - 1 Allen key with pin, No. 4.0 ............14 0222 33111 - 1 Allen key with handle, No. 2.0 ............14 0194 04790 - 1 screwdriver 3 x 50 ............14 0170 11568 Fig. 42 Order No..........14 0502 37995 Leica RM2125 RTS...
- Page 48 Optional accessories Knife holder E, for high-profile microtome blades (80 x 14 x 0.317 mm), RM2125 RTS, silver, quick clamp system clear- ance angle adjustment, movable knife guard Enclosed toolset: - Allen key with pin, No. 4.0 .............. 14 0222 33111 - Allen key with handle, No.
- Page 49 10 packages of 50 pcs......14 0358 38382 Fig. 47 Disposable blades – high-profile (818) (80 x 14 x 0.317 mm) 01 package of 50 pcs......14 0358 38926 10 packages of 50 pcs......14 0358 38383 Fig. 48 Leica RM2125 RTS...
- Page 50 Disposable blades Leica TC-65 Leica TC-65 microtome, disposable blade system for sectioning hard specimen mate- rials. The Leica TC-65 carbide metal dispos- able blades were specially developed for the requirements in labs where hard, blunt materi- als are routinely sectioned. The one-of-a-kind fine-grain carbide metal guarantees sections to approx.
- Page 51 Order No..........14 0216 04206 Knife case Variable knife case (plastic), for 1 or 2 knives: 10 - 16 cm long (Carbide metal or SM2500 knife: only for 1 knife!) Order No..........14 0213 11140 Fig. 53 Leica RM2125 RTS...
- Page 52 Optional accessories Specimen holder fixture, non-orientable RM2125 RTS, silver To modify your microtome with these accessories, please contact your Leica representative or the Tech- nical Service department of Leica Biosystems Nussloch GmbH. Order No..........14 0457 46996 Fig. 54...
- Page 53 Maximum specimen size: 25 x 13 mm Order No..........14 0402 09307 Fig. 58 Foil clamp Type II for standard specimen clamp, black Order No..........14 0402 26922 Fig. 59 Leica RM2125 RTS...
- Page 54 Optional accessories Round specimen holder with adapter, without clamping rings, silver Order No..........14 0502 38001 Fig. 60 Round specimen holder with adapter, with 3 clamping rings, silver Order No..........14 0502 38002 Fig. 61 Clamping ring for round specimen holder 6 mm diameter Order No.
- Page 55 15 mm diameter Order No..........14 0356 09200 Fig. 63 Clamping ring, for round specimen holder 25 mm diameter Order No..........14 0356 08320 Fig. 64 Section waste tray Order No..........14 0402 13128 Fig. 65 Leica RM2125 RTS...
- Page 56 Optional accessories Dust cover Order No..........14 0212 30350 Fig. 66 Safety gloves, cut-resistant, size S Order No..........14 0340 40859 cut-resistant, size M Order No..........14 0340 29011 Fig. 67 Instructions for Use, V 2.1 – 10/2012...
-
Page 57: Troubleshooting
Technical Service inspect and reconfigure the universal cassette clamp. • When using cassettes, particularly thin-walled cassettes, from a com- pany other than Leica or Surgipath, the cassette may become deformed or other clamping problems may arise. If while trying to clamp the cassette... -
Page 58: Instrument Malfunctions
Troubleshooting Problem Possible cause Corrective action • Laterally displace the knife • The blade is dull. holder or insert a new blade. • The pressure plate is damaged • Insert a new pressure plate or use a new knife holder. or incorrectly adjusted. • Clearance angle of the knife/ • Methodically experiment with larger clearance angle settings blade too small. until you have found the opti- mum angle. -
Page 59: Warranty And Service
The scope of the warranty is based on the content of the concluded agreement. The warranty terms of your Leica sales organization or the or- ganization from which you have purchased the contractual product shall apply exclusively. - Page 60 Notes Instructions for Use, V 2.1 – 10/2012...
Need help?
Do you have a question about the RM2125RTS and is the answer not in the manual?
Questions and answers