
Related Manuals for Leica RM2255


Summary of Contents for Leica RM2255
- Page 1 Instructions for Use Leica RM2255 Rotary Microtome Instructions for Use Leica RM2255 V 2.2, English 09/2016 Order No. 14 0502 80101 RevI Always keep this manual with the instrument. Read carefully before working with the instrument.
- Page 3 Leica reserves the right to change technical following thorough investigation in this field. specifications as well as manufacturing process- We are under no obligation to update the present es without prior notice.
-
Page 4: Table Of Contents
Table of Contents Important Information ............................4 Symbols in the text and their meanings ....................4 Qualification of personnel ........................... 5 Intended use of instrument ......................... 5 Instrument type ............................. 5 Safety .................................. 6 Safety notes ..............................6 Warnings ............................... 6 Integrated safety devices ........................... - Page 5 Cleaning and Maintenance .......................... 71 Cleaning the instrument ..........................71 Maintenance ............................... 73 8.2.1 Replacing fuses ............................73 8.2.2 Maintenance instructions ......................... 74 8.2.3 Lubricating the instrument ........................75 Warranty and Service ............................ 76 Decontamination Certificate ........................77 Leica RM2255...
-
Page 6: Important Information
Important Information Symbols in the text and their meanings Symbol for labeling electrical and elec- tronic equipment in accordance with Section 7 of the German Electrical and Warnings Electronic Equipment Act (ElektroG). appear in a gray box and are marked by ElektroG is the law on the bringing into a warning triangle circulation, return and environmentally... -
Page 7: Qualification Of Personnel
Indicates the item can be recycled where correct facilities exist. Qualification of personnel • The Leica RM2255 may be operated by trained laboratory personnel only. • All laboratory personnel designated to operate the Leica instrument must read these Instruc- Fig. -
Page 8: Safety
The protective devices located on the instrument and the accessories must not be removed or modified. Only service personnel qualified by Leica may repair the instrument and access the instrument's internal components. Warnings The safety devices installed in this instrument by the manufacturer only constitute the basis for accident prevention. - Page 9 • The protective devices located on the instrument/accessories must not be removed or modi- fied. Personal safety precautions • When working with microtomes, personal safety precautions must always be taken. It is mandatory to wear work safety shoes, safety gloves, a mask and safety goggles. Leica RM2255...
- Page 10 Safety Safety instructions – working with the instrument • Take care when handling microtome knives and disposable blades. The cutting edge is extremely sharp and can cause serious injuries! • Always remove the knife / blade before detaching the knife holder from the instrument. Always put the knives back into the knife case when not in use! •...
-
Page 11: Integrated Safety Devices
The lever (3) must be pulled completely forward with force so that the handwheel brake is applied. The handwheel is securely locked only when the lever (5) is in the 12 o'clock position. Leica RM2255... - Page 12 Safety Centering the handle For safety reasons, the handle of the handwheel must always be centered while in motorized sectioning mode. • Activate the handwheel lock. • To center the handwheel, lightly pull the han- dle (6) outwards and swivel it into the center of the handwheel (12) (Fig.
-
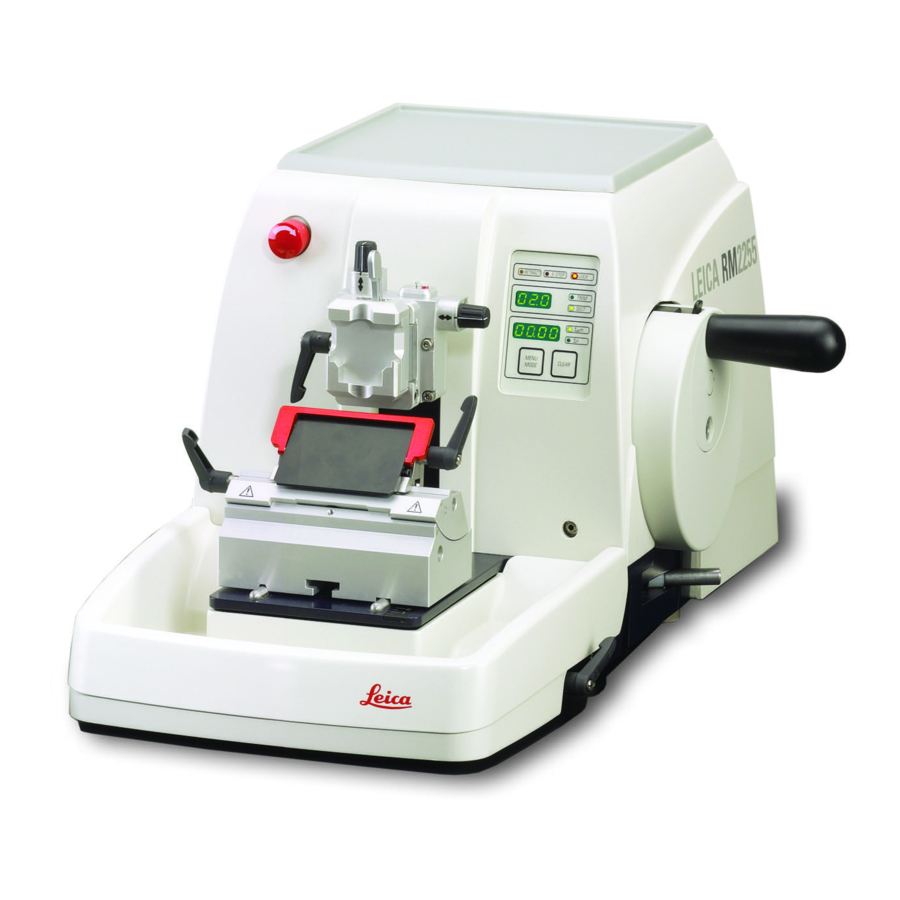
Page 13: Instrument Components And Specifications
Instrument Components and Specifications Overview – instrument components Leica RM2255 Standard clamp Instrument control panel Handwheel locking Knife holder NZ mechanism Smooth-turning Handwheel Lever for Knife holder base activating the Handwheel brake Socket for backlighting Clamping lever of knife holder base... -
Page 14: Instrument Specifications
Power supply Connecting jack for foot switch Fig. 8 Instrument specifications The Leica RM2255 is a motorized rotary micro- • The specimen retraction can be turned off. tome. In manual operation the retraction can be adjusted. In motorized operation the retrac- •... -
Page 15: Technical Data
Working height (knife blade): 168 mm (measured from the table) Weight (without accessories): approx. 37 kg Control panel Width: 121 mm Depth: 166 mm Height: 50 mm Height (in inclined position): 81 mm Weight (net): approx. 0.660 kg Leica RM2255... - Page 16 Instrument components and specifications Microtome Sectioning thickness setting: Section thickness setting range: 0.50 - 100 µm in 0.5 µm increments Setting values: from 0.50 - 5.0 µm in 1.0 µm increments from 5.0 - 20.0 µm in 5.0 µm increments from 20.0 - 60.0 µm in 10.0 µm increments from 60.0 - 100.0 µm...
-
Page 17: Instrument Setup
The accessories are included at the top of the package (item 2, Fig. Check the delivery carefully against the packing list, delivery note and your order. Should you find any discrepancies, please contact your Leica sales office without delay. Leica RM2255... -
Page 18: Unpacking And Installation
Instrument Setup Unpacking and installation When the instrument is delivered, check the tilt indicators on the packaging. If the arrowhead is blue, the shipment was transported laying flat, was tilted at too great an angle or fell over during transport. Note this on the shipping documents and check the shipment for pos- sible damage. - Page 19 • To move the instrument, hold it by the front of the base plate, lift it up gently and slide it on its slides. Observe the correct resting angle to the table to avoid pinching your fingers. Fig. 10a Leica RM2255...
-
Page 20: Assembling The Handwheel
Checking the voltage Before connecting the instrument to the The Leica RM2255 can be connected to various power supply, be absolutely certain to electrical power grids (depending on voltage and check that the voltage selector is set to... - Page 21 After transporting, please wait at least 2 hours to allow the instrument to adopt the ambient temperature before turning it on! Failure to comply with this may cause damage to the instrument. Leica RM2255...
- Page 22 Instrument Setup Connecting the dummy plug • Insert the dummy plug provided (18) into the connecting jack (19) on the rear of the instru- ment and fasten it by tightening the screws (20). Connecting the foot switch (optional accessory) • If a foot switch is to be used with the instru- ment, attach it in the same way as the dummy plug.
-
Page 23: Operation
CLEAR button Resets the display (section counter or section thickness sum) back (to 0). MENU MODE + CLEAR pressed simultaneously switches to the setting of Fig. 14 the retraction value. Leica RM2255... -
Page 24: Control Panel
Operation 5.1.2 Control panel Buttons Three-digit display for for setting the sec- section thickness/ tion thickness/ trimming section trimming section thickness thickness Green LED Lights up when trim- ming mode is activated. Green LED Lights up when section- ing mode is activated. Rotary knob for setting the section- CUT MODE button... -
Page 25: Switching On The Instrument
If the yellow LED in the M-STOP field (4) of the control panel is lit, the me- chanical handwheel lock or the handwheel brake (Item 3 in Fig. 3) is acti- vated. The instrument cannot be used as long as the LED is lit. Leica RM2255... -
Page 26: Display And Control Elements
Operation Display and control elements Three-digit display This display is located both on the instrument and on the control panel. If the SECT LED is lit up, the display shows the section thickness setting in µm. If the TRIM LED is lit up, the display shows the trimming section thickness setting in µm. - Page 27 (ensure that version number 2.1 was displayed). This feature is only available in sectioning mode in version 2.1 or higher. For software versions older than 2.1, contact Leica Techni- cal Service. Multiple...
- Page 28 Operation Forward coarse feed • Press the button to start the slow backwards movement. The travel contin- ues as long as the button is held depressed. • Press the appropriate button to start a rapid or slow forward movement. The travel continues as long as the button is held depressed.
- Page 29 "OFF". • To exit the retraction settings, press MENU MODE. When retraction is switched off, the specimen is not retracted. The yellow LED (4) of the RETRACT indicator does not light up. Leica RM2255...
- Page 30 Operation Setting the sectioning speed • The sectioning speed can be set continuously (in the range of 0 - 420 mm/s) using the rotary knob. The speed selector has a scale graduation from 1 to 10. The graduation is provided for reference purposes and does not indicate a particular speed. The set sectioning speed is only active within the boundaries of the sectioning area.
- Page 31 • To stop motorized sectioning, press RUN/STOP or ENABLE. If both the green and the yellow LEDs in the RUN/STOP button are lit up, the cutting motor is still running; however it will stop in the next upper end position of the vertical stroke. Leica RM2255...
- Page 32 Operation Motorized sectioning In motorized operation, you can choose between three operating modes: CONT = continuous stroke SINGLE = single stroke STEP = step stroke. CONT (continuous stroke) operating mode • Select CONT operating mode. After beginning the sectioning process, sectioning continues until the pro- cess is stopped by pressing RUN/STOP or ENABLE.
- Page 33 • You can continue to work on the specimen by moving it back a short distance using the coarse feed buttons (set trimming mode!). • The STEP function is disabled in the remaining feed range. Leica RM2255...
- Page 34 Operation Foot switch (optional accessory) The foot switch can be used to control the motorized sectioning process. It also has a function that is similar to the emergency stop function. Caution! In addition to the foot switch, all control panel functions and all but- tons on the instrument continue to be active.
- Page 35 (50 x 55 mm) is used, the speci- during turning. men orientation of ± 8° in north-south • To lock the current orientation, turn the direction is no longer possible. eccentric lever (29) backwards. The usable angle is only about ± 4° in this case. Leica RM2255...
- Page 36 Operation Fine adjustment of the force balance If another accessory of a different weight is mounted on the specimen head (33), you must check whether it is necessary to readjust the force balance. Checking the correct setting: • Attach the new accessory and clamp the specimen.
-
Page 37: Inserting The Knife Holder
(71) until the knife holder (57) can be moved. • Place the knife holder (57) with the underside groove onto the T-piece (56) of the knife holder base (51). • To clamp, retighten the screw (58). Fig. 24 Leica RM2255... -
Page 38: Inserting The Universal Cassette Clamp
Operation Inserting the universal cassette clamp There are two versions of the specimen holder fixture, one with and one without specimen ori- entation, which are interchangeable. The specimen orientation allows for simple posi- tion correction of the specimen surface when the specimen is clamped into place. -
Page 39: Adjusting The Clearance Angle
5°. The recommended clearance angle setting for knife holder E ranges from a minimum of 2.5° to 5°. 59.1 59.2 • Hold down the knife holder in this position and retighten the screw (58) for clamping. Fig. 26 Leica RM2255... -
Page 40: Clamping The Specimen
Operation Clamping the specimen Always clamp the specimen block BEFORE clamping the knife or the blade. Lock the handwheel and cover the knife edge with the knife guard prior to any manipulation of knife or specimen, prior to changing the specimen block and during all work breaks! •... - Page 41 (9) downward. Guide the brush with magnet to the blade and lift it upwards and out. Once the blade has been removed from the blade holder, it is disposed of into the dispenser con- tainer (underside, see image). Fig. 28 Leica RM2255...
-
Page 42: Trimming The Specimen
Operation Trimming the specimen 5.9.1 Trimming in manual operation • Use the TRIM/SECT key to select the trim mode. • Set the desired trim section thickness. • Deactivate the handwheel lock and release the brake. • In TRIM mode, use the coarse feed buttons to move the specimen against the knife/blade. -
Page 43: Sectioning
• Cover the sectioning edge with the knife guard. • Remove the specimen from the specimen clamp and mount a new sam- ple to continue. • Before cutting into a new specimen, move the specimen head back to the rear end position. Leica RM2255... -
Page 44: Optional Accessories
Optional Accessories Assembly for fixture for specimen clamps Depending upon the purchase order, the basic instrument is delivered with the directional or rigid fixture for specimen clamps which must be assembled first. All specimen clamps avail- able as accessories can be used in both fixtures for specimen clamps. Before assembling the fixture for specimen clamps, activate the mechanical handwheel lock! 6.1.1 Rigid fixture for specimen clamps •... -
Page 45: Fine-Directional Fixture For Specimen Clamps
Allen key No. 3 onto the specimen head. If the fine-directional fixture for speci- men clamps is not used, retain the base- plate and 4 screws (11) together with the fine-directional fixture for specimen clamps! Fig. 31 Leica RM2255... -
Page 46: Quick Clamping System
Optional Accessories 6.1.4 Quick clamping system It is used as specimen holder for use with the fine-directional fixture for specimen clamps with zero point indicators or the directional fixture for specimen clamps. • Screw the 4 screws (13) into bore A with an Allen key size 2.5 and tighten them. -
Page 47: Specimen Clamps And Holders
When clamping cassettes, make sure that they are not clamped too tightly, since the cassette bodies can bend and result in sections that are too thick or thin, or the entire specimen may fall out and become damaged. Leica RM2255... -
Page 48: Vee Insert
Optional Accessories 6.2.2 Vee insert The vee insert (70) is mounted in the hole pro- vided in the lower movable jaw of the standard specimen clamp. This makes it possible to clamp round specimens in the standard specimen clamp. • Turn the knurled screw (66) counterclockwise to move the movable jaw (68) downward. -
Page 49: Foil Clamp Type 1
(74) by turning the setscrew (77) against the fixed jaw (73). • Insert the foil clamp in the standard specimen clamp as shown. • Turn the knurled screw (66) clockwise to clamp the foil clamp in the standard specimen clamp. Fig. 36 Leica RM2255... -
Page 50: Universal Cassette Clamp
• To clamp the cassette, release the lever (60). Fig. 37 Leica / Surgipath cassettes with minimum dimensions of 39.8 x 28 mm and maximum dimensions of 40.9 x 28.8 mm may be clamped in the universal cassette clamp (UCC) horizontally as well as vertically. -
Page 51: Holder For Round Specimens
You can now rotate the specimen so that the side you want faces upwards. • To lock it in the position you have chosen, tighten the pin (92) by turning it clockwise. Fig. 38 Leica RM2255... -
Page 52: Super Mega-Cassette Clamp
Optional Accessories 6.2.6 Super mega-cassette clamp Fig. 39 Assembly of the super mega-cassette clamp The super mega cassette clamp should preferably be used with the rigid fixture for specimen clamps. To do so, proceed as follows: Remove the rubber ring (5) only after having attached the cassette clamp on the object head! •... -
Page 53: Knife Holder Base And Knife Holder
• Reposition the knife holder together with the knife holder base forward or backward as appropriate. • Secure the clamping mechanism by rotating the lever (50) clockwise. Fig. 41 Leica RM2255... -
Page 54: Knife Holder E/E-Tc
Optional Accessories 6.3.2 Knife holder E/E-TC The knife holder E-TC is designed Prior to inserting the blade, both knife for the Leica TC-65 tungsten carbide holder and knife holder base must have blades. been installed on the instrument! Inserting the blade, knife holder E and E-TC Knife holder E-TC •... - Page 55 Leica Biosystems offers special prices for new clamp mounts in case of damages to the clamp mount after the warranty has expired.
- Page 56 Optional Accessories Knife holder E with a water trough for low-profile blade The knife holder E with a water trough is for low- profile blades. The knife guard on knife holder E consists of a red foldaway handle (9). To cover the cutting edge, fold the knife guard handle (9) upwards as illustrated in the figure.
-
Page 57: Knife Holder N/Nz
For holding conventional and carbide metal knives up to 16 cm in length. Knife holder N Knife pressure plate (56) for extreme For holding conventional stability and full utilization of the knife knives up to 16 cm in blade. length. Fig. 47 Leica RM2255... - Page 58 Optional Accessories Inserting the knife • Rotate the knurled nuts (48) on the right and left of the knife holder for- ward in opposite directions, lowering the knife support bar to the lowest possible position, thus ensuring that the knife edge will not be damaged when inserting the knife.
-
Page 59: Blades/Knives
Knife 16 cm - profile c - steel Knife, 16 cm long, profile c (ground on both sides, for paraffin and frozen sections) Note: Knife case 14 0213 11140 included Order No..........14 0216 07100 Profile Fig. 50 Leica RM2255... - Page 60 Optional Accessories Knife 16 cm, profile d - steel Knife, 16 cm long, profile d Note: Knife case 14 0213 11140 included Order No..........14 0216 07132 Fig. 51 Knife, 16 cm, profile d, tungsten carbide Knife, 16 cm long, tungsten carbide, profile d Note: Knife case 14 0213 11140 included Order No.
-
Page 61: Section Waste Tray
• Connect the plug (4) of the backlighting to the socket (5) on the microtome. The backlighting illuminates once the microtome is turned on with the power switch. Fig. 55 NEVER use the backlighting illumination with the super mega-cassette clamp! Leica RM2255... -
Page 62: Tray
Optional Accessories Tray The tray is mounted on the hood of the micro- tome so that the small feet on the underside fit into the cutouts on the hood. It is for storage of the utensils used during sec- tioning as well as the sectioned specimens. Fig. -
Page 63: Universal Microscope Carrier
• Select the large (5) or small (4) support plate, depending on the microtome to be used. • Attach the support plate to the baseplate with the included 4 countersunk screws (7) using the Allen key No. 3 (6). Fig. 60 Leica RM2255... - Page 64 Optional Accessories 2. Attach vertical column • Insert the cap screw (b) into the hole of the baseplate from below. Place the lock washer (c) on the cap screw from above. • Thread the silver vertical column (2) onto the baseplate from above and tighten with the Fig.
-
Page 65: Magnifying Lens
Optional Accessories 6.10 Magnifying lens The magnifying lens provides a 2x mag- nification and can be used with all Leica 2200 series rotary microtomes. • Open the screw (3) on the horizontal arm of the microscope carrier in a counterclockwise direction. -
Page 66: Cold Light Source
• Remove the protective caps (8) and align the light guide with the specimen. Fig. 68 Fig 70, Leica rotary microtome with installed optional Fig. 69 accessories: Magnifier and fiber-optic light guide Instructions for Use, V 2.2 RevI – 09/2016... -
Page 67: Ordering Information
Foil clamp - type 1, black ....................14 0402 09307 Round specimen holder, 3 clamping rings, silver ............14 0502 38002 EM specimen holder fixture, black .................. 14 0502 29968 EM univ. specimen holder ....................14 0356 10868 EM flat specimen holder ....................14 0355 10405 Leica RM2255... - Page 68 Universal microscope carrier, complete ............... 14 0502 40580 Magnifying lens assembly ....................14 0502 42790 Cold light sources Leica CLS 100X, 100-120 V/50-60 Hz ................14 0502 30214 Leica CLS 100X, 230 V/50-60 Hz ................14 0502 30215 Leica CLS 100X, 240 V/50-60 Hz ................
-
Page 69: Troubleshooting
The following is a list of the most common problems which can arise while working with the instrument, along with possible causes and troubleshooting procedures. If the malfunction cannot be remedied with any of the options listed in the table, or the problem occurs repeatedly, inform Leica Service Support immediately. Problem Possible cause Corrective action 1. - Page 70 • HOME and STOP are lit up 1. The end position detection is 1. Contact Leica after-sales ser- simultaneously. defective. vice. Instructions for Use, V 2.2 RevI – 09/2016...
-
Page 71: Possible Faults
• When using cassettes, par- ticularly thin-walled cassettes, from a company other than Leica or Surgipath, the cassette may become deformed or other clamping problems may arise. If while trying to clamp the cas- sette you realize that it is not... - Page 72 Troubleshooting Problem Possible cause Corrective action • The blade is dull. • Laterally displace the knife holder or insert a new blade. • Insert a new pressure plate or • The pressure plate is damaged use a new knife holder. or incorrectly adjusted.
-
Page 73: Cleaning And Maintenance
The instrument must be completely dry before it can be used again. Cleaning the knife Always wipe the knife from the back of the knife to the cutting edge. NEVER wipe in the oppo- site direction - risk of injury! Clean using an alcohol-based solution or acetone. Leica RM2255... - Page 74 Cleaning and Maintenance Knife holder E Take the knife holder apart for cleaning. To do so, proceed as follows: • Fold the knife guard (9) and ejector (84) downward. • Rotate the clamping lever (11) of the lateral dis- placement forwards and pull it out sideways. •...
-
Page 75: Maintenance
(24) in the hous- ing. • Replace defective fuses and reinstall the volt- age selector into the instrument. Fig. 75 • Check that the correct voltage value is dis- played in the viewing window (22). Leica RM2255... -
Page 76: Maintenance Instructions
The instrument is basically maintenance-free. To ensure trouble-free operation of the instru- ment over a long period of time, the following is recommended by Leica: 1. Thoroughly clean the instrument on a daily 3. Have the instrument inspected on a regular basis. -
Page 77: Lubricating The Instrument
• Clamping lever (10) for the blade. Knife holders N and NZ: Knife holder NZ • Sliding surfaces of the finger guard (8). • Knurled nuts (73) for measuring height adjust- ment. Knife holder N Fig. 76 Leica RM2255... -
Page 78: Warranty And Service
Leica Biosystems Nussloch GmbH guarantees that the contractual product delivered has been subjected to a comprehensive quality control proce- dure based on the Leica in-house testing standards, and that the product is faultless and complies with all technical specifications and/or agreed characteristics warranted. -
Page 79: Decontamination Certificate
Dear Customer, Any product that is to be returned to Leica Biosystems or serviced on site, must be cleaned and decontaminated in the appropriate manner. Since it is not possible to decontaminate for prion diseases, such as CJD, BSE, CWD etc., equipment exposed to specimens containing prion diseases cannot be returned to Leica Biosystems for repair. - Page 80 Such equipment must not be returned without the written agreement of Leica Biosystems. Decontamination Certificate The equipment has been prepared to ensure safe handling/transportation. Whenever possible, please use the original transportation case/box. Important - to avoid refusal of shipment: Place one copy in the unit prior to packaging, or hand it over to the service engineer. Customer assumes all responsibility for the immediate return shipment of articles sent to Leica without proper decontamination documentation.
- Page 82 Leica Biosystems Nussloch GmbH Heidelberger Straße 17-19 D- 69226 Nussloch Phone: +49 - (0) 62 24 - 143 0 Fax: +49 - (0) 62 24 - 143 268 Web: www.LeicaBiosystems.com...
Need help?
Do you have a question about the RM2255 and is the answer not in the manual?
Questions and answers