Table of Contents
Advertisement
Quick Links
Advertisement
Table of Contents

Related Manuals for Alecto IVM-200


Summary of Contents for Alecto IVM-200
- Page 1 USER MANUAL SMART BABYCAMERA IVM-200...
-
Page 3: Product Overview
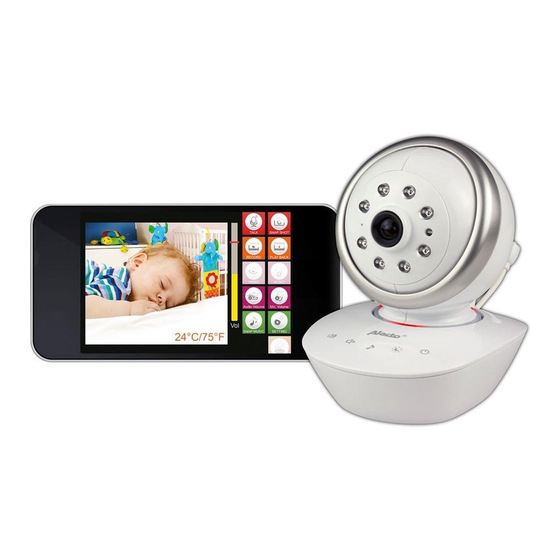
PRODUCT OVERVIEW The Alecto Smart baby camera is a wireless audio/video baby monitor, suitable for indoor use in conjunction with a tablet or a smart phone. The camera can be viewed and operated via the internet or local (WI-FI) network. -
Page 4: Camera Installation
After that, the camera can be accessed with your tablet or smartphone directly. 5. Select the Alecto-IVM-200 as your Wi-Fi router on your tablet or smart phone. This can be done in the configuration settings for Wi-Fi connection. - Page 5 STARTING THE IOS APP. Start the app. by clicking the Start icon button. The following screen will appear. Press the button to go to the login details on the camera. Press the key to add a new camera. You will see the same screen except the login details are empty.
- Page 6 CAMERA LOG IN TO SECOND SMARTPHONE. Download the app. from the Apple store and install the app. Start the app. and go to the screen opposite by pressing the button. 100% Take a smartphone or tablet that is already connected to the camera using the app.
- Page 7 3.1 OVERVIEW CAMERA 1. Temperature sensor 7. Lens 2. Sensor for IR LEDS 8. Power adaptor 3. Indication led/night light 9. Control keys 4. Pan and tilt camera head 10. Mounting fixture 5. Infrared LEDs 11. Reset key 6. Microphone 12.
-
Page 8: Control The Camera
3.2 CONTROL THE CAMERA There are a number of operation controls on the camera itself not related to the app. These keys are designed as touch keys. While touching the key will vibrate slightly. he Touch buTTons have The following funcTions Volume increase. - Page 9 OPERATION VIA THE IOS APP We assume in this chapter that the app is running on your device and that you are connected to the camera via your Wi-Fi network. OVERVIEW IOS APP. Press on this button to talk into the camera. Your voice will be heard through the camera.
- Page 10 Press on this button to turn off the screen.The other functions will continue to operate. Press on this button to turn off the receiving sound from the camera. The other functions will continue to operate. Button to adjust the loudspeaker volume. Button to adjust the microphone sensitivity on the camera.
- Page 11 Setting the audio volume of the camera: The camera has a built-in speaker. This function can be used either to speak to the baby or to play baby music. The volume of the loud speaker in the camera can be set using this button.
- Page 12 Talk back into the baby room: You can speak into the baby’s room by using the talkback button from either your smartphone or tablet. Your voice will come through the loud speaker located in the camera. Press the button. The icon will now change to icons .
- Page 13 Recording and playback: You can record video images or pictures from the camera screen using the app. The video or still images will be recorded onto the internal memory of your smartphone or tablet. Making snapshot photos (picture): Press the button to take a snapshot of the screen.
-
Page 14: Advanced Settings
ADVANCED SETTINGS. Login: Before you go to the advanced settings menu, you first need to log in with a password. The password is the same as the SSID code for the camera in “pairing” mode. The default password is “12345678”. Press the button to fill in the password. - Page 15 the registration process should be restarted. Use only a password of 8 digits or characters. The camera does not work with longer or shorter password Connect the camera with Wi-Fi: (only available when using an internal Wi-Fi network connection) When you open this menu all the Wi-Fi access points will appear on the screen. Choose your own Wi-Fi network and log in with the correct password for the network.
- Page 16 Volume indicator: The sound of the volume can be adjusted by sliding the level of the volume detector. If the sound is louder than the volume detection limit, an alarm notification will be sent. Short noise peaks will not be picked up by the volume indicator. Take this into account when setting the volume.
-
Page 17: Other Functions
OTHER FUNCTIONS HOW TO USE IN THE DARK The IVM-200 camera has built in infrared LEDs which illuminate the room for the camera when it is dark. The image on the screen will be colourless. The LEDs will automatically turn on when the room starts to get dark. A slight flicker in the image may occur if the brightness of the room dims and the LEDs come on. -
Page 18: Tips And Warnings
TIPS AND WARNINGS General: • Read the instruction manual carefully and follow all the instructions. • Do not place or use the camera in a wet place or damp environment. • Ensure proper ventilation for the heat; never cover the camera unit and/or the power adapter(s), and never place it directly next to a heat source. -
Page 19: Environment And Disposal
7 DECLARATION OF CONFORMITY The Alecto Camera complies with the essential requirements and provisions as defined by the European Directive 1999/5/EC. The declaration of conformity is available on the website www.alecto.nl. -
Page 20: Specifications
SPECIFICATIONS Wireless: RF Frequency 2412MHz - 2462MHz (channel 1~11) Standard WIFI 802.11b/g/n RF Output power 11b: 21+/-1dBm/11Mbps; 11g: 18+/-1dBm/54Mbps; 11n: 17+/-1dBm/HT20 - 11n: 17+/-1dBm/HT40 RF Level of Sensitivity 11b: -88dBm/11Mbps; 11g: -74dBm/54Mbps; 11n: -71dBm/MSC7/HT20 - 11n: -68dBm/MSC7/HT40 Transmission range in a open field: >= 80m Camera: Image Sensor... - Page 21 Power: Power adapter external DC 5,8V - 1000mA Mode selection: Switch Mode Pairing to Acces Point router / Link naar Acces Point router Antenna: Antenna type Dipole Antenna Operating Temperature: Operating temperature range 0 - 40 °C Operating humidity 40 - 90% RH Temperature sensor: Temperature sensor NTC type, 10K ohm @25 °C...
-
Page 22: Troubleshooting
TROUBLESHOOTING WIFI registration: Ensure that the switch on the back of the camera is set correctly. Switch on pairing to connect directly either a smartphone or tablet to the camera. Link the camera connec- tion with your router or access point. This product is designed for plug and play, made for the most common router available in the Netherlands. - Page 23 If you notice a defect, first consult the manual. If the manual does not give an answer, check the latest version of this manual on the internet at: www.alecto.nl or www. hesdo-service.nl. You can also contact the supplier of the camera, or the Alecto custo- mer service at: +31 (0) 73 6411 355.
- Page 24 Service Help WWW.ALECTO.INFO SERVICE@ALECTO.NL NL 073 6411 355 (Lokaal tarief) BE 03 238 5666 (Lokaal tarief) (Tarif local) DE 0180 503 0085 Lokale Festnetzkosten Hesdo, Australiëlaan 1 5232 BB, ‘s-Hertogenbosch The Netherlands WWW.ALECTO.INFO Service SERVICE@ALECTO.NL NL 073 6411 355 (Lokaal tarief)
Need help?
Do you have a question about the IVM-200 and is the answer not in the manual?
Questions and answers