Certikin MB20S Operating, Installation And Servicing Instructions
Indirect fired condensing pool & spa heaters
Hide thumbs
Also See for MB20S:
Table of Contents
Advertisement
Operating, Installation and Servicing Instructions for
Indirect fi red condensing pool & spa heaters
Models: MB20S, MB35S, MB50S
WARNING: If the information in these instructions are not followed exactly, a fi re
or explosion may result causing property damage, personal injury or death.
Do not store or use gasoline or other fl ammable vapours and liquids in the vicinity of
this or any other appliance.
WHAT TO DO IF YOU SMELL GAS
•
Do not try to light any appliance.
•
Do not touch any electrical switch; do not use any phone in your building.
•
Immediately call your gas supplier from a neighbour's phone. Follow the gas sup-
plier's instructions.
Installation and service must be performed by a Gas Safe registered installer, service
agency or the gas supplier.
Genie
M2709D
Advertisement
Table of Contents

Related Manuals for Certikin MB20S


Summary of Contents for Certikin MB20S
- Page 1 Operating, Installation and Servicing Instructions for Indirect fi red condensing pool & spa heaters Models: MB20S, MB35S, MB50S Genie WARNING: If the information in these instructions are not followed exactly, a fi re or explosion may result causing property damage, personal injury or death.
-
Page 2: Technical Data
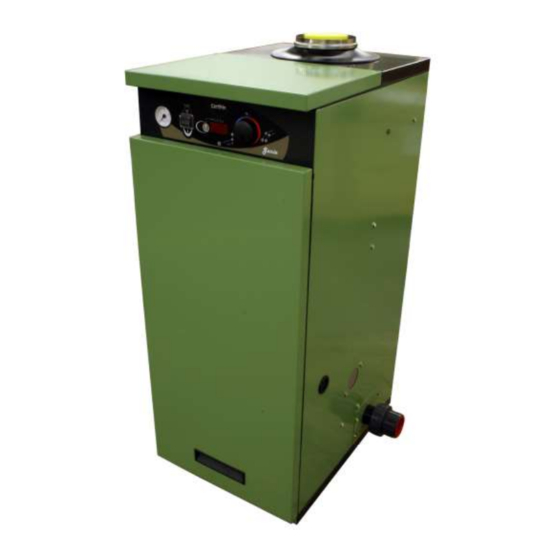
TECHNICAL DATA GENERAL SPECIFICATIONS WATER CONTENT MB20S & MB35S/MB50S 3.0 Litres / 4.0 Litres WEIGHT (net) MB20S & MB35S/MB50S 53 kg 55kg DIMENSIONS, OVERALL 375 mm wide, 520 mm deep, 980 mm high SERVICE CLEARANCE 300mm Left, Right and Above. 800 mm Infront... -
Page 3: Table Of Contents
Contents Section Page TECHNICAL DATA Inside cover List of Figures Page User Instructions Fig 1.0 Flue Terminal Positions INTRODUCTION Fig 2.0 Hydraulic Resistance Graph 6 Heater Location Fig 3.0 Outdoor Terminal Fixing Gas Supply Fig 3.1 Service Access & Conversion Pipe Connections Flueing Fig 3.2... -
Page 4: User Instructions
Genie USER’S OPERATING INSTRUCTIONS FOR YOUR SAFETY - READ BEFORE OPERATING WARNING: IF YOU DO NOT FOLLOW THESE INSTRUCTIONS EXACTLY, A FIRE OR EXPLOSION MAY RESULT, CAUSING PROPERTY DAMAGE, PERSONAL INJURY OR LOSS OF LIFE. This appliance is equipped with an ignition device * Do not use this appliance if any part which automatically lights the burner. - Page 5 Pool Demand LED - Green Off - There is no pool heating demand. CAUTION: Elevated water On - There is pool heating demand and the pool is temperature can be hazardous. not up to temperature. It is important to follow these Flashing - The pool heating demand is met, the pool guidelines: is up to temperature.
-
Page 6: Introduction
INTRODUCTION Gas Safety (Installation and Use) Regulations, (as amended). These Instructions cover a range of indirect, fl oor It is the law that all gas appliances are installed by mounted, gas fi red, condensing pool heaters which a competent person (e.g. a Registered operative) in are room sealed and fan assisted. -
Page 7: Gas Supply
Conversion IMPORTANT For countries permitted to use diff erent gases the If the Heater is to be fi tted in a timber framed build- appliance is supplied setup for the primary gas. It ing it should be fi tted in accordance with the Brit- can be converted to the alternative by the addition ish Gas publication ‘Guide for Gas Installations in of an Orifi... -
Page 8: Fig. 1.0
Flue terminal positions Minimum Distance A Directly below an opening, air brick, opening window etc. B Above an opening, air brick, opening window etc. C Horizontally to an opening, air brick, opening window etc. D Below a gutter or sanitary pipework E Below the eaves F Below a balcony or carport roof G From vertical drain or soil pipework... -
Page 9: Condensate Drain 6 Fig
Fig. 2.0 Condensate Drain Winterisation See Fig. 7.0, and 7.1 Turn off the Mains electricity and Gas Supply. As supplied the Heater includes one litre of Sentinel A 75mm condensate trap is provided on the Heater X500 Inhibitor/Anti-freeze, this is suffi cient to protect and is satisfactory when connected to Soakaways, the Heater down to -10°C. -
Page 10: Installation Of Heater
INSTALLATION OF HEATER Space required for installation and servicing: Left, right and above 300mm Front 800mm Suggested procedure: Site to suit the pool, terminal, plume and condensate drain limitations. The Terminal position should follow BS 5440 and be at least 600mm away from any opening or obstacle. -
Page 11: Service Access
Heater Dimensions Pipe Connections & Locations Fig. 3.1 Service Access Left, Right or Above 300mm In Front 800mm Dimensions Model Genie 20 / 35 138mm 226mm 361mm Genie 50 170mm 258mm 425mm Connections Multi Heater Connection Electric & External Control (CCP01) Gas Supply - 22mm Copper Safety Valve Outlet - 15mm Copper Condensate Drain - 1¼”... -
Page 12: Outdoor Terminal
Outdoor Terminal Outdoor Flue Terminal Dimensions (MBOT) Clamp Assembly Screw Fig. 3.3 Vertical Roof Terminal Dimensions Flat Roof Pitched Roof Instal- Installation lation Use Seldeck Flashing System for all Roof Installations Vertical Roof Terminal (MBVT) 1 metre Horizontal/ Vertical Extension Pipe (MBHVE) 45 degree bends (MB45DB) -
Page 13: Flue Examples 12 Fig
Flue Examples Extended Horizontal Extended Vertical Outdoor Terminal Wall Terminal Roof Terminal MBOT MB90DB MBHVE MBHT (not shown) MBVT MBHVE TO OFFSET USE MB45DB TO OFFSET USE MB45DB Fig.4.3 Horizontal Wall Terminal MB90DB MBHT (not shown) Fig.4.1 Fig.4.2 Fig.4.0 Flue Kit Part Codes Determine the type of Flue system you require and choose from the list of kits available below: Type of Flue System... - Page 14 Flue Kit Part Codes (cont.) The Maximum Flue Equivalent Length (FEL) permitted is 20 metres, horizontal or vertical. The Flue Kits avail- able below list the FEL for each component. Add up all the FEL’s used in your design and check that this does not exceed 20 metres.
-
Page 15: Roof Terminal Fig
Terminal Guard the demount connection on the right, complete with blanking plates, and swap with the connec- The fl ue products from this appliance are very tions on the left. Ensure that the Pool Sensor is low temperature so a guard is only required if the correctly positioned in its pocket after the change. -
Page 16: Gas Connection
Conversion to LPG The Heater can be converted on site. NG to Propane, Throttle or Propane to Butane. Adjustment 1. With the gas and electrical supply off , undo the three screws that hold the venturi to the gas valve. (See Fig.6.0) 2. -
Page 17: Condensate Connection
The simplest and most fl exible control scheme is to It is permissible to connect to an external gully or use a Certikin CCP01 Control Unit. This provides an rain water hopper provided they connect to a com- electrical safety trip and timer with outputs for the bined system. -
Page 18: Condensate Disposal
Example Condensate Disposal Methods Note: Do not reduce the pipe size below the 40mm provided. Soakaway 200mm Land Drain Filled with Lime Stack Attachment chippings 400mm Insulate against deep freezing Strap-On Boss 1:20 Fall ( 2.5 Degrees ) Soil Pipe or Fig.7.0 Drain Condensate Syphon (75 mm) -
Page 19: Fig. 8.0
Commissioning It is recommended that the condensate trap is full of water before fi ring. If the heater fails to light the gas it IMPORTANT The heater primary circuit will shutdown and try again. It will repeat this a total of 5 contains Sentinel X500 inhibitor/anti-freeze. -
Page 20: Fig. 9.0
Pressure Gauge Fig. 9.0 Temperature Pool Temperature Lock/Reset On / Off Display Control Knob Button Switch User Setup Mode Setting Factory Setting Alternative Display Indicator Display units ° F = Fahrenheit ° C = Centigrade ° F or ° C Maximum temperature 32 °C (90 °F) 41 °C ( 106 °F) -
Page 21: Multiple Heater Kit Fig
Multiple Heater Kit Installation Instructions Disconnect the Heater from the Mains then Overview remove the Top Panel and the Electrical Chassis Cover. It is possible to connect together several Heaters and by doing so obtain a larger output with an eco- Remove Pool Thermostat Control Knob ... -
Page 22: Multiple Heater Install
• Turn on the Mains, then switch on all the Heat- ates that Slave will not operate. ers. After a short self-test the Master should • If a Slave has Flow fault which its Pressure show the actual temperature, and the Slaves Switch detects the burner will stop immediately three dashes “---”. -
Page 23: Wall Mounting Kit 20 Fig
Wall Mounting Kit Overview The Genie models can be wall hung using the Wall Mounting Kit. Kit Part Code: MBWMK35/50 Instructions • Select a suitable wall and position to mount the Heater. (Note the Heater weighs 53kg). • Screw the Top Wall Mounting Bracket level to the wall (Fig 10.4). -
Page 24: Wall Mounting Assembly
TOP HANDLE BRACKET M4 SCREWS SUPPLIED (3 PLC'S) LOCATING STUDS (2 PLC'S) TOP WALL MOUNTING BRACKET REMOVE DEMOUNTABLE POOL FITTINGS FOR BETTER DRILL ACCESS Fig. 10.5 GOLD SCREWS SUPPLIED (3 PLC'S) BOTTOM WALL MOUNTING BRAKET Condensing Pool Heater Genie S... -
Page 25: Schematic Wiring
Schematic Wiring Fig.11.0 Condensing Pool Heater Genie S... -
Page 26: Fault Finding
FAULT FINDING BEFORE COMMENCING OR COMPLETING ANY ELECTRICAL WORK ON THE APPLIANCE, IT IS RECOMMENDED THAT THE BASIC SAFETY CHECKS FOR EARTH CONTINUITY, SHORT CIRCUIT, POLARITY AND RESISTANCE TO EARTH ARE MADE. ALL WORK CARRIED OUT SHOULD FOLLOW GUIDELINES LAID DOWN BY THE I.E.T. Operation The Heater requires mains on both the Live (L) and switched live (SL) connection to be able to operate. -
Page 27: Display Fault Codes
Fault Codes LED2 LED1 YELLOW GREEN Condensing Pool Heater Genie S... - Page 28 Fault Codes LED2 LED1 YELLOW GREEN Condensing Pool Heater Genie S...
- Page 29 Condensing Pool Heater Genie S...
-
Page 30: Fig 12.0
SERVICING Routine Service To ensure continued effi cient operation of the ap- pliance it is recommended that it is checked and serviced at regular intervals. The frequency of servicing will depend upon the particular installation and usage but in general every 2,000 hours of operation should be the maximum. -
Page 31: Water Pressure Switch
Heat Exchanger Flow Sensor • Heat Exchanger Combustion Temperature Sensor This is located on the front connection to the heat exchang- • Flue Thermostat er. (See Fig.14.4) • Ignition Control • Un-clip the sensor from the connection. • Gas Valve •... - Page 32 • Remove the Off set tube from the Gas Valve and Heat Exchanger (See Fig.14.0) unscrew the Off set Connector and transfer to the • Remove the Expansion Vessel new Gas Valve. • Remove the spacer below the Secondary Heat •...
-
Page 33: Spares
Spares Item Mfg’ Part Number Supplier Part No Primary Heat Exchanger (Genie 20 & Genie 35) M2136 SPMBG001 Primary Heat Exchanger (Genie 50) M2139 SPMBG002 Secondary Heat Exchanger M2745 SPMBG053 Propane Orifi ce (Genie 20 & Genie 35) M2150 SPMBG014 Propane Orifi... -
Page 34: Heater Components
Heater Components Combustion Flue Adapter Flue Thermostat Sample Point Fig.14.1 Condensate Pressure Heat Exchanger Switch Combustion Temp Sensor Air Vent Spark & Sense Heat Ex- Electrode Fig.14.2 changer Fan Fix- ing Nuts Venturi Pump Fan Electrical Connectors Air Tube Condensate Syphon Fig.14.3 Venturi... - Page 35 INSTALLATION & SERVICE HISTORY Circle appropriate: Model Genie 20 Genie 35 Genie 50 Commissioning Installer No Date: Working pressure mbar Instructed User in operation? Yes/No Service History Date Cleaned ? Pressure Date Cleaned ? Pressure Date Cleaned ? Pressure Condensing Pool Heater 04/12/13...
- Page 36 Station Lane Industrial Estate Witney Oxon. Tel. 01993 778855 Fax. 01993 703407 April 2016...
Need help?
Do you have a question about the MB20S and is the answer not in the manual?
Questions and answers