Advertisement
Quick Links
DTP R HWP 4K D Series • Setup Guide
This setup guide provides instructions for an experienced installer to set up and operate the Extron DTP R HWP 4K 231 D and
DTP R HWP 4K 331 D extenders.
AUTO SW
AUDIO IN
AUDIO IN
HDCP
1
HDMI IN
VGA IN
CONFIG
IR OUT
G
S
Extron
DTP T UWP 232 D
Transmitter
AUTO SW
AUDIO IN
AUDIO IN
HDCP
HDCP
1
1
HDMI IN
2
HDMI IN
CONFIG
IR OUT
G
S
Extron
DTP T HWP 232 D
Transmitter
Installation
Step 1 — Disconnect Power
Disconnect all equipment power sources.
Step 2 — Prepare the Mounting Surface
ATTENTION:
•
Installation and service must be performed by authorized personnel.
•
L'installation et l'entretien doivent être effectués par le personnel autorisé uniquement.
•
The unit must be installed in accordance with the National Electrical Code and with local electrical and safety
codes.
•
L'unité doit être installée conformément au National Electric Code et aux normes électriques et de sécurité locales.
NOTE:
Use the included mud ring (MR 200) or a UL approved 1-gang RACO wall box (not supplied) with a depth of at
least 3.0 inches (7.6 cm). For more information, see the full product user guide at www.extron.com.
Place either the mud ring (see figure on page 1) or the wall box (see figure on page 2) against the installation surface and
a.
mark the opening guidelines.
TIP: Use a level to mark the opening.
Cut out the material from the marked area.
b.
Either:
c.
Insert the mud ring into the opening, rotate the locking
•
arms, and secure it with the supplied screws,
or
Secure the wall box to the wall stud with 10-penny nails
•
or #8 or #10 screws, leaving the front edge flush with the
surface.
INPUTS
INPUTS
OUTPUTS
MENU
1 2 3 4 5 6 7 8
SIGNAL
1
2
3
4
5
6
7
8
A
B
C
CONFIG
HDCP
ENTER
Extron
IN1608 SA
INPUTS
OUTPUTS
AUDIO INPUTS
OVER DTP
RS-232
IR
L
1
R
L
3
R
L
5
R
1
3
5
C
A
7
Tx Rx
G
Tx Rx
8
SIG
LINK
SIG
LINK
SIG
LINK
CONFIGURABLE
OVER DTP
OVER DTP
100-240V ~ -- A MAX
2
HDMI
HDMI
RS-232
IR
RS-232
IR
HDMI
L
2
R
L
4
R
L
6
R
4
6
B
DTP IN
Tx Rx
G
Tx Rx
DTP IN
Tx Rx
G
Tx Rx
DTP OUT
50/60 Hz
IN1608
XTP DTP 24 Cable
230'
VOLUME
IN1608
SCALING PRESENTATION SWITCHER
AMPLIFIED OUTPUT
2x25W(8Ω)/2x50W(4Ω)
L
R
IPCP PRO 550
OUTPUTS
COM
1
2
CLASS 2 WIRING
RTS
SWITCHED
IR/SERIAL
RELAYS
FLEX
eBUS
REMOTE
12 VDC
I/O
CTS
1000
1
2
LIMIT
1
2
3
4
1
2
3
4
1
2
S
LIMIT
+48V
LAN
R
Tx
Tx
LINK
MIC/LINE
VARIABLE
IR
2
L
R
RESET
RS-232
Rx
Rx
ACT
3
4
OVER
1
2
3
4
5
6
7
8
5
6
7
8
5
6
7
8
3
4
OVER
+48V
Tx Rx
G
IPCP PRO 550
Ethernet
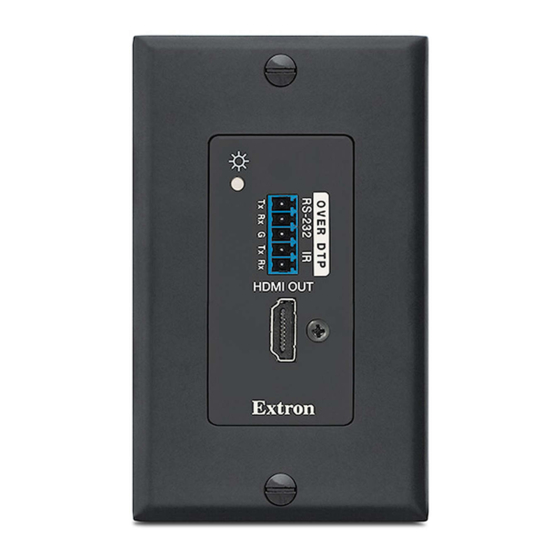
HDMI OUT
HDMI
Extron
DTP R HWP 4K 331 D
Receiver
Rotate locking arm
and insert into wall
opening.
Network
TLP 1000TV
Projector
Mud Ring
1
Advertisement

Related Manuals for Extron electronics DTP R HWP 4K D series


Summary of Contents for Extron electronics DTP R HWP 4K D series
- Page 1 DTP R HWP 4K D Series • Setup Guide This setup guide provides instructions for an experienced installer to set up and operate the Extron DTP R HWP 4K 231 D and DTP R HWP 4K 331 D extenders. INPUTS...
- Page 2 DTP R HWP D 4K Series • Setup Guide (Continued) Run all required cables (see steps , and Wall Stud thread the cables through the mud ring or walll box, and secure them with cable clamps. Signal TIP: In order to fit the unit in the junction Output Cable box, do not install boots on TP cables...
- Page 3 DTP R HWP D 4K Series • Setup Guide (Continued) Rear Panel DC power input connector — Wire and plug the included external 12 VDC power supply into either this 2-pole connector or the power input connector on the transmitter (see the DTP R HWP 4K 231 and 331 D User Guide at www.extron.com for wiring information).
- Page 4 (Inside Europe Only) +86.21.3760.1566 FAX (Inside India Only) Extron USA - West Extron USA - East +1.714.491.1500 +1.919.850.1000 +31.33.453.4040 +91.80.3055.3777 +1.714.491.1517 FAX +1.919.850.1001 FAX +31.33.453.4050 FAX +91.80.3055.3737 FAX 68-2816-50 Rev. A © 2016 Extron Electronics All rights reserved. www.extron.com 04 16...
Need help?
Do you have a question about the DTP R HWP 4K D series and is the answer not in the manual?
Questions and answers