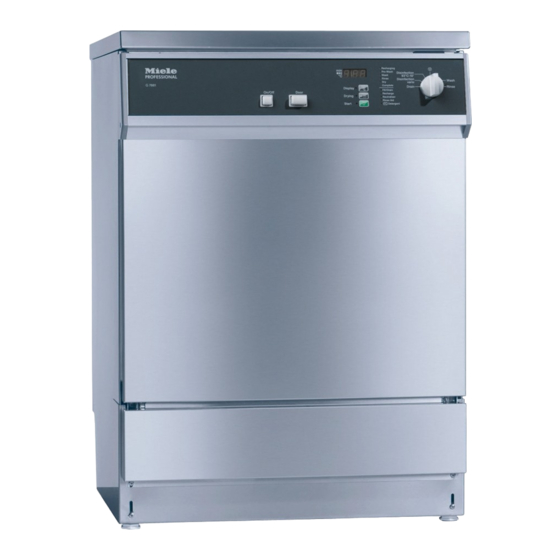
Miele G 7881 Installation And Operating Instructions Manual
Washer-disinfector
Hide thumbs
Also See for G 7881:
- Operating instructions manual (72 pages) ,
- Operating instructions manual (64 pages)
Table of Contents

Related Manuals for Miele G 7881


Summary of Contents for Miele G 7881
- Page 1 Installation and Operating Instructions Washer-Disinfector G 7881 en - CA To avoid the risk of personal injury or damage to the appliance, it is essential that you read these operating instructions before installation and use. M.-Nr. 07 778 581...
-
Page 2: Table Of Contents
Contents Safety instructions and warnings ........5 Symbols on the appliance . - Page 3 Contents Progress indicator ..........37 End of program .
- Page 4 Contents Installation ............66 Undercounter installation .
-
Page 5: Safety Instructions And Warnings
Good Laboratory Read the operating instructions Practice and regulations governing the carefully before using this machine. use of medical products, a valid Miele This will help keep you safe and service and repair contract is avoid damage to the machine. - Page 6 Safety instructions and warnings Always exercise caution when When operating this machine, be handling processing chemicals for this aware of the high temperatures machine (cleaner, neutralizer, involved. If you bypass the electrical saponifier, rinsing agent, etc.). These lock to open the door, there is the may contain irritant or corrosive danger of scalding and heat or ingredients.
- Page 7 Under certain circumstances, the It is the responsibility of the operator to routinely check that the required processing chemicals can damage the appliance. Consult Miele Customer Ser- cleaning and disinfection standards are vice for recommendations. For being met. Therefore, the processes...
- Page 8 (processing chemicals, water quality, etc.) be discussed in advance with Miele Application Technology. The mobile units, baskets and inserts must only be used for their specific applications. Hollow items must be positioned for full exposure to wash water.
-
Page 9: Symbols On The Appliance
For safety and environmental protection, be sure to drain/remove all Only Miele mobile units, baskets processing chemical residue. (Comply and inserts should be used. If Miele with safety regulations and wear accessories are altered in any way, or protective eyewear and gloves.) -
Page 10: Description Of The Machine
Description of the machine The Miele washer-disinfector is The cleaning parameters should always designed to clean, rinse and thermally be optimally matched to the type of disinfect re-usable equipment. soiling and items involved. Always comply with the particular Processing chemicals are to be... - Page 11 Description of the machine High -level disinfection Instruments suitable for processing in the washer-disinfector The washer-disinfector cleans items, and in the disinfection program, In general, only high quality stainless simultaneously thermally disinfects at steel items are suitable for processing 93°C/200°F. in the washer-disinfector.
- Page 12 Description of the machine Do not clean fiberoptics or electrical equipment and components in the washer-disinfector. Rhodium coated mirrors must be arranged so that their surfaces do not suffer any mechanical damage. Not all specula with glass are suitable for machine treatment.
-
Page 13: Guide To The Machine
Guide to the machine a ON/OFF switch h Check/Fill indicators: Fill / Drain b Door release Recharge c Time/Display Neutralizer Rinse Aid d Toggle switch ß to show: 8 Detergent optical interface for - actual temperature service technician; - elapsed time for connected - active wash block DOS Module K 60:... - Page 14 Guide to the machine a Connection for DOS module K 60 on f Reservoir for rinse aid, with dosage rear side of appliance selector b Service panel g Rinse aid level indicator c Filter combination on rear side of the appliance: d Reservoir for regenerating salt –...
-
Page 15: Caring For The Environment
Caring for the environment Disposal of packing materials Disposing of your old appliance The packing materials help protect the appliance during transport. They have Old electric and electronic equipment been selected with an eye to often contains valuable materials but environmental compatibility and they may also contain harmful efficient disposal and should be... -
Page 16: Before Using For The First Time
Before using for the first time Load the machine carefully. Before using the machine for the first Arrange the load so that water will time please pay special attention to come into contact with all surfaces. the following points: Concealed surfaces will not be cleaned. -
Page 17: Opening And Closing The Door
Opening and closing the door Electric door lock How to use the emergency release (opening the door The machine is equipped with an during a power failure) electric door lock. The door can only be opened when The emergency release feature ^ the electrical supply to the machine should only be used when it is not possible to open the door normally,... -
Page 18: Water Softener
Water softener How to program the water In order to provide good cleaning results, the machine requires a supply softener of soft water (water that is low in ^ Use the "ON/OFF" button to switch off calcium and magnesium). If hard tap the machine. - Page 19 Water softener Settings Settings gr/gal Settings gr/gal 1 - 30 CaCO 31 -60 CaCO 1 - 30 31 -60 19 *) 1010 1030 1040 1060 1080 *) factory setting...
-
Page 20: How To Fill The Salt Reservoir
^ Remove the bottom basket from the How to fill the salt reservoir machine. Only use special, coarse-grained, Miele ^ Unscrew the salt reservoir cap. reactivation salt with a grain size of 1 - 4 mm. NEVER use other types of... -
Page 21: Refill Salt Indicator
Water softener Refill Salt Indicator ^ Wipe any residual salt off the seal and the screw threads on the The water softener is automatically reservoir. regenerated during the next program ^ Screw the cap back on completely. cycle. The program display will show a ^ Immediately after this step, start the Recharging during this process. -
Page 22: Application
Cleaning results should be subjected to periodic protein tests, e.g. with the – Are the hollow items properly loaded Miele test kit. so that all cavities and channels will be flushed clean? – Are the spray arms clean and can they rotate freely? –... -
Page 23: How To Load The Machine
Application How to load the machine – To avoid corrosion, only load stainless steel items in good – Always load items in such a way that condition. all surfaces will be exposed to the cleaning water. This ensures that the –... -
Page 24: Spring Adapter For The Water Connection
Application Spring adapter for the water How to adjust the upper basket connection The upper basket can be adjusted above and below the middle position The spring adapter for the water by 2 cm each. connection must be properly engaged when a basket is inserted into the Depending on the height selected, and machine. -
Page 25: Application
Application Application During patient treatment, check that as little residue as possible (dental cement, polishing compound, etc.) is left on the items (wipe off as needed). After thermal disinfection, manual cleaning in accordance with the biological materials ordinance can be conducted without danger of infection. -
Page 26: Chemical Process
Chemical process general information Effect Action Damage to elastomer (seals and hoses) – Find and correct the causes of the or plastic components of the machine damage. may cause the materials to swell, See also the information on "connected shrink, harden or become brittle, and processing chemicals", "dirt"... - Page 27 OXIVARIO or OXIVARIO PLUS. – hydrogen peroxide, – In the case of hydrogen peroxide, the washing temperature should be – peracetic acid. below 70 °C. – Consult Miele Customer Service or a Miele Application Specialist.
- Page 28 – damage to the elastomer and plastic antifoaming agent using the components of the machine, SPECIAL 93°C-10' program. – attack certain plastics (e.g. – Consult Miele Customer Service or a polycarbonates, plexiglass, etc.) in Miele Application Specialist. the wash load.
- Page 29 Chemical process dirt Effect Action The following substances can cause – First rinse the load with a sufficient excessive foaming during washing and quantity of water. rinsing: – Select a wash program with one or – treatment agents such as disinfection more short pre-rinses with cold or agents, rinsing agents, etc.
-
Page 30: Dispensing Processing Chemicals
Dispensing processing chemicals ^ Open the machine door. Only use agents formulated specifically for use in washer- disinfectors and make sure you follow the manufacturer's instructions. Pay particular attention to information regarding toxic residues. Adding rinse aid Rinse aid is needed to ensure that water promptly falls away from the washload, preventing spots and speeding up the drying process. -
Page 31: Rinse Aid Indicator Light
Dispensing processing chemicals Rinse aid indicator light Setting the rinse aid dosage ^ Rinse aid does not need to be refilled The dosage adjuster has settings from until the "rinse" indicator light comes 1 to 6 (in other words, 1 - 6 ml). The on in the display. -
Page 32: How To Add Neutralizer
Dispensing processing chemicals ^ Place the neutralizer container (red) How to add neutralizer next to the machine on the floor or in For certain programs, neutralizer is an adjacent cabinet. dispensed in the rinse cycle after washing, to help prevent discoloration and corrosion spots on the items (especially around jointed areas). -
Page 33: Neutralizer Indicator Light
Dispensing processing chemicals Neutralizer indicator light ^ When the "Neutralizer" indicator light comes on, it is important to promptly refill or exchange the neutralizer container. The "Neutralizer" indicator light should turn off. ^ If the container has been allowed to run dry, the light will not go out until the priming process is performed (See "priming the neutralizer... -
Page 34: How To Add Detergent
Dispensing processing chemicals How to add detergent Using powder detergent Avoid inhaling powdered products. Never swallow cleaning agents, because this can result in chemical burns to the mouth and throat, and suffocation. Before starting the program, load the powdered detergent into the receptacle (except for the programs "Rinse"... -
Page 35: Liquid Option
Dispensing processing chemicals Liquid option As a separate option, this machine can be fitted with a dispenser pump for automatic liquid detergent dispensing (DOS Module K 60). This is connected externally. The optional DOS Module K 60 is supplied with its own installation and connection instructions. -
Page 36: Operating The Machine
Operating the machine Select the additional "Drying" feature How to switch on ^ Close the door. Immediately once a program has been ^ Press the "ON/OFF" button. selected, "Drying" can be selected as an additional feature, except in the A dot will appear in the display when "Rinse"... -
Page 37: Progress Indicator
Operating the machine End of program While the program is running, any of the following displays can be selected: A program is completed when the – Actual temperature, indicator light "Complete", in the progress display, is lit and the indicator –... -
Page 38: How To Switch Off
Operating the machine ^ Arrange items in a stable fashion, How to switch off take all necessary infection control ^ Press the "ON/OFF" button and let it measures and wear gloves. pop up. ^ If required, replenish powder The door is equipped with an detergent. -
Page 39: Programmable Functions
Programmable functions For future servicing, be sure to document any changes made to the standard factory settings. Enter the information in the field(s) provided. General information: – Program selector positions that have no assigned function are represented by a bar ( - ) in the middle of the display. –... -
Page 40: Dos 1 Dispensing (Detergent)
Programmable functions DOS 1 dispensing (detergent) Setting the liquid detergent dispensing concentration The dispensing concentration only needs to be set for liquid detergents. Set the concentration according to the detergent manufacturer's recommendations. Do NOT change the setting if you are using powder detergent in the door dispenser. -
Page 41: Priming The Liquid Detergent Dispensing System
Programmable functions Priming the liquid detergent dispensing system The dispensing system does not need to be primed (cleared of air) unless: – the dispensing concentration is being set for the first time, – the liquid detergent container was not refilled in time and became completely empty. -
Page 42: Dos 3 Dispensing (Neutralizer)
Programmable functions DOS 3 dispensing (neutralizer) Setting the neutralizer concentration Set the neutralizer dispensing concentration according to the manufacturer's recommendations or to meet specific requirements. Step Display / Result ^ Activate the programming mode as per page 35. ^ Press the "Drying" 0 button until E02 appears in the display. -
Page 43: Priming The Neutralizer Dispensing System
Programmable functions Priming the neutralizer dispensing system The dispensing system does not need to be primed (cleared of air) unless: – the dispensing concentration is being set for the first time, – the processing chemical container was not refilled in time and became completely empty. -
Page 44: Buzzer
– Fault warning = Buzzer at 1-second intervals, and – Sample-collection signal = sets of 3 short beeps followed by a 2-sec pause. Contact Miele Customer Service to program the sample-collection signal. The numbers shown in the display correspond to the following settings:... -
Page 45: How To Restore The Factory Settings
Programmable functions How to restore the factory settings Step Display / Result ^ Activate the programming mode as per page ^ While in programming mode, press or hold down the "Drying" 0 button until E33 appears in the display. ^ Turn the program selector to a program. Basic factory setting(s): Reprogrammed setting(s): ^ When PP appears in the display, press the... -
Page 46: Setting The Time And Date
Programmable functions Setting the time and date The serial interface contains the date and time. This data is transmitted to the report printer. You can reset the date and time, e.g. to change from summer to winter time. The individual values of date and time are activated according to the position of the programme selector: "1 o'clock"... -
Page 47: Data Transfer (Optional)
Various printer types with Epson-compatible fonts can be used – dosage system with dosage temperature and target dosage for printing. Miele Technical Service maintains a list amount of recommended printers. – target values for temperature and Pin assignment 9-pin sub-D connector:... -
Page 48: Machine Care
After every 1,000 hours of operation, or at least once a year (but never – a program test run, later than every 18 months), Miele – electrothermal measurement, Customer Service will need to perform – seals testing, routine maintenance on the washer-disinfector. -
Page 49: Process Validation
Machine care Process validation Routine checks It is the responsibility of the operator to Before each day's use, the operator routinely check that the required must conduct a series of routine cleaning and disinfection processes checks. A routine checklist is supplied are being conducted. -
Page 50: Cleaning The Filters In The Wash Cabinet
Machine care Cleaning the filters in the wash Cleaning the coarse filter cabinet The filters in the base of the wash cabinet prevent large particles from entering the circulation pump. These filters can become blocked and need to be inspected on a daily basis and cleaned as needed. -
Page 51: Cleaning The Flat And Micro-Fine Filters
Machine care Cleaning the flat and micro-fine filters ^ Remove the coarse filter. ^ Remove the fine filter (between the coarse filter and the micro-fine filter). ^ Remove it together with the flat filter. ^ Clean the filters. ^ Re-insert the filter combination in reverse order. -
Page 52: Cleaning The Spray Arms
Machine care ^ Unscrew the upper spray arm. Cleaning the spray arms ^ After loosening the ring nut, remove The spray arm jets can become blocked. the lower spray arm. It is important to inspect them every day. ^ After cleaning, re-insert the spray ^ Use a sharp pointed object to push arms and tighten down as needed. -
Page 53: Cleaning The Control Panel
^ To clean the stainless steel exterior, use a damp cloth and dish liquid or a Damaged or leaky door seals should be replaced by Miele Technical Ser- non-abrasive stainless steel cleaner. vice. ^ To help prevent re-soiling (fingerprints, etc.), a stainless steel... -
Page 54: Baskets And Inserts
Machine care Baskets and inserts To ensure that the baskets and inserts are functioning properly, they must be checked daily. A checklist is supplied with the washer-disinfector. Check the following points: – Are the rollers in proper condition and are they securely attached to the basket / insert? –... -
Page 55: Troubleshooting
^ Press the "ON/OFF" button to switch off the machine. ^ Turn the machine back on and re-start the program. ^ If the error occurs again and cannot be corrected, contact Miele Customer Ser- vice for advice. ^ You will need to provide the error code ( "F...") . - Page 56 Troubleshooting Fault Cause Solution Before the start of a Before addressing the program, the indicator error: light 8 Detergent – Turn the program flashes and the selector to the 12 o'clock position f. The program can't be started. error message is erased.
- Page 57 Troubleshooting Fault Cause Solution Before the start of a Before addressing the program, the indicator error: light "Neutralizer" – Turn the program flashes and the selector to the 12 o'clock position f. The program can't be started. error message is erased.
- Page 58 Troubleshooting Fault Cause Solution The refill salt message Because no regeneration Carefully fill the reservoir "Recharge" is flashing. salt was added, the water with reactivation salt. softener could not be reactivated. A few minutes after the Before addressing the start of a program, the error: "Fill/Drain"...
- Page 59 Troubleshooting Fault Cause Solution The rinse program is Before addressing the interrupted and the error: "Fill/Drain" indicator – Turn the program light is flashing. selector to the 12 o'clock position f. The error message is erased. – Press the "ON/OFF" button to switch off the machine.
- Page 60 Troubleshooting Fault Cause Solution After a program, there is The dispenser was wet Make sure the dispenser is detergent residue left when it was loaded. dry before loading it. behind in the dispenser. The detergent dispenser Always arrange items such flap was blocked by items.
- Page 61 Troubleshooting Error Cause Solution Items show signs of The chloride content of the Test your water corrosion. water is too high. composition. If needed, condition the water externally and use demineralized water. Rust articles or a rust film – Check the piping. appears in the wash –...
- Page 62 Troubleshooting Fault Cause Solution There are spots on the The rinse aid setting is too Increase the rinse aid items. low. dosage. The rinse aid container is Add rinse aid. empty. The wash result is The baskets and inserts Properly arrange the items. unacceptable.
-
Page 63: Correcting Faults
^ Remove the underlying cause. ^ Remove the service panel. ^ Press the re-set button for the ther- mostat on the right side of the plinth. If the thermostat is triggered again, please contact Miele Customer Ser- vice without delay. -
Page 64: Cleaning The Non-Return Valve And Drain Pump
Correcting faults Cleaning the non-return valve The drain pump is located beneath the non-return valve (see arrow). and drain pump If you find that water has not been pumped away at the end of a program, the drain pump or non-return valve may be blocked. -
Page 65: Cleaning The Filter In The Water Inlet
Correcting faults Cleaning the filter in the water Cleaning the filter inlet ^ Disconnect from the power supply. There are filters in the screw connection ^ Turn off the water supply and of the water inlet hose to protect the unscrew the water inlet hose. - Page 66 Correcting faults This machine must be installed, commissioned and repaired by a Miele trained and qualified technician only. Unauthorised maintenance and repair work could cause personal injury or damage to the machine. If a fault occurs and cannot be corrected using these Operating Instructions, please contact Miele Technical Service.
-
Page 67: Installation
Installation Undercounter installation Please refer to the installation To install the machine under a diagram supplied with the continuous countertop, the machine lid appliance. can be removed, as follows: ^ Open the door. In order to reduce the risk of steam damage, the area around the machine should be limited to furniture and fittings that are... - Page 68 How to protect the countertop Depending on your requirements for installation, contact Miele Customer Service for countertop protection kits. The underside of the countertop is protected from steam damage by a stainless steel plate.
-
Page 69: Electrical Connection
(30 mA) before the machine. – To replace the power cord, use only original Miele replacement parts or a The machine must only be suitable cord with core cable ends. operated with the voltage, frequency and fusing shown on the data plate –... -
Page 70: Plumbing
25 - 60 psi – If the water pressure is not in the range listed above, the "Fill/Drain" indicator may come on and the fault code "F..E" will appear in the display. If this occurs, contact the Miele Technical Service Department for advice. -
Page 71: Di Water Connection
Plumbing DI water connection The DI water connection should not be hooked up (or Y connected) to any The machine is equipped for optional water source, it should remain connection to a DI water supply. When unconnected, unless DI water is the water pressure is below the available. -
Page 72: Connect The Water Drain
22 mm). It must not be shortened. Use the supplied hose clamps to secure it into position. – Longer drain hoses (up to 4 m) can be ordered through Miele. – The drainage system must not exceed 4 m. See the supplied installation diagram. -
Page 73: Technical Data
Noise level in dB (A), < 70 peak LpA for cleaning and drying cycles Certification marks CSA, Medical Class II Device Licence ! mark MPG Guidelines - 93/42/EEC, Class IIb Manufacturer's address Miele & Cie. KG, Carl-Miele-Str. 29, 33332 Gütersloh, Germany... - Page 74 Program guide Choose your program according to the types of instruments or utensils being cleaned and the degree of soiling. Programs Program Description (fixed) Wash Wash program without disinfection. Rinse (cold) Rinse only. To rinse items before a wash program, to avoid excessive foam.
- Page 75 Program guide Program Sequence 1. Pre-wash 2. Cleaning 3. Interim 4. Interim 5. Final 6. Drying and/or rinse I with rinse II rinse (extra thermal Neutralization and/or program) disinfection disinfection and/or cleaning Cleaning Rinse 60°C/3’ 65°C/1’ (DI) DOS 2 Cleaning DOS 3 Rinse and 55°C/5’...
- Page 76 Subject to change without notice / Publication date: 01/05/2011 M.-Nr. 07 778 581 / 01 0366...