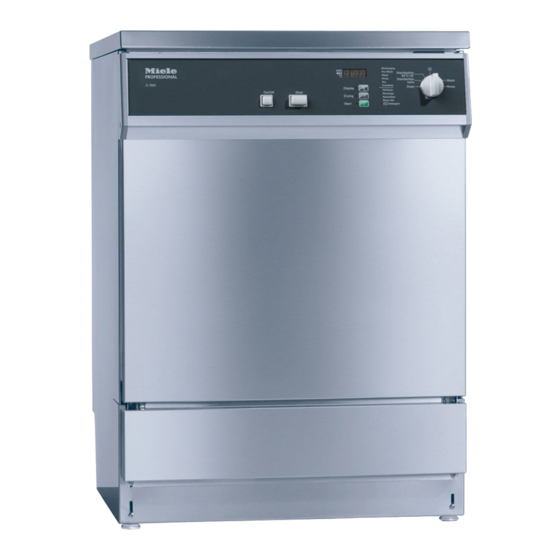
Miele G 7881 Operating Instructions Manual
Dental thermal disinfector
Hide thumbs
Also See for G 7881:
- Operating instructions manual (72 pages) ,
- Installation and operating instructions manual (76 pages)

Related Manuals for Miele G 7881


Summary of Contents for Miele G 7881
- Page 1 Operating Instructions Dental Thermal Disinfector G 7881 To prevent accidents and machine damage read these instructions before installation or use. M.-Nr. 05 970 440...
-
Page 3: Table Of Contents
Contents IMPORTANT SAFETY INSTRUCTIONS ....... . . 4 IMPORTANT SAFETY INSTRUCTIONS ..... . . Center pages Description of the machine . -
Page 4: Important Safety Instructions
Only clean and/or disinfect instruments dangerous. Turn off at the main and utensils (dental) in this machine if power immediately and call the Miele the manufacturer has stated that they Service Department or an authorized are suitable for machine processing. -
Page 5: Important Safety Instructions
IMPORTANT SAFETY INSTRUCTIONS Personnel operating the machine When using this machine in the should be trained regularly. higher temperature ranges be Children and untrained personnel must especially careful not to scald or burn not be allowed access to the machine yourself when opening the door! or its controls. - Page 6 Please be aware that changes in formulation, storage conditions, etc. Only use Miele approved cleaning which may not be publicized by the agents formulated for use in chemical manufacturer can have a washer disinfectors in this machine.
- Page 7 Consult Miele on the type and such as cleaning agent, quality of water application of such equipment. etc. are discussed with the Miele Technical Application specialists.
- Page 8 200°F/93°C, instruments and All critical instrments must be accessories. sterilized after treatment in the G 7881 Dental Thermal Disinfector. Critical Areas of effectiveness are physical instruments are used to penetrate soft removal or thermal inactivation of tissue or bone, e.g.
- Page 9 Carbon steel and chrome-plated instruments may corrode during the cleaning process. Processing these types of instruments in the G 7881 is If you notice any of the above not recommended. symptoms in your instruments, please...
-
Page 10: Guide To The Machine
Guide to the machine a "On/Off" button j "Detergent" (liquid) indicator* Optical interface for service b "Door" button technician c Display k "Rinse Aid" indicator d "Display" indicator l "Neutralizer" indicator e "Drying" indicator m "Recharge" indicator f "Start" indicator n "Fill / Drain"... - Page 11 Guide to the machine a Connection for DOS module G 60 d Dispenser for powder detergent (Optional dispenser pump for e Rinse aid reservoir liquid detergent) (with dosage selector) b Filter combination f Rinse aid level indicator c Salt container (for the water softener)
-
Page 12: Before Using For The First Time
Before using for the first time Load the machine carefully Before using for the first time please Arrange the load so that water will pay special attention to the following come into contact with all the surfaces. points: Concealed surfaces will not be cleaned. -
Page 13: Opening And Closing The Door
Opening and closing the door Electric door lock To cancel a program The machine is equipped with an If a program has to be canceled in an electric door lock. The door can only be emergency, e.g. the program has been opened when the electrical supply to interrupted due to a fault, the door will the machine is turned on, and the... - Page 14 Opening and closing the door To open the door with the emergency release The emergency release should only be used when the door cannot be opened normally, e.g. in the event of a power failure. ^ Turn the program selector to "Stop" ^ Press the "On/Off"...
-
Page 15: Water Softener
Water softener Before using the machine for the first Your local water authority will advise time, the water softener should be you on the water hardness in your programmed. The water needs to be area. If the water supply is harder or softened to avoid calcium deposit buildup on instruments and in the softer than the factory setting... - Page 16 Water softener Settings Settings gr/gal Settings gr/gal 1 - 30 1 - 30 CaCO 31 - 60 31 - 60 CaCO 19 *) 1010 1030 1040 1060 1080 *) factory setting...
-
Page 17: Setting The Water Softener
Water softener Setting the water softener For future servicing, it is useful to make a note of your water hardness level. ^ Turn off the machine with the "On/Off" ^ Enter your water hardness level here: button. ^ Turn the program selector to the gr/gal "Stop"... -
Page 18: Filling The Salt Reservoir
Filling the salt reservoir Only special, coarse-grained reactivation salt* should be used in this machine. *Available from Miele’s distributor. Please see back page for more information. Do not use other types of salt, e.g. table salt, agricultural or gritting salt. These... -
Page 19: Salt Indicator
Water softener Salt indicator When the salt reservoir is empty, the "Recharge" indicator, b, illuminates to remind you to fill the reservoir. Reactivation takes place automatically during a program. The "Recharging" indicator, a, illuminates while this is occurring. -
Page 20: Rinse Aid
Rinse aid ^ Open the door fully. Rinse aid is necessary to ensure water does not cling to and leave marks on items during the drying phase. It also enables items to dry faster after they have been washed. Rinse aid is poured into the storage reservoir, and a pre-set amount is dispensed automatically. -
Page 21: Setting The Dosage
Rinse aid Setting the dosage The dosage adjuster in the opening has settings from 1 to 6 (1-6 ml). It is factory-set to 3 (3 ml). ^ Use a higher setting if spots are left after drying. ^ If surfaces become cloudy and/or streaky, use a lower setting. -
Page 22: Adding Neutralizing Agent
Adding neutralizing agent Neutralizer (pH-level: acidic) neutralizes detergent residue on the surface of instruments being cleaned. It is automatically dispensed in the rinse following the wash step of a program. To set up the Neutralizer ^ Place the container of neutralizer next to the machine. - Page 23 Adding neutralizing agent Priming the neutralizer Refilling the neutralizing agent dispensing system ^ Turn the program selector to the "STOP" f position. ^ Turn off the machine. ^ Press and hold the "Display" ß and "Start" 6 buttons at the same time. Simultaneously turn the machine on with the "On/Off"...
-
Page 24: Adding Detergent
Adding detergent Only use detergents recommended and sold by Miele for the dental disinfector. Detergent comes in two forms – a powder or a liquid option. Powder Option Powder detergent must be placed in the detergent dispenser before every program (except for the "Rinse" and "Drain"... - Page 25 (DOS-Module G 60). This is connected externally. Contact Miele or your authorized Miele distributor for details. The optional DOS Module G 60 is supplied with its own installation and connection instructions.
- Page 26 Adding detergent Setting the dosage and DOS 1 (liquid detergent) via the optional DOS-Module G 60 priming the dispensing system Setting the dosage Selecting the programming level ^ Turn the program selector to the Follow the dosage recommedation "STOP" f position. of the cleaning agents manufacturer.
- Page 27 Adding detergent Priming the dispensing system b) If only priming is required (e.g. the dispensing system has been allowed to a) After setting the detergent dosage: become empty by mistake): ^ Turn the program selector to the ^ Select programming level 2 1 o’clock position.
- Page 28 Maintenance of the dispensing system To ensure trouble-free operation, the following regular maintenance should be carried out by a Miele approved service technician. ^ Replace the dispensing hoses in the DOS modules every 12-18 months. Take care when handling liquid agents and additives.
-
Page 29: Loading The Machine
Loading the machine ^ Tall, narrow pieces should be placed This disinfecting washer normally requires a top and bottom basket. in the center of the baskets to ensure Various inserts and special baskets are water coverage. also available for a wide variety of ^ The spray arms must not be blocked instruments. - Page 30 Loading the machine Important Make sure that the water connection spring adapter engages correctly when a basket or injector unit is inserted in the machine. It must be 4-5 mm higher than the water connection inlet. If it is not: ^ Loosen the plastic nut.
- Page 31 Only clean and/or disinfect instruments dangerous. Turn off at the main and utensils (dental) in this machine if power immediately and call the Miele the manufacturer has stated that they Service Department or an authorized are suitable for machine processing.
- Page 32 G 7881 IMPORTANT SAFETY INSTRUCTIONS Personnel operating the machine When using this machine in the should be trained regularly. higher temperature ranges be Children and untrained personnel must especially careful not to scald or burn not be allowed access to the machine yourself when opening the door! or its controls.
- Page 33 Please be aware that changes in formulation, storage conditions, etc. Only use Miele approved cleaning which may not be publicized by the agents formulated for use in chemical manufacturer can have a washer disinfectors in this machine.
- Page 34 Consult Miele on the type and such as cleaning agent, quality of water application of such equipment. etc. are discussed with the Miele Technical Application specialists.
-
Page 35: Adjusting The Top Basket
Loading the machine Adjusting the top basket Adjusting the top basket ^ Pull out the top basket until a The top basket can be adjusted above and below the middle position by 2 cm. resistance is felt; lift from the runners and remove. -
Page 36: Program Selection
Program selection Choose your program according to the types of instruments or utensils being cleaned and the degree of soiling. Programs (fixed) Program Description Wash Wash program without disinfection. Rinse (cold) Rinse only. To rinse items before a wash program, to avoid excessive foam. - Page 37 Program selection Program Sequence 1. Pre-wash 2. Cleaning 3. Interim 4. Interim 5. Final 6. Drying and/or rinse II rinse (extra rinse I thermal and/or program) with disinfection disinfection Neutralization and/or cleaning Cleaning Rinse 60°C/3’ 65°C/1’ (DI) DOS 2 Cleaning DOS 3 Rinse and 55°C/5’...
-
Page 38: Operation
Operation Once the program has started, all other Turning on programs are blocked. If the program ^ Close the door. selector is turned to another program, ^ Press the "On/Off" button. the values shown in the display will go out. The values can be seen again if the When the program selector is in the program selector is turned back to the "Stop"... -
Page 39: Drying
Operation Drying At the end of a program "Drying" 0 may be selected as an ^ The "Complete" indicator in the additional feature once a program has program sequence display illuminates, and the "Start" 6 been selected (except in the "Rinse" and "Drain"... -
Page 40: Cancelling A Program
Operation Cancelling a program ^ Turn the program selector to the "Stop" f position (the program will stop after approximately 2 seconds). ^ Open the door. Caution: Water and items in the machine may be hot. Danger of burning or scalding. ^ Arrange the load securely. -
Page 41: Programming Special Functions
Programming special functions 1.1 DOS 1 (liquid detergent) via the For future servicing, please optional DOS-Module G 60 document any alterations to the standard factory settings. 1.1.1 Setting the dosage Enter any alterations in the field Value set:________. Follow the dosage recommedation of the cleaning agents manufacturer. - Page 42 Programming special functions 1.1.2 Priming the dispensing system b) If only priming is required (e.g. the dispensing system has been allowed to a) After setting the detergent dosage: become empty by mistake): ^ Turn the program selector to the ^ Select programming level 2 1 o’clock position.
- Page 43 Programming special functions ^ Turn the program selector to "Rinse". 2. Buzzer A number from 20 to 27 will appear in This special function allows you to the display: program a buzzer (lasting up to a maximum of 30 seconds) for the 20 = Buzzer switched off following functions: 21 = Buzzer at end of program...
-
Page 44: Machine Care
Machine care Filter combination Cleaning the fine, flat and micro-fine filters The machine must not be used ^ Remove the coarse filter. without all the filters in place. The ^ Remove the fine filter (if fitted) from be- filters protect the circulation pump from damage caused by foreign tween the flat and the micro-fine filters. - Page 45 Machine care Cleaning the spray arms From time to time, particles may become trapped in the spray arm jets. The spray arms should be inspected and cleaned every 4 - 6 months. Remove the spray arms as follows: ^ Unscrew the upper spray arm. ^ Unscrew the middle spray arm (under the upper basket) clockwise at the protruding nut.
- Page 46 Machine care Cleaning the non-return valve The drain pump is located beneath the non-return valve (see arrow). and drain pump If water has not been pumped away at the end of a program, the drain pump or the non-return valve may be blocked. ^ Turn off the washer.
- Page 47 Machine care ^ Replace filters and the seal. Make Cleaning the filters in the water sure they are sitting correctly. inlet ^ Reconnect the hose to the water inlet, Filters are incorporated in the screw making sure that it goes back on connection of the water inlet hose to straight.
-
Page 48: Correcting Minor Faults
Correcting minor faults Before contacting the Miele service The wash cycle finishes too early and department, please read the following the "Fill/Drain" indicator flashes troubleshooting steps. (fault code "F A" appears in the display) Any work on the electrical ^ Turn the program selector to the components of the machine should "Stop"... - Page 49 If this switch trips repeatedly, contact ^ Rearrange the load to be cleaned so the Miele Technical Service that the spray arms can rotate freely. Department. ^ Check if anything obstructs the powdered detergent dispenser flap.
-
Page 50: After Sales Service
If you still have difficulty or if a fault code "F..." appears in the display, please contact your authorized Service Dealer or the Miele Service Department. See back cover for addresses. Please quote the fault code as well as... - Page 51 INSTALLATION INSTRUCTIONS...
-
Page 52: Caring For The Environment
Caring for the environment Disposal of the packing Disposal of the appliance material Appliances contain materials which can be recycled. Please contact your local The protective packing materials are authorities about recycling in your area. environmentally safe and can be recycled. -
Page 53: Installation
Steam Deflector (protects the countertop) Depending on the requirements for an undercounter installation, a steam deflector can be ordered from the Miele Technical Service Department. The underside of the Countertop is protected from steam damage by a stainless steel plate. - Page 54 Installation Removing the lid (if necessary) Important for machines with steam condenser (depending on model) If necessary, remove the lid from the ^ To prevent countertop damage by machine to make installation possible. steam, the supplied self adhesive ^ Open the door. protective foil (25 x 58 cm) must be placed underneath the countertop near the steam condenser.
-
Page 55: Electrical Connection
^ A damaged power cord must only be replaced with a genuine Miele cord The machine comes equipped for by a Miele service technician. connection to a 208 V, 60 Hz, 1 phase power supply. - Page 56 Electrical connection Removing the service panel Re-assembling the service panel Disconnect the machine from the ^ Refit the plastic protective cap, main electrical supply. facing and service panel in the reverse order to which they were removed. ^ Remove the fixing screws, a, from the service panel.
-
Page 57: Plumbing
^ If the water pressure is not in the range listed above, the "Fill/Drain" indicator may come on and the fault code "F..E" will appear in the display. If this occurs, contact the Miele Technical Service Department for advice. ^ Connections with a "... - Page 58 DI inlet for purified water. If the machine has a DI water connection which is not going to be used, the electronics will need to be reprogrammed by a Miele technician. The inlet hose will remain on the rear of the machine.
- Page 59 ^ The machine should preferably be connected to a separate drainage system onsite. If separate drainage is not available contact your Miele application specialist for advice. The onsite drain connection point should be located between 1 ft. (0.3 m) and 3 ft. (1 m) above the lower edge of the machine.
-
Page 60: Technical Data
Technical data English Metric Height: " (32 ") 85 (82) cm Width: " 60 cm Depth: " 60 cm Voltage: 208 V 60 HZ 1 Phase Rated load: 6 KW Power cord approx. 5’ 11" 1.8 m Cold Water Connection: Acceptable water pressure (flow rate) 10 - 147 psi... - Page 64 All rights reserved / 5003 M.-Nr. 05 970 440 / 00 This paper has been bleached without the use of chlorine.