Advertisement
Quick Links
Advertisement

Related Manuals for ZALMAN M1


Summary of Contents for ZALMAN M1
- Page 1 USER MANUAL English / 한 글 / Français / Español Ver.140324...
- Page 2 8. Avoid inserting objects or hands into the system while it is in operation to prevent product damage and injuries. 9. Zalman Tech Co., Ltd. is not responsible for any improper use. 10. Product design and specifications may be revised to improve quality and performance.
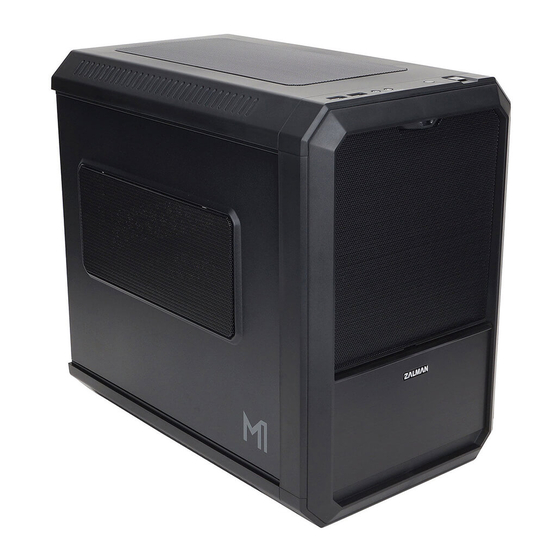
- Page 3 3. Specification / 스펙 Enclosure Type ATX Mini Tower Dimensions 261(W) x 394(H) x 426(D)mm Motherboard Compatibility MINI-ITX Board Power Supply Compatibility Standard ATX / ATX12V PCI/AGP Card Compatibility Full Size 350 mm (12.5 inch) 5.25" External Bay x 1 3.5"...
- Page 4 6. Installation / 설치방법 1) Side Panel Removal / 사이드 커버 분리 2) Power supply installation / 파워 서플라이 설치 A Type: 120mm fan for PSU faces down to improve the PSU cooling. B Type: 120mm fan for PSU faces in to improve the cooling of the system.
- Page 5 4) VGA Card Installation / 그래픽 카드 설치 ① Unfasten the Screw holding the PCI Cover and disassemble the cover. ② Remove the PCI Slot Cover. ③ Install the VGA Card and fasten with a fixing screw. ① PCI커버를 고정하는 스크류를...
- Page 6 ③ Hot swap HDD Tray installation / Hot swap HDD 트레이에 장착 ③ Hot swap HDD Tray installation / Hot swap HDD 트레이에 장착 1) Press open the front door to remove the HDD tray. Push/누름 1) 정면 Door를 누른 후 HDD 트레이를 분리합니다. 2.5"...
- Page 7 8) 2.5" HDD / SSD installation / 2.5" HDD / SSD 설치 HDD Anti-static C Bolt rubber 9) Cabel Connect / 케이블 연결 ① Power button cable connect / 전원버튼 케이블 연결 Power button / 전원 버튼 Power LED Power Motherboard / 마더보드...
- Page 8 ② Fan Controller Display connection / 팬 컨트롤러 연결 - After connecting the 4-Pin Power cable, connect Fans to Fan Connector. - 팬 컨트롤러 : 4핀 전원을 연결한 후 팬 커넥터에 팬을 연결합니다. (팬 2개 연결 가능) Fan controller / 팬 컨트롤러 PSU Power / PSU 전원...
- Page 9 Français / Español 1. Précautions 1. Assurez-vous d'être bien informé du manuel du produit avant son installation. 2. Assurez-vous de vérifier l'état des composants et des produits, et s'il vous plaî consulter votre revendeur quand il y a une erreur. 3.
- Page 10 3. Spécification du produit / Especificacion de Producto Enclosure Type ATX Mini Tower Dimensions 261(W) x 394(H) x 426(D)mm Motherboard Compatibility MINI-ITX Board Power Supply Compatibility Standard ATX / ATX12V PCI/AGP Card Compatibility Full Size 350 mm (12.5 inch) 5.25" External Bay x 1 3.5"...
-
Page 11: Installation
6. Installation 1) Retrait du panneau latéral / Retirar el panel lateral 2) L'installation d'alimentation / La instalación de suministro de energía Type A : L'effet de refroidissement de l'alimentation s’ améliore si le ventilateur de 120mm de l'alimentation s’ o riente vers le bas du boîtier. Type B: L'effet de refroidissement du système s’... - Page 12 4) Assemblage de la carte graphique / Ensamblaje de tarjeta grafica Français ① Desserrer la vis à la main qui fixe le couvercle de PCI et séparer le couvercle. ② Retirer le couvercle du logement PCI. ③ Installer la carte graphique et la fixer avec vis de fixation.
- Page 13 ③ Installation de Hot swap HDD Tray / Instalar Hot swap HDD Tray 1) Presione la puerta de entrada y después extraiga la bandeja de la unidad de disco duro. Push 1) Appuyer la porte frontale pour retirer le plateau de disque dur. 2.5"...
- Page 14 8) Installation du 2.5" HDD/SSD / Instalar 2.5" HDD/SSD HDD isolateur de vibrations en caoutchouc / Vis C / Tornillo C HDD hule antipolvo 9) Connexion des câbles / Cable Connection ① 1) Connexion des câble d'alimentation de bouton / Conexión cable de botón de potencia bouton d’alimentation / Botón de encendido Power LED Power...
- Page 15 ② Connection du contrôleur de ventilateur / Conexión del controlador de abanico - Contrôleur de ventilateur: Après connecter le contrôleur à l`alimentation de 4 broches, brancher le ventilateur au connecteur de ventilateur. (2 ventilateur peuvent être connectés) Controlador de abanico: Después de conectar la potencia 4pin, conectar el abanico en el conectador de abanico.
Need help?
Do you have a question about the M1 and is the answer not in the manual?
Questions and answers