Table of Contents
Advertisement
Advertisement
Table of Contents

Related Manuals for NextBase 212


Summary of Contents for NextBase 212
- Page 1 Instruction Manual...
-
Page 3: Introduction To Using An In-Car Cam
INTRODUCTION TO USING AN IN-CAR CAM The iN-CAR CAM range of dash cams have been designed specifically with ease of use in mind, it is recommended NOT to change the default settings, which have been carefully selected to give the best performance for day to day use. -
Page 4: Table Of Contents
TABLE OF CONTENTS INTRODUCTION TO USING AN IN-CAR CAM ............. TABLE OF CONTENTS ....................PRECAUTIONS ......................CAUTIONS ON USING THIS PRODUCT ..............PRODUCT SPECIFICATION ..................PACKAGE CONTENTS ....................PRODUCT FEATURES ....................POWERED MOUNT ....................... CAMERA - PARTS & CONTROLS ................. IN VEHICLE INSTALLATION .................. -
Page 5: Precautions
PRECAUTIONS Please read this manual carefully before operation and keep it for future reference. It will be helpful should you encounter any operational problem. WARNING: Do not expose this product to rain, moisture or water under any circumstances, doing so may result in the risk of electric shock or fire. CAUTION: To reduce the risk of electric shock, do not perform any servicing other than that contained in the instruction manual unless you are qualified to do so. -
Page 6: Product Specification
PRODUCT SPECIFICATION Model Number / Name NBDVR212 / NEXTBASE iN-CAR CAM LITE Power Requirements 5V / 1.5A Power Supply 12-24Vdc Car Power Cable (supplied) Fuse Type: 32mm / 2A Output: 5Vdc Sensor Resolution 3M Pixel (3,000,000 Pixel) Lens - Type / Angle / Aperture 6G / 140°... -
Page 7: Package Contents
Disk Product appearance may differ slightly to that shown above. PRODUCT FEATURES Thank you for purchasing this NEXTBASE iN-CAR CAM product, in this section we will outline some of the features available with this dash cam. 2.7" LCD Colour Screen LCD screen for ease of use and viewing the playback of recorded videos and photos. -
Page 8: Powered Mount
POWERED MOUNT Please see below to identify the parts of the supplied powered mount. Locking lever The locking lever is used to attach and release the window mount to your vehicles windscreen. Pull the lever down to prepare the window mount for use. Once the mount is firmly upon the windscreen (in a suitable location) push the lever to lock the mount in place. -
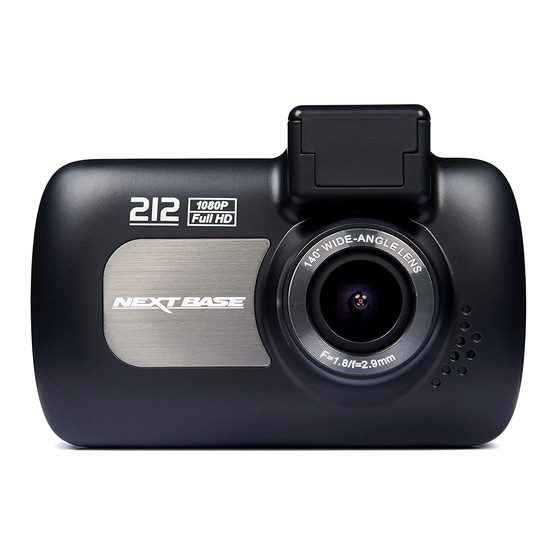
Page 9: Product View, Parts & Controls
CAMERA - PARTS & CONTROLS Please see below to identify the parts and controls of your iN-CAR CAM. Front: Mounting point (located under dust cover) After removing the dust cover, attach the supplied powered mount here. Camera lens Wide Angle 140°, 6 Element glass lens for optimum picture quality. Speaker Integral speaker for audio playback directly from the iN-CAR CAM. - Page 10 CAMERA - PARTS & CONTROLS (CONTD.) Back: 11 10 Screen 2.7' LCD colour screen for the viewing of recorded files on the iN-CAR CAM. Protect File button Press whilst recording to protect the current file in event of an emergency situation. A beep sound will be heard to confirm that the file was protected successfully.
- Page 11 CAMERA - PARTS & CONTROLS (CONTD.) Back continued: 11 10 Up / Microphone Off button Press to navigate up within menus and to move to the previous file when in playback mode. Microphone Off: Press to turn off / on the microphone (audio recording), only available whilst in video mode. 10.
- Page 12 CAMERA - PARTS & CONTROLS (CONTD.) Top: 13. AV Out socket Used to connect your iN-CAR CAM to a television using an AV Cable (sold separately). 14. DC-IN & USB socket Connect the supplied car power cable or USB data cable here. Note: - Normally the Car power cable is connected to the powered mount when in use, not directly to this socket.
-
Page 13: In Vehicle Installation
IN VEHICLE INSTALLATION Please follow the instructions below for first-time installation of the iN-CAR CAM. For day to day use simply remove the camera from the mount as required. Insert MicroSD Card Insert a suitable MicroSD card (Class 10 48/Mbps) in to the iN-CAR CAM, taking care that the gold contacts are facing towards the LCD screen side of the iN-CAR CAM. - Page 14 IN VEHICLE INSTALLATION (CONTD.) Attach the mount to the iN-CAR CAM Slide the iN-CAR CAM onto the mount. Once attached magnets within the mount will hold the two parts together. Attach the mount to the windscreen Remove the protective plastic film from the suction cup of the mount. Select a suitable position for the mount and clean the windscreen with a dry / clean cloth to achieve a good contact between the glass and suction cup.
- Page 15 - A Nextbase hardwire kit is available from your retailer. This connects directly to the vehicle fusebox and hence leaves your cigarette socket available for Phone / Sat Nav charging.
- Page 16 IN VEHICLE INSTALLATION (CONTD.) Please read and follow the notes below for the safe operation of your iN-CAR CAM within your vehicle. As per the installation instructions, you must install the iN-CAR CAM so it does NOT obstruct the drivers view of the road, preferably on the passenger side of the vehicle and behind the rear view mirror.
-
Page 17: Video Mode
VIDEO MODE The key below explains the various information displayed on the screen when your iN-CAR CAM is in Video mode, some icons will only be displayed once the relevant function has been selected within the Video menu, as described below. Mode: indicates the iN-CAR CAM is in Video mode. - Page 18 VIDEO MODE (CONTD.) Video Menu The Video Menu is accessed by pressing the MENU button whilst in video mode. Video Menu Video Menu Resolution Resolution Exposure Exposure Audio Recording Audio Recording Video Length Video Length Back Enter MENU The default settings have been carefully selected to allow you to use the iN-CAR CAM without the need to change any settings.
- Page 19 VIDEO MODE (CONTD.) Continued from previous page. Video Menu Video Menu Resolution Audio Recording Exposure Video Length Audio Recording Information Stamp Video Length G Sensor Back Enter MENU Video Length Select the duration of the individual recorded video files. The iN-CAR CAM will continue recording, filling the memory card.
-
Page 20: Photo Mode
PHOTO MODE Press the MODE button to select Photo mode. The key below explains the information displayed on the screen when your iN-CAR CAM is in Photo mode. 1. Mode: indicates the iN-CAR CAM is in Photo mode. 2. Exposure: displays current exposure level setting. 3. - Page 21 PHOTO MODE (CONTD.) Photo Menu The Photo Menu is accessed by pressing the MENU button whilst in photo mode. Video Menu Photo Menu Resolution Exposure Exposure Time & Date Stamp Audio Recording Audio Recording Video Length Back Enter MENU The default settings have been carefully selected to allow you to use the iN-CAR CAM without the need to change any settings.
-
Page 22: Playback Mode
PLAYBACK MODE Press the MODE button to select Playback mode, the last file that was saved to the memory card will be shown on screen along with the relevant playback controls. Press the Up or Down buttons to move to the previous or next file respectively. Dependent on the type of file, the on-screen information and playback functions differ. - Page 23 PLAYBACK MODE Photo Files: 23550001.MOV 00340002.JPG 1080P 23:55:54 23:55:54 06/01/2015 06/01/2015 : NEXT : NEXT : PREV OK : MODE : : NEXT / II Mode: indicates the iN-CAR CAM is in Playback mode. File type: indicates whether a video or photo file is being viewed. File number: displays current file number.
- Page 24 PLAYBACK MODE (CONTD.) Deleting files: Highlight the Delete Files option and press the OK button. Playback Menu Video Menu Resolution Delete Files Exposure Protect Files Back Enter MENU This will then give you two options: Delete File Delete ALL Files ? Video Menu Delete Files Video Menu...
- Page 25 PLAYBACK MODE (CONTD.) Protecting files: Highlight the Protect Files option and press the OK button. Playback Menu Video Menu Resolution Delete Files Exposure Protect Files Back Enter MENU This will then give you four options: Protect File Unprotect File Protect Files Video Menu Protect Files Video Menu...
-
Page 26: Setup Menu
SETUP MENU Setup Menu The Setup Menu is accessed by pressing the MENU button twice. Video Menu Setup Menu Resolution Parking Mode Exposure Time & Date Audio Recording Language Video Length Screen Saver Back Enter MENU The default settings have been carefully selected to allow you to use the iN-CAR CAM without the need to change any settings. - Page 27 SETUP MENU (CONTD.) Continued from previous page. Video Menu Setup Menu Resolution Language Exposure Screen Saver Audio Recording Device Sounds Video Length Auto Power Off Back Enter MENU Language Select preferred language. Options: English, Dansk, Deutsch, Español, Français, Italiano, Nederlands, Norsk, Suomi and Svenska.
- Page 28 SETUP MENU (CONTD.) Continued from previous page. Video Menu Setup Menu Resolution Number Plate Exposure Format SD Card Audio Recording System Info Video Length Default Settings Back Enter MENU Number Plate Enter the registration number for your vehicle, this will then be shown on the recorded video files.
-
Page 29: Mass Storage & Pc Camera
When this option is selected, the iN-CAR CAM will function as a card reader for your PC. An extra drive will appear, e.g. NEXTBASE (D:) and you will be able to view / manage the stored files upon the MicroSD card within the iN-CAR CAM. -
Page 30: Video & Audio Output
VIDEO & AUDIO OUTPUT The iN-CAR CAM can be connected to external video equipment, such as a television or a monitor within your vehicle that uses standard RCA inputs. Connect the AV cable (sold separately) between the iN-CAR CAM and your external device, then turn on the iN-CAR CAM. -
Page 31: Trouble Shooting
The sound is not synchronised The Codecs upon your PC may not be compatible or the latest with video during playback. standard. Download the latest Codecs from: www.nextbase.co.uk Video has no sound. Ensure that “Record Audio” setting is turned ON within the Video Menu. - Page 32 TROUBLE SHOOTING (CONTD.) PROBLEM SOLUTION My iN-CAR CAM shuts down Either the battery has gone flat, or there is no power to the by itself after a while. iN-CAR CAM and the AutoPower Off period has been triggered. No power to my iN-CAR CAM, The cigarette power cable is not working.
- Page 33 Parking Mode section above. Downloading files from This is not a cause for concern, simply go to the settings within www.nextbase.co.uk Google Chrome and turn off the malicious software protection using Google Chrome results temporarily to download and install the playback software.
- Page 34 NOTES...
- Page 36 NBDVR212-IM-ENG-R3...
Need help?
Do you have a question about the 212 and is the answer not in the manual?
Questions and answers