
Related Manuals for NorthStar Explorer 538


Summary of Contents for NorthStar Explorer 538
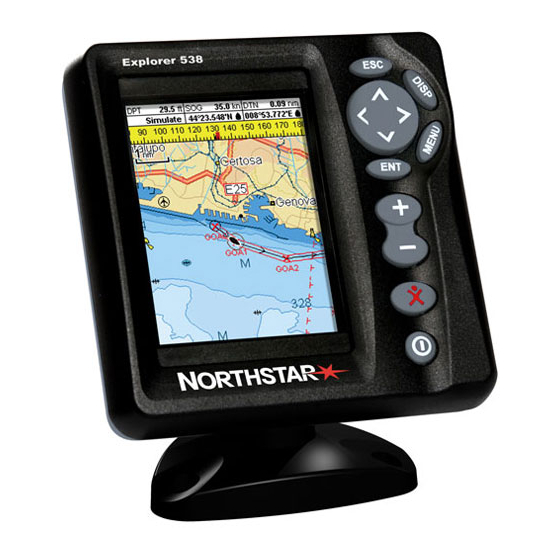
- Page 1 Explorer 538/538i Chartplotter Installation and Operation Manual www.northstarnav.com...
- Page 2 English language version of the Documentation will be the official version of the Documentation. This manual represents the Explorer 538/538i as at the time of printing. Brunswick New Technologies Inc. and its subsidiaries and affiliates reserve the right to make changes to specifications without notice.
-
Page 3: Important
Important It is your sole responsibility to install and use Northstar’s instrument and GPS antenna in a manner that will not cause accidents, personal injury or property damage. Always observe safe boating practices. The choice, location, angle and installation of the instrument & GPS antenna are critical to performance of the system as intended. -
Page 4: Table Of Contents
Contents Important ...3 Quick reference ...6 1 Introduction ...7 1-1 Overview ............... . . 7 1-2 Cleaning and maintenance . - Page 5 15 Installation ... 49 15-1 Installation: What comes with the Explorer 538/538i ......49 15-2 Installation: Options and Accessories .
-
Page 6: Quick Reference
Navigate to any point or to a waypoint Navigate along a route Projected course: An estimate of progress Tracks: records of where the boat has been GPS receiver status Saving and loading data with a user card Chart data Chart features (built in world chart) -
Page 7: Introduction
1 Introduction 1-1 Overview The Northstar Explorer 538 is a compact, rugged, highly integrated marine chartplotter. It is easy to use and has a Color display. Complex functions can be performed with a few key presses, taking the hard work out of boating. -
Page 8: Removing And Replacing The Display Unit
Handle plug-in cards carefully. Keep them in their protective cases when not plugged into the Explorer 538/538i. Keep the holder in place in the Explorer 538/538i at all times to prevent moisture from entering the card compartment. Turn the Explorer 538/538i off (see section 2-3). -
Page 9: Basic Operation
Start an action or accept a change. Zoom in or out to display diff erent areas and detail on the chart. Man overboard (MOB, see section 2-5). Turn Explorer 538/538i on and off (see section 2-3); adjust the backlighting (see section 2-4). -
Page 10: Using The Menus
2-3 Turning on and off / auto power Turning on manually If the Explorer 538/538i is not wired for auto power, press to turn the unit on. If necessary, adjust the display to be easy to read (see section 2-4). -
Page 11: Backlight And Night Mode
No: Use the Explorer 538/538i to manually navigate to the destination MOB waypoint (see sections 3-1-1 and 3-1-2). Yes: The Explorer 538/538i asks if the boat is to go to the MOB waypoint. Select: Yes: to immediately start navigating to the MOB waypoint. -
Page 12: Simulate Mode
2-7 Simulate mode In Simulate mode, the Explorer 538/538i ignores data from the GPS antenna and other transducers and sensors and the Explorer 538/538i generates this data itself. Otherwise, the Explorer 538/538i functions normally. There are two simulate modes: Normal: Allows a user to become familiar with the Explorer 538/538i off the water. - Page 13 Other menu and displays Note: Press to go from an Other display back to your last chart display. Northstar Explorer 538i/538 Installation and Operation Manual...
- Page 14 2-8-1 Dual displays The Explorer 538/538i can show two displays at once, for example Chart + Gauges. One of the displays, called the active display, has a yellow border and is controlled by the user. To change the active display, press cannot be the active display).
- Page 15 Tip: If less than the maximum number of lines of data are used, the data will take up less of the display area. Press to return to the display. 2-8-3 Compass The chart and highway displays can show a compass at the top of the display. The compass always shows the boat’s course over ground (COG), a red symbol in the middle.
-
Page 16: Navigation: Chart
The chart display shows the chart, the boat’s position course and navigation data. 3-1 Overview of navigating The Explorer 538/538i has two ways of navigating, going straight to a point or following a route. 3-1-1 Navigating to a point When the Explorer 538/538i is navigating to... - Page 17 Start Route. 3. Press to highlight the route to follow. Press 4. The Explorer 538/538i asks for the direction to traverse the route. Select Forward (the order the route was created) or Reverse . 5. The Explorer 538/538i displays the chart with the route marked and starts navigating from the start of the route.
-
Page 18: Chart Display
3-2 Chart display To go to the Chart display, press A typical chart display shows: Data header. To turn the data off or on or to change what data is displayed, see section 2-8-2 Compass (see section 2-8-3) Chart scale (see section 3-2-3) Boat position (see section 3-2-1) Boat track (see section 3-5) Boat course and CDI lines (see Appendix C, CDI). - Page 19 3-2-1 Chart modes The Chart has two modes: Centre on boat mode To switch to centre on boat mode in the chart display, press . The boat is at the centre of the chart. As the boat moves through the water, the chart automatically scrolls to keep the boat in the centre of the chart.
-
Page 20: Distance And Bearing Calculator
3-2-5 Finding places To see places near the boat’s position, press to switch to centre on boat mode. To see places near a different point, move the cursor to that point on the chart. To find and display places of interest: Press and select Find. -
Page 21: Projected Course
Time intervals. Or distance intervals. The track of where the boat has been can be displayed on the chart. The Explorer 538/538i can display one track while recording another. To work with tracks, see section 14-5. The Explorer 538/538i can store five tracks:... -
Page 22: Navigation: Highway Display
A waypoint is a position that you can set on the Explorer 538/538i chart for example a fishing spot or a point on a route. The Explorer 538/538i can have up to 3000 waypoints. A waypoint can be created, changed or deleted. A waypoint has: A name (up to eight characters). -
Page 23: Waypoints Display
5-1 Waypoints display To go to the waypoints display, press , select Other, then select Waypoints. The waypoints display is a list of the waypoints that have been entered, each with waypoint symbol, name, latitude and longitude, distance and bearing from the boat, type and display option. - Page 24 Or, in the Chart display, press Find, then select Waypoints. Select a waypoint from the list. The Explorer 538/538i switches to the chart display, with the selected waypoint at the centre of the chart. Deleting a waypoint from the chart display In the chart display, move the cursor to the waypoint to delete.
-
Page 25: Navigation: Routes
A route is a list of waypoints that the boat can navigate along. Routes can be created, changed and deleted. The Explorer 538/538i can have up to 25 routes. Each route can have up to 50 waypoints. A route can: Start and stop at the same waypoint . -
Page 26: Managing Routes
6-2 Managing routes After creating or changing a route, display the route on the chart and check that it does not cross land or dangerous water. 6-2-1 Creating a new route A. Creating a new route from the chart display while creating the route: Press to change the range;... - Page 27 3. Or, in the Chart display, press Find, then select Route. Select a route from the list. The Explorer 538/538i displays the selected route on the chart. to highlight the route to delete. Press and select Delete all.
-
Page 28: Satellites
DGPS A DGPS system uses correction signals to remove some of the errors in the GPS position. The Explorer 538/538i can use one of two types of DGPS system: WAAS and EGNOS DGPS WAAS and EGNOS are two satellite based DGPS systems. -
Page 29: Satellite Display
7-1 Satellite display The satellite display has information about the GPS satellites and GPS position. To go to the satellite display, press Other, then select Satellite. The satellite display shows: Northstar Explorer 538i/538 Installation and Operation Manual A Status of GPS antenna, for example Acquiring, GPS fix, No GPS. -
Page 30: Gauges Display
8 Gauges display The Gauges display shows boat data, such as water speed, as analog or digital gauges. To go to the Gauge display, press select Chart , then select Chart+Gauges. If necessary, press twice to switch to the Gauges display (see section 2-8-1). Before using the Gauge display, set Speed range and Max fuel flow (see section 17-11). -
Page 31: Data Display
9 Data display 10 Fuel functions and display The Fuel functions require optional fuel sensors to be installed. 10-1 When you add or remove fuel When you add or remove fuel in a boat with no SmartCraft fuel tank level sensors, you must tell the Explorer, otherwise REMAINING, RANGE and the low fuel alarm will be meaningless. -
Page 32: Fuel Display
This is useful for checking that both engines are under the same load. Speed If the Explorer 538/538i has both GPS and paddlewheel speed available then you can select which to use. The choice affects the calculated Range and Economy (see section 17-5 Speed source). -
Page 33: Fuel Consumption Curves
Enter the comfortable maximum RPM you have measured for the engine. Do not use the maker’s maximum RPM. The Explorer 538/538i then asks you to set the minimum RPM. Set the throttle for minimum RPM; for a twin engine boat set both engines to about the same minimum RPM. -
Page 34: Managing Fuel Consumption Curves
10-3-2 Managing fuel consumption curves Record several curves for different conditions. Renaming a curve Press one or more times until the Setup menu is displayed, then select Fuel. Select Fuel consumption curve. Select Name , press name of the curve to rename. Select Rename and press name and press 10-3-3 Using fuel consumption curves... -
Page 35: Tides Display
11 Tides display The tides display is available on C-MAP charts. The tides display shows tide information at a tide station for the selected date. Note: The tides display requires the local time offset to be set to work correctly (see section 14-11) To show the tides display for the tide station nearest to the boat, press... -
Page 36: User Card Display
The number of points in tracks 1 to 5 currently in the Explorer 538/538i. Note: To save Explorer 538/538i data onto the user card, use the Save command (see below). Data stored on the user card and shown on the file list is not available to be used by... -
Page 37: About Display
A routes file: The new routes are added to any existing routes in the Explorer 538/538i. If a new route has the same name as an existing route but has different data then the Explorer 538/538i asks which route to keep. -
Page 38: Setting Up The Explorer 538/538I
14 Setting up the Explorer 538/538i The Explorer 538/538i has a number of advanced features which are set up through the setup menu. We recommend that you become familiar with the operation of the unit using the default settings before making any changes to the data in these menus. - Page 39 Setup option menus Factory default settings are shown. The setup data available will depend on the optional sensors and instruments installed. System Chart (see 14-1) (see 14-2) Water (14-2) Others (14-2) Fuel Track SmartCraft (see 14-4) (see 14-3) (see 14-5) (see the SmartCraft Gateway Installation and...
-
Page 40: Setup > Chart
Factory reset This option returns all of the Explorer 538/538i settings (except the language, waypoints and routes) to the default factory settings shown on the setup menus. SmartCraft No SmartCraft gateway is fitted. Disable SmartCraft functions. Normal SmartCraft operation See section 15-7. -
Page 41: Map Shift
Select the map datum for the paper chart you are using. If you select a datum other than WGS 84 the Explorer 538/538i asks if you want to apply the NMEA datum offset (see below). When you change to a chart with a different datum, change the Explorer 538/538i map datum again. - Page 42 Non marine chart data shown Projected course The Explorer 538/538i can estimate the course after a given time, based on the current speed and heading (see section 3-4). The options are 2 minutes, 10 minutes, 30 minutes, 1 hour, 2 hours or Off.
-
Page 43: Setup > Gps
GPS: GPS Source • Internal: Use the internal GPS antenna (Explorer 538i) or the external GPS antenna supplied (Explorer 538) (see section 15-5). • NMEA: Use an external GPS or DGPS source connected via NMEA (see section 15-9). •... -
Page 44: Setup > Fuel
Always carry adequate fuel for the journey, plus a reserve. Tank full Tells the Explorer 538/538i you have filled a fuel tank (see section 10-1). Set remaining Tells the Explorer 538/538i you have added or removed fuel (see section 10-1). -
Page 45: Setup > Track
1 has up to 2000 points and tracks 2, 3, 4 and 5 have up to 500 points each. Record Off: The Explorer 538/538i tops recording a track. 1 to 5 (select a track number): The Explorer 538/538i starts recording the boat’s course into the selected track. -
Page 46: Setup > Logs
Explorer 538/538i can not receive the DGPS signal (beacon, WAAS or EGNOS) Explorer 538/538i can not receive the GPS signal (this alarm is always on) -
Page 47: Setup > Units
(nautical miles), mi (miles) or km (kilometres) Speed kn (knots), mph (miles per hour) or kph (kilometres per hour) 14-9 Setup > Comms Use this feature when the Explorer 538/538i is connected to other Northstar instruments through NavBus or any compatible NMEA instrument. Press... -
Page 48: Setup > Calibrate
Date format The options are dd/MMM/yy, MMM/dd/yy, dd/MM/yy or MM/dd/yy. Never have simulate mode on when the Explorer 538/538i is navigating on the water. Mode There are two choices for Mode: 1 Normal Simulates the boat moving from the selected start point at the given speed and heading. -
Page 49: Installation
Tip: As the boat moves, vary Course to simulate the boat moving off course. 2 Demo Simulates a boat moving along a route and automatically displays different Explorer 538/538i functions. The options required for Demo are: Speed: The simulated boat speed to use. - Page 50 External alarm out, 30 V DC 200 mA maximum. Northstar Explorer 538i/538 Installation and Operation Manual SmartCraft: With one or two SmartCraft capable Mercury engines, the Explorer 538/538i can display engine data and trim and can control troll speed (see section 18-10).
-
Page 51: Installation: The Display Unit
15-3 Installation: The display unit Select a position for the display unit: At least 4” (100 mm) away from the compass, • at least 12” (300 mm) away from any radio transmitter and at least 4 ft (1.2 m) away from any antenna. -
Page 52: Installation: Power/Data Cable
Wire the Explorer 538/538i for auto power to have the Explorer 538/538i turn on with the boat’s ignition switch or to to record engine hours or if the Explorer 538/538i must add up the total fuel used (for example if Northstar petrol/gasoline fuel sensors are installed or if SmartCraft is installed without fuel tank level sensors). -
Page 53: Installation: Gps Antenna
A compatible GPS or DGPS instrument or • antenna connected by NavBus (see section 15-8) or NMEA (see section 15-9). In this case, the Explorer 538/538i does not need its own antenna. Note: The Explorer 538/538i can apply the WAAS •... -
Page 54: Installation: Smartcraft
15-7 Installation: SmartCraft If the boat has one or two SmartCraft capable Mercury petrol/gasoline engines, connect the Explorer 538/538i to the SmartCraft engines with an optional SmartCraft gateway. The display unit can display engine data and trim and can control troll speed. -
Page 55: Installation: Other Nmea Instruments
Insert any required C-MAP chart card (see section 1-3). Turn the instrument on (see section 2-3). When the Explorer 538/538i is turned on for the first time, it displays an installation menu: Select the language to use. Change the data if necessary (see section... - Page 56 Appendix A - Specifications GENERAL Size: 126 mm H x 126 mm W x 65 mm D (5.0” x 5.0” x 2.6”) Display: 3.8” diagonal, TFT Color, 240 x 320 pixels Backlight: Display and keys Supply voltage 10 to 16 V DC. Supply current: at 13.8 V 120 mA min - no backlighting 220 mA max - full backlighting...
- Page 57 List of datums Adindan American Samoa 1962 ARC 1950 Astro Beacon ‘E’ 1945 Astro Tern Island (Frig) 1961 Ayabelle Lighthouse Bissau Camp Area Astro Cape Chatham Island Astro 1971 Corrego Alegre Djakarta (Batavia) European 1950 Gan 1970 Guam 1963 Herat North Hong Kong 1963 Indian 1954 Indonesian 1974...
- Page 58 There are no user serviceable parts. Specialized methods and testing equipment are required B-1 General Problems 1-1 The Explorer 538/538i won’t turn on: The Explorer 538/538i is designed to operate on a 12 volt battery system, where the voltage may vary from 10 to 16 volts. If an excessive voltage is supplied, a fuse will be tripped, turning the display unit off.
- Page 59 B-2 GPS navigation problems 2-1 No GPS fix or long time to get fix at startup: May occur occasionally if the antenna does not have a clear view of the sky. The satellite positions are constantly changing. Antenna cable not connected to display unit. Restart the GPS (see section 14-3).
- Page 60 B-3 Fuel consumption problems Note: For the Explorer 538/538i to measure fuel consumption, the optional fuel flow kit must be fitted. 3-1 Fuel used or remaining seem inaccurate: Explorer is not wired for auto power (see section 15-4). In rough seas, fuel may surge back and forth through the fuel transducer, resulting in incorrect readings.
- Page 61 Appendix C - Glossary and navigation data Glossary Attention Area - An important area on a chart, such as a restricted anchorage or a shallow area (see section 14-2). Bathymetric line - A depth contour line on the chart. Chart card - A plug-in card that stores chart data for a region (see section 1-3).
- Page 62 Navigation data The boat is sailing from the start to the destination and has moved off the plotted course from the start to the destination. Bearing to Destination: Bearing to the destination from the boat. BRG Bearing to cursor: Bearing to cursor from boat (cursor mode, see section 3-2) Course Deviation Indicator: When the boat is navigating to a point, the chart and highway displays show a parallel line on either side of the plotted course.
- Page 64 AMERICAS 30 Sudbury Road, Acton, MA 01720, USA Ph: +1 978.897.6600 Ph: +1 800.628.4487 Fax: +1 978.897.7241 sales@bntmarine.com AUSTRALIA PO Box 479, Gladesville, NSW 2111, AUSTRALIA Ph: +61 2 9879 9060 Fax: +61 2 9879 9009 northstaraus@northstarnav.com www.northstarnav.com EUROPE Unit 2, Ocean Quay, Belvidere Rd, Southampton, SO14 5QY, ENGLAND Ph: +44 2380 339922...