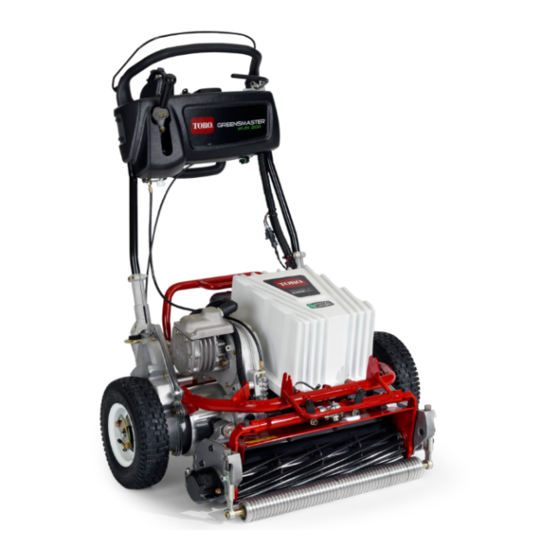
Toro Greensmaster eFlex 1800 Service Manual
Hide thumbs
Also See for Greensmaster eFlex 1800:
- Service manual (312 pages) ,
- Diagnostic manual (136 pages) ,
- Operator's manual (44 pages)
Table of Contents
Advertisement
Quick Links
Preface
The purpose of this publication is to provide the service
technician with information for troubleshooting, testing
and repairing assemblies and components on the
Greensmaster eFlex 1800 (Model 04043) and eFlex
2100 (Model 04042).
REFER TO THE OPERATOR'S MANUAL FOR OPER-
ATING,
MAINTENANCE
INSTRUCTIONS. Space is provided in Chapter 2 of this
book to insert the Operator's Manual and Parts Catalogs
for your machine. Replacement Operator's Manuals
and Parts Catalogs are available on the internet at
www.toro.com
The Toro Company reserves the right to change product
specifications or this publication without notice.
Greensmaster
AND
ADJUSTMENT
E The Toro Company - - 2012
(Models 04043 and 04042)
R
eFlex 1800/2100
This safety symbol means DANGER, WARNING
or CAUTION, PERSONAL SAFETY INSTRUC-
TION. When you see this symbol, carefully read
the instructions that follow. Failure to obey the
instructions may result in personal injury.
NOTE: A NOTE will give general information about the
correct operation, maintenance, service, testing or re-
pair of the machine.
IMPORTANT: The IMPORTANT notice will give im-
portant instructions which must be followed to pre-
vent damage to systems or components on the
machine.
PART NO. 12189SL
Service Manual
Advertisement
Chapters
Table of Contents
Troubleshooting

Related Manuals for Toro Greensmaster eFlex 1800


Summary of Contents for Toro Greensmaster eFlex 1800
- Page 1 The Toro Company reserves the right to change product IMPORTANT: The IMPORTANT notice will give im- specifications or this publication without notice. portant instructions which must be followed to pre- vent damage to systems or components on the machine.
- Page 2 This page is intentionally blank. Greensmaster eFlex 1800/2100...
- Page 3 ......4 -- 26 Service and Repairs ..... . . 4 -- 44 Greensmaster eFlex 1800/2100...
- Page 4 This page is intentionally blank. Greensmaster eFlex 1800/2100...
-
Page 5: Table Of Contents
..... SAFETY AND INSTRUCTION DECALS ..Greensmaster eFlex 1800/2100 Page 1 - - 1 Safety... -
Page 6: General Safety Instructions
General Safety Instructions Greensmaster eFlex 1800 and eFlex 2100 machines have been tested and certified by TORO for compliance WARNING with existing safety standards and specifications. Al- though hazard control and accident prevention are par- tially dependent upon the design and configuration of... -
Page 7: While Operating
6. If the electric motor must be running to perform main- machine, use genuine Toro replacement parts and ac- tenance or make an adjustment, keep hands, feet, cloth- cessories. Replacement parts and accessories made... -
Page 8: Battery Pack Connection
Replace any decal that is damaged or lost. Decal part numbers are listed in your Parts Catalog. Order re- placement decals from your Authorized TORO Distribu- tor. Safety Page 1 - - 4... -
Page 9: Product Records 2
......Product Records Insert Operator’s Manual and Parts Catalog for your Greensmaster eFlex 1800 or eFlex 2100 at the end of this section. Additionally, if any optional equipment or accessories have been installed to your machine, insert the Installation Instructions, Operator’s Manuals and... -
Page 10: Equivalents And Conversions 2
Equivalents and Conversions 0.09375 Product Records and Maintenance Page 2 - - 2 Greensmaster eFlex 1800/2100... -
Page 11: Torque Specifications 2
For critical applications, as determined reduced by 25% for lubricated fasteners to achieve by Toro, either the recommended torque or a torque that the similar stress as a dry fastener. Torque values may is unique to the application is clearly identified and spe- also have to be reduced when the fastener is threaded cified in this Service Manual. - Page 12 NOTE: Reduce torque values listed in the table above by 25% for lubricated fasteners. Lubricated fasteners are defined as threads coated with a lubricant such as engine oil or thread sealant such as Loctite. Product Records and Maintenance Page 2 - - 4 Greensmaster eFlex 1800/2100...
- Page 13 NOTE: Reduce torque values listed in the table above by 25% for lubricated fasteners. Lubricated fasteners are defined as threads coated with a lubricant such as engine oil or thread sealant such as Loctite. Greensmaster eFlex 1800/2100 Page 2 - - 5 Product Records and Maintenance...
- Page 14 -lb X 11.2985 = N- -cm N- -cm X 0.08851 = in- -lb ft- -lb X 1.3558 = N- -m N- -m X 0.7376 = ft- -lb Product Records and Maintenance Page 2 - - 6 Greensmaster eFlex 1800/2100...
-
Page 15: General Information 3
Transmission ......Greensmaster eFlex 1800/2100 Page 3 - - 1 Traction and Reel Drive System... -
Page 16: Specifications
Two Beam Style Couplers Used in Reel Drive System Final Reel Drive has Three (3) Pulleys with Positive Drive Belt Pulley Configuration Allows Six (6) Clip Adjustments Traction and Reel Drive System Page 3 - - 2 Greensmaster eFlex 1800/2100... -
Page 17: General Information
Use extreme care when handling a battery pack with a cracked case. Only use the charger designed for the battery pack. Greensmaster eFlex 1800/2100 Page 3 - - 3 Traction and Reel Drive System... -
Page 18: Disengaging Drum Drive From Transmission
5. Connect the battery pack (see Battery Pack Connec- tion in this section). Traction and Reel Drive System Page 3 - - 4 Greensmaster eFlex 1800/2100... -
Page 19: Transmission Belt Tensioner
(Fig. 4). 5. Connect the battery pack (see Battery Pack Connec- tion in this section). Figure 4 1. Engage/disengage shaft 3. Cover alignment mark 2. Alignment mark Greensmaster eFlex 1800/2100 Page 3 - - 5 Traction and Reel Drive System... -
Page 20: Special Tools
4. Use modified socket and socket wrench to loosen or tighten bearing collar. Figure 7 1. Modified socket 3. Pin 2. Reel clutch shaft assy Traction and Reel Drive System Page 3 - - 6 Greensmaster eFlex 1800/2100... - Page 21 Refer to Transmission Drive System in the Service and Repairs section of this chap- ter for complete information on servicing the transmis- sion drive system. Toro Part Number: TOR4112 Figure 8 Figure 9 1. Motor adapter 4. Drive spline 2.
-
Page 22: Adjustments
22 TOOTH PULLEY IS ALUMINUM COLOR 0.160 0.126 24 TOOTH PULLEY IS BLACK COLOR 0.174 0.137 25 TOOTH PULLEY IS RED COLOR 0.182 0.143 0.190 0.149 Figure 11 Traction and Reel Drive System Page 3 - - 8 Greensmaster eFlex 1800/2100... -
Page 23: Reel Clutch Adjustment
General Information section of this chapter). Figure 13 1. Reel clutch lever 3. Reel drive hub 2. Reel clutch hub 4. Reel clutch pulley Greensmaster eFlex 1800/2100 Page 3 - - 9 Traction and Reel Drive System... - Page 24 This page is intentionally blank. Traction and Reel Drive System Page 3 - - 10 Greensmaster eFlex 1800/2100...
-
Page 25: Service And Repairs
2. Bearing housing nut 4. Bearing housing flange head screw (Fig. 14). 8. Connect the battery pack (see Battery Pack Connec- tion in the General Information section of this chapter). Greensmaster eFlex 1800/2100 Page 3 - - 11 Traction and Reel Drive System... -
Page 26: Reel Drive Assembly
(items 8, 11 and 14) to the appropriate loca- tions on the reel drive assembly (see Cutting Unit Clip Adjustment in the Adjustments section of this chapter). Traction and Reel Drive System Page 3 - - 12 Greensmaster eFlex 1800/2100... - Page 27 A. If bearings (item 24) were removed from idler shaft, use press to install bearings and bearing spacer onto shaft. 2. Apply light coating of grease on reel drive housing O--rings (items 2 and 9). Greensmaster eFlex 1800/2100 Page 3 - - 13 Traction and Reel Drive System...
-
Page 28: Reel Drive Bearing Housing
11. Spring pin (2 used) 3. Bearing (2 used) 8. Flat washer 12. Flex coupling 4. Bearing spacer 9. Retaining ring 13. Reel hex shaft 5. Wave washer Traction and Reel Drive System Page 3 - - 14 Greensmaster eFlex 1800/2100... - Page 29 8. Clean all bearing housing components. ing (see Reel Drive Assembly in this section). 8. Connect the battery pack (see Battery Pack Connec- tion in the General Information section of this chapter). Greensmaster eFlex 1800/2100 Page 3 - - 15 Traction and Reel Drive System...
-
Page 30: Drum Drive Belt
5. Remove and discard gasket (item 3) from between 2. Remove transport wheels if attached (see Transport cover and housing. Wheels in the Service and Repairs section of Chapter 6 -- Chassis and Controls). Traction and Reel Drive System Page 3 - - 16 Greensmaster eFlex 1800/2100... - Page 31 Transport Wheels in the Service and Repairs section of Chapter 6 -- Chassis and Controls). 11. Connect the battery pack (see Battery Pack Connec- tion in the General Information section of this chapter). Greensmaster eFlex 1800/2100 Page 3 - - 17 Traction and Reel Drive System...
-
Page 32: Drum Drive Idler Assembly
(see Disengaging Drum Drive From Transmission in the General Information section of this chapter). Traction and Reel Drive System Page 3 - - 18 Greensmaster eFlex 1800/2100... - Page 33 Transport Wheels in the Service and Repairs section of Chapter 6 -- Chassis and Controls). 10.Connect the battery pack (see Battery Pack Connec- tion in the General Information section of this chapter). Greensmaster eFlex 1800/2100 Page 3 - - 19 Traction and Reel Drive System...
-
Page 34: Traction Drums
2. If installed, remove transport wheels (see Transport Wheels in the Service and Repairs section of Chapter 6 -- Chassis and Controls). Traction and Reel Drive System Page 3 - - 20 Greensmaster eFlex 1800/2100... - Page 35 140 to 160 ft- -lb (190 to 216 N- -m). 3. Place square key (item 6) into slot of long spur gear (item 8). Apply antiseize lubricant to top surface of key. Greensmaster eFlex 1800/2100 Page 3 - - 21 Traction and Reel Drive System...
- Page 36 (item 15). While retaining LH drum, se- cure drum to traction drum assembly with bearing nut (item 15). Torque bearing nut from 75 to 90 ft- -lb (102 to 122 N- -m). Traction and Reel Drive System Page 3 - - 22 Greensmaster eFlex 1800/2100...
- Page 37 This page is intentionally blank. Greensmaster eFlex 1800/2100 Page 3 - - 23 Traction and Reel Drive System...
-
Page 38: Differential Assembly
3. Slide spur gear assembly from differential assembly nect the battery pack (see Battery Pack Connection in in drum drive housing (Fig. 28). the General Information section of this chapter). Traction and Reel Drive System Page 3 - - 24 Greensmaster eFlex 1800/2100... - Page 39 (or equivalent). Slide differential assembly into drum drive housing (item 1) and onto long spur gear (item 8). Make sure that spur gear properly engages dif- ferential gears. Greensmaster eFlex 1800/2100 Page 3 - - 25 Traction and Reel Drive System...
-
Page 40: Differential Assembly Service
The projections need to be aligned 4. Replace all worn or damaged differential assembly with the pins that have one (1) gear (Fig. 33). components. Traction and Reel Drive System Page 3 - - 26 Greensmaster eFlex 1800/2100... - Page 41 1. Housing index mark 3. Pin with 1 gear 2. Pin with 2 gears Figure 33 1. Projection on cover 3. Pin with 1 gear 2. Pin with 2 gears Greensmaster eFlex 1800/2100 Page 3 - - 27 Traction and Reel Drive System...
-
Page 42: Transmission Drive Belt
7. Note transmission belt routing for assembly pur- shaft wire (item 7) in telescoping coupler (item 8). With poses (Fig. 35). wire ends spread, slide coupler from transmission shaft. Traction and Reel Drive System Page 3 - - 28 Greensmaster eFlex 1800/2100... - Page 43 Service and Repairs section of Chapter 4 -- Electrical System). 9. Connect the battery pack (see Battery Pack Connec- tion in the General Information section of this chapter). Greensmaster eFlex 1800/2100 Page 3 - - 29 Traction and Reel Drive System...
-
Page 44: Transmission
Transmis- sion idler components can be accessed by removing the battery pack from the frame, removing the transmission cover and then removing the drive belt. Traction and Reel Drive System Page 3 - - 30 Greensmaster eFlex 1800/2100... - Page 45 (see Trans- mission Drive Belt in this section). 3. Connect the battery pack (see Battery Pack Connec- tion in the General Information section of this chapter). Greensmaster eFlex 1800/2100 Page 3 - - 31 Traction and Reel Drive System...
- Page 46 2. Disconnect reel clutch cable from transmission (see tion for removal procedure. Reel Clutch Cable Replacement in the Service and Re- pairs section of Chapter 6 -- Chassis and Controls). Traction and Reel Drive System Page 3 - - 32 Greensmaster eFlex 1800/2100...
- Page 47 2. If bearing was removed from bearing collar, press C. Use modified socket and socket wrench to re- new bearing fully onto collar. move bearing collar assembly from clutch shaft. Greensmaster eFlex 1800/2100 Page 3 - - 33 Traction and Reel Drive System...
- Page 48 9. Carefully secure reel brake disc (item 14) to reel drive hub (item 18) with retaining ring (item 13). Take care to not damage brake disc friction material when installing retaining ring. Traction and Reel Drive System Page 3 - - 34 Greensmaster eFlex 1800/2100...
- Page 49 Make sure that new ball bearing is installed on reel clutch shaft. 8. Install reel clutch shaft assembly into transmission housing and assemble transmission (see Transmission Reel Drive System in this section). Greensmaster eFlex 1800/2100 Page 3 - - 35 Traction and Reel Drive System...
-
Page 50: Transmission Drive System
(item 2) that secure motor adapter (item 1) to transmis- nect the battery pack (see Battery Pack Connection in sion housing and remove adapter from housing. the General Information section of this chapter). Traction and Reel Drive System Page 3 - - 36 Greensmaster eFlex 1800/2100... - Page 51 C. Slide coupler (item 6) onto drive spline and use spline insert tool (see Special Tools in this chapter) to secure drive spline into driven pulley. Greensmaster eFlex 1800/2100 Page 3 - - 37 Traction and Reel Drive System...
-
Page 52: Transmission Drum Drive System
(item 7) and wave washer (item 8) from extension hous- the General Information section of this chapter). ing. 2. Remove transmission drive belt (see Transmission Drive Belt in this section). Traction and Reel Drive System Page 3 - - 38 Greensmaster eFlex 1800/2100... - Page 53 1. RH drum drive housing 4. Idler arm assembly 7) and ball bearings (item 3) into extension housing. 2. Extension housing assy 5. Idler pulley assembly 3. Screw (4 used) Greensmaster eFlex 1800/2100 Page 3 - - 39 Traction and Reel Drive System...
-
Page 54: Transmission
Chapter 6 -- Chassis and Controls). in this section. 3. Slide the telescoping coupler off the cutting unit hex shaft (Fig. 48). Traction and Reel Drive System Page 3 - - 40 Greensmaster eFlex 1800/2100... - Page 55 (item 16) that secure rear of transmission to frame. Make sure that washer (item 14) is below frame tube. C. Flange head screw (item 2) that secures front of transmission to frame. Greensmaster eFlex 1800/2100 Page 3 - - 41 Traction and Reel Drive System...
- Page 56 This page is intentionally blank. Traction and Reel Drive System Page 3 - - 42 Greensmaster eFlex 1800/2100...
-
Page 57: Lithium Battery Pack Charger Operation 4
Lithium Battery Pack Fuse ....Toro Electronic Controller (TEC) .... -
Page 58: General Information
Electrical Drawings The electrical schematic and wire harness drawings for Greensmaster eFlex 1800 and 2100 machines are lo- cated in Chapter 8 -- Foldout Drawings. Toro Electronic Controller (TEC) Greensmaster eFlex 1800 and 2100 machines use a Toro Electronic Controller (TEC) to manage machine electrical functions. -
Page 59: Can--Bus Communications
Use extreme care when handling a battery pack with a cracked case. Only use the charger designed for the battery pack. Greensmaster eFlex 1800/2100 Page 4 - - 3 Electrical System... -
Page 60: Electrical System Operation
When the key switch is rotated to the START position, the machine electrical system goes through a wake--up A Toro Electronic Controller (TEC) is used on eFlex ma- process. The contactor in the battery pack should click chines to manage machine electrical functions. The... - Page 61 This page is intentionally blank. Greensmaster eFlex 1800/2100 Page 4 - - 5 Electrical System...
-
Page 62: Lithium Battery Pack Charger Operation
AC power to the charger is interrupted (e.g. circuit breaker tripped). The charger states are described on the following pages. Electrical System Page 4 - - 6 Greensmaster eFlex 1800/2100... -
Page 63: Startup
State 3, CHARGING XX.XV XX.X% X.XA During charging, the battery voltage, state of charge (as percent of fully charged) and charging amperage will be displayed in the LCD message display. Figure 6 Greensmaster eFlex 1800/2100 Page 4 - - 7 Electrical System... -
Page 64: Cell Balance
During standby, the battery state of charge (as percent of fully charged) will be displayed in the LCD message Figure 8 display. Typically, SOC for a fully charged battery will be from 98% to 100%. Electrical System Page 4 - - 8 Greensmaster eFlex 1800/2100... -
Page 65: Hibernate
If a fault continues to occur, make sure to record the fault information and contact your Toro Distributor for assistance. Greensmaster eFlex 1800/2100 Page 4 - - 9... -
Page 66: Special Tools
Multimeter The multimeter can test electrical components and cir- cuits for current, resistance or voltage. NOTE: Toro recommends the use of a DIGITAL Volt-- Ohm--Amp multimeter when testing electrical circuits. The high impedance (internal resistance) of a digital me- ter in the voltage mode will make sure that excess cur- rent is not allowed through the meter. - Page 67 The tool set includes base plate, threaded shaft and handle (Fig. 14). Toro Part Number: TOR6028 NOTE: For electric motor service procedures, see Electric Motor Service in the Service and Repairs sec- tion of this chapter.
-
Page 68: Troubleshooting
The lithium battery pack is faulty (battery charger Replace the battery pack. should be used to identify a battery pack fault). TEC controller is faulty. Replace TEC controller. Electrical System Page 4 - - 12 Greensmaster eFlex 1800/2100... -
Page 69: Traction Circuit Is Inoperative
Check electrical connections. Repair wiring as needed. damaged. Electric motor is faulty (NOTE: Fault should be Check electric motor and circuit wires. Repair as displayed on InfoCenter if electric motor is faulty). necessary. Greensmaster eFlex 1800/2100 Page 4 - - 13 Electrical System... -
Page 70: Machine Is Inoperative And Infocenter Power Light Indicates That A Fault Has Occurred
Possible Causes Correction Wire harness connections or wires to InfoCenter Check electrical connections. Repair wiring as needed. Display are loose or damaged. The InfoCenter Display is faulty. Replace InfoCenter Display. Electrical System Page 4 - - 14 Greensmaster eFlex 1800/2100... - Page 71 This page is intentionally blank. Greensmaster eFlex 1800/2100 Page 4 - - 15 Electrical System...
-
Page 72: Infocenter Display
Information on the main menu and menu item screens is included below. Main Menu Faults Service Diagnostics Figure 17 1. Main menu 4. Choose menu item 2. Menu items 5. Back button 3. Move to menu items Electrical System Page 4 - - 16 Greensmaster eFlex 1800/2100... -
Page 73: Operator Advisories
The Use Handbrake advisory would be displayed, for example, if the mower with a fully charged battery was going down a long hill during op- eration. Greensmaster eFlex 1800/2100 Page 4 - - 17 Electrical System... -
Page 74: Main Menu Screen
To return to the main menu screen from the faults screen, press the back button (left button). Electrical System Page 4 - - 18 Greensmaster eFlex 1800/2100... -
Page 75: Service Screen
To return to the main menu screen from the service screen, press the back button (left button). Figure 21 1. Service menu 4. Choose menu item 2. Service items 5. Back button 3. Move to menu items Greensmaster eFlex 1800/2100 Page 4 - - 19 Electrical System... -
Page 76: Diagnostics Screen
4. Choose menu item 2. Diagnostics items 5. Back button D Throttle identifies the throttle control setting (in 3. Move to menu items volts) that is used by the TEC controller to determine Electrical System Page 4 - - 20 Greensmaster eFlex 1800/2100... -
Page 77: About Screen
To return to the main menu screen from the settings screen, press the back button (left button). Figure 24 1. Settings menu 4. Change menu item 2. Settings items 5. Back button 3. Move to menu items Greensmaster eFlex 1800/2100 Page 4 - - 21 Electrical System... -
Page 78: Adjustments
FRONT Figure 26 1. Park brake latch switch 5. Lock nut (2 used) 2. Switch panel 6. Console cover 3. Lower handle 7. Screw (4 used) 4. Screw (2 used) Electrical System Page 4 - - 22 Greensmaster eFlex 1800/2100... -
Page 79: Traction Switch
7. Screw (4 used) 8. Connect the battery pack (see Lithium Battery Pack 4. Screw (2 used) 8. Switch mount bracket Connection in the General Information section of this chapter). Greensmaster eFlex 1800/2100 Page 4 - - 23 Electrical System... -
Page 80: Reel Engage Switch
1. Reel engage switch 5. Lock nut (2 used) 2. Engagement lever assy 6. Console cover 3. Lower handle 7. Screw (4 used) 4. Screw (2 used) 8. Switch mount bracket Electrical System Page 4 - - 24 Greensmaster eFlex 1800/2100... - Page 81 This page is intentionally blank. Greensmaster eFlex 1800/2100 Page 4 - - 25 Electrical System...
-
Page 82: Component Testing
(e.g. unplug the ON/OFF switch connector before doing a continuity check on switch). Individual compo- nents should be electrically isolated (e.g. disconnect all leads or remove from circuit) from the circuit when tested. Electrical System Page 4 - - 26 Greensmaster eFlex 1800/2100... -
Page 83: Fuse Block
5. After fuse service is completed, secure power center cover to machine with four (4) screws. 6. Connect the battery pack (see Lithium Battery Pack Connection in the General Information section of this chapter). Greensmaster eFlex 1800/2100 Page 4 - - 27 Electrical System... -
Page 84: Lithium Battery Pack Fuse
IMPORTANT: The fuse used in the lithium battery pack is a very fast acting 58 volt fuse. If battery pack fuse replacement is necessary, make sure to use fuse as identified in your eFlex Parts Catalog. Electrical System Page 4 - - 28 Greensmaster eFlex 1800/2100... -
Page 85: Key Switch
Install con- sole cover to handle. 7. Connect the battery pack (see Lithium Battery Pack Connection in the General Information section of this chapter). Greensmaster eFlex 1800/2100 Page 4 - - 29 Electrical System... -
Page 86: Parking Brake Latch Switch
InfoCenter. Electrical System Page 4 - - 30 Greensmaster eFlex 1800/2100... - Page 87 5. Connect switch to machine wire harness. Secure console cover to handle. 6. Connect the battery pack (see Lithium Battery Pack Connection in the General Information section of this chapter). Greensmaster eFlex 1800/2100 Page 4 - - 31 Electrical System...
-
Page 88: Traction Switch
The head of the cap not change when using the InfoCenter. screw in the traction engagement lever is moved toward the switch target when the traction lever is engaged causing the switch to close. Electrical System Page 4 - - 32 Greensmaster eFlex 1800/2100... - Page 89 5. Connect switch to machine wire harness. Secure console cover to handle. 6. Connect the battery pack (see Lithium Battery Pack Connection in the General Information section of this chapter). Greensmaster eFlex 1800/2100 Page 4 - - 33 Electrical System...
-
Page 90: Reel Engage Switch
The tab on the reel lever is moved next to ry only if the switch state does not change when using the switch when the cutting reel is engaged causing the the InfoCenter. switch to close. Electrical System Page 4 - - 34 Greensmaster eFlex 1800/2100... - Page 91 3. Position switch to switch panel and secure with screws and lock nuts (Fig. 42). 4. Connect the battery pack (see Lithium Battery Pack Connection in the General Information section of this chapter). Greensmaster eFlex 1800/2100 Page 4 - - 35 Electrical System...
-
Page 92: Ez Turn Switch
5. Connect switch to machine wire harness. Secure Figure 46 console cover to handle. 6. Connect the battery pack (see Lithium Battery Pack Connection in the General Information section of this chapter). Electrical System Page 4 - - 36 Greensmaster eFlex 1800/2100... -
Page 93: Ez Turn Sensor
B. Make sure key switch is OFF and then disconnect ORANGE wire at B the EZ turn sensor connector from the machine wire BLACK wire at C harness. Figure 48 Greensmaster eFlex 1800/2100 Page 4 - - 37 Electrical System... -
Page 94: Speed Control Potentiometer
Further poten- speed control assembly on the handle (Fig. 49). tiometer testing is necessary only if the displayed volt- age does not change when using the InfoCenter. Electrical System Page 4 - - 38 Greensmaster eFlex 1800/2100... - Page 95 Figure 49 as a guide. Secure wire har- ness connector to potentiometer. Secure console cover to handle. 6. Connect the battery pack (see Lithium Battery Pack Connection in the General Information section of this chapter). Greensmaster eFlex 1800/2100 Page 4 - - 39 Electrical System...
-
Page 96: Main Contactor
1. Main contact post 2. Coil post C. The machine wire harness work light connector leading to the harness black wire will be used for con- tactor voltage testing. Electrical System Page 4 - - 40 Greensmaster eFlex 1800/2100... - Page 97 7. When main contactor testing is complete, install power center cover to machine (Fig. 51). 8. Connect the battery pack (see Lithium Battery Pack Connection in the General Information section of this chapter). Greensmaster eFlex 1800/2100 Page 4 - - 41 Electrical System...
-
Page 98: Toro Electronic Controller
Toro Electronic Controller Greensmaster eFlex machines use a Toro Electronic Controller (TEC) to monitor the condition of various switches (inputs) and then direct electrical power output to allow certain machine functions. The controller is also connected to the CAN--bus system for communications with the electric motor and battery controllers. -
Page 99: Can--Bus Termination Resistor
The termination resistors (Fig. 56) can be individually tested using a digital multimeter (ohms setting). There should be 120 ohms resistance between terminals A and B. Terminal C is not used on Greensmaster eFlex machines. Greensmaster eFlex 1800/2100 Page 4 - - 43 Electrical System... -
Page 100: Service And Repairs
NOTE: A faulty electric motor assembly may cause a #5, #6, #7, #8 or #9 fault to be generated and displayed on the InfoCenter display. Refer to InfoCenter Display in this chapter for information on faults. Electrical System Page 4 - - 44 Greensmaster eFlex 1800/2100... - Page 101 6. Connect the battery pack (see Lithium Battery Pack Connection in the General Information section of this 7. Remove and discard O--ring (item 3) from flange of chapter). motor. Greensmaster eFlex 1800/2100 Page 4 - - 45 Electrical System...
-
Page 102: Electric Motor Service
7. Remove motor cover and wave washer (item 4) from 3. Remove and discard O--rings (items 8 and 10) from rotor assembly. Remove and discard O--rings (items 14 gearbox cover. and 3) from cover. Electrical System Page 4 - - 46 Greensmaster eFlex 1800/2100... - Page 103 Secure cover with six (6) torx head 1. Output gear 3. Shaft seal 2. Gearbox cover screws. 7. Make sure that rotor rotates before continuing with motor assembly. Greensmaster eFlex 1800/2100 Page 4 - - 47 Electrical System...
-
Page 104: Lithium Battery Pack
54 pounds (24.5 kg). Figure 61 7. Support the battery pack to prevent it from moving or 1. Lithium battery pack 3. Machine connector 2. Battery connector falling. Electrical System Page 4 - - 48 Greensmaster eFlex 1800/2100... - Page 105 (Fig. 62). 1. Wire harness connector 3. Battery receptacle 8. Connect the battery pack (see Lithium Battery Pack 2. Rotating locking collar Connection in the General Information section of this chapter). Greensmaster eFlex 1800/2100 Page 4 - - 49 Electrical System...
- Page 106 Make sure that the bat- transportation authorities require that lithium ion batter- tery pack is charged with the Toro lithium battery pack ies be transported using special packaging and only be charger that is specifically designed for the eFlex battery transported by carriers certified to haul them.
-
Page 107: Lithium Battery Pack Charger
3. Power switch occur, make sure to record the fault information from the 2. Input power socket charger LCD display and contact your Toro Distributor for assistance. With the exception of the battery charger fuse, power supply cord and labels, there are no consumer service- able parts on or in the lithium battery pack charger. - Page 108 This page is intentionally blank. Electrical System Page 4 - - 52 Greensmaster eFlex 1800/2100...
-
Page 109: Specifications 5
....... . . Transport Wheels (Optional) ....Greensmaster eFlex 1800/2100 Page 5 - - 1 Chassis and Controls... -
Page 110: Specifications
Specifications Item Description Transport Wheel (Optional) Tire Pressure 12 to 15 PSI (83 to 103 kPa) Chassis and Controls Page 5 - - 2 Greensmaster eFlex1800/2100... -
Page 111: General Information
Use extreme care when handling a battery pack with a cracked case. Only use the charger designed for the battery pack. Greensmaster eFlex 1800/2100 Page 5 - - 3 Chassis and Controls... -
Page 112: Service And Repairs
Service and Repairs Handle Assembly RIGHT FRONT Figure 2 1. Brake lever 4. Reel clutch cable 7. Console cover 2. Brake cable 5. Traction and reel drive lever 8. Washer head screw (4 used) 3. Handle 6. Throttle assembly Handle Removal (Fig. 2) 5. - Page 113 9. Hair pin 3. Carriage screw 10. Side plate (LH shown) 4. Carriage screw 11. Flange nut 5. Shoulder bolt 12. Flange nut 6. Bushing 13. Handle clamp 7. Rubber bumper Greensmaster eFlex 1800/2100 Page 5 - - 5 Chassis and Controls...
-
Page 114: Brake Cable Replacement
Brake Cable Replacement 10.5 to 12.5 in- -lb (1.2 to 1.4 N- -m) RIGHT FRONT Figure 5 1. Brake cable 8. Screw (4 used) 15. Washer head screw (4 used) 9. Spacer 16. Reel clutch cable 2. Brake lever 3. Flange nut 10. - Page 115 Leave 1. Brake cable 3. Cable jam nut location jam nuts snug until final cable adjustment. 2. Cable eyelet 4. Retaining ring Greensmaster eFlex 1800/2100 Page 5 - - 7 Chassis and Controls...
-
Page 116: Reel Clutch Cable Replacement
Reel Clutch Cable Replacement Note orientation of spring hook RIGHT FRONT Figure 7 1. Brake cable 5. Reel clutch cable 9. Traction switch 6. Console cover 10. Reel engage switch 2. Brake lever 3. Lever assembly 7. Washer head screw (4 used) 11. - Page 117 D. While holding the bottom jam nut in place, tighten top cable jam nut. 4. Install console cover to handle assembly. 5. Connect the battery pack (see Battery Pack Connec- tion in this section). Greensmaster eFlex 1800/2100 Page 5 - - 9 Chassis and Controls...
-
Page 118: Traction And Reel Drive Engagement Lever Assembly
Traction and Reel Drive Engagement Lever Assembly Note orientation of spring hook Note orientation of spring hook Figure 10 1. Washer head screw 11. Shift handle 21. Screw 2. Detent ball 12. Extension spring 22. Flat washer 3. Detent spring 13. - Page 119 3. Position lever assembly (including lever assembly, shifter bracket, shift mount and switch mount bracket) to handle. Secure assembly in place with four (4) flange head screws and flange nuts. Greensmaster eFlex 1800/2100 Page 5 - - 11 Chassis and Controls...
- Page 120 4. Connect spring (item 11 in Figure 11) between trac- tion lever assembly and operator presence control. 5. Connect wire harness connectors to traction and reel engage switches (Fig. 11). 6. Connect reel clutch cable to lever assembly (see Reel Clutch Cable Replacement in this section). Check cable operation and adjust as necessary.
- Page 121 This page is intentionally blank. Greensmaster eFlex 1800/2100 Page 5 - - 13 Chassis and Controls...
-
Page 122: Kickstand
Kickstand RIGHT FRONT Figure 14 1. Kickstand 5. Frame 9. Spacer 2. Flange nut 6. Rear frame 10. Retaining ring 3. Spacer 7. Service position locking pin 11. LH side plate 4. Cap screw 8. Compression spring 12. Torsion spring NOTE: The offset handle clamps on eFlex 2100 ma- chines are mounted on the outside of the side plates. - Page 123 Use a nutdriver or small diameter pipe over the end of the torsion spring. Push the spring end down and out to install spring (Fig. 15). 6. Connect the battery pack (see Battery Pack Connec- tion in this section). Greensmaster eFlex 1800/2100 Page 5 - - 15 Chassis and Controls...
- Page 124 Transport Wheels (Optional) Loctite #242 Figure 16 1. Cap screw (3 used) 6. Wheel retaining lever 10. Deep rim 2. Lock washer (3 used) 7. Torsion spring 11. Inner tube 3. Shallow rim 8. Shoulder screw (2 used) 12. Hub bushing 4.
- Page 125 2. Support the machine on the kick stand. 3. Slide transport wheel completely onto the wheel hex shaft until the wheel retaining lever is secured into the groove on the wheel hex shaft. Greensmaster eFlex 1800/2100 Page 5 - - 17 Chassis and Controls...
- Page 126 This page is intentionally blank. Chassis and Controls Page 5 - - 18 Greensmaster eFlex1800/2100...
-
Page 127: Specifications 6
....Preparing Reel for Grinding ....Greensmaster eFlex 1800/2100 Page 6 - - 1 Cutting Unit... - Page 128 This page is intentionally blank. Cutting Unit Page 6 - - 2 Greensmaster eFlex 1800/2100...
-
Page 129: Specifications
The front roller is a 2.500” (6.3 cm) diameter roller that is chosen from a variety of configura- tions (narrow spaced Wiehle front roller is shown above). Greensmaster eFlex 1800/2100 Page 6 - - 3 Cutting Unit... -
Page 130: General Information
Figure 2 1. Battery pack 3. Machine connector Connect the machine wire harness to the battery pack 2. Battery connector as the last step in any repair. Cutting Unit Page 6 - - 4 Greensmaster eFlex 1800/2100... -
Page 131: Separating Cutting Unit From Traction Unit
General Information section of this chapter). Figure 4 1. Telescoping coupler 2. Cutting unit hex shaft Figure 5 1. Cutting unit pitch arm 3. Flange head screw 2. Traction unit roll frame Greensmaster eFlex 1800/2100 Page 6 - - 5 Cutting Unit... -
Page 132: Special Tools
Special Tools Some special tools may have been supplied with your mower or are available as TORO parts. Order special tools from your Toro Distributor. Some tools may also be available from a local supplier. Gauge Bar Assembly Toro Part Number: 13- -8199 Used to verify height--of--cut. -
Page 133: Adjustments 6
This tool should be used with the Toro Guide to Evaluation Reel Mower Performance and Using the Turf Evaluator (Toro part no. 97931SL). -
Page 134: Factors That Can Affect Quality Of Cut
Use correct number of blades for clip frequency and optimum height--of--cut range. Rear roller level. Reel and rear roller should be parallel for proper cutting performance (see Leveling Rear Roller in Adjustments section of this chapter). Cutting Unit Page 6 - - 8 Greensmaster eFlex 1800/2100... - Page 135 The traction drive belt may be loose or worn. Check the condition of the traction belt. Replace traction drive belt if necessary. Groomer reel operation. See Troubleshooting section of Chapter 8 -- Groomer. Greensmaster eFlex 1800/2100 Page 6 - - 9 Cutting Unit...
-
Page 136: Adjustments
6. After tightening the side plate, recheck the rear roller. If necessary, loosen and adjust second side plate. 7. After leveling rear roller, complete cutting unit set--up and adjustment sequence. Cutting Unit Page 6 - - 10 Greensmaster eFlex 1800/2100... -
Page 137: Service And Repairs
(Fig. 15). Top Face 6. Insert a 1/2” socket onto hex of reel drive shaft. Remove Burr Relief Angle 7. Backlap according to procedure in Toro General Ser- Front Face vice Training Book, Reel Mower Basics (part no. 09168SL). Front Angle 8. -
Page 138: Bedbar Assembly
6. Loosen the lock nuts (item 10) on each bedbar pivot 3. Remove the cutting unit from the machine and place bolt (item 18). cutting unit on a flat work area. Cutting Unit Page 6 - - 12 Greensmaster eFlex 1800/2100... - Page 139 (item 4). 6. Position one (1) metal washer (item 17) and one (1) plastic washer (item 16) between bedbar and each cut- ting unit side plate (Fig. 18). Greensmaster eFlex 1800/2100 Page 6 - - 13 Cutting Unit...
-
Page 140: Bedknife Service
1. Use scraper to remove all rust, scale and corrosion from bedbar surface and lightly oil bedbar surface be- 5. After installing bedknife to bedbar, grind bedknife. fore installing bedknife. Cutting Unit Page 6 - - 14 Greensmaster eFlex 1800/2100... -
Page 141: Specifications 7
Also, clean and dress 10 12 grinding stone often during the grinding process. Figure 20 1. Use Toro General Service Training Book, Reel Mow- er Basics (part no. 09168SL) and grinder manufactur- er’s instructions for bedknife grinding information. Remove... -
Page 142: Bedbar Adjuster Service
NOTE: Adjuster shaft (item 4) has left--hand threads. on bushing to slot in frame and install bushings in cutting 3. Unscrew bedbar adjuster shaft (item 4) from the bed- unit side plates. bar adjuster screw. Cutting Unit Page 6 - - 16 Greensmaster eFlex 1800/2100... - Page 143 Figure 24 spring is fully compressed, then loosen lock nut 1/2 turn. 1. Crossmember 3. Cap screw 2. Detent 7. Adjust cutting unit (see Cutting Unit Operator’s Manual). Greensmaster eFlex 1800/2100 Page 6 - - 17 Cutting Unit...
-
Page 144: Front Roller
1. Front roller assembly 3. HOC screw 5. Center front roller to the cutting reel and secure to 2. HOC arm 4. HOC washer & nut HOC arms with cap screws (item 1). Cutting Unit Page 6 - - 18 Greensmaster eFlex 1800/2100... -
Page 145: Rear Roller
Install two (2) carriage screws and flange nuts to retain bracket in position. Do not fully tight- en flange nuts. Greensmaster eFlex 1800/2100 Page 6 - - 19 Cutting Unit... -
Page 146: Roller Service
This will preserve the patch lock feature in the new lock nuts. Use the new nuts only after new bearings and Figure 30 seals have been installed. 1. Bearing lock nut 3. Bearing 2. Black assembly washer Cutting Unit Page 6 - - 20 Greensmaster eFlex 1800/2100... - Page 147 4. Seal nut(s). 12.Install bearing lock nut with V--ring onto each end of the roller shaft. Torque lock nuts from 25 to 30 ft- -lb (34 to 41 N- -m). Greensmaster eFlex 1800/2100 Page 6 - - 21 Cutting Unit...
-
Page 148: Cutting Reel Assembly Removal And Installation
1800 cutting units, square nuts are used instead of bly Service in this section for information on servicing flange nuts. Cutting unit service procedures are the the cutting reel assembly. same on both models. Cutting Unit Page 6 - - 22 Greensmaster eFlex 1800/2100... - Page 149 8. Support cutting reel to prevent it from shifting or fal- Figure 36 ling. 1. Cutting reel 4. Reel drive shaft 2. Flocked seal (2 used) 5. Bearing lock screw 3. Bearing (2 used) 6. Reel groove location Greensmaster eFlex 1800/2100 Page 6 - - 23 Cutting Unit...
- Page 150 12.Install cutting unit to the machine. 27 N- -m). 13.After all necessary adjustments have been made, connect the battery pack (see Battery Pack Connection in the General Information section of this chapter). Cutting Unit Page 6 - - 24 Greensmaster eFlex 1800/2100...
- Page 151 This page is intentionally blank. Greensmaster eFlex 1800/2100 Page 6 - - 25 Cutting Unit...
- Page 152 (123 to 149 N- -m) (Left Hand Threads) Figure 37 1. Cutting reel 3. Bearing (2 used) 5. Bearing lock screw (RH threads) 2. Flocked seal (2 used) 4. Reel drive shaft (LH threads) Cutting Unit Page 6 - - 26 Greensmaster eFlex 1800/2100...
- Page 153 2. Press flocked seals onto reel shaft with flocked side orientated toward bearing location. Seal should be per- pendicular to reel shaft after installation. Greensmaster eFlex 1800/2100 Page 6 - - 27 Cutting Unit...
- Page 154 1. Follow reel grinder manufacturer’s instructions to Blade Land Width Range 0.030 to 0.050 in (0.8 to 1.2 mm) grind cutting reel to Toro specifications (see Reel Grind- ing Specifications chart to the right). Additional reel Service Limit - 0.010 in (0.25 mm)
-
Page 155: Troubleshooting 7
......Groomer Brush ......Greensmaster eFlex 1800/2100 Page 7 - - 1 Groomer... -
Page 156: Specifications
1800 and 2100. The groomer drive assembly is at- inch (0.8 to 15.7 mm) at mowing HOC range of 0.060 to tached to the right side of the cutting unit. 0.750 inch (1.5 to 19.1 mm). Groomer Page 7 - - 2 Greensmaster eFlex 1800/2100... -
Page 157: General Information
Use extreme care when handling a battery pack with a cracked case. Only use the charger designed for the battery pack. Greensmaster eFlex 1800/2100 Page 7 - - 3 Groomer... -
Page 158: Troubleshooting
5. The height--of--cut. 11. Stress periods for turf (e.g. high temperatures, high humidity, unusually high traffic). 6. The grooming depth. 7. The type of grass on the green. Groomer Page 7 - - 4 Greensmaster eFlex 1800/2100... -
Page 159: Grooming Reel Mechanical Problems
Grooming depth is not equal on Adjust depth if necessary. Check both ends of grooming reel. and adjust cutting unit set up (level bedknife to reel, level rear roller to reel, set height--of--cut, etc.). Greensmaster eFlex 1800/2100 Page 7 - - 5 Groomer... -
Page 160: Adjustments
Height setting on both ends of groomer should be identi- cal. 7. After groomer adjustment is completed, connect the battery pack (see Battery Pack Connection in the Gen- eral Information section of this chapter). Groomer Page 7 - - 6 Greensmaster eFlex 1800/2100... -
Page 161: Service And Repairs
7. Connect the battery pack (see Battery Pack Connec- tion in the General Information section of this chapter). Figure 4 1. Drive pulley 4. Driven pulley 2. Idler pulley 5. Groomer drive belt 3. Idler pulley nut Greensmaster eFlex 1800/2100 Page 7 - - 7 Groomer... -
Page 162: Groomer Cover (Counter Rotating Groomer Drive)
Figure 6 1. Groomer cover 6. Plunger detent 2. Plug 7. Cap screw 3. Shaft 8. Retaining ring 4. O- -ring 9. Set screw 5. Thrust washer 10. Handle Groomer Page 7 - - 8 Greensmaster eFlex 1800/2100... - Page 163 RH drive plate. Secure cover with five (5) flange head screws. 3. Connect the battery pack (see Battery Pack Connec- tion in the General Information section of this chapter). Greensmaster eFlex 1800/2100 Page 7 - - 9 Groomer...
-
Page 164: Grooming Reel (Forward Rotating Groomer Drive)
2. Disconnect the battery pack (see Battery Pack Con- 12) that secure RH groomer arm lift rod to drive plate as- nection in the General Information section of this chap- sembly (Fig. 9). ter). Groomer Page 7 - - 10 Greensmaster eFlex 1800/2100... - Page 165 8. Secure driven pulley to grooming reel shaft with lock 5. Position groomer shim (item 8) to RH drive plate as- nut (item 1). Torque lock nut from 17 to 21 ft- -lb (24 to sembly. 28 N- -m). Greensmaster eFlex 1800/2100 Page 7 - - 11 Groomer...
- Page 166 30 seconds, stop machine and wipe excess 14.Secure RH groomer arm assembly to drive plate with grease from groomer shaft and seals. spring washer (item 12) and lock nut (item 13). Groomer Page 7 - - 12 Greensmaster eFlex 1800/2100...
- Page 167 This page is intentionally blank. Greensmaster eFlex 1800/2100 Page 7 - - 13 Groomer...
-
Page 168: Grooming Reel (Counter Rotating Groomer Drive)
RH drive plate assembly (Fig. 13). The bearings are pressed into the gears. 3. Remove the cutting unit from the machine and place cutting unit on a flat work area. Groomer Page 7 - - 14 Greensmaster eFlex 1800/2100... - Page 169 O--ring on shaft. 1. Roller cap screw 4. Spring washer 2. Grooming reel assembly 5. Groomer arm lift rod 3. Lock nut Greensmaster eFlex 1800/2100 Page 7 - - 15 Groomer...
- Page 170 120 in- -lb (13.5 N- -m). groomer for 30 seconds, stop machine and wipe excess grease from groomer shaft and seals. 9. Install extension spring to RH drive plate assembly (Fig. 12). Groomer Page 7 - - 16 Greensmaster eFlex 1800/2100...
-
Page 171: Grooming Reel Service
5. Install grooming reel back onto cutting unit (see Figure 18 Grooming Reel Installation (Forward Rotating or Count- 1. Lock nut 2. Grooming shaft er Rotating) in this section). Greensmaster eFlex 1800/2100 Page 7 - - 17 Groomer... -
Page 172: Grooming Reel Bearing Replacement
When bearings 1. RH drive plate assy 3. Seal (2 used) are greased, grease will purge from inner seals. 2. Bearing (2 used) Groomer Page 7 - - 18 Greensmaster eFlex 1800/2100... - Page 173 Figure 24 1. Outer bearing 5. Seal lip 2. Drive plate shoulder 6. Support plate bearing 3. Inner bearing 7. Drive plate (RH side) 4. Inner race 8. Support plate (LH side) Greensmaster eFlex 1800/2100 Page 7 - - 19 Groomer...
-
Page 174: Idler Assembly (Forward Rotating Groomer Drive)
10. Idler pulley 2. Spacer 7. O- -ring 11. Bearing (2 used) 3. Spring 8. Retaining ring 12. Retaining ring 4. Idler bracket 9. Grease fitting 13. Lock nut 5. Spacer Groomer Page 7 - - 20 Greensmaster eFlex 1800/2100... - Page 175 3. Check and adjust grooming reel height and mower height--of--cut settings. 4. When all adjustments have been completed, con- nect the battery pack (see Battery Pack Connection in the General Information section of this chapter). Greensmaster eFlex 1800/2100 Page 7 - - 21 Groomer...
-
Page 176: Idler Assembly (Counter Rotating Groomer Drive)
(see Groomer Cover (Counter Rotating gear and grooming reel driven gear are properly Groomer Drive) in this section). torqued. Do not install idler gears, extension spring or groomer cover assembly to drive plate assembly. Groomer Page 7 - - 22 Greensmaster eFlex 1800/2100... - Page 177 5. Plate bearing location 3. Adjustment cam 120 in- -lb (13.5 N- -m) Figure 30 1. RH drive plate assy 3. 43T idler gear/bearing 2. Flange nut 4. 47T idler gear/bearing Greensmaster eFlex 1800/2100 Page 7 - - 23 Groomer...
-
Page 178: Lift Arm Assembly
15. Side plate (LH shown) 4. E- -ring 10. Spring washer 16. Lock nut 5. Groomer lift rod 11. Cap screw 17. Spring washer 6. Lock screw 12. Bushing 18. Bushing Groomer Page 7 - - 24 Greensmaster eFlex 1800/2100... - Page 179 Figure 31 are the same on both sides of cutting unit. NOTE: Grooved pin (item 3) is used to retain lock screw (item 6) to lift arm assembly. Greensmaster eFlex 1800/2100 Page 7 - - 25 Groomer...
-
Page 180: Groomer Brush
Make sure that the J--bolts are installed with the threaded portion on the outside of the brush (Fig. 33). 1. J- -bolt 2. Lock nut Torque lock nuts from 20 to 25 in- -lb (2.3 to 2.8 N- -m). Groomer Page 7 - - 26 Greensmaster eFlex 1800/2100... -
Page 181: Electrical Schematic 8
Battery Wire Harness Drawing ....Battery Wire Harness Adapter Drawing ..Greensmaster eFlex 1800/2100 Page 8 - - 1 Foldout Drawings... - Page 182 This page is intentionally blank. Foldout Drawings Page 8 - - 2 Greensmaster eFlex 1800/2100...
-
Page 183: Electrical Schematic
Greensmaster eFlex 1800/2100 Electrical Schematic Page 8 - - 3... -
Page 184: Main Wire Harness Drawing
EZ TURN SENSOR EZ TURN SWITCH Greensmaster eFlex 1800/2100 Main Wire Harness Drawing Page 8 - - 4... - Page 185 BLACK/WHITE VIOLET BLUE WHITE BLACK BLACK YELLOW EZ TURN BROWN PINK EZ TURN ORANGE SENSOR BLACK RED/WHITE BLACK/WHITE BLACK BLACK BLACK BLACK BLACK BLACK BLACK Greensmaster eFlex 1800/2100 EZ TURN Main Wire Harness Diagram SWITCH Page 8 - - 5...
-
Page 186: Battery Wire Harness Drawing
Greensmaster eFlex 1800/2100 Battery Wire Harness Drawing Page 8 - - 6... - Page 187 RED/WHITE RED/WHITE BLACK/WHITE BLACK/WHITE BLACK/WHITE BLUE RED/WHITE BLUE BLACK Greensmaster eFlex 1800/2100 Battery Wire Harness Diagram Page 8 - - 7...
-
Page 188: Battery Wire Harness Adapter Drawing
BLACK Greensmaster eFlex 1800/2100 Battery Wire Harness Adapter Drawing Page 8 - - 8...