
Related Manuals for Glow-worm ULTIMATE 30c


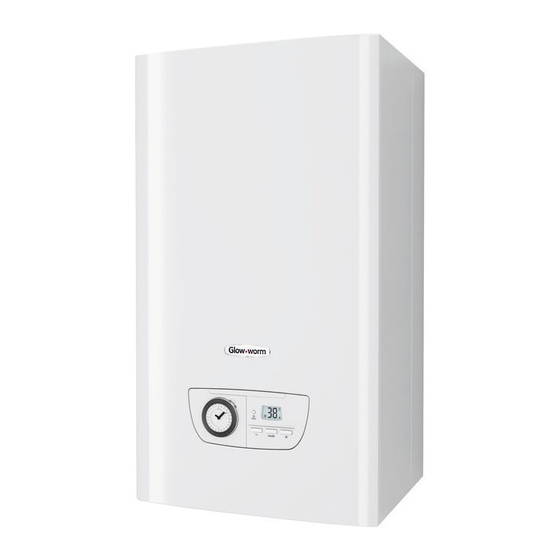
Summary of Contents for Glow-worm ULTIMATE 30c
-
Page 1: And Servicing
Installation and Servicing ULTIMATE 30c G.C. No. 47-044-48 ULTIMATE 35c G.C. No. 47-044-49... -
Page 3: Table Of Contents
TABLE OF CONTENTS I NT RODU C TIO N Instructions guidance ........................3 Product documentation ..................3 Explanation of symbols ..................3 Guarantee registration ..................3 Appliance description ........................3 Safety devices ....................3 Data label ......................3 Regulation and statutory requirements ..............4 Hydraulic schematic ...................4 Safety instructions and regulations .................... - Page 4 TABLE OF CONTENTS Commissioning ......................... 21 11.1 Reading the fi lling pressure ................21 11.2 Switching on ....................21 11.3 Filling the CH system (Central heating) ...............21 11.4 Filling DHW Circuit ....................22 11.5 Filling the Condensate Trap ................22 11.6 Initial lighting ....................22 11.7 Gas rates ......................23 11.8...
-
Page 5: Introduction
INTRODUCTION INTRODUCTION 2.1.2 Safety discharge valve A safety discharge valve and discharge pipe are fi tted to the boiler. This valve must not be touched. Instructions guidance - The heating safety valve opens when the pressure in the heating circuit exceeds 3 bars. Product documentation •... -
Page 6: Regulation And Statutory Requirements
INTRODUCTION Regulation and statutory requirements Hydraulic schematic 2.3.1 CE Mark This boiler meets the requirements of Statutory Instrument, No. 3083 The Boiler (Effi ciency) Regulations, and therefore is deemed to meet the requirements of Directive 92/42/EEC on the effi ciency requirements for new hot water boilers fi red with liquid or gaseous fuels. -
Page 7: Safety Instructions And Regulations
INTRODUCTION Safety instructions and regulations • Use only original spare parts. • Use only new O-rings and gaskets. Safety instructions • After having completed work on gas or water carrying components, check for their tightness. If the gas pressure at the input of the appliance is outside the range specifi... -
Page 8: Recycling
INTRODUCTION Recycling Gas Supply The gas installation must be in accordance with the relevant standards. IMPORTANT: The recycling of the packaging must be carried out by In GB, this is BS6891. the qualifi ed professional who installed the appliance. In IE, this is the current edition of I.S.813 “Domestic Gas Installations”. -
Page 9: Technical Data
TECHNICAL DATA TECHNICAL DATA ULTIMATE c Boiler, type C13, C33, C43 Description Unit Description Unit Gas category Gas connection Ø O.D. 15 (copper) 15 (copper) 2H3P 2H3P Heating flow and return connection SEDBUK rating 2009 88.8% 88.9% 22 (copper) 22 (copper) Ø... -
Page 10: Installation
INSTALLATION INSTALLATION Ø A IMPORTANT: All the drawings dimensions are shown in mm. Ø A Appliance location Location 6.1.1 Instructions 1 5 0 Before choosing a site for the appliance, carefully read the safety warnings and installation manual. • Ensure that wall to which the appliance will be mounted on is structurally safe in order to support the weight of the appliance. -
Page 11: Appliance Installation
INSTALLATION Appliance installation Recommendations before installing 7.2.1 Domestic hot water circuit design Scope of delivery Water pressure The appliance is delivered in a single carton with a document pack and fi ttings. The minimum working pressure to obtain the maximum domestic fl... -
Page 12: Dimensions
INSTALLATION General Drain points This boiler is designed for use as part of a sealed water central Drain taps must be provided at all low points of the system, which heating system with fully pumped circulation. The pump, will allow the entire system to be drained. expansion vessel and associated safety devices are all fi... -
Page 13: Mounting
INSTALLATION Mounting 7.4.1 Fixing to the wall • Make sure that the equipment used for implementing the installation is compatible with that of the appliance. 1 3 0 • Determine the assembly location. See the "Appliance location" chapter. 9 0 ° Wall template Standard fl... -
Page 14: Hydraulic Connection
INSTALLATION 7.4.2 Boiler hanging DANGER: Do not perform any 'hot work' directly under the appliance, this may cause damage to the appliance DANGER: base. Heat may also damage the isolation valves. With regards to the Manual Handling Operations, 1992 Always pre-assemble pipes before fi tting them to the Regulations, the following lift operation exceeds the boiler. -
Page 15: Safety Discharge Valve
INSTALLATION Safety Discharge Valve Condensate pipe Condensate outlet pushfi t • Make sure there is no protective plug fi tted. • Connect the condensate pipe (1) to the condensate outlet (2). IMPORTANT: The pipe should have a fall of a least 2.5° 44mm/metre away from the boiler. - Page 16 INSTALLATION Washing machine trap / waste INCREASE PIPE SIZE 100 mm min. 75 mm min. 0020167175_01 - 02/13 - Glow-worm - 14 -...
-
Page 17: Evacuation Of Combustion Gas
INSTALLATION Evacuation of combustion gas ATTENTION: If the fl ue terminal is positioned near a light source insects may enter the fl ue system. Where safe and Regulation practical to do so advise the homeowner to check the fl ue outlet and clear visible insects from the terminal end. -
Page 18: Flue Confi Guration Description
INSTALLATION Flue confi guration description Each time an additional 90° bend is necessary (or 2 at 45°), the length (L) must be reduced by 1 m. 9.2.1 Horizontal concentric fl ue Ø 60/100 mm When using the Plume Management Kit, the maximum lengths or Ø... -
Page 19: Electrical Connections
INSTALLATION 9.2.3 Multiple boiler chimney fl ue Model Ø 60/100 mm (C43 type installation) Exhaust mass rate (g/s) At min thermal load (40°C/30°C) ATTENTION: At max thermal load (80°C/60°C) 11.3 13.8 The fl ue connecting from the appliance to the fl ue system must be supplied from the manufacturer of the Exhaust temperature (°C) boiler. -
Page 20: Main Board
INSTALLATION 10.2 Main board 10.3.1 230V permanent supply DANGER: All cables connected to the appliance should be permanently fi xed to the wall. IMPORTANT: This appliance will not operate without a link or system controls fi tted. 30mm Connector Electrical wires Insulation •... -
Page 21: External Accessories
INSTALLATION 10.3.2 230V permanent supply + 230V system controls 10.4 External accessories DANGER: DANGER: All cables connected to the appliance should be Under no circumstances must any mains voltage be applied to any of the terminals on the 24v connection permanently fi... -
Page 22: Wiring Diagram
INSTALLATION 10.6 Wiring diagram INTERFACE 18 17 16 15 14 13 12 11 10 9 8 7 6 5 4 3 2 1 X101 24 V Ebus 230 VAC 18 17 16 15 14 13 12 11 10 9 8 7 6 5 4 3 2 1 1 2 3 Pump Control accessories connector... -
Page 23: Commissioning
INSTALLATION 11 Commissioning 11.3 Filling the CH system (Central heating) • Make sure that the installation's cold water inlet isolating valve is IMPORTANT: open. At the time of commissioning, complete all relevant • Open the isolating valves located on the connections: they must sections of the Benchmark Checklist located in the centre be positioned in the direction of the fl... -
Page 24: Filling Dhw Circuit
INSTALLATION 11.4 Filling DHW Circuit 11.6 Initial lighting • Open the various hot water taps to fi ll the DHW circuit. 11.6.1 Control 11.5 Filling the Condensate Trap IMPORTANT: The combustion for this appliance has been checked, adjusted and preset at the factory for operation on natural gas (G20) as defi... -
Page 25: Gas Rates
INSTALLATION 11.7 Gas rates 11.7.2 Gas Rate • Make sure that all other gas burning appliances and pilot The supply from the governed meter must be of adequate size to lights are off . provide a steady inlet working pressure of 20mbar (8in wg) at the boiler. -
Page 26: Testing Domestic Hot Water System
12.1 Heating circuit adjustment By pass operation is automatic and not adjustable. • If necessary, fi t an external by-pass. ULTIMATE 30c Available pressure between heating fl ow and return (kPa) Heating circuit fl ow rate (l/h) ULTIMATE 35c Available pressure between heating fl ow and return (kPa) Heating circuit fl... -
Page 27: Installation Settings
Modifi able Code Parameter Unit Description Factory setting parameter Choose a value: ULTIMATE 30c > 6 to 25 25 (ULTIMATE 30c) d.00 Maximum heating power and ULTIMATE 35c > 8 to 30. 30 (ULTIMATE 35c) d.01 Pump over-run time - heating... -
Page 28: Status Of The Appliance
INSTALLATION Factory Modifi able Code Parameter Unit Description setting parameter Display the digitalized ionisation voltage. Multiply d.44 Digitalized ionisation voltage the displayed value by 100. Display the number of unsuccessfull ignitions at fi rst d.68 Unsuccessfull ignitions at fi rst attempt attempt. -
Page 29: Test Modes
INSTALLATION 12.5 Test modes 12.7 Re-check and restart By activating these various test modes, you can enable special • Once the appliance is installed, check the operation of the functions on the appliance. appliance. • Press the on/off button to switch off the appliance. •... -
Page 30: Maintenance
MAINTENANCE MAINTENANCE 14.1.1 Check the electrical installation To ensure the continued effi cient and safe operation of the boiler it is recommended that it is checked and serviced at regular intervals. The frequency of servicing will depend upon the particular installation and usage, but in general once a year should be enough. -
Page 31: Fault Memory
MAINTENANCE 14.2 Fault memory • This menu allows you to display the 10 most recent failure codes registered by the appliance. • In order to display the fault code memory, simultaneously press the buttons for more than 7 seconds. • The screen will display the fi rst fault "1." (record) and after "XX"... - Page 32 MAINTENANCE Fault Description Cause Solution codes Gas valve command fault Gas valve closure fault • Check the main boards connections. Fault in the main board memory • Check the main board. Fault in the main board Rapid fl uctuation of return or fl ow heating •...
-
Page 33: Functional Fl Ow Diagram
MAINTENANCE 14.4 Functional fl ow diagram 14.4.1 Central Heating 14.4.2 Domestic Hot Water 0020167175_01 - 02/13 - Glow-worm - 31 -... -
Page 34: Gas Conversion Adjustments
MAINTENANCE 15 Gas conversion adjustments In order to adjust the appliance to a diff erent gas that it is set to in production. This conversion should only be carried out by a competent person approved at the time by the Health and Safety Executive. •... -
Page 35: Restart - Re-Check Commissioning
MAINTENANCE 16 Draining • Compare the value measured with the values indicated in the table below. 16.1 Heating circuit Gas adjustment case ON 9 ± 0.2 % 10.1 ± 0.2 % case OFF 9.2 ± 0.3 % 10.3 ± 0.3 % IMPORTANT: Safe combustion can only be verifi... -
Page 36: Annual Maintenance
MAINTENANCE 17.1.3 Cleaning of the components • To obtain service, please call your installer or Glow-worm’s own service organisation. • Clean the following components: - The condensate trap PLEASE NOTE: During routine servicing, and after any maintenance, we recommend that the following must be checked: - The heat exchanger. -
Page 37: Combustion Check And Setting The Air/Gas Ratio Valve
MAINTENANCE 17.2.2 Control box • Electrical, gas and water connections. • System pressure. • The combustion performance, refer to the following procedure. • The operational gas inlet pressure and gas rates, refer to the commissioning section paragraph 12.5. Correct any fault before continuing. -
Page 38: Servicing
MAINTENANCE 17.4 Servicing G31 Burner % CO Model Check (case on) Setting (case off ) CO/CO ratio IMPORTANT: 10.3 ± 0.3% 10.1 ± 0.2% 0.004 If the annual check of combustion CO2, CO/CO2 ratio 10.3 ± 0.3% 10.1 ± 0.2% 0.004 checks did not require adjustment and the inspections described in "Preliminaries"... -
Page 39: Expansion Vessel
MAINTENANCE 17.6 Expansion vessel The condense trap will contain water, lift taking care not to spill the water. • Remove the condensate trap (5) using the retaining screw (4). • Clean the hose, the trap and the siphon, remove any accumulated dirt. -
Page 40: Combustion Block
MAINTENANCE 17.8 Combustion block Legend 17.8.1 Spark electrode Gas valve connection Grounding cable • Disconnect the electrode inlet (3) and the grounding cable (2). Spark electrode inlet Spark electrode retaining screw. • Remove the 2 spark electrode retaining screws (4). Spark electrode gasket Spark electrode •... -
Page 41: Service Completion
MAINTENANCE 17.8.2 Dismantling the burner 17.9 Service completion • Re-check the combustion, see chapter "Combustion check". Warning: The burner door seal (12) must be replaced each time On completion of the service, the "Benchmark" Service Record the burner is dismantled. sould be completed. -
Page 42: Boiler Access
MAINTENANCE 18.2 Boiler Access 18.3.1 Expansion vessel For replacement of parts, the front casing panel of the boiler will need to be removed. • To remove undo the two screws on the underside of the front casing and lift off . 18.3 Viewing window Fibre washer... -
Page 43: Hydraulic Block
MAINTENANCE 18.4 Hydraulic block 26 Bypass Valve retaining nut Three-way valve 27 Bypass Valve retaining nut Three-way valve electrical plug 28 Impeller housing Three-way valve electrical plug retaining clip 29 Safety discharge valve plastic housing Low water pressure sensor connector 30 Retaining clip Low water pressure sensor Low water pressure sensor retaining clip... - Page 44 MAINTENANCE 18.4.2 Automatic air vent • Disconnect the electrical plug (2). • Remove the retaining clip (3). • Drain the boiler heating circuit as described in the appropriate chapter "Draining". • Remove the three way valve motor (1). • Remove the retaining clip (19). Remove the automatic air vent •...
-
Page 45: Combustion Block
MAINTENANCE 18.5 Combustion block Legend Igniter unit retaining bracket 20 Thermal fuse connection Igniter unit 21 Heat exchanger Igniter unit retaining screw 22 Heat exchanger retaining bracket Igniter unit electrical connector 23 Heat exchanger retaining screw Electrode / igniter unit connection cable 24 Heating return pipe Earth cable 25 Heating return pipe retaining clip... - Page 46 MAINTENANCE 18.5.1 Spark electrode 18.5.5 Heat exchanger • Disconnect the electrode cap (7) and the earthing cable (6). ATTENTION: There will be water in the heat exchanger.Carefully ease • Remove the 2 spark electrode retaining screws (8). heat exchanger out. •...
-
Page 47: Condensate Trap
MAINTENANCE 18.5.9 Gas valve • Place a container under the condensate trap (5). • Remove the condensate from the reservoir (1). • Remove the burner door (11) refering to chapter "Dismantling the burner door". • Disconnect the condensation discharge (2). •... -
Page 48: Spare Parts
MAINTENANCE 19 Spare parts 18.7.2 2A Fuse Rating • For access, refer to chapter "Main PCB". In order to guarantee the safe and prolonged life of the product, manufacturers genuine spare parts must be used. • The fuse is located at top right hand side of the PCB, see chapter "Electrical connection >Wiring diagram". - Page 49 MAINTENANCE Short List of Parts • When ordering spare parts, contact Glow-worm’s own service Part No. Description GC Part No. organisation. 0020136541 Plate to plate heat exchanger 30c • Please quote the name of the appliance and serial number, to 0020173017 Plate to plate heat exchanger 35c be found on the data label.
-
Page 50: Manual Handling
Manual Handling IMPORTANT. With regards to the Manual Handling Operations, 1992 Regu- Positioning of Appliance for Final Installation – no obstructions. lations, the following lift operation exceeds the recommended weight for Recommend 2 persons lift appliance to position into place. Fit bracket a one man lift. -
Page 51: Declaration Of Conformity
Declaration of Conformity Installation, Commissioning and Service Record... -
Page 53: Service Interval Record
SERVICE INTERVAL RECORD It is recommended that your heating system is serviced regularly and that you complete the appropriate Service Interval Record Below . Service Provider. Before completing the appropriate Service Interval Record below, please ensure you have carried out the service as described in the boiler manufacturer’s instructions. - Page 56 GLOW-WORM Nottingham Road, Because of our constant endeavour for Belper, Derbyshire. improvement, details may vary slightly DE56 1JT from those shown in these instructions. www.glow-worm.co.uk...
Need help?
Do you have a question about the ULTIMATE 30c and is the answer not in the manual?
Questions and answers