
Related Manuals for Casio IT-3100 Series


Summary of Contents for Casio IT-3100 Series
- Page 1 CASIO IT-3100 Series Quick Start Guide (Version 1.02) CASIO Computer Co., Ltd. Copyright ©2010. All rights reserved. May 2010...
-
Page 2: Table Of Contents
7.4.2 Debugging Applications Chapter 8. eMbedded Visual C++ Building a Simple eVC++ 4.0 Test Program Using CASIO Libraries from eVC++ 4.0 Chapter 9. Visual Studio Using CASIO .NET Libraries from VB Using CASIO .NET Libraries from C# Using CASIO Libraries from C++ Chapter 10. - Page 3 Ltd. in Tokyo Japan. Information in this document is subject to change without advance notice. CASIO Computer Co., Ltd. makes no representations or warranties with respect to the contents or use of this manual and specifically disclaims any express or implied warranties of merchantability or fitness for any particular purpose.
-
Page 4: Editorial Record
Editorial Record Manual Version Date edited Page Content 1.00 July 2008 Original version 1.01 January 2009 7 to 9 In Chapter 1, the contents in Library Configuration, Development Reference Manuals, and Sample Program are changed. 15 to 19 In Chapter 3.2, the instruction of installation is changed. The configuration of the CAB files is changed. -
Page 5: Preface
This guide clearly and concisely sets out the information developers need to know to get started with the CASIO IT-3100 series development. The best methods of connecting to your development system are covered and step by step instructions for installing and testing the CASIO SDKs are included. -
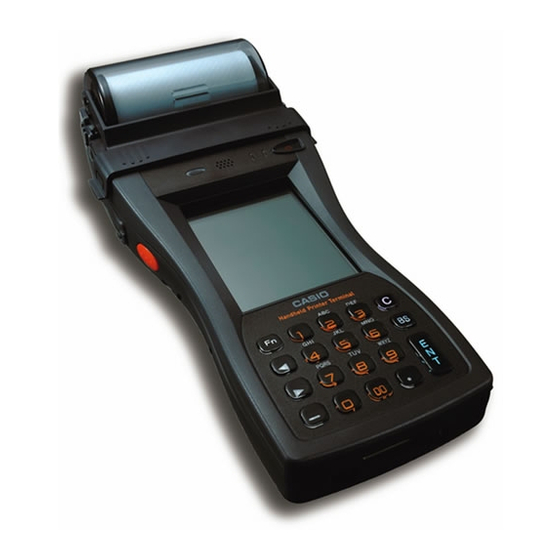
Page 6: Product Overview
1. Product Overview 1.1 Features at a Glance The IT-3100 features a built-in high speed thermal printer capable of printing up to 28 lines per second and other notable capabilities including the following functions. Outstanding development environment ® ® • Microsoft Windows CE 5.0 English Version as the built-in OS •... -
Page 7: Library Configuration
1.2 Library Configuration The CASIO Software Development Kit (“SDK”) for IT-3100 series provides various libraries listed in the table. The compatibility on these libraries with ones for IT-3000, see Chapter 6.5 “Use of IT-3000 Software Legacy”. Table 1.1 Library Description System Library Library that is used to control the system. -
Page 8: Development Reference Manuals
1.3 Development Reference Manuals The CASIO Software Development Kit (“SDK”) for IT-3100 series includes the development reference manuals listed in the table. Table 1.3 Development Manual Description Quick Start Guide This reference manual. Hardware Manual Reference manual that describes hardware specifications in detail on... -
Page 9: Sample Program
1.4 Sample Program The following sample programs are included in the IT-3100 SDK. Table 1.4 Sample Program Description Common Device Control Library BLUETOOTHLIBSAMPLE Connects the terminal to a Bluetooth printer and prints out data. CAMERALIBSAMPLE Takes pictures and displays them on the screen. (note 2) IMGLIBSAMPLE Scans bar codes using the Imager with settings set with Imager setting file. -
Page 10: Prerequisites
2. Prerequisites 2.1 Skills Required The following skills are required by developers aiming to develop application software for the IT-3100. • Windows programming • A good knowledge of one or more of the following - Visual C++ - Visual Basic .NET - Visual C# .NET - Browser based applications (not covered in this guide) The following skills or experience are also desirable. -
Page 11: Hardware Required
2.2 Hardware Required The following models of the IT-3100 series (see Table 2.1) and dedicated options (see Table 2.2) are available. • IT-3100 Table 2.1 Available models and features Model no. C-MOS 8-pin Serial IT-3100M53E 128 MB IT-3100M53E-CN IT-3100M54E 128 MB... - Page 12 Table 2.2 Available options Model no. Description HA-B61IO Bridge Satellite Cradle HA-B61IO-CN HA-B30CHG Cradle-type Battery Charger HA-B30CHG-CN HA-B34AT Battery Charger Car Mount Unit HA-B34AT-CN DT-9723LIC Battery Pack DT-9723LIC-CN DT-9721CHGE Battery Charger DT-9721CHGE-CN AD-S42120BE AC Adaptor with power cable accompanied AD-S42120BE-CN AD-S42120B AC Adaptor without power cable accompanied AC-CORD-EU...
- Page 13 External views of the IT-3100 and the dedicated options Figure 2.1...
-
Page 14: Software Required
2.3 Software Required PC Operating System • Microsoft Windows 2000 Professional Service Pack 4 or later • Or Microsoft Windows 2000 Server Service Pack 4 or later • Or Microsoft Windows XP Professional Service Pack 2 or later • Or Microsoft Windows 2003 Server Service Pack 1 or later •... - Page 15 9F07AAA1914&displaylang=en CASIO IT-3100 SDK Download the IT-3100 SDK from http://www2.casio.co.jp/system_en/pa/PADealer/ (The site requires your user name and password. Enter your user name and password as issued by CASIO.)
-
Page 16: Installing Sdk To Pc
Install Microsoft’s development platform which supports Visual Studio 2005. For detail, refer to Chapter 2.3 “Software Required”. 2. Installing CASIO SDK to PC Install Casio’s SDK and various libraries if necessary. For installation method, refer to Chapter 3.2 “Installing CASIO SDK Files”. 3. Connecting IT-3100 to PC (via ActiveSync/Windows Mobile Device Center) Connect the IT-3100 to PC via Microsoft’s ActiveSync (for Windows XP or any other OS before... -
Page 17: Installing Casio Sdk Files
Download the CASIO IT-3100 SDK installation CD image file from the following site and write it to a CD-ROM meadia. http://www2.casio.co.jp/system_en/pa/PADealer/ (The site requires your user name and password. Enter your user name and password as issued by CASIO.) Notes: •... - Page 18 Installing ExportSDK 1. When the CASIO IT-3100 SDK CD-ROM is inserted in the drive of your PC, the following menu screen appears automatically. Figure 3.1 2. Click Installation List in Figure 3.1. The installation screen appears. Figure 3.2 3. Click IT-3100 ExportSDK to display the Setup Wizard. Choose any one of the buttons in the...
- Page 19 3. When the Library is installed in PC, the Help file (*.chm) is installed in the following folder. C:\Program Files\CASIO\MBSYS\HELP The Help file can be accessed by navigating to Start menu → All Programs → CASIO Basic Development Kit → Help.
- Page 20 Installing Sample Program When the Sample is chosen in the Installation List, the sample program folder in the CD-ROM appears. The Sample program folder is available for each development platform. Copy one of the folders you wish to use into your PC. EVC for Microsoft embedded Visual C++ VS2003 for Microsoft Visual Studio.NET 2003 VS2005 for Microsoft Visual Studio 2005...
-
Page 21: Connecting Power Supply To Cradle
4. Connecting Power Supply to Cradle 4.1 HA-B61IO Use the dedicated AC adaptor (AD-S42120BE or AD-S42120B) for supplying power to the HA-B61IO Bridge Satellite Cradle. Ensure that you connect the AC adaptor to the cradle before starting communication between the IT-3100 and PC via the cradle. Use the dedicated cable (DT-887AXA or DT-380USB) to connect the HA-B61IO with PC. - Page 22 2. Plug the AC adaptor into the AC adaptor jack where “DCIN12V” is printed on the back of the cradle. 3. After connecting the power cable to the AC adaptor, plug in the plug to an electrical outlet. 4. Turn on the power switch on the cradle. 5.
-
Page 23: Connecting The It-3100 To Pc
5. Connecting the IT-3100 to PC To make connection establishment with PC, use one of the methods, depending on the OS your PC runs, described below. • ActiveSync (for Windows XP or any other OS earlier) Use the ActiveSync to connect the IT-3100 to PC if the PC runs in Windows XP or other OS earlier than Windows XP. -
Page 24: Installing Irxpress
Method of installing USB and RS-232C drivers is dependant on the OS type of your PC. Choose one of the drivers you wish to install in your PC and download the appropriate file depending on the OS type from the CASIO web site. Table 5.1 Windows Server 2003... -
Page 25: Installing Usb Driver
5.1.1 Installing USB Driver This chapter describes the USB driver installation method by the OS type your PC runs. Setting up communication speed is also required after installing the USB driver. See “Setting Up the USB Communication Speed” on page 32. Windows Server 2003, Windows XP, Windows 2000 1. - Page 26 3. The confirmation screen appears after clicking Next > button in Figure 5.2. If all detail appeared in the below screen is okay, click Next > button. Figure 5.3 4. The installation screen appears. Choose the radio button of Yes, I want to restart my computer now, and Finish button.
- Page 27 Continuing the installation process for Windows XP 1. After the PC has started up again, turn on the power on the cradle and then the below screen appears. Figure 5.5 2. Choose Install the software automatically [Recommended] radio button in Figure 5.5. The below screen appears.
- Page 28 Continuing the instllation process for Windows Server 2003 1. After the PC has started up again, turn on the power on the cradle. 2. Navigate to Control Panel → System. 3. Choose the Device Manager in Hardware tab. 4. Right-click IRExpress USB IrDA Controller in the Other Device and choose Update Driver in the menu.
- Page 29 Continuing the instllation process for Windows Vista 1. Initiate SetupUSBIrDA.exe. The User Account Control screen appears. Figure 5.9 2. Choose Allow in Figure 5.9 to continue the installation. When the preparation is complete, the background screen changes to InstallShield Wizard screen (see Figure 5.10). The rest of screens in the installation process will show only pop-up screens and the background screen is omitted.
- Page 30 3. Click Next > button in Figure 5.10. The default installation path of Destination Directory appears in Figure 5.11. Figure 5.11 4. Specify your own instillation path in Figure 5.11 and click Next > button. The confirmation screen below appears. Figure 5.12...
- Page 31 5. If all detail is okay in Figure 5.12, click Next > button. The screen below appears to indicate the completion of installing the driver. Figure 5.13 6. Clicking Finish button in Figure 5.13 starts up the PC again. 7. After starting up the PC, turn on the power on the cradle. The device recognition is automatically carried out.
- Page 32 2. Choose Locate and install driver software (recommended) in Figure 5.14. The below screen appears. Figure 5.15 3. Click Continue button in Figure 5.15 and then the below screen appears. Figure 5.16 4. Choose Install this driver software anyway in Figure 5.16 and then the below screen appears.
- Page 33 3. Navigate to Control Panel → System. 4. Choose Device Manager in Hardware tab. If the cradle is connected to the PC and the power on the cradle is turned on, CASIO IRXpress USB Infrared appears in the Device Manager (see Figure 5.18).
- Page 34 6. Choose Advanced tab and then highlight Maximum Connect Rate. Choose a baud rate in Value field following the note below. Figure 5.19 Note: Choose a baud rate depending on the configuration. In single configuration : 4000000 bps or 115200 bps In daisy chained configuration : 115200 bps only 7.
-
Page 35: Installing Rs-232C Driver
5.1.2 Installing RS-232C Driver This chapter describes the RS-232C driver installation method by the OS type your PC runs. The communication speed and the port must also be set up after installing the driver. See “Setting Up the RS-232C Communication Speed and Port” on page 39. Windows Server 2003, Windows XP, Windows 2000 1. - Page 36 3. Specify your own installation path in Figure 5.21 and click Next > button. The confirmation screen below appears. Click Next > button. Figure 5.22 4. If all detail appeared in Figure 5.23 is okay, click Next > button. Figure 5.23 5.
- Page 37 Windows Vista 1. Initiate SetupSerialIrDA.exe. The User Account Control screen appears. Figure 5.24 2. Choose Allow in Figure 5.24 to continue the installation. When the preparation is complete, the background screen changes to InstallShield Wizard screen. The rest of screens in the subsequent installation procedure show only pop-up screens and the background screen are omitted.
- Page 38 3. Click Next > button in Figure 5.25. The below screen appears. Figure 5.26 4. Specify your own installation path of destination directory in Figure 5.26 otherwise the default and click Next > button. The confirmation screen below appears. Figure 5.27 5.
- Page 39 6. Choose Install this driver software anyway in Figure 5.28. The installation complete screen appears. Figure 5.29 7. Choose Yes, I want to restart my computer now radio button in Figure 5.29 and click Finish button. This starts up the PC again.
- Page 40 In Windows Vista, a screen asking you to continue with the administrator right appears. Click Continue button in the screen to navigate to the Device Manager. 4. Right-click CASIO IRXpress Serial Infrared in the Infrared devices menu (see Figure 5.30) and choose Properties in the menu.
- Page 41 RS-232C communication speed 5. Choose Advanced tab in Properties and highlight Maximum Connect Rate. Choose 115200 bps in the Value field. Figure 5.31 RS-232C port 6. Choose Advanced tab in Properties and highlight COM Port. Choose COM 1 in the Value field.
-
Page 42: Activesync Connection Via Irda
5.2 ActiveSync Connection via IrDA If you have already installed ActiveSync and connected the IT-3100 to the PC via IrDA, You may skip Chapter 5.2.1. You already have the IrDA driver and ActiveSync in your development environment. 5.2.1 Installing ActiveSync 1. -
Page 43: Setting Activesync
5.2.2 Setting ActiveSync If already the ActiveSync is installed in your PC, change only the setting in Connection Settings … by following the procedure below. 1. Navigate to File → Connection Settings…. from the menu in ActiveSync. See Figure 5.35. Figure 5.35 2. -
Page 44: Irda Connection Via Windows Mobile Device Center
5.3 IrDA Connection via Windows Mobile Device Center To establish connection via IrDA interface with PC runs in Windows Vista, use Windows Mobile Device Center (“WMDC”). Note: The WMDC version 6.1 or later supports the connection establishment via IrDA interface. Any other versions earlier are not interoperable with Windows CE devices. -
Page 45: Setting Up The Development Environment
6. Setting Up the Development Environment 6.1 Installing CAB Files 1. After installing the library files, the CAB files in Table 6.1 are installed in the folder below. C:\Program Files\CASIO\MBSYS\CAB Table 6.1 Library CAB file Preinstalled System Library en_SystemLib.ARMV4I.CAB Bluetooth Library en_BluetoothLib.ARMV4I.CAB... -
Page 46: Embedded Visual C
Pack 4 prior to the development. 2. Other SDKs (e.g. standard SDK etc.) released before the IT-3100 SDK are also operable. 3. Application software developed using MFC (Microsoft Foundation Class) for CASIO IT-10 is not operable on the IT-3100. 4. Any application developed not using MFC is operable on the IT-3100. -
Page 47: Visual Studio 2005
6.3 Visual Studio 2005 Follow the steps in Chapter 5 “Connecting the IT-3100 to PC” before checking the steps below to confirm that you can connect to the IT-3100 from Visual Studio 2005. 1. Establish connection with the IT-3100 via ActiveSync. 2. -
Page 48: Visual Studio .Net 2003
6.4 Visual Studio .NET 2003 Follow the steps in Chapter 5 “Connecting the IT-3100 to PC” before checking the steps below to confirm that you can connect to the IT-3100 from Visual Studio .NET 2003. Microsoft has released an add-on for Visual Studio .NET 2003 that allows you to set the target CPU for a connected device (Visual Studio is unable to detect the target CPU of non-Pocket PC devices). -
Page 49: Use Of It-3000 Software Legacy
IT-3000 application software so that the CMOS Imager Library functions of the IT-3100 SDK can be operable. 2. The default destination folders to copy the header file, import library file and class library file are as follows. Header file C:\Program Files\CASIO\MBSys\INCLUDE Import Library file C:\Program Files\CASIO\MBSys\LIB\ARMV4I Class Library file C:\Program Files\CASIO\MBSYS\WindowsCE 3. -
Page 50: Use Of .Net Application Legacy
6.6 Use of .NET Application Legacy This chapter explains how to make a .NET application run on the device installed with Compact Framework which runtime version is as same as the runtime version of Compact Framework which build a .NET application. The application may not work as designed on the device installed with Compact Framework which runtime version is different from the runtime version of Compact Framework which you build an application, because event order depends on the runtime version of Compact Framework. -
Page 51: Device Emulator
• ActiveSync 4.2 or a later version (If required) http://www.microsoft.com/downloads/details.aspx?FamilyID=7269173a-28bf-4cac-a682-58d32 33efb4c&DisplayLang=en • Visual Studio 2008 or Visual Studio 2005 (Required) • CASIO IT-3100 SDK (Required) • Standalone Device Emulator 3.0 (Optional. See note 2.) http://www.microsoft.com/downloads/details.aspx?displaylang=en&FamilyID=a6f6adaf-12e3-4 b2f-a394-356e2c2fb114 Using Visual Studio.NET 2003 •... - Page 52 Notes: 1. The software is not required if your PC already has Visual Studio 2005 installed. 2. To use Microsoft Device Emulator 3.0, follow the steps below. 2-1. Install IT-3100 ExportSDK and Device Emulator in IT-3100 SDK. 2-2. Download Microsoft Device Emulator 3.0 and install it. 2-3.
- Page 53 Please check “Run this program as an administrator” of property from opening Explorer. (Ex. Execute I/O simulator in Windows Vista as administrator.) Figure 7.1 These program have installed the following location as default setting. • Device emulator C:\Program Files\Microsoft Device Emulator\1.0\DeviceEmulator.exe • I/O simulator C:\Program Files\Common Files\CASIO\Emulator\DevIoSim.exe...
-
Page 54: Starting Up The Device Emulator
After installing all required software described in Chapter 7.1, follow the steps below to start up the Device Emulator on your PC. 1. Navigate to Start menu → All Programs → CASIO Device Emulator and click IT-3100. 2. Make sure that the IT-3100 Device Emulator has started up on the screen. See Figure 7.2. If Figure 7.2 and Figure 7.3 appear on your PC, you are ready to use the emulator. - Page 55 program using external events. The Emulator performs in a pseudo CPU and hardware environment and it is impossible for the application to recognize whether it is in the actual device environment or pseudo environment. However, actions carried out by the Simulator are not as alike to those performed by actual components but merely mimic them very closely.
-
Page 56: Using The Device Emulator
7.3 Using the Device Emulator 7.3.1 IT-3100 Device Emulator The IT-3100 Device Emulator emulates various operations carried out by the actual IT-3100 device on the PC’s screen such as mouse operation, input on PC’s keyboard, displaying execution of applications, and operations by actual devices such as the scanner. Figure 7.4 shows an emulated IT-3100 device on the screen of a PC. -
Page 57: I/O Simulator
7.3.2 I/O Simulator The I/O Simulator simulates registration of bar codes, generation of low battery warning, detection of terminal being mounted on cradle. Registration of bar code symbologies Registration Click ADD1D or ADD2D button (circled in red in Figure 7.5) to go into the bar code registration mode. - Page 58 Registration of bar code and note Enter bar code data in the Barcode field (see Figure 7.7) and a note about the bar code in the Note field if necessary. Click OK button to complete the bar code registration. Figure 7.7 Completion of registration After completion of the bar codes registration, the screen in Figure 7.8 shows a list of bar codes that have been registered in the I/O Simulator.
- Page 59 Editing registered bar code content Highlight a bar code in the list of registered bar codes (see Figure 7.8) and click Edit button. Figure 7.9 appears for editing the bar code and its information. Figure 7.9 Deleting registered bar code content Highlight a bar code in the list of registered bar codes (see Figure 7.8) and click the Del button.
- Page 60 Detection of Terminal in Cradle and Low Battery Warning If you check the I/O Box and Low Battery boxes in STATE SETTING field (see Figure 7.11), the simulator simulates the respective events in the emulator. Figure 7.11 I/O Box If this box is checked, a notification is issued that the connection between the IT-3100 Device Emulator and cradle has been established.
- Page 61 Indications The I/O Simulator expresses a change of state that occurred in the IT-3100 Device Emulator. • When the IT-3100 Device Emulator turns on the LED, the LED icon (LED2) in the I/O Simulator also turns on. See Figure 7.11. Figure 7.12 Note: The vibration on the IT-3100 Device Emulator does not take effect.
-
Page 62: Connecting Via Activesync
7.3.3 Connecting via ActiveSync If debugging with the Device Emulator is carried out in eMbedded Visual C++ 4.0 or Visual Studio 2008 or Visual Studio 2005, or transmission/reception of a file with the Device Emulator is carried out, ActiveSync must be used. Setting ActiveSync 1. - Page 63 Connection via ActiveSync The ways to establish connection of the Device Emulator via ActiveSync are; • Using Visual Studio 2008 or Visual Studio 2005 • Using Standalone Device Emulator 3.0 (if Visual Studio 2008 or Visual Studio 2005 is not available.) 1.
- Page 64 4. Make sure ActiveSync has started up and the icon in the status bar appears. See the emulated screen of IT-3100 in Figure 7.15. The icon indicates that the connection via ActiveSync has been established. Figure 7.16 simultaneously appears. Figure 7.16 Figure 7.17...
-
Page 65: Debugging Applications
7.4 Debugging Applications This chapter describes how to debug your application using the Device Emulator. Before starting to “Build”, establish a connection between the IT-3100 and your PC via ActiveSync by referring to Chapter 7.3 “Using the Device Emulator”. For the basic order of developing an application, refer to Chapters 8 “eMbedded Visual C++” and 9 “Visual Studio”. - Page 66 When using Visual Studio 2008 or Visual Studio 2005 Navigate to Debug menu → Start Debugging to start up the debugger. Figure 7.19 Similar to ordinary debugging operations with an actual IT-3100, the Device Emulator allows break point setting (circled in red in Figure 7.20) in the source code and step-by-step debugging.
- Page 67 When using eMbedded Visual C++ 4.0 1. Establish a connection between the Device Emulator and PC via ActiveSync before starting debugging in eMbedded Visual C++ 4.0. For establishing connection via ActiveSync, refer to Chapter 7.3.3 “Connecting via ActiveSync”. 2. Navigate to Build in the menu bar → Start Debug → Go to start up debugging. Figure 7.21 3.
-
Page 68: Embedded Visual C
8. eMbedded Visual C++ 8.1 Building a Simple eVC++ 4.0 Test Program 1. On the PC, initiate eVC++ 4.0. 2. Navigate to File → New in the File menu. Figure 8.1 3. Highlight WCE Application in Projects tab. See Figure 8.1. 4. - Page 69 11. The program will be built and automatically downloaded to the IT-3100. By default, the program will be copied to the root folder on the terminal. Run the program to check that the process was successful. Note that for this basic example you will need to use the mouse emulator to close the application on the device.
-
Page 70: Using Casio Libraries From Evc
Files\CASIO\MBSys\INCLUDE. This is the default location but yours will be different if you install the SDK to another location. 2. Make sure all the “.lib” files for the CASIO libraries have been installed in C:\Program Files\CASIO\MBSys\LIB\ARMV4I 3. In eVC++ 4.0, select New from the File menu. - Page 71 10. On the Project menu, navigate to Add To Project → Files… 11. Change Files of type: pull-down menu list to Library files (.lib). 12. Navigate to the folder where the CASIO library files are stored (see step no. 2 in the previous page), highlight SystemLib file and click OK button.
-
Page 72: Visual Studio
CASIO handheld terminals. They are not compatible with the ones in the previous CASIO library. The exceptions are DT-X11 and IT-600 which do use the same libraries. • VB or C# applications developed with Visual Studio .NET 2003, but not with the CASIO dedicated libraries will run on the IT-3100. -
Page 73: Using Casio .Net Libraries From Vb
1. Create a new VB Smart Device Application in Visual Studio. 2. Click Add Reference… from Project menu. 3. Click Browse and navigate to the folder where you have stored the CASIO .NET library files. Highlight SystemLibNet.dll and click Open. Click OK button. - Page 74 8. The project will be built and copied to the IT-3100. By default, it will be copied to \Program Files\<name of project> folder. SystemLibNet.dll will be deployed to the same folder. 9. Check that the program works correctly on the IT-3100. You can also use the CASIO samples as described in Chapter 1.4.
-
Page 75: Using Casio .Net Libraries From C
1. Create a new C# Smart Device Application in Visual Studio .NET. 2. Click Add Reference… from Project menu. 3. Click Browse and navigate to the folder where you have stored the CASIO .NET library files. Highlight SystemLibNet.dll and click Open. Click OK button. - Page 76 8. The project will be built and copied to the IT-3100. By default, it will be copied to \Program Files\<name of project> folder. SystemLibNet.dll will be deployed to the same folder. 9. Check that the program works correctly on the device. You can also use the CASIO samples as described in Chapter 1.4.
-
Page 77: Using Casio Libraries From C
The test program flashes the LED in red for 5 seconds. Before following the steps below, you will need to add the paths for the CASIO header and library files to Visual Studio 2008 or Visual Studio 2005. Choose Tools-Options-Projects and Solutions-VC++ Directories. - Page 78 3. Choose IT-3100 in the Installed SDKs field and click > button. Figure 9.4 4. Click Next > button while IT-3100 is kept being highlighted in the Selected SDKs field. Figure 9.5 5. Choose Console Application for the Application type in the Application Settings menu, and click Finish button.
- Page 79 7. Append the source code below in the main function of DeviceApp.cpp. DWORD result; TCHAR msg[16]; result = SysSetLED(LED_RED, 5, 8, 8); if(result == TRUE) result = SysGetLED(); switch(result & 0x0000000F) { case LED_OFF: wcscpy_s( msg, _countof(msg), TEXT("LED_OFF") ); break; case LED_RED: wcscpy_s( msg, _countof(msg), TEXT("LED_RED") );...
- Page 80 11. The project will be built and copied to the “\Program Files\<name of project>” folder (by default) in the IT-3100. 12. Check that the program runs correctly on the IT-3100. You can also use the CASIO samples as described in Chapter 1.4.
-
Page 81: Resources
10. Resources Microsoft’s own http://msdn.microsoft.com/mobility/ is an extremely comprehensive resource for programmers targeting WindowsCE .NET based devices. It includes links to most other useful web based resources. You will find detailed Software, Library and .NET Library manuals on http://world.casio.com/system/pa.