
Related Manuals for Casio IT-3100


Summary of Contents for Casio IT-3100
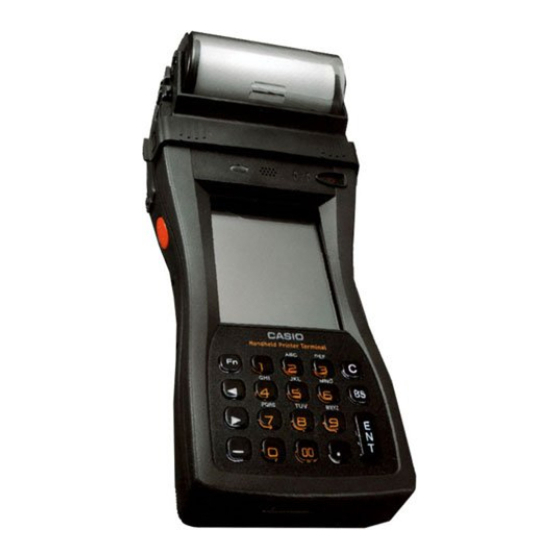
- Page 1 Handheld Printer Terminal Series User’s Guide Be sure to read “Safety Precautions” inside this guide before trying to use your Handheld Printer Terminal.
- Page 2 • Other company names and product names used in this guide are trademarks or registered trademarks of their respective owners. Information in this document is subject to change without advance notice. CASIO Computer Co., Ltd. makes no representations or warranties with respect to the contents or use of this manual and specifically disclaims any express or implied warranties of merchantability or fitness for any particular purpose.
- Page 3 Safety Precautions Congratulations upon your selection of this CASIO product. Be sure to read the following Safety Precautions before trying to use it for the first time. Your neglect or avoidance of the warning and caution statements in the subsequent pages causes the danger of fire, electric shock, malfunction and damage on the goods as well as personal injury.
- Page 4 Safety Precautions Warning Dust and Moisture • Though the Handheld Printer Terminal is dust and water splash resistant, its options including the battery pack are not. Keep loose metal objects and containers filled with liquid away from your Handheld Printer Terminal and the options.
- Page 5 Caution Printer • Do not touch the areas around the printer motor or head since they can become very hot. Doing so can cause burns. • Touching any of the gears while they are turning with unprotected hands can cause personal injury. Be careful not to come in contact with turning gears. •...
- Page 6 Immediately rinse it off with clean tap water and then consult a physician. Caution • Replace only with the same type of battery pack recommended by CASIO. Dispose of used battery packs according to the local regulation. • Keep the battery pack out of the reach of small children.
- Page 7 Power Supply / AC Adaptor Warning • Do not use the Handheld Printer Terminal at a voltage other than the specified voltage. Also, do not connect the Handheld Printer Terminal to a multi-plug power strip. • Never modify, sharply bend, twist, or pull on the power cord. •...
-
Page 8: Safety Precautions
Backup Copies of All Important Data Caution • Note that CASIO Computer Co., Ltd. shall not be held liable to you or any third party for any damages or loss caused by deletion or corruption of data due to use of the Handheld Printer Terminal, malfunction or repair of the Handheld Printer Terminal or its peripherals, or due to the batteries going dead. -
Page 9: Operating Precautions
Operating Precautions Your Handheld Printer Terminal and its options are precision digital instruments. Improper operation or rough handling can cause problems with data storage and other problems. Note and observe the following precautions to ensure proper operation. • Do not leave dead batteries in the Handheld Printer Terminal for a long period. Dead batteries can leak, leading to malfunction and damage to the Handheld Printer Terminal. -
Page 10: Important
Important • This guide does not include any information about programming and download procedures. See the applicable separate documentation for information about the procedures. After Service • Should this product ever malfunction, contact your original retailer providing information about the product name, the date you purchased it, and details about the problem. -
Page 11: Regulatory Information
Model Numbers: IT-3100M53E, IT-3100M54E, HA-B61IO, HA-B30CHG Trade Name: CASIO Responsible party: Casio America, Inc. Industrial Handheld Division Address: 10710 Baxter Avenue, Los Altos, California 94024 USA Telephone number: 408-738-8220 This device complies with Part 15 of the FCC Rules. Operation is subject to the following two conditions: (1) This device may not cause harmful interference, and (2) this device must accept any interference received, including interference that may cause undesired operation. -
Page 12: Declaration Of Conformity
RF field in excess of Health Canada limits for the general population; consult Safety Code 6, obtainable from Health Canada's website at http://www.hc-sc.gc.ca/ewh-semt/pubs/radiation/99ehd-dhm237/index_e.html Europe DECLARATION OF CONFORMITY We, the under signed, CASIO Europe GmbH, hereby declare that the following equipment: Product: Handheld Printer Terminal Models: IT-3100M53E, IT-3100M54E, IT-3100M55E, IT-3100M56E, IT-3100M75E Brand:... -
Page 13: Table Of Contents
Magnetic Card Reader ................. E-42 Performing Data Communication ............... E-43 IR Communication ................... E-43 RS-232C Communication (IT-3100M53E/IT-3100M54E only) ...... E-43 ® Bluetooth Communication ................E-44 Resetting the Handheld Printer Terminal ........... E-45 Performing a Full Reset (Initialization) ............E-46 IT-3100 Specifications .................. E-47 E-11... - Page 14 Contents Using the Bridge Satellite Cradle (HA-B61IO) ........... E-49 General Guide ....................E-49 Connecting the AC Adaptor and Connecting to a Computer ......E-51 Configuring DIP Switch Settings ..............E-53 Connecting Multiple Bridge Satellite Cradles (HA-B61IO) ......E-54 Bridge Satellite Cradle (HA-B61IO) Specifications ........E-55 Using the Cradle-type Battery Charger (HA-B30CHG) ......
-
Page 15: Before Getting Started
Before Getting Started Be sure to perform the following steps before trying to use the Handheld Printer Terminal for the first time. 1. When unpacking, make sure that everything is included. Open the box and make sure that all the items shown here are included. Handheld Printer Terminal PC Card Remover (2 pcs) Handheld Printer Terminal... - Page 16 Before Getting Started 3. Load the battery pack into the Handheld Printer Terminal. 1 Turn the battery pack cover lock switch on the side of the Handheld Printer Terminal to the “FREE” position. 2 Open the battery pack cover. 3 Install the battery pack (DT-9723LIC). Push it all way to the end inside the compartment until the eject button at the front of the battery compartment...
-
Page 17: Handheld Printer Terminal System Configuration
Handheld Printer Terminal System Configuration Options IT-3100 Series Bridge Satellite Cradle HA-B61IO Cradle-type Battery Charger HA-B30CHG Required AC Adaptor for Bridge Satellite Cradle / Cradle-type Battery Charger AD-S42120BE AD-S42120B-N E-15... - Page 18 Handheld Printer Terminal System Configuration AC Cord for Europe AC-CORD-EU AC Cord for North America AC-CORD-US AC Code for Taiwan AC-CORD-TW AC Code for Korea AC-CORD-KR AC Code for Australia AC-CORD-AU Battery Pack DT-9723LIC Paper Holder* HA-B93PH Splash Protect Cover* HA-B92PCV * Not available for IT-3100M75E.
- Page 19 Screen Protect Cover* HA-B90DCV AC Adaptor AD-S10095AE AD-S10095A-N AD-S10095AU Cables DT-887AXA Dsub 9-Pin (Female) RS-232C Cross Cable for Bridge Satellite Cradle DT-888RSC RS-422 Modular Cable for connecting Bridge Satellite Cradle DT-380USB USB Cable for connecting Bridge Satellite Cradle and HA-B80AX RS-232C Cross Cable for connecting Handheld Printer Terminal and PC * Not available for IT-3100M75E.
-
Page 20: General Guide
General Guide IT-3100 * The above illustrations show a model with C-MOS Imager and Magnetic Card Reader installed. E-18... - Page 21 SD Memory Card Slot Slot for inserting SD memory card. This key can be assigned any function available. Program Key (L) IT-3100M55E/IT-3100M55U/IT-3100M56E/IT-3100M75E The default settings are as follows. This key is used to read bar codes and 2D code. Roll Paper Holder Roll paper is placed in this holder.
- Page 22 General Guide Battery Pack Turn this switch when opening and closing the battery pack Cover Lock Switch cover. Battery Pack Houses the battery pack inside. Cover PC Card Slot For connection of a separately sold PC card. Remove the cover to install a PC card.
-
Page 23: Key Functions
Key Functions Fn Key This key is used to switch the character input mode or make various settings in combination with other keys, or start up a pre-registered application. Numeric Keys These keys are used to input numbers and letters. (Cursor Key) Moves the cursor to the left. -
Page 24: Replacing The Battery
Replacing the Battery Your Handheld Printer Terminal uses two types of battery: a battery pack and a memory backup battery. A battery pack (DT-9723LIC) is used for the main battery. A backup battery is housed inside the Handheld Printer Terminal. This guide uses the following terms to refer to the batteries. - Page 25 To replace the battery pack 1. Make sure that the Handheld Printer Terminal is turned off. If the power is on, press the power key to turn it off. 2. Turn the battery pack cover lock switch on the side of the Handheld Printer Terminal to the “FREE”...
- Page 26 Replacing the Battery 6. Return the battery pack cover to its original position as shown in the illustration, and then turn the battery pack cover lock switch to the “LOCK” position. Important! • When replacing the battery pack, make sure you do not leave the Handheld Printer Terminal without a battery pack for more than about 10 minutes.
-
Page 27: Attaching The Hand Strap
Attaching the Hand Strap A flexible hand strap can be attached to the Handheld Printer Terminal. Hook A Hook B Hand Strap Attach the hand strap following the procedure described below. 1. Attach Hook B of the hand strap to the hand strap hook located on the bottom of the Handheld Printer Terminal. -
Page 28: Attaching The Neck Strap
IT-3100 terminal specifically when it is hung from the operator's neck with the Neck Strap. For those who often use the IT-3100 terminal in a hanging position, it is recommended to use the rings to secure the Neck Strap. -
Page 29: Attaching The Stylus Holder
Removal Procedure 1. Pull back the locking bar of the neck strap mounting hook and then release the hook from each ring as shown in the illustration. 2. Following the attachment procedure in reverse way, remove the neck strap rings from each neck strap mounting hook on the Handheld Printer Terminal and then push back the neck strap mounting... - Page 30 Attaching the Neck Strap 2. Remove Mounting Hook C. 3. Pass the stylus holder through the strap as shown in the illustration. 4. Fold back the strap after passing through Bracket C, and then fasten in the same way it was originally fastened with Bracket A and Bracket B.
-
Page 31: Configuring Handheld Printer Terminal Settings
Configuring Handheld Printer Terminal Settings Calibrating Touch Screen Alignment Whenever you feel that touch screen response is poor or that the operations being executed do not match the location you are tapping on the touch screen, perform the following operations to calibrate the alignment of the touch screen. •... -
Page 32: Adjusting Display Contrast
Configuring Handheld Printer Terminal Settings Adjusting Display Contrast Perform the following steps to adjust display contrast to make display colors more vivid and easier to see. • Press the “Fn” key and then make sure that “F” appears in the lower right corner of the screen. -
Page 33: Using The Printer
Using the Printer The printer can print on roll paper (80 mm or 58 mm wide)* or 80 mm wide formed sheet paper. When printing on formed sheet paper, use the paper holder (HA-B93PH) sold separately. When Using Roll Paper Installing the Roll Paper 1. - Page 34 Using the Printer 5. Close the roll paper holder, slide the lock knobs on the left and right sides as shown in the illustration to align at the LOCK FREE “LOCK” position to lock the roll paper holder in position, and then tear off the protruding roll paper.
-
Page 35: Attaching The 58 Mm Paper Width Adjuster
Attaching the 58 mm Paper Width Adjuster Attach the 58 mm Paper Width Adjuster* inside the roll paper holder when using 58 mm wide roll paper. Refer to the procedure described in “Installing the Roll Paper” for information on opening and closing the roll paper holder. 1. -
Page 36: When Using Formed Sheet Paper
Using the Printer When Using Formed Sheet Paper Attaching the Paper Holder Attach the separately sold Paper Holder (HA-B93PH)* when printing on formed sheet paper. The Paper Holder is composed of four parts and four screws. In addition, a PC card cushion is enclosed to prevent the PC card from being dislodged by an impact and so forth. - Page 37 5. Loosen the two screws shown in the illustration (the screws cannot be removed off). 6. Open the cover (PC card slot cover) as shown in the illustration. 7. Loosen and remove the four screws shown in the illustration. Store the removed screws in a safe place so that they do not become lost.
- Page 38 Using the Printer 10. Fasten Part A of the Paper Holder to the Handheld Printer Terminal. Press both ends of Part A to fasten to the Handheld Printer Terminal. 11. Insert the projections on both sides of Part into the grooves of Part B and fasten to the Handheld Printer Terminal with the four screws for the Paper Holder.
- Page 39 Loading Formed Sheet Paper Enable the Auto Loading function by selecting Start, Settings, Control Panel and then “Printing Control” of Printer Settings in that order before loading the formed sheet paper. 1. Insert the formed sheet paper all the way into the printer until it stops with the side to be printed facing downward.
-
Page 40: Precautions When Using Printer
Using the Printer Precautions When Using Printer Printing Accuracy 1. During high-duty printing such as printing horizontal lines or printing while the battery remaining capacity is low, the printing speed may slow down to prevent excess current consumption that may cause unaligned printing for one dot or more. - Page 41 4. Paper scraps may accumulate and printing quality may decrease when the printer has been used for a long period of time. The thermal head must be cleaned when this happens. Contact your nearest CASIO distributor or an authorized CASIO service provider to have cleaning performed.
-
Page 42: Using The C-Mos Imager (It-3100M55E/It-3100M55U/It-3100M56E/It-3100M75E Only
Using the C-MOS Imager (IT-3100M55E/IT-3100M55U/IT-3100M56E/IT-3100M75E only) 1. Turn on the Handheld Printer Terminal, position its C-MOS Imager reader port near the bar code or 2D code, and then press the Trigger Key (R or L). 2. The Handheld Printer Terminal reads the code by emitting laser and red lights. Indicator 2 (read operation indicator lamp) lights in green when the reading is successful. -
Page 43: Warning Label
Warning Label Laser light is emitted IT-3100M55U/M56U/ from this port M55E/M56E • This label is a warning label for Class 2 laser products that comply with IEC60825-1+A2:2001 CAUTION • Use of controls or adjustments or performance of procedures other than those specified herein may result in hazardous radiation exposure. -
Page 44: Magnetic Card Reader
Magnetic Card Reader The Magnetic Card Reader comes as standard with IT-3100M54E/M55E/M55U/M75E. Only use cards that are compatible with the ISO standards. The procedure for reading cards is described below. 1. Remove the cover as shown in the illustration. 2. Insert the card all the way into the reader as shown in the illustration, and steadily pass the card through the reader in the direction of the arrow. -
Page 45: Performing Data Communication
Performing Data Communication IR Communication IR communication can be used to transfer data between two Handheld Printer Terminals. When performing IR communication, orient the IR ports of both Handheld Printer Terminals so they are pointing directly at each other. Data communication is possible within a distance of 0 (in direct contact) to 1 m (max. -
Page 46: Bluetooth Communication
Performing Data Communication ® Bluetooth Communication ® Bluetooth protocol can also be used to transfer data between two Handheld Printer Terminals. The two Handheld Printer Terminals should be no more than three meters apart (as long as there is nothing blocking the path in between). -
Page 47: Resetting The Handheld Printer Terminal
Resetting the Handheld Printer Terminal Resetting the Handheld Printer Terminal is the same as restarting a computer. Performing a reset causes all unsaved inputs and edits to be lost, but data that is already stored in the memory as well as all settings should be unaffected. Use reset to restore normal operation whenever the Handheld Printer Terminal operates abnormally due to misoperation or some other reason. -
Page 48: Performing A Full Reset (Initialization
Resetting the Handheld Printer Terminal Performing a Full Reset (Initialization) Performing a full reset initializes memory. This means that all data stored in the memory (RAM) is deleted and all the settings are returned to their initial factory settings. Perform a full reset whenever any one of the following conditions exists. •... -
Page 49: It-3100 Specifications
IT-3100 Specifications 1. Terminal Model: IT-3100M53E, IT-3100M55E, IT-3100M55U, IT-3100M54E, IT-3100M56E, IT-3100M75E ® CPU: Marvell PXA255 Application Processor (400 MHz max.) Memory: 128MB RAM, 96MB ROM (user defined: Approx. 30MB) ® ® Microsoft Windows CE 5.0 operating system Display: 3.5-inch, 240 × 320 dots, 2-Way TFT Color LCD 2. - Page 50 IT-3100 Specifications Character Fonts: Kanji 12-dot 48/32 columns, 16-dot 36/24 columns, 24-dot 24/16 columns (columns shown for 80 mm wide paper and 58 mm wide paper, respectively) Character Size: Free double-width characters Generating Method: Black/white inversion, mixed character font printing 8.
-
Page 51: Using The Bridge Satellite Cradle (Ha-B61Io
Using the Bridge Satellite Cradle (HA-B61IO) The optionally available Bridge Satellite Cradle (HA-B61IO) makes it possible to transfer system data and file data between the Handheld Printer Terminal and a computer using an RS-232C interface or USB interface. You can also use the Bridge Satellite Cradle to charge the battery pack installed on the Handheld Printer Terminal. - Page 52 Using the Bridge Satellite Cradle (HA-B61IO) System Status This lamp indicates whether the system is operating normally. Indicator Lamp This lamp indicates the system status and whether or not communication with the system can be performed regardless of whether or not a Handheld Printer Terminal is mounted. Off: System is not operating.
-
Page 53: Connecting The Ac Adaptor And Connecting To A Computer
Connecting the AC Adaptor and Connecting to a Computer Use the AC adaptor available as an option for the Bridge Satellite Cradle to supply the power to it. Always make sure that the power is being supplied to the Bridge Satellite Cradle by the AC adaptor before performing any type of data communication operation with the Handheld Printer Terminal. - Page 54 Using the Bridge Satellite Cradle (HA-B61IO) 4. Turn on the power. This causes the Bridge Satellite Cradle power indicator lamp to light red. 5. Place the Handheld Printer Terminal so that the infrared communication unit on the right side is faced firmly with the infrared communication unit of the Bridge Satellite Cradle.
-
Page 55: Configuring Dip Switch Settings
Configuring DIP Switch Settings Removing the bottom cover of the Bridge Satellite Cradle exposes the DIP switches. You can change the ON/OFF settings of the DIP switches to set the configuration. Only set the DIP switches after first switching OFF the power. 1 2 3 4 5 6 7 8 Not used (Always off) Not used (Always off) -
Page 56: Connecting Multiple Bridge Satellite Cradles (Ha-B61Io
Using the Bridge Satellite Cradle (HA-B61IO) Connecting Multiple Bridge Satellite Cradles (HA-B61IO) Connect “C-OUT” of the Bridge Satellite Cradle connected to the host computer to RS-232C cable or “C-IN” of the next Bridge Satellite Cradle USB cable you want to connect. To host computer RS-422 modular cables... -
Page 57: Bridge Satellite Cradle (Ha-B61Io) Specifications
Bridge Satellite Cradle (HA-B61IO) Specifications 1. IR Data Communication Interface: IR interface Protocol: IrDA Ver. 1.1 Standard Synchronization: Start/stop synchronous, frame synchronization Transfer Rate: 9,600/115,200bps/4Mbps (4Mbps is possible during a USB connection with the host computer only.) 2. USB Protocol: USB Ver1.1 Standard Transfer Rate: 12Mbps (max.) -
Page 58: Using The Cradle-Type Battery Charger (Ha-B30Chg
Using the Cradle-type Battery Charger (HA-B30CHG) The optionally available Cradle-type Battery Charger (HA-B30CHG) lets you charge the Handheld Printer Terminal’s battery simply by placing the Handheld Printer Terminal onto the charger. General Guide Front Right Back Bottom E-56... - Page 59 Power Indicator This lamp indicates the power status and the mounting status of Lamp the Handheld Printer Terminal. Off: Power off Red: Power on, Handheld Printer Terminal not mounted Green: Power on, Handheld Printer Terminal mounted correctly These switches detect when the Handled Printer Terminal is Terminal Detect seated correctly on the Cradle.
-
Page 60: Connecting The Ac Adaptor For The Cradle-Type Battery Charger
Using the Cradle-type Battery Charger (HA-B30CHG) Connecting the AC Adaptor for the Cradle-type Battery Charger Use the dedicated AC adaptor for the Cradle-type Battery Charger to connect to a wall outlet. 1. After making sure that the Cradle-type Battery Charger power switch is turned off, plug the AC adaptor into the AC adaptor jack on the back of the charger. -
Page 61: Cradle-Type Battery Charger (Ha-B30Chg) Specifications
Cradle-type Battery Charger (HA-B30CHG) Specifications 1. Charging Charging System: Fixed-voltage (with current limiter) Charge Time: Approximately 8.0 hours 2. Power Supply Power Requirement: AC adaptor (AD-S42120BE*) Power Consumption: 12V DC, approximately 2,100mA to Handheld Printer Output Terminal 10V DC 1,800mA (max.) 3. -
Page 62: Using The Ac Adaptor (Ad-S10095Ae/Au
Using the AC Adaptor (AD-S10095AE/AU) 1. Turn off the power of the Handheld Printer Terminal by pressing the power key. 2. Open the jack cover ( ), and then insert the plug of the AC Adapter into the charging jack ( After connecting the power cable to the AC adaptor, plug the other end of it into an electrical outlet. -
Page 63: Specifications
Specifications 1. Charging Specification Charging Method: Constant current/voltage Charge Period: Approx. 8 hours (with the power off) 2. AC Adaptor Model: AD-S10095A Input: 100V to 240V AC 50/60 Hz 0.4A Output: 9.5V DC 1A 9.5W 3. Dimensions and Weight Dimensions: Approximately 78(W) ×... -
Page 64: Using Pc Cards
Using PC Cards PC card compatible with the PCMCIA(Type I/II) standard can be installed in the PC Card slot on the Handheld Printer Terminal. Insert a PC card according to the procedure described below. Attaching the PC Card Removal Tape to a PC Card There are some PC cards that may be difficult to remove from the PC card slot PC card removal tape... - Page 65 4. Open the cover (PC card slot cover) as shown in the illustration. 5. Insert a PC card having PC card removal tape attached. Insert the PC card all the way in with the top of the card facing towards the top of the Handheld Printer Terminal.
-
Page 66: Inserting A Pc Card (When Using The Paper Holder
Using PC Cards Removing a PC Card Press the eject button on the left side of PC card slot with the stylus as shown by the arrow, and pull out the PC card while holding onto the end of the PC card removal tape. - Page 67 3. After pushing on both ends of Part A and reattaching to the Handheld Printer Terminal ( ), remove Part B by removing the screws ( 4. Insert a PC card to which PC card removal tape has been attached. Insert the PC card all the way in so that the top of the PC card faces the top of the Handheld Printer Terminal.
- Page 68 Using PC Cards 7. While spreading apart both ends of Part A ), remove Part A from the Handheld Printer Terminal by lifting up Part A until the projections reach the upper edges of the grooves of Part B ( ), and then press on Part C and Part D from the left and right sides (...
-
Page 69: Using Sd Memory Cards
Using SD Memory Cards SD memory card can be installed in the SD Memory Card slot on the Handheld Printer Terminal. Insert (or remove) an SD memory card according to the procedure described below. Inserting an SD Memory Card 1. Check that the power is off. If the power is on, always make sure to turn it off by pressing the power key. -
Page 70: Connecting A Bar Code Reader (It-3100M53E/It-3100M54E Only
Connecting a Bar Code Reader (IT-3100M53E/IT-3100M54E only) Connect a bar code reader to the RS-232C interface connector (8-Pin) on the Handheld Printer Terminal. Connecting the bar code reader 1. Check that the power is off. If the power is on, always make sure to turn it off by pressing the power key. -
Page 71: Attaching The Screen Protect Cover
Attaching the Screen Protect Cover Attaching the Screen Protect Cover to the Handheld Printer Terminal prevents the screen from being cracked or damaged when carrying. 1. Remove the two screws on the right side of the Handheld Printer Terminal. Store the screws in a safe place after they have been removed. -
Page 72: Attaching The Splash Protect Cover
Attaching the Splash Protect Cover Attaching the Splash Protect Cover to the Handheld Printer Terminal lets you use it even during inclement weather. inner cover Attach the Splash Protect Cover by following the procedure described below. 1. Press the ridged ( ) portions ( ) of the paper outlet cover while spreading... - Page 73 5. Close the roll paper holder, slide the lock knobs on the left and right sides as shown in the illustration to align at the LOCK FREE “LOCK” position to lock the roll paper holder in position, and then tear off the protruding roll paper.
-
Page 74: Using The Battery Pack
Using the Battery Pack Important! • Make sure to attach the contact cover provided when removing the Battery Pack from the Handheld Printer Terminal and storing. • If the battery pack has been left over unused for a long period of time, the capacity remained decreases due to spontaneous discharge or chemical decomposition by the battery pack itself. - Page 75 CASIO COMPUTER CO., LTD. 6-2, Hon-machi 1-chome Shibuya-ku, Tokyo 151-8543, Japan...