Table of Contents
Advertisement
Quick Links
Download this manual
See also:
Reference Manual
Advertisement
Table of Contents

Related Manuals for Honeywell Thor VX8


Summary of Contents for Honeywell Thor VX8
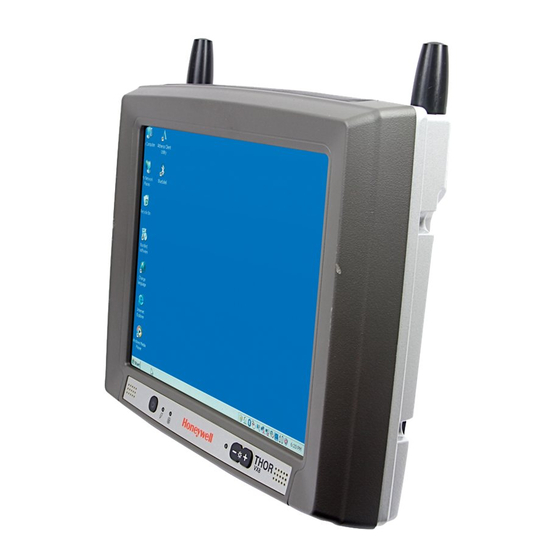
- Page 1 Thor™ VX8 Vehicle-Mount Computer Microsoft® Windows® Embedded Standard Operating System Microsoft® Windows® 7 Professional Operating System Microsoft® Windows® XP® Professional Operating System User's Guide...
-
Page 2: Limited Warranty
Disclaimer Honeywell International Inc. (“HII”) reserves the right to make changes in specifications and other information contained in this document without prior notice, and the reader should in all cases consult HII to determine whether any such changes have been made. The information in this publication does not represent a commitment on the part of HII. -
Page 3: Table Of Contents
95-Key Keyboard with Pointing Device Key Maps NumLock CapsLock and Scroll Lock Keyboard Backlight Chapter 2: Set Up A New Thor VX8 Hardware Setup Software Setup Tapping the Touch Screen with a Stylus Thor VX8 Configuration Options Date and Time... - Page 4 Connection with Screen Blanking Box 3-12 Connection with Relay/Mechanical Switch for Screen Blanking 3-13 Connect Multipurpose Cable 3-14 Securing Port Lid 3-15 Chapter 4: Product Agency Compliance - Thor VX8 Lithium Battery Safety Statement Vehicle Power Supply Connection Safety Statement Chapter 5: Technical Assistance...
-
Page 5: Chapter 1: Introduction
Microsoft Windows icons that the installed Windows operating system supports. An illuminated keyboard is available to facilitate use in dimly lit areas. The Thor VX8 provides the power and functionality of a desktop computer in a vehicle mounted unit, with a wide range of options. -
Page 6: Components
Components Top View The service lid has been removed to show components. Position Function USB 2.0 Hard drive Compact Flash slot, optional (behind HD cable) Battery/UPS Mini PCI slot PC Card slot (option) -
Page 7: Bottom View
Bottom View Position Function Power supply (12V DC 50W) Mic. in Audio out COM2 RS232 +12V COM1 RS232 +5V VGA (external monitor) Multipurpose Connection (provides USB, COM4 with optional +12V on pin 9 or both with optional cables) RJ-45 Ethernet 10/100 (LAN) 2x USB 2.0 PS/2 Mouse PS/2 Keyboard... -
Page 8: Indicators And Buttons
Indicators and Buttons Power Button Screen Brightness 1. Power LED 2. UPS Mode 3. Hard Drive 4. Light Sensor... -
Page 9: Power Led
Power LED The Power LED is incorporated into the power button. Power LED Behavior System State Off (no light) Off and not powered Green flash very slow Off but powered Green on Operating normally Green flashing slow Suspend Green flashing fast Black-out Screen Red on Over voltage shutdown... -
Page 10: 60-Key Keyboard
The 60-key keyboard supports all 101 keyboard functions. However, because the keyboard only has 60 keys, all functions are not visible (or printed on the keyboard). Please refer to the Key Maps section of the Thor VX8 Reference Guide. NumLock The 60-key keyboard does not have a NumLock indicator or key. -
Page 11: 95-Key Keyboard With Pointing Device
Designed for ease of use with Windows operating systems, the 95-key QWERTY keyboard with pointing device connects via a cable to the keyboard port on the Thor VX8. Additional Windows keys (the Windows logo key and the Application key) and an integrated pointing device are provided for ease of use with Windows operating systems. -
Page 12: Keyboard Backlight
Keyboard Backlight The 95-key keyboard backlights each key with an LED. The keyboard backlight is manually controlled using the “backlight” key in the upper right hand corner of the keyboard. Pressing the backlight key cycles the keyboard backlight through the levels of backlight intensity: Maximum intensity Medium intensity... -
Page 13: Chapter 2: Set Up A New Thor Vx8
Chapter 2: Set Up A New Thor VX8 This page lists a quick outline of the steps you might take when setting up a new Thor VX8. More instruction for each step is listed later in this guide. Please refer to the Thor VX8 Reference Guide for additional information and instruction. -
Page 14: Tapping The Touch Screen With A Stylus
Tapping the Touch Screen with a Stylus Note: Always use the point of the stylus for tapping or making strokes on the touch screen. Never use an actual pen, pencil, or sharp/abrasive object to write on the touch screen. Hold the stylus as if it were a pen or pencil. Touch an element on the screen with the tip of the stylus then remove the stylus from the screen. -
Page 15: Thor Vx8 Configuration Options
Thor VX8 Configuration Options Many configuration options are available via the Microsoft Windows Control panel. Refer to the Thor VX8 Reference Guide or For Help and Support on the Start menu for configuration details. Date and Time Use the Windows interface to set date, time and time zone. Tap the time displayed in the task bar or tap: Start > Control Panel >... -
Page 16: Restart/Shutdown
Restart/Shutdown Use the Windows interface to restart or shut down the Thor VX8. Start > Shut down right arrow list menu > Restart Start > Shut down Start > Shut down > Restart Start > Shut down > Shut down Soft Keyboard The optional soft keyboard can be enabled and configured from the keyboard control panel in the MountFocus software. -
Page 17: Setup Terminal Emulation Parameters
Setup Terminal Emulation Parameters Before you make a host connection, you will, at a minimum, need to know: the alias name or IP address (Host Address) and the port number (Telnet Port) of the host system to properly set up your host session. 1. -
Page 18: Cleaning The Touch Screen
If dust, lint or smudges are trapped between the protective film and the glass display, remove the protective film, clean the display and apply the protective film again. Contact Technical Assistance about protective film packs designed specifically for your Thor VX8 touch screen. -
Page 19: Chapter 3: Connecting Cables To The Thor Vx8
Removing the Port Lid Before any cables can be attached to the Thor VX8, the port lid must be removed. The port lid is held in place with eight (8) Torx 20 screws. Remove the screws and the port lid and set aside for reinstallation once all accessories are attached. -
Page 20: 95 Key Rugged Keyboard
95 key Rugged Keyboard The 95 key keyboard contains an integrated 2 button mouse, shown with adapter cable. 1. To adapter cable 2. To 95-key keyboard cable 3. To VX8 PS/2 keyboard connector (color coded) 4. To VX8 PS/2 mouse connector (color coded) -
Page 21: 60 Key Rugged Keyboard
60 key Rugged Keyboard Shown with adapter cable. 1. To adapter cable 2. To 60-key keyboard cable 3. To VX8 PS/2 keyboard connector (color coded) 4. To VX8 PS/2 mouse connector (color coded) -
Page 22: Connect Usb Devices
Plug the desired device, such as a USB mouse or storage device, into the USB port. Refer to Start > Help and Support and the documentation for your USB device for more information. USB devices may be installed, removed or swapped without turning off the Thor VX8. Connect Ethernet Cable Note: Use of a shielded cable is required to maintain emissions and susceptibility compliance.. -
Page 23: Connect Serial Bar Code Scanner
Seat the connector firmly over the pins and turn the thumbscrews in a clockwise direction. Do not overtighten. When you have finished using the scanner, remove it from the Thor VX8 and store the scanner in a closed container or bag. -
Page 24: External Ac Power Supply, Optional
3. Plug cordset into appropriate, grounded, electrical supply receptacle (AC mains). 4. Connect the watertight connector end to the Thor VX8’s Power Connector by aligning the connector pins to the power connector; push down on the watertight connector and twist it to fasten securely. -
Page 25: Connect External Headset
Connect External Headset The Thor VX8 provides an external headset connection via an audio jack connector and a microphone to a separate microphone jack connector. The connectors are color keyed and marked with the headset and microphone symbols. 1. Insert the speaker or headphone plug into the audio connector; making sure the plug is firmly seated in the jack. -
Page 26: Connecting Vehicle Power
Complete vehicle cradle mounting and power instruction is contained in the Thor VX8 Cradle Guide. The DC to DC converter is used to power the Thor VX8. The converter must be used with the Thor VX8 regardless of vehicle voltage. -
Page 27: Connect Vehicle Electrical Connection
4. Route the cable from the Thor VX8 to the DC to DC converter and, optionally, the screen blanking box. Cut the cable to length and strip the wire ends. If the screen blanking box is not used, do not strip the green and yellow wires. - Page 28 6. If the screen blanking box is used for the Thor VX8 installation, attach the stripped wire ends to the box. Refer to the applicable following diagram and the label on the screen blanking box for proper wiring connection. 7. Connect the DC to DC converter to the vehicle’s electrical system.
-
Page 29: Connection Without Screen Blanking
Connection without Screen Blanking Power Cable Routing without Screen Blanking 1. Existing circuitry on vehicle 2. Forklift Battery 3. Main Switch 4. 10A slow fuse close to power source 5. Power input 6. Isolated DC power output 7. White 8. Brown 9. -
Page 30: Connection With Screen Blanking Box
Connection with Screen Blanking Box It is assumed that the motion sensing circuitry in the illustration below is powered by internal vehicle circuitry. Power Cable Routing with Screen Blanking Box 1. Existing Circuitry on Vehicle 2. Forklift Battery 3. Main Switch 4. -
Page 31: Connection With Relay/Mechanical Switch For Screen Blanking
Connection with Relay/Mechanical Switch for Screen Blanking Power Cable Routing with Screen Blanking Switch/Relay 1. Existing Circuitry on Vehicle 2. Forklift Battery 3. Main Switch 4. 10A slow fuse close to power source 5. Power Input 6. Isolated DC power output 7. -
Page 32: Connect Multipurpose Cable
Configuration of COM port power is handled via the VMT Manager option in the Control Panel. For more information consult the Thor VX8 Reference Guide or the system administrator responsible for the configuration of the Thor VX8. The multipurpose cable is attached to the port. The cable requires a nine-pin D-shell female connector for the Thor VX8. 3-14... -
Page 33: Securing Port Lid
The screws used for the port lid should be alternately tightened to provide proper dust and moist protection (IP65 requirement). There are eight (8) Torx 20 screws securing the port lid. Fasten the cable tube in the vehicle, without putting strain on the tube. Now the Thor VX8 is ready to be mounted in the vehicle. 3-15... - Page 34 3-16...
-
Page 35: Chapter 4: Product Agency Compliance - Thor Vx8
Li-Ion Battery When disposing of the Thor VX8 main battery, the following precautions should be observed: The battery should be disposed of properly. The battery should not be disassembled or crushed. The battery should not be heated above 212°F (100°C) or incinerated. - Page 36 Bluetooth and GSM technology are not available in Brazil. Bluetooth e tecnologia GSM não estão disponíveis no Brasil. Waste Electrical and Electronic Equipment (WEEE) Important: This symbol is placed on the product to remind users to dispose of Waste Electrical and Electronic Equipment (WEEE) appropriately, per Directive 2002-96-EC.
-
Page 37: Lithium Battery Safety Statement
Lithium Battery Safety Statement Caution: Lithium battery inside. Danger of explosion if battery is incorrectly replaced. Replace only with same or equivalent type recommended by battery manufacturer. (US) Attention: Contient une pile de lithium. Risque d’explosion dans le cas où la pile ne serait pas correctement remplacée. Remplacer uniquement avec une pile semblable ou equivalente au type de pile recommandé... - Page 38 Lithium Battery Safety Statement, continued Legend: Chinese – CN; Danish – DK; Dutch – NL; English – US; Finnish – FI; French- - FR; German – DE; Greek – GR; Italian – IT; Japanese – JP; Korean – KR; Norwegian – NO; Portuguese – PT; Spanish – ES; Swedish – SE; Turkish – TR.
-
Page 39: Vehicle Power Supply Connection Safety Statement
Vehicle Power Supply Connection Safety Statement Vehicle Power Supply Connection: If the supply connection is made directly to the battery, a 10A slow-blow fuse should be installed in the positive lead within 5 inches (12.7 cm.) of the battery positive (+) terminal. (US) Raccordement de l’alimentation du véhicule Si l’alimentation est raccordée directement à... -
Page 41: Chapter 5: Technical Assistance
Limited Warranty Honeywell International Inc. ("HII") warrants its products to be free from defects in materials and workmanship and to conform to HII’s published specifications applicable to the products purchased at the time of shipment. This warranty does not cover any HII product which is (i) improperly installed or used;... - Page 42 The duration of the limited warranty for the Thor VX8 internal UPS battery is 1 year. The duration of the limited warranty for the Thor VX8 AC power supply and cables is 1 year. The duration of the limited warranty for the Thor VX8 DC-DC Converter is 1 year.
- Page 44 Honeywell Scanning & Mobility 9680 Old Bailes Road Fort Mill, SC 29707 www.honeywellaidc.com E-EQ-VX8OGWW Rev J 10/12...