Cisco ASR 1001-X Installation Manual
Hide thumbs
Also See for ASR 1001-X:
- Hardware installation manual (152 pages) ,
- Common criteria operational user guidance and preparative procedures (72 pages)
Table of Contents
Advertisement
Advertisement
Table of Contents

Related Manuals for Cisco ASR 1001-X


Summary of Contents for Cisco ASR 1001-X
- Page 1 Cisco ASR 1001-X Router Hardware Installation Guide July 28, 2014 Cisco Systems, Inc. www.cisco.com Cisco has more than 200 offices worldwide. Addresses, phone numbers, and fax numbers are listed on the Cisco website at www.cisco.com/go/offices. Text Part Number: OL-32376-03...
- Page 2 OR ITS SUPPLIERS HAVE BEEN ADVISED OF THE POSSIBILITY OF SUCH DAMAGES. Cisco and the Cisco logo are trademarks or registered trademarks of Cisco and/or its affiliates in the U.S. and other countries. To view a list of Cisco trademarks, go to this URL: www.cisco.com/go/trademarks.
-
Page 3: Table Of Contents
Warning Definition Obtaining Documentation and Submitting a Service Request xvii Cisco ASR 1001-X Router Overview Hardware Features of the Cisco ASR 1001-X Router Cisco ASR 1001-X Overall Chassis Front View Cisco ASR 1001-X Router LEDs Cisco ASR 1001-X Management Storage Connections... - Page 4 Contents Cisco ASR 1001-X Router DC Power Supply AC/DC Power System Input Range and Voltage for the Cisco ASR 1001-X Router Power Cords Supported by the Cisco ASR 1001-X Router Preparing Your Site for Installation Prerequisites and Preparation Site Planning Checklist...
- Page 5 Contents Guidelines for a Standalone Equipment Shelf or Tabletop Installation Steps for Installing the Cisco ASR 1001-X Router on a Standalone Equipment Shelf or Tabletop Installation General Guidelines for Rack Installation Rack-Mounting the Cisco ASR 1001-X Router Verifying Rack Dimensions...
- Page 6 Installing DC Input Power on the Cisco ASR 1001-X Router Wiring the DC Input Power Source Removing and Replacing Cisco ASR 1001-X Router USB Flash Memory Stick or Secure Token Removing and Replacing the Cisco ASR 1001-X Router DIMM Removing and Replacing the Cisco ASR 1001-X Router DIMM Memory Module...
- Page 7 Contents Checking the Current ROMMON Version Upgrading the ROMMON for the Cisco ASR 1001-X Router Example: Upgrading a ROMMON Compatible ROMMON Releases Resolved Caveats Hardware the Require a CPLD Upgrade Upgrading the CPLD Checking Hardware and Software Compatibility Using Cisco Feature Navigator...
- Page 8 Contents Cisco ASR 1001-X Router Hardware Installation Guide viii OL-32376-03...
-
Page 9: Document Revision History
Updated for Cisco IOS XE Release 3.12.1. OL-32376-01 June 2014 First version of the document. Document Objectives This publication describes the installation of a Cisco ASR 1001-X Router and replacement or upgrade of field-replaceable units (FRUs). Cisco ASR 1001-X Router Hardware Installation Guide OL-32376-03... -
Page 10: Audience
Audience This publication is primarily designed for persons responsible for installing, maintaining, and troubleshooting the Cisco ASR 1001-X Router. The users of this guide should: Be familiar with electronic circuitry and wiring practices. • Have experience working as electronic or electromechanical technicians. -
Page 11: Conventions
Timesaver the paragraph. Safety Warnings and Cautions Most safety warnings for the Cisco ASR 1001-X Router are placed in relevant sections throughout the document. For translated safety warnings, see the Regulatory Compliance and Safety Information for the Cisco 1000 Series Aggregation Services Routers. -
Page 12: Warning Definition
éviter les accidents. Pour prendre connaissance des traductions des avertissements figurant dans les consignes de sécurité traduites qui accompagnent cet appareil, référez-vous au numéro de l'instruction situé à la fin de chaque avertissement. CONSERVEZ CES INFORMATIONS Cisco ASR 1001-X Router Hardware Installation Guide OL-32376-03... - Page 13 Al final de cada advertencia encontrará el número que le ayudará a encontrar el texto traducido en el apartado de traducciones que acompaña a este dispositivo. GUARDE ESTAS INSTRUCCIONES Cisco ASR 1001-X Router Hardware Installation Guide xiii OL-32376-03...
- Page 14 Använd det nummer som finns i slutet av varje varning för att hitta dess översättning i de översatta säkerhetsvarningar som medföljer denna anordning. SPARA DESSA ANVISNINGAR Cisco ASR 1001-X Router Hardware Installation Guide OL-32376-03...
- Page 15 Brug erklæringsnummeret efter hver advarsel for at finde oversættelsen i de oversatte advarsler, der fulgte med denne enhed. GEM DISSE ANVISNINGER Cisco ASR 1001-X Router Hardware Installation Guide OL-32376-03...
- Page 16 Cisco ASR 1001-X Router Hardware Installation Guide OL-32376-03...
-
Page 17: Obtaining Documentation And Submitting A Service Request
Obtaining Documentation and Submitting a Service Request For information on obtaining documentation, submitting a service request, and gathering additional information, see the monthly What’s New in Cisco Product Documentation, which also lists all new and revised Cisco technical documentation, at: http://www.cisco.com/en/US/docs/general/whatsnew/whatsnew.html... - Page 18 Cisco ASR 1001-X Router Hardware Installation Guide xviii OL-32376-03...
-
Page 19: Cisco Asr 1001-X Router Overview
ASIC called Quantum Flow Processor that aggregates services at scale. The Cisco ASR 1001-X Router is a part of the Cisco ASR 1000 Series and offers a compact form factor that consumes less rack space and power while offering 20 Gbps forwarding throughput. The Cisco ASR 1001-X Router supports all the general-purpose routing and security features of the Cisco ASR 1000 Series Aggregation Services Routers. -
Page 20: Cisco Asr 1001-X Overall Chassis Front View
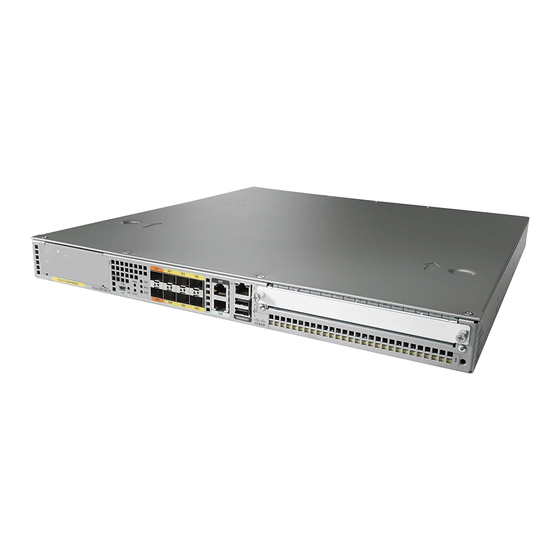
Field-replaceable units (FRU) with online insertion and removal (OIR). • Cisco ASR 1001-X Overall Chassis Front View Figure 1-1 shows the front of the Cisco ASR 1001-X Router. Figure 1-1 Cisco ASR 1001-X Router Front View NIM slots Shared port adapter slot CON—One mini eUSB por... -
Page 21: Cisco Asr 1001-X Router Leds
Cisco ASR 1001-X Router Overview Hardware Features of the Cisco ASR 1001-X Router Cisco ASR 1001-X Router LEDs Figure 1-2 shows the front panel of the Cisco ASR 1001-X Router. Figure 1-2 Common LEDs for the Cisco ASR 1001-X Router LED Label... -
Page 22: Cisco Asr 1001-X Chassis Rear View
Two power supplies, either two AC power supplies or two DC power supplies are accessed from the rear of the router and are hot-swappable. The Cisco ASR 1001-X Router can support two AC or two DC power supplies. Do not install mixed AC Note and DC power supply units in the same chassis. -
Page 23: Cisco Asr 1001-X Spa Ge And Te Ports
GE SFP Port 0/0/4 GE SFP Port 0/0/1 GE SFP Port 0/0/5 Field-Replaceable Units for the Cisco ASR 1001-X Router The Cisco ASR 1001-X Router has a number of FRUs. These include: SPAs • Dual In-line Memory Modules (DIMMs) •... -
Page 24: Cisco Product Identification Standard
Cisco Product Identification Standard Cisco Product Identification Standard This section describes the Cisco products and services product identification standard. This feature provides you with the ability to effectively integrate and manage Cisco products in your network and business operations. Unique Device Identifier The Unique Device Identifier (UDI) is the Cisco product identification standard for hardware products. -
Page 25: Spa Slot Numbering
Common Language Equipment Identification (CLEI) code is a ten-digit character code that identifies a Note specific product. A CLEI code is applied to each part within a Cisco ASR1001-X Router as they are programmed in manufacturing for shipment to customers. -
Page 26: Serial Number And Pid/Vid Label Location
Slot 0/1 connected to the half-height SPA slot - Serial Number and PID/VID Label Location Figure 1-7 shows a Cisco ASR 1001-X Router chassis along with the location of the serial number and the PID/VID label. Figure 1-7 Cisco ASR 1001-X Router Serial Number and PID/VID Label Location... -
Page 27: Cisco Asr 1001-X Router Supported Hardware Components
C H A P T E R Cisco ASR 1001-X Router Supported Hardware Components This chapter contains information about the supported hardware components on the Cisco ASR 1001-X Router, and contains the following sections: • Supported Hardware Components, page 2-1 Supported Half-Height SPAs, page 2-2 •... -
Page 28: Supported Half-Height Spas
Chapter 2 Cisco ASR 1001-X Router Supported Hardware Components Supported Half-Height SPAs Supported Half-Height SPAs Table 2-1 lists the supported half-height SPAs on the Cisco ASR 1001-X Router.Supported Half-Height SPAs Table 2-2 Supported Half-Height SPAs Description SPA-1X10GE-L-V2 Cisco 1-Port 10GE LAN-PHY... -
Page 29: Supported Small Form-Factor Pluggable (Sfp And Sfp+) Transceivers
SPA-24CHT1-CE-ATM Cisco 24 Port T1/E1/J1 Circuit Emulation SPA 1. There is a limitation for clock switchover scenarios between the Cisco ASR 1001-X Router's built-in ports and the Metronome SPA. All the other functionalities on the Metronome SPA are supported. Supported Small Form-Factor Pluggable (SFP and SFP+) -
Page 30: Supported Nims
The Cisco ASR 1001-X Router supports the following NIM form factors: NIM-SSD • NIM-T1/E1 • NIM-SSD Table 2-5 lists the supported NIM with Solid State Disk (SSD) on the Cisco ASR 1001-X Router: Table 2-5 Supported NIM SSDs Part Number Description NIM-SSD NIM Carrier Card for SSD drives... -
Page 31: Cisco Asr 1001-X Router Power Supplies
+12 V. The power supply operates between –40 and –72 VDC. The DC power supply current shares on the 12 V output and is used in a dual hot-pluggable configuration. The Cisco ASR 1001-X Router can support two AC or two DC power supplies. Do not install mixed AC Note and DC power supply units in the same chassis. -
Page 32: Cisco Asr 1001-X Power Supply Fans
Cisco ASR 1001-X Power Supply Fans The fans in the power supply module of the Cisco ASR 1001-X Router are used for cooling the power supply module itself while system-level cooling is provided by four fans within the chassis. The power supplies do not depend on the system-level fans for cooling. -
Page 33: Cisco Asr 1001-X Router Dc Power Supply
Retaining latch Cisco ASR 1001-X Router DC Power Supply The Cisco ASR 1001-X Router DC input connector is a two-wire connector with connection polarity from left to right (when facing the unit) of negative (–) positive (+). The power supply has a handle to be used for insertion and extraction. The module must be supported with one hand because of its length. -
Page 34: Ac/Dc Power System Input Range And Voltage For The Cisco Asr 1001-X Router
Cisco ASR 1001-X Router Power Supplies AC/DC Power System Input Range and Voltage for the Cisco ASR 1001-X Router The power supply DC Input Range is –40 to –72 VDC, and the AC Input Range is +85 to +264 VAC. - Page 35 Chapter 2 Cisco ASR 1001-X Router Supported Hardware Components Cisco ASR 1001-X Router Power Supplies Table 2-8 Power Cords Supported by the Cisco ASR 1001-X Router (continued) Power Cord Item Number Description CAB-C13-C14-JMPR Cabinet Power Cord, 250 VAC 13 A, C14-C15 Connector...
- Page 36 Chapter 2 Cisco ASR 1001-X Router Supported Hardware Components Cisco ASR 1001-X Router Power Supplies Cisco ASR 1001-X Router Hardware Installation Guide 2-10 OL-32376-02...
-
Page 37: Preparing Your Site For Installation
Preparing Your Site for Installation This chapter contains important safety information you should know before working with the Cisco ASR 1001-X Router, and guides you through the process of preparing your site for router installation. This chapter contains the following sections: Prerequisites and Preparation, page 3-1 •... -
Page 38: Site Planning Checklist
Site Planning Checklist Use the following checklist to perform and account for all the site-planning tasks described in this chapter: The site air conditioning system can compensate for the heat dissipation of the Cisco ASR 1001-X • Router. Electrical service to the site complies with the requirements. -
Page 39: Safety Recommendations
Safety Recommendations The following guidelines will help to ensure your own safety and protect your Cisco equipment. This list does not cover all potentially hazardous situations, so be alert. Cisco safety policy mandates that all its routers must conform to the requirements of IEC 60950, •... -
Page 40: Cautions And Regulatory Compliance Statements For Nebs
Class A emission requirements for EMC. Shielded twisted pair T1/E1 cables must be used with any of the T1/E1 NIM interfaces Caution in any Cisco ASR 1000 chassis. This is required for compliance with Class A emission requirements for EMC. Telcordia NEBS... -
Page 41: Standard Warning Statements
Note: SAVE THESE INSTRUCTIONS Statement 1071 General Safety Warnings Warning Read the installation instructions before you connect the system to its power source. Statement 1004 Cisco ASR 1001-X Router Hardware Installation Guide OL-32376-02... - Page 42 This product relies on the building’s installation for short-circuit (overcurrent) protection. Ensure that the protective device is rated not greater than: AC power supply for the Cisco ASR 1001-X Router: 120 VAC, 30A U.S. maximum. DC power supply for the Cisco ASR 1001-X Router: 30A U.S. maximum.
- Page 43 Laser radiation is present when the system is open. Statement 1009 Warning Do not stare into the laser beam. Statement 1010 Class I(CDRH) and Class 1M (IEC) laser products. Statement 1055 Warning Cisco ASR 1001-X Router Hardware Installation Guide OL-32376-02...
-
Page 44: Site Planning
This section contains site-planning information, and will help you plan for the installation of the Cisco ASR 1001-X Router. General Precautions Observe the following general precautions when using and working with your Cisco ASR 1001-X Router: Keep your system components away from radiators and heat sources and do not block cooling vents. -
Page 45: Site Selection Guidelines
The following sections provide specific information to help you plan for a proper operating environment. The Cisco ASR 1001-X Router is designed to meet the industry EMC, safety, and environmental standards described in the... -
Page 46: Physical Characteristics
+50° C minute Physical Characteristics Be familiar with the physical characteristics of the Cisco ASR 1001-X Router to assist you in placing the system at a proper location. Note For information regarding rack widths supported for the Cisco ASR 1001-X Router, see the following sections: •... -
Page 47: Site Power Guidelines
Make sure that the total ampere rating of all the products plugged into the power strip does not exceed 80 percent of the rating. The Cisco ASR 1001-X Router can support two AC or two DC power supplies. Do not install mixed AC Note and DC power supply units in the same chassis. -
Page 48: Site Cabling Guidelines
This section contains guidelines for wiring and cabling at your site. When preparing your site for network connections to the Cisco ASR 1001-X Router, consider the type of cable required for each component, and the cable limitations. Consider the distance limitations for signaling, EMI, and connector compatibility. -
Page 49: Console Port Connections
Console Port Connections The Cisco ASR 1001-X Router provides console and auxiliary ports to connect a terminal or computer for local console access. Both ports have RJ-45 connectors, support RS-232 asynchronous data, and have distance recommendations specified in the IEEE RS-232 standard. - Page 50 Strong EMI can destroy the signal drivers and receivers in the Cisco ASR 1001-X Router and even create an electrical hazard by causing power surges through power lines into installed equipment. These problems are rare, but could be catastrophic.
-
Page 51: Rack-Mounting Guidelines
EIA or ETSI hole patterns in the mounting rails. Required mounting hardware is shipped with the • Cisco ASR 1001-X Router. If the rack that you plan to install the system in has metric-threaded rails, you must provide your own metric-mounting hardware. -
Page 52: Guidelines For 23-In. (Telco) Racks
Locating for Safety If the Cisco ASR 1001-X Router is the heaviest or the only piece of equipment in the rack, consider installing it at or near the bottom to ensure that the rack’s center of gravity is as low as possible. -
Page 53: Preventing Electrostatic Discharge Damage
Avoid locating the Cisco ASR 1001-X Router in a location in which the chassis air intake vents could draw in the exhaust air from adjacent equipment. Consider how the air flows through the router. The airflow direction is front to back with ambient air drawn in from the venting located on the chassis’... -
Page 54: Electrical Safety
Do not remove installed components from the chassis. • Always disconnect all external cables before lifting or moving the chassis. • Cisco ASR 1001-X Router Hardware Installation Guide 3-18 OL-32376-02... -
Page 55: Tools And Equipment
The following tools and equipment are recommended as the minimum necessary equipment to install the Cisco ASR 1001-X Router. You may need additional tools and equipment to install associated equipment and cables. You may also require test equipment to check electronic and optical signal levels, power levels, and communications links. -
Page 56: Cisco Asr 1001-X Router Installation Checklist
Cisco ASR 1001-X Router Installation Checklist To assist you with your installation and to provide a historical record of what was done by whom, photocopy the Cisco ASR 1001-X Router Installation Checklist shown in Table 3-8. Use this to record when each procedure or verification is completed. - Page 57 Chapter 3 Preparing Your Site for Installation Cisco ASR 1001-X Router Installation Checklist Table 3-8 Cisco ASR 1001-X Router Installation Checklist (continued) Verified Task Date AC power cable(s) connected to AC source(s) and router DC power cable(s) connected to DC source(s) and router...
- Page 58 Chapter 3 Preparing Your Site for Installation Cisco ASR 1001-X Router Installation Checklist Cisco ASR 1001-X Router Hardware Installation Guide 3-22 OL-32376-02...
- Page 59 C H A P T E R Cisco ASR 1001-X Router Installation This chapter provides procedures for installing the Cisco ASR 1001-X Router on an equipment shelf, tabletop, or in an equipment rack. This chapter contains the following sections: Installation Methods, page 4-1 •...
-
Page 60: Cisco Asr 1001-X Router Installation
Lift the chassis into position on the equipment shelf or tabletop. Step 2 Step 3 through Step 9 are optional if you are installing the Cisco ASR 1001-X Router on a rack Note shelf. The chassis rack-mount brackets must be installed prior to installing the cable-management brackets. -
Page 61: General Guidelines For Rack Installation
General Guidelines for Rack Installation When planning your rack installation, consider the following guidelines: The Cisco ASR 1001-X Router requires a minimum of 3.5 inches or 8.9 cm rack units of vertical • rack space. Measure the proposed rack location before mounting the chassis in the rack. -
Page 62: Rack-Mounting The Cisco Asr 1001-X Router
19 inches (48.26 cm). The height of the chassis is 1.71 inches (43.43 mm). Airflow through the chassis is from front to back. The Cisco ASR 1001-X Router can be installed with both front or rear rack-mount brackets. Verifying Rack Dimensions... -
Page 63: Attaching The Chassis Rack-Mount Brackets
3-19. Note The Cisco ASR 1001-X Router has a set of threaded features in the rear of the chassis to accommodate a set of rear-mounting brackets, should the requirement arise. The cable-management brackets are attached to the chassis after you install the chassis rack-mount Note brackets on the chassis and mount the chassis in the rack. -
Page 64: Mounting The Cisco Asr 1001-X Router In The Rack
Step 2 engaged or that the rack is otherwise stabilized. (Optional) Install a shelf in the rack to support the Cisco ASR 1001-X Router. If you use a shelf, it helps Step 3 support the chassis while you secure it to the rack. - Page 65 Chassis Ground Connection” section on page 4-10 to continue the installation. Figure 4-3 shows the Cisco ASR 1001-X Router on a two-post equipment rack. Figure 4-3 Cisco ASR 1001-X Router Installed on a Two-Post Equipment Rack Cisco ASR 1001-X Router Hardware Installation Guide...
-
Page 66: Four-Post Rack Installation
General Guidelines for Rack Installation Four-Post Rack Installation (Optional) Install a shelf in the rack to support the Cisco ASR 1001-X Router. If you are using a shelf, Step 1 raise the chassis to the level of the shelf. Let the bottom of the chassis rest on the brackets, but continue to support the chassis. -
Page 67: Attaching The Cable Management Bracket
The cable-management brackets for the Cisco ASR 1001-X Router contain one independent cable-management U type feature with four screws and provides cable dressing for each card module slot. Follow these steps to attach the cable-management brackets to both sides of the Cisco ASR 1001-X Router in the rack: Step 1 Align the cable-management bracket to the rack-mount bracket on one side of the Cisco ASR 1001-X Router. -
Page 68: Attaching A Chassis Ground Connection
(earth) connection for the chassis in compliance with Telcordia grounding requirements. A chassis ground connector is provided on each Cisco ASR 1001-X Router. There is a stud on the side of the chassis and on the DC power supply (primary grounding stud). - Page 69 Cisco ASR 1001-X Router Installation Attaching a Chassis Ground Connection Figure 4-6 shows how to attach the ground lugs on the Cisco ASR 1001-X Router. Figure 4-6 Installing a Ground Connection on the Cisco ASR 1001-X Router Chassis ground studs and lead wire...
-
Page 70: Connecting Cables
Connecting the Console and Auxiliary Port Cables This section describes how to attach a cable to the console port or to the auxiliary ports on the Cisco ASR 1001-X Router. The router uses RJ-45 ports for both auxiliary ports and console ports to attach a console terminal. -
Page 71: Connecting To The Mini Usb Console Port
9600 baud, 8 data bits, no parity, 1 stop bits (9600 8N1). Step 2 Connect one end of the RJ-45 cable to the serial RJ-45 console port (CON) on the Cisco ASR 1000-X Router using the RJ-45 to DB-9 cable. Connect the DB-9 end to your terminal equipment. -
Page 72: Management Ethernet Port Cable Connection
SFP+ Module Connections The small form-factor pluggable (SFP+) module is an input/output (I/O) device that plugs into the 10 Gigabit Ethernet optical slots on the two built-in 10 Gigabit Ethernet ports. Cisco ASR 1001-X Router Hardware Installation Guide 4-14 OL-32376-02... -
Page 73: Connecting The Shared Port Adapter Cables
Gigabit Ethernet and for products other than the two built-in 10 Gigabit Ethernet ports. The built-in 1 GE SFP modules and two 10 GE SFP+ modules of the Cisco ASR 1001-X Router share the Warning same basic form factor and will fit in to each other’s port slots. If you accidentally install an SFP+ module into an SFP port or vice versa, the following error message is displayed: Jun 23 12:07:51.273 EST: %TRANSCEIVER-6-INSERTED: SIP0/0: transceiver module... - Page 74 Chapter 4 Cisco ASR 1001-X Router Installation Connecting Cables Cisco ASR 1001-X Router Hardware Installation Guide 4-16 OL-32376-02...
-
Page 75: Cisco Asr 1001-X Router Power Up And Initial Configuration
Do not operate the system unless all cards, faceplates, front covers, and rear covers are in place. Statement 1029 To view the boot sequence, you must have a console connection to the Cisco ASR 1001-X Router before Note it powers up. -
Page 76: Powering Up The Cisco Asr 1001-X Router
Chapter 5 Cisco ASR 1001-X Router Power Up and Initial Configuration Powering Up the Cisco ASR 1001-X Router Ensure that the following conditions are addressed before starting up the router: The network interface cable or the optional Fast Ethernet Management port cable is connected. - Page 77 Chapter 5 Cisco ASR 1001-X Router Power Up and Initial Configuration Powering Up the Cisco ASR 1001-X Router File size is 0x1c103d44 Located asr1001x-universalk9.BLD_V154_2_S0A_XE3120A_THROTTLE_LATEST_20140427_042227-std.SPA.bin Image size 470826308 inode num 81931, bks cnt 114948 blk size 8*512 ########################################################################################## ########## ########################################################################################## ##########...
-
Page 78: Performing The Initial Configuration On The Router
If you make a mistake while using the setup command facility, you can exit and run the setup command facility again. Press Ctrl-C, and enter the setup command in privileged EXEC mode (Router#). Step 1 From the Cisco IOS-XE CLI, enter the setup command in privileged EXEC mode: Router> enable Password: <password>... - Page 79 Chapter 5 Cisco ASR 1001-X Router Power Up and Initial Configuration Performing the Initial Configuration on the Router --- System Configuration Dialog --- Continue with configuration dialog? [yes/no]: The prompts in the setup command facility vary depending on your router model, on the installed interface modules, and on the software image.
- Page 80 Chapter 5 Cisco ASR 1001-X Router Power Up and Initial Configuration Performing the Initial Configuration on the Router GigabitEthernet0/0/4 15.1.1.1 YES NVRAM administratively down down GigabitEthernet0/0/5 200.1.1.1 YES NVRAM administratively down down Te0/1/0 22.1.1.1 YES NVRAM administratively down down GigabitEthernet0 2.1.12.233...
-
Page 81: Completing The Configuration
Performing the Initial Configuration on the Router Completing the Configuration When using the Cisco setup command facility, and after you have provided all the information requested by the facility as described in “Using the Cisco setup Command Facility” section on page 5-4, the final configuration appears. -
Page 82: Configuring The Router Hostname
Chapter 5 Cisco ASR 1001-X Router Power Up and Initial Configuration Performing the Initial Configuration on the Router Several log messages are displayed. Press Return to bring up the Router> prompt. Step 3 Type enable to enter privileged EXEC mode: Step 4 Router>... - Page 83 Chapter 5 Cisco ASR 1001-X Router Power Up and Initial Configuration Performing the Initial Configuration on the Router We recommend that you use the enable secret command because it uses an improved encryption algorithm. For more information, see the “Configuring Passwords and Privileges” chapter in the...
-
Page 84: Configuring The Console Idle Privileged Exec Timeout
Chapter 5 Cisco ASR 1001-X Router Power Up and Initial Configuration Performing the Initial Configuration on the Router Command or Action Purpose Step 5 Enables privileged EXEC mode. enable Verify that your new enable or enable secret password works. Example: Router>... -
Page 85: Gigabit Ethernet Management Interface Overview
Chapter 5 Cisco ASR 1001-X Router Power Up and Initial Configuration Performing the Initial Configuration on the Router Command or Action Purpose Step 4 Sets the idle privileged EXEC timeout, which is the interval exec-timeout minutes [seconds] that the privileged EXEC command interpreter waits until user input is detected. -
Page 86: Default Gigabit Ethernet Configuration
Chapter 5 Cisco ASR 1001-X Router Power Up and Initial Configuration Performing the Initial Configuration on the Router Default Gigabit Ethernet Configuration By default, a forwarding VRF is configured for the interface with a special group named Mgmt-intf. This cannot be changed. This isolates the traffic on the management interface away from the forwarding plane. -
Page 87: Saving Your Router Configuration
Chapter 5 Cisco ASR 1001-X Router Power Up and Initial Configuration Saving Your Router Configuration Command or Action Purpose Step 3 Enters global configuration mode. configure terminal Example: Router# configure terminal Step 4 Specifies the Ethernet interface and enters interface interface gigabitethernet 0 configuration mode. -
Page 88: Verifying The Initial Configuration
Router# copy running-config startup-config To aid file recovery and minimize downtime in case of file corruption, we recommend that you save Note backup copies of the startup configuration file and the Cisco IOS-XE software system image file on a server. Note To avoid losing work you have completed, be sure to save your configuration occasionally as you proceed. -
Page 89: Environmental Monitoring And Reporting Functions
Cisco ASR 1001-X Router Power Up and Initial Configuration Environmental Monitoring and Reporting Functions To remove power from the Cisco ASR 1001-X Router safely, follow this procedure: Slip on the ESD-preventive wrist strap included in the accessory kit. Step 1 Enter the reload command. -
Page 90: Cisco Asr1001-X Router Alarm Monitoring
To clear a visual alarm, you must resolve the alarm condition. The clear facility-alarm command does not clear an alarm LED on the Cisco ASR 1001-X Router. For example, if a critical alarm LED is illuminated because an active SPA was removed without a graceful deactivation of the SPA, the only way to resolve that alarm is to replace the SPA. - Page 91 All DC power remains disabled until you toggle the power switch. The Cisco ASR 1001-X Router does not shut down automatically during an over-temperature condition. Note The router will remain active irrespective of what the ambient temperature is, if the router is exposed to an extremely hot environment for a prolonged period of time, it will remain active until the hardware fails.
-
Page 92: Fan Failures
The chassis manager on the forwarding engine control processor manages the local resources of the forwarding processor. The Cisco ASR 1001-X Router displays warning messages on the console if the chassis interface-monitored parameters exceed a threshold. You can also retrieve and display... - Page 93 Chapter 5 Cisco ASR 1001-X Router Power Up and Initial Configuration Environmental Monitoring and Reporting Functions Sensor List: Environmental Monitoring Sensor Location State Reading PEM Iout Normal PEM Vout Normal 12 V DC PEM Vin Normal 117 V AC Temp: PEM In...
- Page 94 If you are unable to comply with U.S. and local laws, return this product immediately. A summary of U.S. laws governing Cisco cryptographic products may be found at: http://www.cisco.com/wwl/export/crypto/tool/stqrg.html If you require further assistance please contact us by sending email to export@cisco.com.
- Page 95 NAME: "Chassis", DESCR: "Cisco ASR1001-X Chassis" PID: ASR1001-X , VID: V00, SN: P3A-9 NAME: "Power Supply Module 0", DESCR: "Cisco ASR1001-X AC Power Supply" PID: ASR1001X-PWR-AC , VID: V00, SN: LIT171616HJ NAME: "Power Supply Module 1", DESCR: "Cisco ASR1001-X AC Power Supply"...
- Page 96 Chapter 5 Cisco ASR 1001-X Router Power Up and Initial Configuration Environmental Monitoring and Reporting Functions ASR1001-X-FANTRAY 00:33:47 Slot CPLD Version Firmware Version --------- ------------------- --------------------------------------- 14041015 15.4(2r)S 14041015 15.4(2r)S 14041015 15.4(2r)S The show platform software status control-processor command displays the average load, memory usage, and CPU utilization levels at which the router is running.
- Page 97 Chapter 5 Cisco ASR 1001-X Router Power Up and Initial Configuration Environmental Monitoring and Reporting Functions Example 5-7 show diag chassis eeprom detail Command Router#: show diag chassis eeprom detail MIDPLANE EEPROM data: EEPROM version Compatible Type : 0xFF Controller Type...
- Page 98 Chapter 5 Cisco ASR 1001-X Router Power Up and Initial Configuration Environmental Monitoring and Reporting Functions RMA Test History : 00 RMA Number : 0-0-0-0 RMA History : 00 CLEI Code : UNASSIGNED Manufacturing Test Data : 00 00 00 00 00 00 00 00...
-
Page 99: Cisco Asr 1001-X Router License Verification
Per Port Counted License (10-GE Interfaces), page 6-7 • Viewing the Cisco IOS License Level Use the show version command to determine the Cisco IOS license level in the router. For example: Router# show version License Level: adventerprise License Type: RightToUse... -
Page 100: Configuring The Throughput Level
Configuring the Throughput Level The built-in embedded service processor of the Cisco ASR 1001-X Router supports throughputs of 2.5 Gbps (default), 5 Gbps, 10 Gbps, and 20 Gbps depending upon the software license. You can upgrade the throughput of the ESP from 2.5 Gbps (default) to 5 Gbps, 10 Gbps, or 20 Gbps by applying a software-activated performance upgrade license and then reloading the router. -
Page 101: Viewing License Information
The following example displays sample output from the show license all command: router# show license all License Store: Primary License Storage StoreIndex: 0 Feature: interface_10g Version: 1.0 License Type: Permanent License State: Active, In Use Lock type: Node locked Cisco ASR 1001-X Router Hardware Installation Guide OL-32376-02... - Page 102 License State: Active, Not in Use, EULA not accepted Evaluation total period: 8 weeks 4 days Evaluation period left: 8 weeks 4 days Period used: 0 minute second Lock type: Non Node locked Cisco ASR 1001-X Router Hardware Installation Guide OL-32376-02...
- Page 103 StoreIndex: 7 Feature: otv Version: 1.0 License Type: EvalRightToUse License State: Active, Not in Use, EULA not accepted Evaluation total period: 8 weeks 4 days Evaluation period left: 8 weeks 4 days Cisco ASR 1001-X Router Hardware Installation Guide OL-32376-02...
- Page 104 Version: 1.0 License Type: EvalRightToUse License State: Active, Not in Use, EULA not accepted Evaluation total period: 8 weeks 4 days Evaluation period left: 8 weeks 4 days Period used: 0 minute second Cisco ASR 1001-X Router Hardware Installation Guide OL-32376-02...
-
Page 105: Per Port Counted License (10-Ge Interfaces)
License Store: Built-In License Storage Per Port Counted License (10-GE Interfaces) The 10-GE interfaces on the Cisco ASR 1001-X Router use a per port counted license, which has the following features: Count-based licenses will be used for 10-GE ports, 1 count per port. - Page 106 No 10-GE ports in use for the evaluation license. License Count: 0/0 (In-use/Violation) Two 10-GE ports in use for the evaluation license License Count: 2/0 (In-use/Violation) (a EULA was accepted for each prior to use). Cisco ASR 1001-X Router Hardware Installation Guide OL-32376-02...
-
Page 107: 10-Ge Interface Evaluation License Features
Permanent and Evaluation licenses. In this case, the Evaluation License becomes Active since it can accommodate both ports. The Permanent License will automatically become Active if and when its port-count meets the user’s desired configuration. Cisco ASR 1001-X Router Hardware Installation Guide OL-32376-02... - Page 108 Chapter 6 Cisco ASR 1001-X Router License Verification Per Port Counted License (10-GE Interfaces) Cisco ASR 1001-X Router Hardware Installation Guide 6-10 OL-32376-02...
-
Page 109: Removing And Replacing Frus From The Cisco Asr 1001-X Router
ASR 1001-X Routers. This chapter contains the following sections: Removing and Replacing the Cisco ASR 1001-X Router Power Supplies, page 7-1 • Removing and Replacing Cisco ASR 1001-X Router USB Flash Memory Stick or Secure Token, • page 7-8 •... -
Page 110: Removing And Replacing The Cisco Asr 1001-X Router Power Supplies
This section describes how to remove an AC power supply from the Cisco ASR 1001-X Router. The Cisco ASR 1001-X Router has two power supply slots, power supply slot 0 (PS0) next to the Standby switch and power supply slot 1 (PS1) to the right, as shown in Figure 7-3. -
Page 111: Installing Ac Power Supplies In The Cisco Asr 1001-X Router
Repeat these steps if it is required to remove the other AC power supply. Step 4 This completes the procedure for removing the AC power supplies from the Cisco ASR 1001-X Router. Installing AC Power Supplies in the Cisco ASR 1001-X Router Note Do not install the power supplies with the chassis cover off. - Page 112 Figure 7-3 Cisco ASR 1001-X Router AC Power Supply Standby Switch Cisco ASR 1001-X Router Standby switch, which does not disconnect power from the power source. Insert the power supply module into the appropriate slot(s), making sure that the retention latch is firmly Step 2 placed.
-
Page 113: Removing Dc Input Power From The Cisco Asr 1001-X Router
Note The Cisco ASR 1001-X Router has redundant power supplies that can be hot-swapped. This section describes how to remove a DC power supply from the Cisco ASR 1001-X Router. Follow these steps: Turn off the circuit breaker from the power source. -
Page 114: Installing Dc Input Power On The Cisco Asr 1001-X Router
Warning Statement 1030 This section describes how to install the DC power supply input power leads to the Cisco ASR 1001-X Router DC input power supply. Before you begin, read these important notices: The color coding of the DC input power supply leads depends on the color coding of the DC power •... - Page 115 Chapter 7 Removing and Replacing FRUs from the Cisco ASR 1001-X Router Removing and Replacing the Cisco ASR 1001-X Router Power Supplies Figure 7-6 Stripped DC Input Power Source Wire 0.39 inch (10 mm) is the recommended wire-strip length for the terminal block.
-
Page 116: Removing And Replacing Cisco Asr 1001-X Router Usb Flash Memory Stick Or Secure Token
Removing and Replacing Cisco ASR 1001-X Router USB Flash Memory Stick or Secure Token The Cisco ASR 1001-X Router contains ports for a flash memory stick or a secure token, to store configurations or Cisco IOS XE consolidated packages. Figure 7-8 shows USB port 0 or 1 connector on the Cisco ASR 1001-X Router for the flash memory stick or secure token. -
Page 117: Removing And Replacing The Cisco Asr 1001-X Router Dimm
Pull the flash memory stick or secure token from the USB port. Step 1 To replace a Cisco USB Flash memory stick or secure token, insert the module into USB port 0 or 1, as Step 2 shown in Figure 7-8. - Page 118 U1D1 8 GB 8 GB This section describes how to remove the chassis cover and then remove and replace the Cisco ASR 1001-X Router DIMMs. Figure 7-9 shows the location of the DIMM slots in the Cisco ASR 1001-X Router.
-
Page 119: Removing A Cisco Asr 1001-X Router Dimm
The chassis cover cannot be removed until the power supplies are removed from the chassis. Note For instructions about how to remove the AC and DC power supplies from the Cisco ASR 1001-X Router, see: “Removing AC Power Supplies from the Cisco ASR 1001-X Router” section on page 7-2 •... -
Page 120: Replacing A Cisco Asr 1001-X Router Dimm
DIMMs, if required, for your upgrade. Step 8 This completes the steps for removing the Cisco ASR 1001-X Router DIMMs from the chassis. Replacing a Cisco ASR 1001-X Router DIMM This section lists the steps to replace a DIMM in the Cisco ASR 1001-X Router. - Page 121 Figure 7-13 shows how to install the DIMM in the socket for the Cisco ASR 1001-X Router. Figure 7-13 Installing a DIMM in the Socket of the Cisco ASR 1001-X Router Cisco ASR 1001-X Router Hardware Installation Guide 7-13 OL-32376-02...
-
Page 122: Removing And Replacing A Cisco Asr 1001-X Router Spa
Installing DC Input Power on the Cisco ASR 1001-X Router, page 7-6 This completes the procedure for replacing the Cisco ASR 1001-X Router DIMM. After you have correctly installed the Cisco ASR 1001-X Router DIMMs, the system should reboot properly. -
Page 123: Electrostatic Discharge Prevention
Chapter 7 Removing and Replacing FRUs from the Cisco ASR 1001-X Router Removing and Replacing a Cisco ASR 1001-X Router SPA Number 2 Phillips or a 3/16-inch flat-blade screwdriver • • Cables • Your own ESD-prevention equipment or the disposable grounding wrist strap included with all •... -
Page 124: Removing A Shared Port Adapter
Removing and Replacing FRUs from the Cisco ASR 1001-X Router Removing and Replacing a Cisco ASR 1001-X Router SPA Always use an ESD wrist strap or ankle strap when installing or replacing a Cisco ASR 1001-X SPA. • Ensure that the ESD strap makes contact with your skin. -
Page 125: Removing And Replacing A Nim On The Cisco Asr 1001-X Router
Your own ESD-prevention equipment or the disposable grounding wrist strap included with all • upgrade kits, FRUs, and spares Antistatic mat or surface, or static shielding bag • If you need additional equipment, contact a Cisco service representative for ordering information. Cisco ASR 1001-X Router Hardware Installation Guide 7-17 OL-32376-02... -
Page 126: Removing A Nim
Chapter 7 Removing and Replacing FRUs from the Cisco ASR 1001-X Router Removing and Replacing a NIM on the Cisco ASR 1001-X Router For information about electrostatic discharge prevention, see the “Electrostatic Discharge Prevention” Note section on page 7-15. Removing a NIM To remove a NIM, follow these steps. -
Page 127: Removing And Replacing An Ssd From The Nim-Ssd Module
1000 Series Aggregated Services Routers that support NIM-SSD do not utilize the NIM in the same format. The NIM-SSD module of the Cisco ASR 1001-X Router recognizes both hard drives as one partition. Caution For example, two 200 GB hard drives are treated as one 400 GB hard drive. Since there is no data backup capability in the NIM-SSD module, replacing any SSD will cause complete data loss. - Page 128 Chapter 7 Removing and Replacing FRUs from the Cisco ASR 1001-X Router Removing and Replacing an SSD from the NIM-SSD Module Figure 7-15 Captive Installation Screws Location 1. Captive screws on the SSD slot cover attaching the SSD drive to the NIM carrier card...
-
Page 129: Installing An Ssd Into The Nim-Ssd Module
Chapter 7 Removing and Replacing FRUs from the Cisco ASR 1001-X Router Removing and Replacing an SSD from the NIM-SSD Module Figure 7-17 Pulling Out the SSD 1. Tabs to pull out the SSD drive Place the NIM-SSD in an antistatic bag to protect it from ESD damage. -
Page 130: Repacking The Router
Chapter 7 Removing and Replacing FRUs from the Cisco ASR 1001-X Router Repacking the Router NAME: "Power Supply Module 0", DESCR: "Cisco ASR1001-X AC Power Supply" PID: ASR1001X-PWR-AC , VID: V00, SN: LIT171616HJ NAME: "Power Supply Module 1", DESCR: "Cisco ASR1001-X AC Power Supply"... -
Page 131: Upgrading The Rommon And Cpld
• Upgrading the ROMMON The ROMMON must be upgraded on the Cisco ASR 1001-X Router if the system message on the router indicates that the ROMMON requires an upgrade, or when a Cisco technical support representative suggests a ROMMON upgrade. -
Page 132: Upgrading The Rommon For The Cisco Asr 1001-X Router
Chapter 8 Upgrading the ROMMON and CPLD Upgrading the ROMMON For a single form-factor platform such as the Cisco ASR 1001-X Router, all of the following commands display the same output: • show rom-monitor 0 show rom-monitor F0 • show rom-monitor FP •... -
Page 133: Example: Upgrading A Rommon
Checking upgrade image... 3211264+0 records in 6272+0 records out Upgrade image MD5 signature is b806b4bffb47e9be24d26ecd976212e8 Burning upgrade partition... 3211264+0 records in 3211264+0 records out Checking upgrade partition... 3211264+0 records in 3211264+0 records out Cisco ASR 1001-X Router Hardware Installation Guide OL-32376-02... - Page 134 *** Correcting the BIOS parameters and rebooting *** Initializing Hardware ... System integrity status: 00000610 System Bootstrap, Version 12.2(20140222:162915) [rommon_release_1_49 101], DEVELOPMENT SOFTWARE Copyright (c) 1994-2014 by cisco Systems, Inc. Compiled Sat 02/22/2014 9:10:52.81 Cisco ASR 1001-X Router Hardware Installation Guide OL-32376-02...
-
Page 135: Compatible Rommon Releases
15.4(2r)S << New ROMmon is confirmed 14022717 15.4(2r)S 14022717 15.4(2r)S Compatible ROMMON Releases For information about the compatibility between ROMMON releases and the Cisco ASR 1001-X Router, see the “ROMMON Release Requirements” section in the Cisco ASR 1000 Series Aggregation Services Routers Release Notes. -
Page 136: Resolved Caveats
Notes. Hardware the Require a CPLD Upgrade The Cisco ASR 1001-X Router has the capability to allow users to perform Complex Programmable Logic Device (CPLD) upgrades in the field. For details about Cisco ASR 1000 Series Aggregation Services Router hardware configuration... -
Page 137: Checking Hardware And Software Compatibility
To identify the set of software images available in a specific release or to find out if a feature is available in a given Cisco IOS XE software image, use Cisco Feature Navigator or the corresponding software release notes. - Page 138 Chapter 8 Upgrading the ROMMON and CPLD Checking Hardware and Software Compatibility Cisco ASR 1001-X Router Hardware Installation Guide OL-32376-02...
-
Page 139: Cisco Asr 1001-X Router Specifications
This appendix provides the Cisco ASR 1001-X Router specifications. Cisco ASR 1001-X Router Specifications Table A-1 lists the Cisco ASR 1001-X Router physical specifications. The Cisco ASR 1001-X Router has the route processor, embedded services processor, and SIP integrated Note in the chassis. Table A-1... - Page 140 Appendix A Cisco ASR 1001-X Router Specifications Cisco ASR 1001-X Router Specifications Table A-2 Memory and Storage Options for Cisco ASR 1001-X Router Memory Type Default Maximum System Support 4 GB DRAM 4 GB DRAM Route Processor The Cisco ASR 1001-X Router...
-
Page 141: Cisco Asr 1001-X Router Signals And Pinouts
A P P E N D I X Cisco ASR 1001-X Router Signals and Pinouts This appendix provides the Cisco ASR 1001-X Router signals and pinout specifications. Management Ethernet Port Signals and Pinouts Table B-1 lists the Management Ethernet 10/100 RJ-45 port pinouts. -
Page 142: Auxiliary Port Signals And Pinouts
Appendix B Cisco ASR 1001-X Router Signals and Pinouts Auxiliary Port Signals and Pinouts Table B-2 Console Port Pinout for Cisco ASR 1001-X Router (continued) Signal Direction Description Input Unused Input Clear to Send (tied to pin 1, RTS) Auxiliary Port Signals and Pinouts Table B-3 lists the pinouts of the dual RJ-45 ports for the auxiliary port.