Table of Contents
Advertisement
POWER
TIMER
SP/ EP
PROGRAM
ZERO RETURN
RESET
COUNTER
1
2
3
MENU
4
5
6
SET
+
7
8
9
–
0
RETURN
SET
ENTER
CANCEL
TV/CAP/TEXT
MUTING
INPUT
CH
VOL
VOL
CH
CALL
SLEEP
TRACKING
AUTO
REW
PLAY
FF
REC
STOP
PAUSE
IMPORTANT NOTE TO THE CUSTOMER:
In the space below, enter the serial number for your
television (located on the rear of the television cabinet).
Staple your sales receipt or invoice to the inside cover of this guide.
Keep this user's guide in a convenient place for future reference.
Keep the carton and original packaging for future use.
VIDEO CASSETTE RECORDER
REC/ITR
REW
PLAY
FF
PHONES VIDEO - IN - AUDIO
INPUT
SP / EP
CHANNEL
VOLUME
REC
REC TIMER
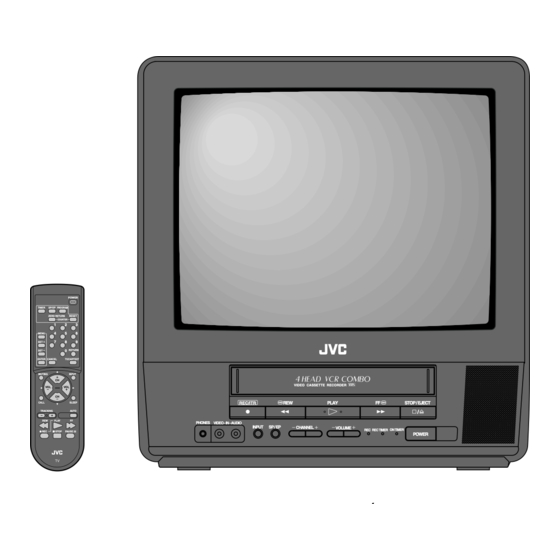
TV/VCR COMBO
USER'S GUIDE
For models :
TV-13143W
STOP / EJECT
/
ON TIMER
POWER
Serial Number
TV-13143
Advertisement
Table of Contents

Related Manuals for JVC TV-13143


Summary of Contents for JVC TV-13143
- Page 1 Keep this user's guide in a convenient place for future reference. Keep the carton and original packaging for future use. TV/VCR COMBO USER’S GUIDE VIDEO CASSETTE RECORDER REC/ITR PLAY STOP / EJECT INPUT SP / EP CHANNEL VOLUME REC TIMER ON TIMER POWER Serial Number For models : TV-13143 TV-13143W...
- Page 2 CAUTION RISK OF ELECTRIC SHOCK DO NOT OPEN CAUTION: TO REDUCE THE RISK OF ELECTRIC SHOCK, DO NOT REMOVE COVER (OR BACK). NO USER-SERVICEABLE PARTS INSIDE. REFER SERVICING TO QUALIFIED SERVICE PERSONNEL. WARNING: TO PREVENT FIRE OR SHOCK HAZARD, DO NOT EXPOSE THIS APPLIANCE TO RAIN OR MOISTURE.
-
Page 3: Important Safeguards
IMPORTANT SAFEGUARDS READ INSTRUCTIONS All the safety and operating instructions should be read before the unit is operated. RETAIN INSTRUCTIONS The safety and operating instructions should be retained for future reference. HEED WARNINGS All warnings on the unit and in the operating instructions should be adhered to. FOLLOW INSTRUCTIONS All operating and use instructions should be followed. - Page 4 IMPORTANT SAFEGUARDS 12. POWER-CORD PROTECTION Power-supply cords should be routed so that they are not likely to be walked on or pinched by items placed upon or against them, paying particular attention to cords at plugs, convenience receptacles, and the point where they exit from the appliance.
- Page 5 21. SAFETY CHECK Upon completion of any service or repairs to this unit, ask the service technician to perform safety checks to determine that the unit is in proper operating condition. 22. WALL OR CEILING MOUNTING The product should be mounted to a wall or ceiling only as recommended by the manufacturer. 23.
- Page 6 FEATURES Color TV With Video Cassette Recorder - Unique space saving design combines a 13" color TV and a video cassette recorder. High Quality Picture Technology - This TV/VCR equipped “HQ” incorporates VHS High Quality technology. A built-in detail enhancer is used to boost the recorded signal and provide maximum picture quality during playback. It is compatible with other VHS video cassette recorders.
-
Page 7: Table Of Contents
TABLE OF CONTENTS It is recommended that you carefully read the descriptions and operating procedures contained in this User’s Guide prior to operating your new TV/VCR. PREPARATION PRECAUTIONS ... 6 LOCATION OF CONTROLS ... 8 REMOTE CONTROL ... 9 ANTENNA CONNECTIONS ... 11 CABLE TV CONNECTIONS ... -
Page 8: Precautions
PRECAUTIONS MOISTURE CONDENSATION DO NOT OPERATE ANY FUNCTIONS ON THIS UNIT FOR AT LEAST TWO OR THREE HOURS WHEN MOISTURE IN THE AIR CONDENSES ON IT. LET THE UNIT STAND WITH POWER ON (SEE BELOW). WHAT IS MOISTURE CONDENSATION? When a cold liquid is poured into a glass, for example, water vapor in the air will condense on the surface of the glass. -
Page 9: Power Source
Do not insert fingers or any other objects into the cassette loading slot. Do not spray cleaner or wax directly on the unit or use forced air to remove dust. Keep the unit away from flower vases, sinks, etc. If liquids should be spilled into the unit, serious damage will result. -
Page 10: Location Of Controls
LOCATION OF CONTROLS FRONT REC / ITR PLAY VIDEO – IN – AUDIO PHONES INPUT SP/EP – – CHANNEL VOLUME REC REC TIMER ON TIMER REC / ITR PLAY VIDEO – IN – AUDIO PHONES INPUT SP/EP – – CHANNEL VOLUME FRONT: 1. -
Page 11: Remote Control
REMOTE CONTROL POWER TIMER SP/ EP PROGRAM ZERO RETURN RESET COUNTER MENU – RETURN ENTER CANCEL TV/CAP/TEXT MUTING INPUT CALL SLEEP TRACKING AUTO PLAY STOP PAUSE 1. TIMER Button - Used to set the TV/VCR to start recording at a preset time. 2. - Page 12 REMOTE CONTROL BATTERY INSTALLATION Slide the battery compart- ment cover in the direction of the arrow. BATTERY PRECAUTIONS The precautions below should be followed when using batteries in this device: 1. Use only the size and type of batteries specified. 2.
-
Page 13: Antenna Connections
ANTENNA CONNECTIONS If you are using outdoor antenna (outdoor antenna not included), follow the instructions below that correspond to your antenna system. If you are using a cable TV service (CATV), see page 12 for Cable TV connections. Combination VHF/UHF Antenna (Single 75 ohm cable or 300 ohm twin-lead wire) 75 OHM COAXIAL CABLE... -
Page 14: Cable Tv Connections
CABLE TV CONNECTIONS This TV/VCR has an extended tuning range and can tune most cable channels without using a Cable TV converter box. Some cable companies offer “premium pay channels” in which the signal is scrambled. Descrambling these signals for normal viewing requires the use of a descrambler device which is generally provided by the cable company. -
Page 15: Setting Language
SETTING LANGUAGE This TV/VCR can display the on screen language in English, Spanish or French. Language selection (step 3) will automatically appear on the screen when you press the MENU button initially. Select language to use the other menu options. Press the MENU button. -
Page 16: Auto Clock Setting
AUTO CLOCK SETTING The Auto Clock feature enables the automatic clock setting and updating, and also to set the Time Zone and Daylight Saving Time by receiving XDS (Extended Data Service) information carried on the channel signal. You must set the antenna connection before the AC cord plug is inserted into the AC outlet. AUTO CLOCK SETTING WAIT 30 MINUTES! switch is off, after the connections of the... - Page 17 DAYLIGHT SAVING TIME SETTING You can set the Daylight saving time automatically or manually. Press the MENU button. Press the SET + or – button to select the SYSTEM SET-UP option, then press the ENTER button. MENU 1 2 3 Press the SET + or –...
-
Page 18: Manual Clock Setting
MANUAL CLOCK SETTING You must set the date and time manually for timer recordings, ON/OFF Timer and Daylight Saving Time if the Auto Clock process did not set them correctly. EXAMPLE: Setting the clock to “8:30 AM”, 23th (WED) January, 2002. Press the MENU button. -
Page 19: Tv Operation
TV OPERATION To turn on the TV/VCR, press the POWER button. POWER Press the Direct Channel selection buttons to select the channel. TV mode direct channel selection When the TV/CATV menu option is in the TV position, all channels can be instantly selected by using two buttons. - Page 20 TV OPERATION MUTING Press this button to turn off the sound. The TV/VCR’s sound will be silenced and “MUTING” will briefly appear on the screen. The sound can be turned back on by pressing this button again or one of the VOLUME + or –...
- Page 21 SLEEP To set the TV/VCR to turn off after a preset amount of time, press the SLEEP button on the remote control. The clock will count down 10 minutes for each press of the SLEEP button (120, 110, ...10, 0). After the sleep time is programmed, the display will appear briefly every ten minutes to remind you that the sleep timer is operating.
- Page 22 TV OPERATION WHAT IS CLOSED CAPTIONING? This television has the capability to decode and display Closed Captioned television programs. Closed Captioning will display text on the screen for hearing impaired viewers or it will translate and display text in another language. CLOSED CAPTIONING WITH A VCR Closed Captioned programs can be recorded and played back on a VCR with the Closed Captioned text intact.
-
Page 23: To Memorize Channels
TO MEMORIZE CHANNELS This TV/VCR is equipped with a channel memory feature which allows channels to skip up or down to the next channel set into memory, skipping over unwanted channels. Before selecting channels, they must be programmed into the TV/VCR’s memory. In addition to normal VHF and UHF channels, this TV/VCR can receive up to 113 Cable TV channels. - Page 24 TO MEMORIZE CHANNELS AUTOMATIC MEMORY TUNING Press the MENU button. MENU Press the SET + or – button to select the AUTO CH MEMORY mode, then press the ENTER button. The TV will begin memorizing all the channels available in your area. ENTER Press the SET + or –...
- Page 25 TO ADD/DELETE CHANNELS Press the MENU button. MENU 2 3 4 2 3 5 Select the desired channel to be memorized or deleted using SET + or – button, or using the Direct Channel Selection buttons (10 keys, 0-9), or CHANNEL + or –...
-
Page 26: Setting The V-Chip
SETTING THE V-CHIP An age limitation can be set to forbid children to see and hear violent scenes or pictures for adults, etc. The TV/VCR responds to "TV RATING", "MOVIE RATING" and "CANADIAN RATING". To use the V-Chip function, you must register a password. TO REGISTER PASSWORD Press the MENU button. - Page 27 TO SET THE V-CHIP In the V-CHIP SET menu, press the SET + or – button to select the desired rating, then press the ENTER button. Press the SET + or – button to display the desired setting, then press the ENTER button. ENTER •...
- Page 28 SETTING THE V-CHIP US TV RATING OFF : US TV RATING is not set TV-Y : All children TV-Y7 : 7 years old and above TV-G : General Audience TV-PG: Parental guidance TV-14 : 14 years old and above TV-MA: 17 years old and above •...
- Page 29 TO CHANGE PASSWORD 1. Press the MENU button. 2. Press the SET + or – button to select the TV SET-UP, then press the ENTER button. 3. Press the SET + or – button to select the V-CHIP SET, then press the ENTER button.
-
Page 30: Picture Control Adjustments
PICTURE CONTROL ADJUSTMENTS Picture controls are factory preset but you can adjust them individually as follows: To display the picture adjustment screen, press the MENU button. Press the SET + or – button to select the TV SET-UP option, then press the ENTER button. MENU BRIGHTNESS Press the ENTER button until “BRIGHTNESS”... - Page 31 COLOR Press the ENTER button until “COLOR” appears on the screen, then press the SET + or – button to adjust the color intensity of the picture. The control should be set when colors appear normal in intensity and brilliance. ENTER SHARPNESS Press the ENTER button until “SHARPNESS”...
-
Page 32: To Set The On Timer
TO SET THE ON TIMER This feature allows you to have the TV automatically turn “ON” at predetermined time. If you program the “ON” timer once the timer will turn “ON” the TV daily at the same time and to the same channel. EXAMPLE: Turning on the TV to channel 12 at 7:00 AM, MONDAY-FRIDAY. -
Page 33: To Set The Off Timer
TO SET THE OFF TIMER This feature allows you to have the TV turn “OFF” automatically at a predetermined time. If you program the OFF TIMER once, the TV will be automatically turned off at the same time daily. EXAMPLE: Turning off the TV at 11:30 PM. Press the MENU button. -
Page 34: Loading And Unloading A Video Cassette
LOADING AND UNLOADING A VIDEO CASSETTE Use only video cassette tapes marked LOADING Push the center of the tape until it is automatically retracted into the TV/VCR. AUTOMATIC POWER ON AND PLAY When loading a cassette tape without the erase prevention tab intact, the TV/VCR will turn on automatically and playback will start immediately. -
Page 35: Playback
PLAYBACK To play a prerecorded tape. TO START PLAYBACK To turn on the TV/VCR, press the POWER button. POWER Press the PLAY button to begin playback. “ ” will appear on the screen. PLAY NOTE: This TV/VCR selects the tape speed SP or EP automatically. Load a prerecorded tape. - Page 36 PLAYBACK TO REWIND OR FORWARD THE TAPE RAPIDLY Press the REW (Re wind) b utton in the Stop mode . “ ” will appear on the screen. FORWARD/REVERSE PICTURE SEARCH If you want to see the tape during REW (FF) mode (forwar d) visual sear ch picture will be seen on the screen.
-
Page 37: Special Playback
SPECIAL PLAYBACK TO VISUALLY SEARCH FOR DESIRED POINTS When either the FF or REW button is pressed in the PLAYBACK mode, the speed search picture will appear. When pressed twice, the search picture will increase speed. Speed search time depends upon the speed used (SP or EP) during recording. - Page 38 SPECIAL PLAYBACK TO WATCH A TAPE REPEATEDLY Press the MENU b utton. MENU Press the ENTER b utton to select the ON position. ENTER • NOTE: To cancel repeat mode , follo w abo ve steps 1 and 2, then press the ENTER b utton to select the OFF position. Press the MENU b utton to return to the TV.
-
Page 39: Recording A Tv Program
RECORDING A TV PROGRAM RECORDING AND VIEWING THE SAME TV PROGRAM To turn on the TV/VCR, press the PO WER button. POWER Press the SP/EP button to select the desired tape speed (SP or EP). “SP” or “EP” will appear on the screen for 4 seconds. SP/EP •... - Page 40 RECORDING A TV PROGRAM Press the Direct Channel Selection buttons to select the channel to be recorded. (Example: Channel 12) Or press the CHANNEL + or – button to select the channel to be recorded. TO STOP RECORDING TEMPORARILY Press the P AUSE button to a void recor ding unwanted material. “...
-
Page 41: Instant Timer Recording (Itr)
INSTANT TIMER RECORDING (ITR) The Instant Timer Recording feature provides a simple and convenient way to make a timed recording. EXAMPLE: Instant timer recording for 30 minutes. Press the PO WER button to turn on the TV/VCR. POWER Set the TV/CATV option to the appropriate setting. -
Page 42: Timer Recording
TIMER RECORDING Timer recording can be programmed on-screen with the remote control. The built-in timer allows automatic unattended recording of up to 8 programs within 1 month. EXAMPLE: Program a timer recording for 23rd. day, channel 007 (CATV), 7:00 - 9:30 PM (Tape speed : EP) •... - Page 43 Set the start time, end time, channel and tape speed as in step 4. ENTER To set the timer f or another pr ogram, press the SET + or – b utton until the position of the second pr ogram b links, then press the ENTER button.
-
Page 44: Other Functions For The Timer Recording
OTHER FUNCTIONS FOR THE TIMER RECORING TO SET DAILY/WEEKLY TIMER When setting the date in the step 4 on page 40, press the SET – button repeatedly when the current day is displayed. The setting changes as follows: Example The current day (Friday) One month later minus one day WKL-WED (Weekly Wednesday) WKL-TUE (Weekly Tuesday) - Page 45 TO CANCEL A PROGRAM Press the SET + or – button to select the TIMER REC SET option in the MENU, then press the ENTER button. Press the SET + or – button to select the unnecessary program, and press the CANCEL button to cancel the program.
-
Page 46: Using The Real Time Tape Counter
USING THE REAL TIME TAPE COUNTER The On-Screen Real Time Tape Counter shows the tape running time in Hours, Minutes and Seconds. You can easily determine how long the tape has been running or how much time is left on the tape. TO VIEW THE COUNTER DISPLAY Press the CALL button to display the Real Time Tape Counter. -
Page 47: Using Zero Return
USING ZERO RETURN The zero return function pr ovides a con venient method of rapidl y returning to the star ting point of recor ding or playbac k. The star ting point can be inde xed for an y location on the tape b y pressing the COUNTER RESET b utton and COUNTER ZERO RETURN button. -
Page 48: Duplicating A Video Tape
DUPLICATING A VIDEO TAPE If you connect the TV/VCR to another VCR or CAMCORDER, you can duplicate a previously recorded tape. Make all connections before turning on the power. Insert a blank cassette with the erase preven- tion tab intact into the TV/VCR. Insert a previously recorded cassette into the playback VCR or Camcorder. -
Page 49: Reception Disturbances
RECEPTION DISTURBANCES Most types of television interference can be remedied by adjusting the height and position of the VHF/UHF antenna. Outdoor antennas are recommended for best results. The most common types of television interfer- ence are shown below. If one of these symptoms appear when the TV/VCR is connected to a Cable TV system, the disturbance may be caused by the local Cable TV company broadcast. -
Page 50: Troubleshooting Guide
TROUBLESHOOTING GUIDE Check the following chart before requesting service. SYMPTOMS POWER No po wer. The AC power cor d is not connected. Although the po wer is on, Cassette is not inser ted. the TV/VCR does not TIMER button is depressed. operate . - Page 51 SYMPTOMS TV station stopped broadcasting. TV shuts off . Sleep timer is set. TV station e xperiencing pr oblems or program tuned is not c losed cap- tions. Closed caption is not TV signal is weak. activ ated. The TV/CAP/TEXT button is not depressed.
-
Page 52: Video Head Cleaning
Auto Clock Setting Notes f or Canadian customer s regar ding the c loc k feature of the TV-13143 and TV-13143W: The XDS signals are carried onl y by cer tain br oadcast tele vision stations (f or example , the signal is carried b y most Public Br oadcasting Ser vice stations). -
Page 53: Specifications
SPECIFICATIONS TELEVISION Picture Tube: Tuner Type: Receiving Channels: Antenna Input: Speaker: Audio Output Power: Video System: Video Signal: Cassette Tape: Audio Track: Tape Speed: F.FWD/REW Time: GENERAL Power Source: Power Consumption: Dimensions: Weight: Inputs: Phone Jack: Accessories: Remote Control Batteries (AA) X 2 Specifications are subject to change without notice. - Page 54 JVC COMPANY OF AMERICA JVC CANADA, INC. Division of U.S. JVC CORP. 21 Finchdene Square 1700 Valley Road Scarborough, Ontario Wayne, New Jersey 07470 Canada M1X 1A7 5B20401A K 02/02 PRINTED IN THAILAND...