Table of Contents
Advertisement
TV/VCR COMBO
USER'S GUIDE
FOR MODEL
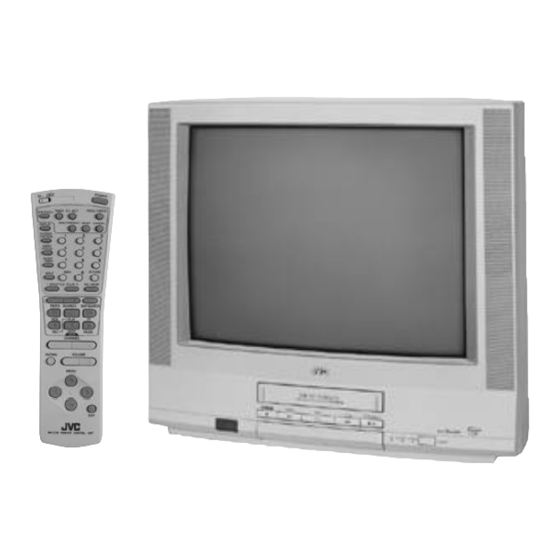
TV-20240
(MONO)
(Illustration of TV-20240 and RM-C139)
IMPORTANT NOTE TO THE CUSTOMER:
Enter the serial number for your television
(located on the rear of the television cabinet) on the space below.
Staple your sales receipt or invoice to the inside cover of this guide.
Keep this user's guide in a convenient place for future reference.
Keep the carton and original packaging for future use.
Serial Number
Advertisement
Table of Contents
Troubleshooting

Related Manuals for JVC TV 20240


Summary of Contents for JVC TV 20240
- Page 1 TV/VCR COMBO USER’S GUIDE FOR MODEL TV-20240 (MONO) (Illustration of TV-20240 and RM-C139) IMPORTANT NOTE TO THE CUSTOMER: Enter the serial number for your television (located on the rear of the television cabinet) on the space below. Staple your sales receipt or invoice to the inside cover of this guide. Keep this user’s guide in a convenient place for future reference.
-
Page 2: Important Safeguards
5. In the event of trouble, unplug the unit and call a service technician. Do not attempt to repair it yourself or remove the rear cover. Changes or modifications not approved by JVC could void the warranty. * When you don’t use this TV set for a long... - Page 3 6 If an outside antenna is connected to the TV set, be sure the antenna system is grounded so as to provide some pro t e c t i o n against voltage surges and built-up static charges. Section 810 of the National Electrical Code provides information with re s p e c t to proper grounding of the mast and supporting stru c t u re , g rounding of the lead-in wire to an antenna discharge unit, size...
- Page 4 Disclaimer: JVC assumes no liability for failure to record or playback audio and video properly with this unit. Precautions About Video Cassettes Keep these points in mind while working with video cassettes.
-
Page 5: Table Of Contents
T A B L E TABLE OF CONTENTS CONNECTIONS Connections Checklist ....5 Front Panel Diagram ....5 Cable Box Connection . -
Page 6: Connections Checklist
5 C O N N E C T I O N S CONNECTIONS CHECKLIST — READ ME FIRST! The Connections Checklist — Read Me First! section of this guide is a list of ideas to keep in mind when you set out to perform your connections. It is designed to help us not-so-technically- advanced individuals. -
Page 7: Cable Box Connection
CABLE BOX CONNECTION There are two basic types of antenna/cable hook-ups. They are easy to distinguish. Type 1: If you use an antenna or have a cable television system that does not require the use of a decoder box to receive signals, use the diagram below to connect your TV/VCR combo. 1) Connect the cable or antenna wire out from the wall in to the TV VHF/UHF input at the rear of the combo unit. -
Page 8: Connecting To A Camcorder
C O N N E C T I O N S CONNECTING TO A CAMCORDER You can connect a camcorder right to your TV/VCR combo using the input jacks located at the front of the unit. 1) Press on the PUSH mark on the front panel door to open it. 2) Connect a yellow video cable from the cam-corder output into the TV’s Video input jack. -
Page 9: Getting Started
REMOTE CONTROL RM-C139 RM-C139 TV-20240 G E T T I N G CHANGING THE BATTERIES Be sure to use only size AA batteries. Push down on the remote's back cover and slide towards the bottom to remove it. Insert the two supplied AA batteries, carefully noting the “+”... -
Page 10: Power
G E T T I N G POWER Press the P button on the remote control or the TV/VCR combo front panel. The On Timer OWER lamp will glow red. Make sure that the TV/CATV switch on the remote is set to TV. Switch to CATV only if you plan to operate a cable box. -
Page 11: Remote Programming
R E M O T E SETTING THE CATV CODES Many CATV brands have more than one code. If the first code in the list does not work, try the other codes listed. If your CATV box does not respond to any of the codes listed for the manufacture r, use the re m o t e c o n t rol for theCAT V box to operate it. -
Page 12: Menu Functions
U S I N G USING THIS GUIDE: Throughout this guide there are certain symbols we use as shorthand to show you what to do. When you see them, keep these factors in mind: Up and down arrows mean press the M buttons. -
Page 13: Initial Setup
AUTO TUNER SETUP During Auto Tuner Setup, the TV w i l l automatically scan through all available channels and memorize the active ones so that when you scan, you do not pick up weak or noisy channels. Press any M button To AUTO TUNER SETUP To operate... -
Page 14: Set Lock Code
I N I T I A L Continued … CHANNEL GUARD - LOCK To CHANNEL SUMMARY To operate +/- to select the channel HANNEL To the Lock column The access code zero (0) to lock or unlock that channel CH NO. SCAN CH NO. -
Page 15: Vcr Plus Guide Setup
VCR PLUS GUIDE SETUP You may simplify the recording of television programs by using VCR PLUS codes to program your VCR. Whenever you want to record a program, all you need to do is find the VCR PLUS code for that program. After entering the code, the TV/VCR Combo. -
Page 16: Picture Settings
P I C T U R E TINT NOTES: Tint allows you to adjust the levels of red and green in the picture. If you do not move to the next setting P ress any M with the up and down arrows, in To TINT approximately three... -
Page 17: Sound Settings
BASS The Bass level adjustment feature allows you to raise or lower the level of lower f requencies in the TV’s sound. P ress any M b u t t o n E N U To BASS To emphasize bass To reduce bass To move to next TREBLE... -
Page 18: Clocks/Timers
C L O C K S / T I M E R S SET CLOCK (S NOTES: The Clock is the heart of all timer To use the Semi- functions. You must set the clock before Auto function, first any timer functions will work. Your clock tune the television can be set automatically by using a to your local PBS... -
Page 19: On/Off Timer
T I M E R S / G E N E R A L ON/OFF TIMER Use the On/Off Timer as an alarm to wake up, as a program reminder, or as a decoy when you’re out of the house. P ress any M b u t t o n E N U... -
Page 20: Vcr Basics
1 9 B A S I C VCR BASICS NOTES: This section of the guide will explain The TV/ VCR c o m b o the many functions of the VCR can re c o rd and play back video portion of your new TV/VCR Combo. -
Page 21: Vcr Menu
V C R VCR MENU The VCR Menu screen gives you a number of options for operating your VCR. For an explanation of how to use on screen menus, see page 11. *Press any of the M buttons to display the menu screen. REGULAR VCR PROGRAMMING This function lets you manually input the time, date and channel informa-... -
Page 22: Recording Speed
2 1 V C R M E N U RECORDING SPEED Select the speed at which you would like to record SP (standard play) or EP (extended play) Press any M display the VCR menu screen. To RECORDING SPEED To set to SP or EP Press E AUTO SP EP This function is used with timer-... -
Page 23: Vcr Plus
VCR PLUS+ Your TV/VCR Combo comes equipped with VCR Plus+ technolo- gy. This function allows you to program your VCR simply by entering the VCR Plus+ code number associated with the program you wish to record. Note: Before VCR Plus+ can be used, VCR Plus guide channels must be programmed. -
Page 24: Timer Recording Troubleshooting
T R O U B L E S H O O T I N G TIMER RECORDING TROUBLESHOOTING The following are some common problems/issues that may arise while using Timer Recording. REC lamp starts flashing when you press T IMER No cassette is loaded into VCR. -
Page 25: Button Functions - Tv
B U T T O N BUTTON FUNCTIONS This section will describe in detail the different buttons on your remote control and their functions. Buttons related to the operation of the televi- sion are listed first, followed by the buttons used to operate the VCR. The names of individual buttons in this section are printed in S MALL... -
Page 26: Number Buttons (10 Key Pad)
B U T T O N NUMBER BUTTONS 10 KEY PAD P ress two of the number buttons to move to single and double digit channels. To move to Channel 7: 0 (zero) 7 (seven) 100 + The 100+ button accesses all channels above Channel 99. -
Page 27: Button Functions - Vcr
L AY re t u rn to normal playback. F U N C T I O N S - INDEX SEARCH Most JVC-brand VCR’s automatically insert an index mark at the start of a recording. The I NDEX can be used to scan a cassette for these marks, to quickly find the... -
Page 28: Skip Search
B U T T O N SKIP SEARCH Each time you press the S while a tape is playing, the unit will fast- f o rw a rd ahead 30 seconds on the tape. Yo u may press the button up to four times in a row to move 120 seconds or two minutes a h e a d . -
Page 29: Top Ject
B U T T O N PROGRAM CHECK The P button allows you ROGRAM HECK to confirm the programmed settings of your VCR. You can also make changes if you find any er rors. Confirm Timer Settings. Press the Program Check button to display the timer information HECK P ress again to leave scre e n . - Page 30 T R O U B L E S H O O T I N G PROBLEMS There is no power • See if the power cord became unplugged. • Perhaps you have experienced a blown circuit breaker or fuse or a power outage. There is no picture •...
-
Page 31: Troubleshooting
T R O U B L E S H O O T I N G PROBLEMS The video cassette • Make sure you are attempting to insert the tape properly. The clear window on the cassette will not enter the should be facing up and the label on the narrow part of the cassette should face away from the machine. -
Page 32: Limited Warranty
If service is not locally available, box the product carefully, preferably in its original carton,and ship, insured,with a copy of your bill of sale plus a letter of explanation of the problem to the nearest JVC Factory Service Center, the name and location which will be given to you by the toll free number. -
Page 33: Authorized Service Centers
Sophisticated electronic products may require occasional service. Just as quality is a keyword in the engineering and production of the wide array of JVC products, service is key to maintaining the high level of performance for which JVC is world famous. The JVC service and engineering organization stands behind our products. -
Page 34: M E M
M E M O... - Page 35 M E M O...
-
Page 36: Specifications
E x t e rnal Dimensions (W x H x D) Weight (lbs./kg.) Accessories Specifications subject to change without notice. JVC COMPANY OF AMERICA DIVISION OF JVC AMERICAS CORP. 1700 Valley Road Wayne, New Jersey 07470 TV-20240 TV/VCR Combo NTSC, BTSC System (Multi Channel Sound) VHF 2 to 13.