
Related Manuals for AEG D 5000


Summary of Contents for AEG D 5000
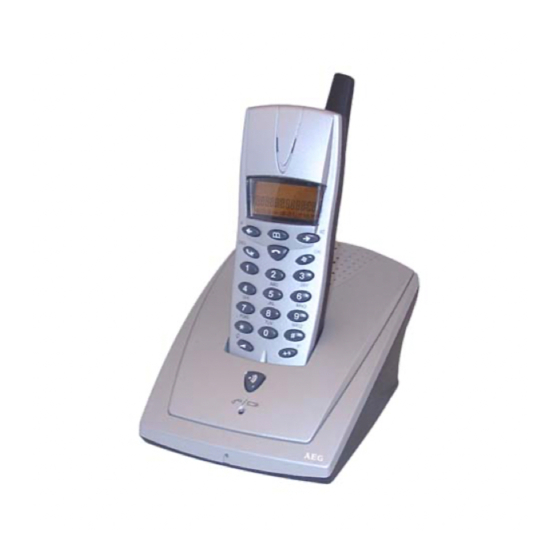
- Page 1 D 5000 / D 7000 Cordless DECT Phone with Caller Identification (CID) D 7000 with built-in digital answering machine Instruction Manual 06/02wh...
-
Page 2: Ce Declaration
CE Declaration 0700 This cordless, analogue DECT – telephone D5000/D7000, complies with the requirements of the EC guidelines: 99/5/EG Guideline for radio facilities and telecommunication terminals The conformity evaluation process has been carried out according to Appendix II of the EC guideline 99/5/EG. -
Page 3: Table Of Contents
Switching off handset ..........................15 Subscribing a Handset to a Base Set ..................... 15 Subscribing the Handset to a D 5000 or D 7000 Base Set................15 Removing a Handset from a Base Set ................... 16 Selecting a Base ..........................16 Settings............................. - Page 4 Answering Calls ..........................25 Answer an External Call..........................26 Answering an Internal Call.......................... 26 Hands free Calling .......................... 26 External Call............................ 27 Block Dialing ........................... 27 Redialing ............................27 Last Number Redial............................. 27 Redial of the 5 Last Numbers ........................27 Dialing a Number from the Phone Book..................
- Page 5 Setting and Checking the Ring Tone ......................39 Changing the Ring Tone..........................39 Setting the Operation Mode......................... 40 Recording a New Outgoing Message ......................40 Restoring Default Outgoing Messages (1 and 2)..................41 Automatic Reset ............................41 Renewed Operation Start..........................41 Showing Received Messages........................
-
Page 6: Delivery Extent
Delivery extent • one base • one handset • one battery pack, NiMH, Type AAA, 600 mAh • one power adapter • one telphone connection cable (TAE) • one instruction manual Notes on safety Do not position the unit in the vicinity of heat sources (heater ventilators or similar) and never expose the unit to direct sun radiation, excessive sources of dust or vibrations. -
Page 7: Description
Description Menu Structure MENÜ INTERCOM INT_ TAST EINST TAST SPERR FREIGEBEN SPERREN TASTENTON TON EIN TON AUS TELEF BUCH SUCHEN NEU NR NAME Name & Rufnummer Name & AENDERN Rufnummer Name & LOESCHEN Rufnummer RUFMELODIE EXTERN MELODIE 1...9 RUFLAUTST 0...9;0 INTERN MELODIE 1...9 RUFLAUTST 1...9... -
Page 8: Brief Overview
Brief Overview... - Page 9 1. LCD display 2. Line key to pick up a call and to hang 3. Arrow right key to scroll the call log or the menu, to activate/ deactivate the speakerphone, to view the call log and to set the ring of volume and melody 4.
-
Page 10: D 7000 Base Station
32. key ( at the bottom of the unit) for outgoing message and setting of the PIN Features Handset D 5000 / D7000 DECT, GAP LCD display with 3 lines ,11 characters, display :12 digits und 10 icons... -
Page 11: Delivery Settings
Subscribing 5 handsets possible Subscribing one handset to 4 base stations possible Transferring external-internal-internal Three party conference extern-intern-intern Caller identification type 1 FSK and DTMF with automatic identification Phonebook matching Support name and numbers Date time stamping Call log for 30 records (10 characters + 25 digits) Deleting call log (selective or collective) Storing numbers from the call log into the phone book Redialing from the caller list... -
Page 13: Installation
Installation Power Supply/ Battery For maximum battery capacity, charge the battery for the first time at least 20 hours without connecting the telephone line. 1. Insert the power plug in the power jack (17) in the back of the base set. 2. -
Page 14: Replacing The Battery
Replacing the battery 1. Open the battery pack compartment. (picture a) 2. Take off the empty batteries. 3. Insert the new battery pack correctly polarised. (picture b) 4. Close the battery pack compartment. (picture c) Important: Batteries are dangerous, chemical waste. Used batteries cannot be thrown away with household refuse but have to be disposed of in a responsible and environmentally friendly manner! Special battery collection! -
Page 15: Switching Off Handset
Subscribing a Handset to a Base Set To a D 5000/ D 7000 base set 5 handsets can be subscribed. You can also subscribe the handset to another GAP compatible DECT base set. The RFPI of the base set is the universal code for all GAP compatible DECT base sets. -
Page 16: Removing A Handset From A Base Set
1. The handset is in standby (no tone). 2. Read the Instruction manual of your base to set it to subscribing mode. 3. Continue from item 4 under Subscribing the Handset to a D 5000 or D 7000 Base Set above Removing a Handset from a Base Set A handset can be deprogrammed from a base set. -
Page 17: Settings
3. Press the arrow key l (11) or k (3) until SETTING is displayed. 4. Press the menu key B (4). 5. DATE/TIME is displayed. 6. Press the arrow key l (11) or k (3) until BASE SEL is displayed. 7. -
Page 18: Selection Mode
NOTE: Please check the date/time setting after the battery has been disconnected or dead. Set again, if necessary. Selection Mode There are two selection modes: • MFV (tone selection) – standard today • IWV (pulse selection) – only necessary for older telephones 1. -
Page 19: Programming The Pin Code
You can program a LONG (300ms) or SHORT (100ms) line interruption on the R- key. Some services will not operate with a short delay, such as call waiting management for instance. But for some professional applications or extensions, setting to SHORT may be necessary. If used on a PABX, the right flash time must be set according to the PABX’s user manual. -
Page 20: Switching On/Off Key Click
This feature enables you to prevent numbers from being called accidentally. When the keypad is locked, only the menu key B (4) is operative and KEY LOCKED is displayed. 1. The handset is in standby (no tone). 2. Press the menu key B (4). 3. -
Page 21: Setting The Ring Volume Of The Handset
There are 5 levels (1 = minimum to 5 = maximum). Default volume setting is 3. The earpiece volume is set during a communication. 1. Press the volume/ring key CD/ D (8). 2. The set earpiece volume is displayed. 3. Press a numerical key from 1 to 5 to select the wanted volume. 4. -
Page 22: Setting The Ring Melody Of The Handset
Setting the Ring Melody of the Handset The handset has 9 melodies (1 to 9). The default ring melody is 1. The ring melody of an external call can be different from the one of an internal call. Setting the Ring Melody of an External Call 1. -
Page 23: Pause Key
Press the arrow key l (11) or k (3) until VOLUME is displayed. 10. Press the menu key B (4). The set ring volume is displayed. 11. Press a numerical key from 0 to 9 to select the wanted volume. 12. -
Page 24: Call Barring
Call Barring This feature is only accessible with the PIN code. It enables you to bar outgoing calls of 5 groups of numbers consisting of maximum 5 digits each. NOTE: The emergency numbers (all numbers consisting of three or four digits without area code) cannot be barred, even if you have programmed them. -
Page 25: Factory Reset (Reset Handset To Default)
Parameter Reset This feature requires the PIN code to turn back to default parameter settings (delivery settings). The phone book memory, the PIN and subscription information will not be cleared. 1. The handset is in standby (no tone). 2. Press the menu key B (4). 3. -
Page 26: Answer An External Call
Answer an External Call 1. All handsets which are subscribed to the base set ring. 2. The contact symbol ^ flashes, the number and the name (if it is stored in the phone book) are displayed. 3. Press the line key _ (2). 4. -
Page 27: External Call
External Call External Calls to the public network. 1. The handset is in standby (no tone). 2. Press the line key _ (2). 3. The line/charge indicator ` /F ((15 or 20) flashes, the contact symbol ^ and EXT are displayed. 4. -
Page 28: Dialing A Number From The Phone Book
8. To end the communication, press the line key _ (2) or replace the hand-set in its cradle Dialing a Number from the Phone Book 1. The handset is in standby (no tone). 2. Press the phone book key b (5). 3. -
Page 29: Three-Party-Conference
You are talking to a party and you want to get some information from a second party (internal or external). For this you press the key R and park the first call. You will hear the special dialling tone. Dial the telephone number of the second party and talk to it. -
Page 30: Intercom
Intercom This function requires at least two attached handsets at the base set. 1. The handset is in standby (no tone). 2. Press the menu key B (4). 3. Press the arrow key l (11) or k (3), until INTERCOM is displayed. 4. -
Page 31: Call Back And Toggle
Call Back and Toggle You can switch between an external and an internal call. 1. You hold an external call. 2. Press the menu key B (4). 3. INTERCOM is displayed. 4. Press the menu key B (4). 5. The external call is on hold. 6. -
Page 32: Activating Of The Direct Call
Activating of the Direct Call 1. Press the menu key B (4). 2. Press the arrow key l (11) or k (3), until DIRECT is displayed. 3. Press the key Mute/Delete ? (10) for ca. 2s. 4. DIRECT ON is displayed. Direct-Call is now active. Deactivating of the Direct-Call 1. -
Page 33: Phone Book
Phone Book Alphanumerical Keypad Times to press Some features need alphanumerical entries. In these cases the keypad switches automatically to alphanumerical mode. To make entries in alphanumerical mode, press the corresponding key as often as necessary to get letters, numbers or symbols. -
Page 34: Editing Phone Book Entries
6. Press the menu key B (4) twice. 7. Press the arrow key l (11) or k (3), to search an entry in the phone book; 6. Press the menu key B (4). 7. Enter the first letter of the name you want to search by pressing the alphanumerical keys. -
Page 35: Call Log (Clip)
Call Log (CLIP) Your DECT-Telephone features identification of the caller as well as presentation of the date and time the call came in. Make sure, date and time are set (see Setting Day/Time). It compares the incoming telephone number with the entries in the phone book (name matching). -
Page 36: Storing A Number From The Call Log Into The Phone Book
Storing a Number From the Call Log into the Phone Book 1. The handset is in standby (no tone). 2. Press the arrow key k (3) to start viewing the call log with the most recent call that came in. 3. -
Page 37: Answering Machine (Only D 7000)
Answering Machine (only D 7000) Your DECT-Telephone has a built-in digital answering machine (without cassette) with a capacity of maximum 11 minutes. It is remote controlled. Each message can last maximum 2 minutes. Answering Machine Operation As soon as the base set is connected, the answering machine will be switched on. It will operate in „outgoing message with recording“... -
Page 38: Settings
Settings Setting Day/Time The feature of presentation of day/time at the end of each message informs you when a message came in. It also can be used as an acoustic clock. Checking the Time 1. The answering machine is in standby. 2. -
Page 39: Setting And Checking The Ring Tone
Changing the volume while using a special feature – checking the automatic messages, playing back memos/messages (including the 8 seconds of waiting period at the end of the replay), checking and setting of the rings, checking and setting of day/time, and hearing default message to give technical support to the user - causes a higher or lower volume for all following messages. -
Page 40: Setting The Operation Mode
7. Was no setting made, the device returns after 4 seconds to standby. The current setting will be repeated. Setting the Operation Mode The answering machine offers 3 different modes, from which you can choose easily: • Recording Mode • Message Only •... -
Page 41: Restoring Default Outgoing Messages (1 And 2)
Note: The recorded outgoing message depends on the Operation Mode! The recorded outgoing message is allocated to the Operation Mode. The length of the outgoing message must be bigger than 5 seconds and smaller/equal to 2 minutes, or else it won’t be recorded. -
Page 42: Memory Full"-Mode
“Memory Full”-Mode Is the full capacity of the memory is reached (at least 7 messages, each 2 min), the answering machine returns into “Memory Full”-mode. The LED “Memory Full” (21) flashes, as soon as the unit is switched into “message and recording”-mode. The unit can’t take any more messages. -
Page 43: Operation
Operation Receiving Messages In operation mode1 (“Message and Recording”), you can receive and save messages. All saved messaged can be heard again and again, and can be deleted, selective or collective. After repeating the outgoing message completely, the unit is sending a signal tone, and the recording of the incoming message begins immediately. -
Page 44: Selecting And Deleting Messages
Selecting and Deleting Messages To delete messages, press the delete key (30) while playing back the selected message. The phone says NACHRICHT GELÖSCHT (MESSAGE DELETED) and continues playback of the other recorded messages. Deleting all Received Messages You can only delete all messages if you have played back all messages once (old messages), to prevent mistakes. -
Page 45: Remote Control
Remote Control You can operate your answering machine with a remote control, and switch On/Off all functions. The answering machine can be secured by a PIN, to prevent a misuse by third persons. Note You can remote control your answering machine with a DTMF phone, or by a selection mode of tone operating phone. - Page 46 Deleting all Messages Played Back Once • After having played back all messages, enter code 0. Recording a Memo 1. Enter code 4. 2. You will hear a beep indicating the beginning of recording. 3. Speak with a loud and clear voice. 4.
-
Page 47: Troubleshooting
Troubleshooting No Display • Check connection of the battery. • Install the handset in its cradle to charge the battery. • Remove the battery from the handset, reinstall it and switch on the handset. The Battery is empty • Check connection of the battery. •... - Page 48 No dialing. • The number you have dialed is barred. • Keyboard locked. • You have forgotten your PIN code. • Perform a full reset of the handset. • Bad voice quality of the answering machine: Repeat what you have said speaking more slowly and close to the microphone.
-
Page 49: Guarantee
Appendix Guarantee * This unit carries a guarantee of 24 months. The guarantee period starts at delivery. To verify the date, please keep the sales slips such as receipt, invoice, cash slips or delivery note. If articles are sent for repair without purchase receipts, the repair can only be carried out chargeable. -
Page 50: Technical Data
Technical Data Telephone System: Analogue DECT Telephone Power Supply Basis: D5000 Net adapter 230VAC/50Hz/32mA; 6VDC/300mA/ 1,8VA D7000 Net adapter 230V/50Hz/60mA 9VDC/500mA /4,5VA Handset 2 Batteries Single Battery, TYP: AAA Ni-MH 1,2V/600mAh, Ambient temperature: 5° C to + 35° C; 25% to 85% humidity Admissible storage temperature -10°... - Page 51 Short Manual Handset Switching On/Off Handset Menu B Arrow Key left l Menu B Menu B Arrow Key right k Menu B choose Key Lock / Key Tone On/Off entry l or k Menu B r y or y r Call Extern Menu B Menu B r Call Intern...
-
Page 52: Short Instruction Answering Machine: Tele-Call
Short Instruction Answering Machine: Tele-Call Function Keyboard Function Keys D7000 Playback of Messages Playback f Pause Playback f Continue Playback Playback f Stop Playback On/Off Playing Back Previous Message 2x i Playing Back Next Message Repeat Current Message Delete Current Message Delete Key Delete All Messages Delete Key...