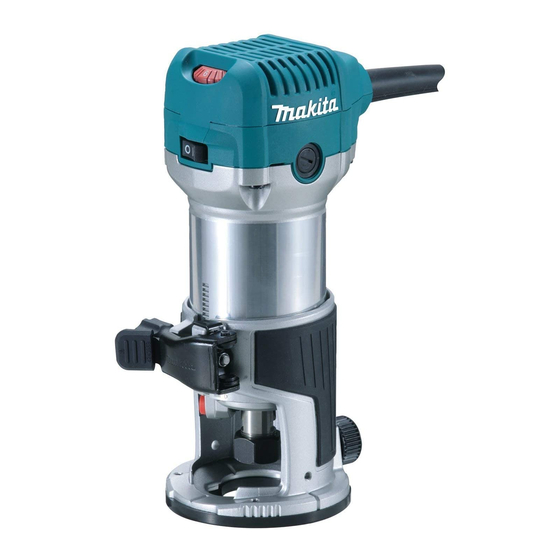
Makita RT0700C Instruction Manual
Double insulation
Hide thumbs
Also See for RT0700C:
- Instruction manual (108 pages) ,
- Navod k obsluze (18 pages) ,
- Manual (2 pages)
Summary of Contents for Makita RT0700C
- Page 1 INSTRUCTION MANUAL Trimmer RT0700C 011833 DOUBLE INSULATION IMPORTANT: Read Before Using.
-
Page 2: Specifications
EC Declaration of Conformity The typical A-weighted noise level determined according Makita Corporation responsible to EN60745: manufacturer declare that the following Makita Sound pressure level (L ) : 82 dB(A) machine(s): Sound power level (L ) : 93 dB(A) Designation of Machine:... - Page 3 Europe who is: Keep cord away from heat, oil, sharp edges or Makita International Europe Ltd. moving parts. Damaged or entangled cords Michigan Drive, Tongwell, increase the risk of electric shock.
-
Page 4: Trimmer Safety Warnings
Power tool use and care to loss of control. 18. Do not force the power tool. Use the correct Wear hearing protection during extended power tool for your application. The correct period of operation. power tool will do the job better and safer at the Handle the bits very carefully. -
Page 5: Functional Description
Speed adjusting dial FUNCTIONAL DESCRIPTION 1. Speed adjusting CAUTION: dial Always be sure that the tool is switched off and • unplugged before adjusting or checking function on the tool. Adjusting bit protrusion 1. Bit protrusion 2. Tool base 011835 3. -
Page 6: Operation
ASSEMBLY OPERATION For the trimmer base CAUTION: Always be sure that the tool is switched off and • unplugged before carrying out any work on the tool. Installing or removing trimmer bit 1. Tighten 2. Loosen 3. Hold 1. Dust nozzle 011837 2. - Page 7 When using the trimmer shoe, the straight guide or • 1. Straight bit the trimmer guide, be sure to keep it on the right 2. Base side in the feed direction. This will help to keep it 3. Templet flush with the side of the workpiece. 4.
- Page 8 distance between the bit and the straight guide. At the NOTE: desired distance, tighten the wing nut securely. Circles between 172 mm and 186 mm in radius • When cutting, move the tool with the straight guide flush cannot be cut using this guide. with the side of the workpiece.
- Page 9 1. Base protector 1. Workpiece 2. Screw 2. Bit 3. Guide roller 001998 When cutting, move the tool with the guide roller riding the side of the workpiece. Tilt base (optional accessory) Tilt base (optional accessory) is convenient for chamfering. 1.
- Page 10 Install the pulley on the tool by pressing the shaft lock 1. Wrench and firmly tightening the pulley with a wrench. 2. Hex wrench 3. Bit 1. Collet nut 2. Collet cone 011992 To install the bit, fall the tool with the offset base on its side. Insert the hex wrench into the hole in the offset base.
- Page 11 Mount the trimmer base with four screws and the grip 1. Screw attachment (optional accessory) with two screws on the 2. Knob offset base plate. Screw a bar type grip (optional accessory) onto the grip attachment. 1. Screw 2. Knob type grip 3.
- Page 12 fasten the stopper pole firmly. Now, your predetermined depth of cut can be obtained by loosening the lock lever and then lowering the tool body until the stopper pole makes contact with the adjusting hex bolt of the stopper block. Always firmly hold the tool by both grip during operation.
- Page 13 the wing bolts to secure the straight guide in place. 1. Bit When cutting, move the tool with the straight guide flush 2. Base with the side of the workpiece. 3. Templet 4. Workpiece 5. Distance (X) 6. Outside diameter of the templet guide 7.
-
Page 14: Maintenance
Take out the worn carbon brushes, insert the new ones and secure the brush holder caps. To maintain product SAFETY and RELIABILITY, repairs, any other maintenance or adjustment should be performed by Makita Authorized Service Centers, always using Makita replacement parts. -
Page 15: Optional Accessories
Only use accessory or attachment for its stated purpose. If you need any assistance for more details regarding these accessories, ask your local Makita Service Center. 005116 Straight & groove forming bits • Edge forming bits •... - Page 16 Drill point flush trimming bit Chamfering bit 005120 005126 1/4" 011930 006462 Drill point double flush trimming bit Cove beading bit 005121 005129 1/4" 011931 006464 Corner rounding bit Ball bearing flush trimming bit 005125 005130 1/4" 1/4" 006465 1/4" 006489...
- Page 17 Ball bearing corner rounding bit Ball bearing cove beading bit 005131 005134 1/4" 006466 006469 Ball bearing chamfering bit Ball bearing roman ogee bit 005132 005135 1/4" 006470 006467 NOTE: Ball bearing beading bit Some items in the list may be included in the tool •...
- Page 20 Makita Corporation Anjo, Aichi, Japan www.makita.com 885025A229...


