Honeywell CS071AE Owner's Manual
Portable evaporative air cooler for indoor use, 120 volt ac, 60hz, 50 watts
Hide thumbs
Also See for CS071AE:
- User manual (45 pages) ,
- User manual (16 pages) ,
- User manual (7 pages)
Table of Contents
Advertisement
Available languages
Available languages
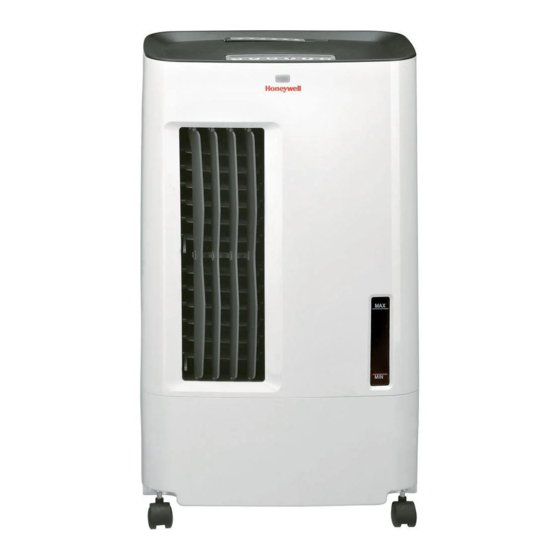
Portable Evaporative Air Cooler
for Indoor Use
Enfriador de Aire Portátil por Evaporación
Para Uso En El Interior
OWNER'S MANUAL
Read and save these instructions before use
Manual del Usuario
Leer y guardar estas instrucciones antes de usar
Model: CS071AE
Modelo: CS071AE
Power rating: 50 Watts
Voltage rating: 120 Volt AC, 60Hz
Potencia: 50 Watt
Voltage: 120 Volt AC, 60Hz
For product inquiries or support, visit www.honeywellaircoolers.com
Para consultas sobre productos o soporte técnico visite: www.honeywellaircoolers.com
Customer Support : 1-800-474-2147
Made in P.R.C.
Centro de servicios al cliente: 1-800-474-2147
Fabricado en China
Advertisement
Chapters
Table of Contents

Related Manuals for Honeywell CS071AE


Summary of Contents for Honeywell CS071AE
-
Page 1: Manual Del Usuario
Para Uso En El Interior OWNER’S MANUAL Read and save these instructions before use Manual del Usuario Leer y guardar estas instrucciones antes de usar Model: CS071AE Modelo: CS071AE Power rating: 50 Watts Voltage rating: 120 Volt AC, 60Hz Potencia: 50 Watt Voltage: 120 Volt AC, 60Hz For product inquiries or support, visit www.honeywellaircoolers.com... -
Page 2: Quick Start Guide
QUICK START GUIDE Fill with water and plug into a standard power outlet. Note: Please make sure the household power voltage matches the product specifications. Place near an open door or window. Note : Evaporative air cooler requires cross ventilation. Turn ON and enjoy the cooling breeze. -
Page 3: Table Of Contents
INDEX Read all instructions carefully before setting up and operating the cooler, and please keep this instruction manual for future reference. This manual is designed to provide you with important information needed to setup, operate, maintain, and troubleshoot your cooler. Failure to follow these instructions may damage and/or impair its operation and void the warranty. -
Page 4: Thank You
THANK YOU Congratulations on your purchase of this versatile Honeywell Evaporative Air Cooler. For optimum cooling from your cooler, fill the water tank to maximum level. Cooler Location (Important - Please Read!) Place the cooler in front of an open door or window. Ensure that there is adequate cross - ventilation in the room by leaving a door or window open opposite the cooler. -
Page 5: User Tips
USER TIPS Energy Efficient, No Compressor Honeywell Evaporative Air Coolers are built to maximize energy efficiency and keep costs low. Warm air is drawn into the cooler through a dust and odor-reducing carbon filter and enters the Honeycomb Cooling Media. Water pumped from the tank pours over the honeycomb media. - Page 6 USER TIPS The recommended maximum relative humidity level is 60% or less, which allows a noticeable temperature decrease. The temperature decrease will be greater in drier climates because higher evaporation occurs when the humidity is low. The evaporative air cooler should not be used in enclosed spaces.
-
Page 7: Safety
SAFETY READ AND SAVE THESE INSTRUCTIONS: When using electrical appliances, basic safety precautions should always be followed: Your cooler runs on 120 Volt AC, 60 Hz current. Check the • household voltage to ensure it matches the appliance's rate 120V - 60 Hz specification. - Page 8 SAFETY • DO NOT attempt to repair or adjust any electrical or mechani- cal functions of the cooler, as this may void the warranty. • DO NOT cover the air inlet or outlet on the appliance as this may cause motor damage. •...
-
Page 9: Parts Description
PARTS DESCRIPTION 1 Remote Control 7 Casters 2 Control Panel 8 Side Handle 3 Remote Control Receptor 9 Back Grill 4 Vertical Louvers 10 Water Fill Door (Automatic Movement with SWING) 11 Power Cord & Plug 5 Drain Plug 12 Rear Grill Removal Screw 6 Water Level Indicator ACCESSORIES: Remote Control (1pc Li batteries CR2032 included) -
Page 10: Use & Operation
USE & OPERATION Control Panel Lo Med Hi SLEEP SWING TIMER SPEED COOL POWER... -
Page 11: Function Buttons
USE & OPERATION Function Buttons POWER Press the POWER button to turn the unit on. The cooler will start automatically at medium speed. After a few seconds the speed will POWER switch to low. To turn the unit off, press the button again. SPEED Press the 'SPEED' button repeatedly and the speed will change. - Page 12 USE & OPERATION Function Buttons SWING Press the ''SWING '' button. The indicator light will come on and the louvers will begin to move from right to left automatically. Manually adjust the SWING horizontal louvers to change vertical airflow. TIMER Press the ''TIMER'' button until the indicator light comes on to your desired timer.
-
Page 13: Remote Control
USE & OPERATION Remote Control Power : On/ Off Speed : Low / Medium / High Cool : Controls cooling or fan option POWER Swing : Controls the motion of the vertical louvers COOL Timer : Controls timer function for automatic shut off Sleep : Turns on the sleep mode SPEED TIMER... -
Page 14: Filling With Water
USE & OPERATION CAUTION Unplug from power when refilling. Filling With Water Unplug the air cooler from power supply. Check water level indicator located on the front of the unit to determine the level of water inside the water tank. The water tank of this cooler holds up to 1.8 gallons of water. -
Page 15: Cleaning & Maintenance
CLEANING & MAINTENANCE Important • The cooler is supplied with Honeycomb Cooling Media. • The cleaning frequency for the Honeycomb Media depends on local air and water conditions. In areas where the mineral content of water is high, mineral deposits may build up on the Honeycomb Cooling Media and restrict air flow. -
Page 16: Cleaning Honeycomb Cooling Media/Carbon Filter
CLEANING & MAINTENANCE Draining and Cleaning The Water Tank Turn the power “off” and disconnect the air cooler from the power supply. • Move the unit to a location where it can be drained. • Remove the cap from the water drain plug and allow the tank to empty (see parts description on •... -
Page 17: Troubleshooting Guide
TROUBLESHOOTING GUIDE PROBLEM POSSIBLE CAUSE SOLUTION No discharge of air Cord is not plugged in. Make sure power cord is plugged in and the supply switch is on. Power is not on. Turn the unit ON by pressing button on the control panel. Not Cooling / Unit is Pump is not turned ON. - Page 18 TROUBLESHOOTING GUIDE PROBLEM POSSIBLE CAUSE SOLUTION The unit does not respond Remote control batteries. Check batteries. Replace if to remote control needed. Try to operate using the control panel. Damaged PCB. Try with remote control. If the unit responds, PCB board fasteners may be loose.
-
Page 19: Technicalspecifications
TECHNICALSPECIFICATIONS MODEL NO. CS071AE Voltage 120V Frequency 60Hz Ampere 0.45A Wattage 50 Watts Water Tank Capacity 1.8 Gallons Honeycomb Cooling Media 15 (W) x 9.8 (D) x 25.4 (H) inches Product Dimension (Inches) 12.3 lbs (5.6 kg) Net Weight Electrical Wiring Diagram... -
Page 20: Service And Warranty
SERVICE AND WARRANTY 1-YEAR LIMITED WARRANTY Read all the instructions before attempting to use this product. This 1 year limited warranty applies to repair or replacement product found to be defective in material or workmanship. This warranty does not apply to any damage resulting from commercial, abusive, unreasonable use or supplemental damage. - Page 21 SERVICE AND WARRANTY Please read the Instruction Manual carefully before setting up or using this product. If you believe this product to be suffering from a manufacturing fault, or if you have inquiries about this product, please contact our Customer Support: CUSTOMER SUPPORT JMA North America LLC Ramsey, New Jersey, 07446.
- Page 22 GUÍA DE INICIO RÁPIDO Llene con agua y conecte a una toma de corriente estándar. Nota: Por favor, asegúrese de que la toma de corriente esta ajustada a la configuración correcta de acuerdo con las especificaciones del producto. Colocar cerca de una puerta o ventana abierta.
- Page 23 ÍNDICE Lea todas las instrucciones cuidadosamente antes de de instalar y operar la unidad, y por favor mantenga este manual de instrucciones para referencia futura. Este manual está diseñado para ofrecerle información importante necesaria para instalar, operar, man- tener y solucionar problemas de su enfriador. No seguir estas instrucciones puede dañar y / o poner en peligro el funcionamiento y anular la garantía.
-
Page 24: Gracias
¡GRACIAS! ¡GRACIAS! Felicitaciones por su compra de este versátil enfriador evaporativo Aire Honeywell. para una refrigeración óptima de su refrigerador, llene el tanque de agua hasta el nivel máximo. Un lugar más fresco (Importante - Por favor leer!) Coloque el enfriador en frente de una ventana o puerta abierta. Asegúrese de que haya suficiente cruzada ventilación de la habitación por dejar una puerta o ventana abierta enfrente del enfriador. -
Page 25: Consejos Para El Usuario
CONSEJOS PARA EL USUARIO FRÍO ~ EFICIENTE ~ NATURAL El enfriamiento de aire por evaporación es la manera más natural de enfriamiento, similar a una brisa que recorre un lago. Esta disminución de la temperatura de esta brisa produce un efecto refrescante y relajante en la personas. - Page 26 CONSEJOS PARA EL USUARIO El nivel recomendado de humedad relativa máxima es 60% o menos, lo que permite que se aprecie un descenso en la temperatura. La disminución de temperatura será mayor en los climas mas secos, porque una mayor evaporación es producida cuando la humedad es baja.
-
Page 27: Reglas De Seguridad
REGLAS DE SEGURIDAD Leer y guardar estas instrucciones: Cuando se usan aparatos eléctricas, las precauciones básicas de seguridad siempre se deben seguir. Su enfriador funciona con 120 Voltios , 60 Hz de corriente. • Compruebe la tensión de la casa para asegurarse de que 120V - 60 Hz coincida con la especificación de potencia del aparato. - Page 28 REGLAS DE SEGURIDAD • NO intente reparar o ajustar cualquier función mecánica o eléctrica del enfriador, ya que esto puede anular la garantía. • NO cubra la salida o entrada de aire en el enfriador, ya que esto puede causar daños al motor. •...
-
Page 29: Descripción De Partes
DESCRIPCIÓN DE PARTES 1 Control Remoto 7 Ruedas 2 Panel De Control 8 Manija Lateral 3 Receptor de control remoto 9 Volver Grill 4 Deflectores Verticales 10 Tanque De Agua (Movimiento Automático Con Swing) 11 Enchufe Y Cordón Eléctrico 5 Drenaje Plug 12 Tornillos De La Rejilla 6 Indicador Del Nivel De Agua Posterior Eliminación... -
Page 30: Uso Y Operación
USO Y OPERACIÓN Panel De Control Lo Med Hi SLEEP SWING TIMER SPEED COOL POWER... -
Page 31: Botones De Funciones
USO Y OPERACIÓN Botones de Funciones POWER Presione el botón ENCENDIDO para encender la unidad. Para apagarla, presione el botón nuevamente. La unidad enfriadora arrancará POWER automáticamente a una velocidad media. Luego de unos pocos segundos la velocidad cambiará a baja. SPEED Presione el botón velocidad repetidamente y la velocidad cambiará. - Page 32 USO Y OPERACIÓN Botones de Funciones SWING Presione el botón ''SWING''. La luz indicadora se encenderá y los deflectores comenzarán a moverse de derecha a izquierda SWING automáticamente. Ajuste manualmente los deflectores horizontales para cambiar el flujo de aire vertical. TIMER Presione el botón “TIMER”...
-
Page 33: Control Remoto
USO Y OPERACIÓN Control Remoto Power : Si / No Speed : Baja / Media / Alta POWER Cool : Controla la función tipo viento Swing : Controla el movimiento de los deflectores COOL Timer : Ajustar para q la unidad se apague automáticamente después de un periodo de horas determin SPEED Sleep : Activa el modo de reposo... -
Page 34: Llenado De Agua
USO Y OPERACIÓN CUIDADO desenchufar la unidad cuando se llene de agua. Llenado de Agua Desenchufe el refrigerador del aire de alimentación. Compruebe el indicador de nivel de agua situado en la parte frontal de la unidad para determinar el nivel de agua dentro del tanque de agua. -
Page 35: Limpieza Y Mantenimiento
LIMPIEZA Y MANTENIMIENTO Importante • El refrigerador se suministra con los medios de refrigeración de nido de abeja. • La frecuencia de limpieza de la prensa Honeycomb depende del aire y del agua condiciones. En las zonas donde el contenido mineral del agua es alta, los depósitos minerales pueden acumularse en los medios de refrigeración de nido de abeja y restringir el flujo de aire. - Page 36 LIMPIEZA Y MANTENIMIENTO Vaciado Y Limpieza Del Depósito De Agua Apagar el equipo y desconectar de la toma corriente. • Mover la unidad a un lugar donde puede ser drenado. • Retire la tapa del tapón de drenaje de agua y deje que el tanque se vacíe (ver descripción de •...
-
Page 37: Guia De Solucion De Problemas
GUIA DE SOLUCION DE PROBLEMAS PROBLEMA POSIBLE CAUSA SOLUCIÓN No hay salida de aire Cable eléctrico no esta Asegúrese que el cable eléctrico conectado este enchufado y el interruptor de alimentación en "ON" La unidad no esta encendida Intente prender la unidad apretando los botones en el panel de control o en el control remoto No enfría / La unidad hace... - Page 38 GUIA DE SOLUCION DE PROBLEMAS PROBLEMA POSIBLE CAUSA SOLUCIÓN La unidad no responda Cambiar las baterías del control Revisar las baterías cambiarlas remoto (* Solamente las unidad- si es necesario. Intente operar es que tienen control remoto) desde el panel del control. PCB dañado Intente usar el control remoto.
-
Page 39: Especificaciones Técnicas
ESPECIFICACIONES TÉCNICAS Modelo No. CS071AE Tensión 120V Frecuencia 60Hz Amperio 0,45A Vatio 50 Watts Capacidad del tanque de agua 1,8 Gallons Honeycomb Medios de enfriamiento 15 (W) x 9,8 (D) x 25,4 (H) inches Dimensiones del Producto (Inches) 12.3 lbs (5.6 Kg) Peso Neto Diagrama De Cableado Eléctrico... -
Page 40: Servicio Y Garantia
SERVICIO Y GARANTIA GARANTÍA LIMITADA DE 1 AÑO Lea todas las instrucciones antes de intentar utilizar este produto. Esta garantía limitada de un año se aplica a la reparación o sustitución del producto siempre que haya algún defecto de material o de manipulación. La garantía no cubre ningún daño resultante de un uso comercial, abusivo o irracional, ni daños causados intencionadamente. - Page 41 SERVICIO Y GARANTIA Por favor, lea el manual de instrucciones detenidamente antes de configurar o de utilizar este producto. Si considera que este producto sufre un defecto de fabricación, o si tiene dudas sobre el mismo, por favor contacte con nuestro Servicio de Atención al Cliente: CUSTOMER SUPPORT JMA North America LLC Ramsey, New Jersey, 07446.
- Page 42 December 2012; CS071AE_IM_Eng_Spa_USA_2 © 2012 AirTek International Corporation Ltd. JMA North America All rights reserved. Ramsey New Jersey 07446 The Honeywell Trademark is used under license from Honeywell International Inc. Customer Support: 1-800-474-2147 Honeywell International Inc. makes no representations E-mail: info@jmana.us or warranties with respect to this product.