Bosch Conettix D6600 Installation And Operation Manual
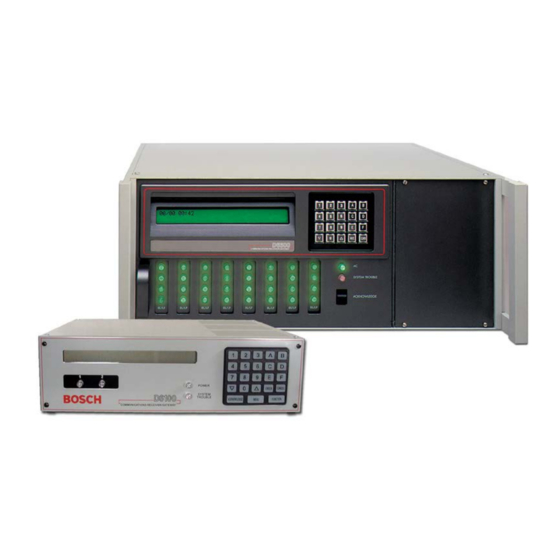
Communications receiver/gateway
Hide thumbs
Also See for Conettix D6600:
- Manual (185 pages) ,
- Installation and operation manual (88 pages) ,
- Operation and installation manual (36 pages)

Related Manuals for Bosch Conettix D6600


Summary of Contents for Bosch Conettix D6600
- Page 1 Conettix D6600/D6100i Installation and Operation Guide Communications Receiver/Gateway...
- Page 2 Conettix D6600/D6100i | Installation and Operation Guide | Trademarks Trademarks ® ® ® Microsoft , Windows , Windows NT are either registered trademarks or trademarks of Microsoft Corporation in the United States and/or other countries. ® Ademco is a registered trademark of Alarm Device Manufacturing Corporation.
-
Page 3: Table Of Contents
Conettix D6600/D6100i | Installation and Operation Guide | Contents Contents Introduction 10.0 D6600/D6100i Operation ..... 18 Emergency Procedures ..... 6 10.1 Process Flow ....18 Card Functions and Locations..6 10.1.1 Receiver Handshake and Kiss-Off ..18 D6600......6 10.1.2 Message Verification ....18 3.1.1... - Page 4 Conettix D6600/D6100i | Installation and Operation Guide | Contents 15.0 Troubleshooting Guide .... 31 Tables 16.0 Specifications 34 Table 1: D6600/D6100i Supported Communication Formats ...... 5 17.0 Service Information ....36 Table 2: Power LED Indications.... 6 Table 3: System Trouble LED ..... 7...
-
Page 5: Introduction
CPU Card. seven additional line terminator cards can be installed Program the D6600/D6100i using the front panel in the D6600 to expand the receiver’s capacity to 32 keypad or through the COM4 port with the D6200 receiving lines. Programming Software package. -
Page 6: Emergency Procedures
(two lines of up to 40 characters each) Disconnect power to the receiver before removing the CPU or CPU terminator 2 – Keypad - The D6600 has a 20-button keypad. card. Table 2 and Table 3 on page 7 show and define the Before Calling D6600/D6100i POWER and SYSTEM TROUBLE LEDs. -
Page 7: Line Cards And Modules
Conettix D6600/D6100i | Installation and Operation Guide | 3.0 Card Functions and Locations Table 3: System Trouble LED System Trouble LED Status Solid Red Clear No System Trouble Any System Trouble* Refer to Appendix B: D6600/D6100i Internal Messages in the D6600/D6100i Computer Interface Manual (P/N: 4998122703). -
Page 8: Rear View
3.1.3 Rear View The D6600 has input and output pin connector sockets for up to eight line cards, network option (if installed), and one CPU card. It also has slots for connecting these cards to their corresponding terminator cards. Figure 2:... -
Page 9: Front Panel
Conettix D6600/D6100i | Installation and Operation Guide | 4.0 D6600 Specific Cards 4.0 D6600 Specific Cards D6100i The difference between the D6100 and D6640/D6641 Line Cards and D6645 the D6100i is the D6100i has a built in Line Terminator Card Ethernet connection. -
Page 10: D6640/D6641 Led Descriptions
D6600 chassis. 2. If you are removing an existing terminator card, open the display door on the front of the D6600 and pull the line card slightly out, then re-insert. This will push the existing terminator card out the back of the D6600 chassis. -
Page 11: D6640/D6641Telephone Line Monitoring Voltage
Card 4.2.1 D6610 CPU Card Connection The CPU card connects to the user interface on the front of the D6600 using a 50-pin ribbon cable socket. 4.2.2 D6615 CPU Terminator Card Figure 10: D6615 CPU Terminator Card 1 – Terminator Card (D6645 shown) 2 –... -
Page 12: Power Supply Modules (D6600 Only)
Parallel printer connection: Use the DB25 port on the standby equipment and a switchover back of the D6600/D6100i rear panel to connect to a can be accomplished in not more than standard parallel text printer. -
Page 13: Burglar Alarm Applications
Conettix D6600/D6100i | Installation and Operation Guide | 7.0 Installation 2. Level III Line Security for ULC-S303 and ULC- Burglar Alarm Applications S304. For commercial fire and burglary, 3. Phone lines have not been evaluated for line proprietary and central station security. -
Page 14: Rack Mount Instructions
1. Remove the battery power connection. replacement card (refer to Section 4.1.2 Card 2. Turn off the AC power on the D6600 or unplug Installation on page 10). the D6100i AC transformer. -
Page 15: Minimum Standby Battery
Conettix D6600/D6100i | Installation and Operation Guide | 8.0 Standby Power Table 6: Battery Voltage Display Battery Voltage Display during Display if no AC power battery when outage AC power is restored Above 11.5 V Battery OK 11.5 V to 10.2 V Battery Low Below 10.2 V... -
Page 16: Input And Output Ports
Conettix D6600/D6100i | Installation and Operation Guide | 9.0 Input and Output Ports 9.0 Input and Output Ports • UPS Battery OK (restore) – contacts closed • UPS Battery Low input – contacts open You can apply other output sources to the input wiring... -
Page 17: Automation Link Monitoring (Com3) Through Cpu Programmable Output Ports
Conettix D6600/D6100i | Installation and Operation Guide | 9.0 Input and Output Ports Operating the input as an analog input between 0.5 V and 5 V might cause abnormal results. This input state is not defined and might change expected... -
Page 18: D6600/D6100I Operation
Conettix D6600/D6100i | Installation and Operation Guide | 10.0 D6600/D6100i Operation 10.0 D6600/D6100i Operation Some communicators wait approximately 30 sec for the proper handshake tone. 10.1 Process Flow Others hang up immediately if they hear an improper handshake tone. Others 10.1.1 Receiver Handshake and Kiss-Off... -
Page 19: Buzzer Operation
Conettix D6600/D6100i | Installation and Operation Guide | 10.0 D6600/D6100i Operation 10.1.6 Buzzer Operation 10.2 Normal Operation Mode In the Manual Mode, an Operator Alert Buzzer In Normal Operation Mode, the D6600/D6100i sends sounds when a message is received until you press messages immediately or in blocks to reporting the [ACKNOWLEDGE] key. -
Page 20: Operating In Manual Mode
Conettix D6600/D6100i | Installation and Operation Guide | 10.0 D6600/D6100i Operation 10.3 Operating in Manual Mode 10.4 Keypad Menu Operation If all reporting devices (such as printers and 10.4.1 Log In computers) fail, the D6600/D6100i reverts to Manual Mode until a device returns to service. -
Page 21: Event Buffer Display
Conettix D6600/D6100i | Installation and Operation Guide | 10.0 D6600/D6100i Operation 10.4.3 Event Buffer Display D6600 D6600 D6100 No more system Shows event buffer contents troubles remain D6100 in the order the events are D6600 D6100 received. SYSTEM TROUBLE Refer to Section 15.0 Troubleshooting Guide on If multiple lines of text are received, page 31 for more information. -
Page 22: Skip Current Automation Event
Conettix D6600/D6100i | Installation and Operation Guide | 10.0 D6600/D6100i Operation 10.4.7 Skip Current Automation Event D6600 D6100 ENTER Use this option to skip the current Automation event. D6100 D6600 D6600: FUNCTION D6100: Enter password. D6600 D6600 default password: 6600... -
Page 23: Clear Pending Events
Conettix D6600/D6100i | Installation and Operation Guide | 10.0 D6600/D6100i Operation 10.4.9 Clear Pending Events 10.5 Busy Seconds (Line Busy) Reports Use this option to clear all pending events. The D6600 software monitors and reports when a call group of receiver lines cannot receive signals. The... -
Page 24: Two-Way Audio
Conettix D6600/D6100i | Installation and Operation Guide | 10.0 D6600/D6100i Operation 10.6 Two-Way Audio 10.6.1 Enhancements and Changes • Setting TWA by the selected Alarm Code allows When using the D6600/D6100i for Two-Way Audio one or multiple Alarm Codes to be selected. TWA... -
Page 25: Two-Way Audio Modes Of Operation
Conettix D6600/D6100i | Installation and Operation Guide | 10.0 D6600/D6100i Operation 10.6.2 Two-Way Audio Modes of Operation • Transfer: D6600/D6100i transfers the incoming line to another line; a flash operation occurs at the end of the alarm signal. The receiver dials the line programmed at Transfer Phone Number (refer to Menu Items 3.1.4.18 Flash [x 100ms] and... -
Page 26: Network Communications
11 – D6680 12 – Connection – D6680 to D6600 COM4 port 13 – D6600 14 – Connection – Second D6680 to D6600 COM 1 port (optional) 15 – Connection – Ethernet hub to second D6680 Bosch Security Systems, Inc. | 9/08 | 4998122704-04... -
Page 27: No Data Received Reports
Conettix D6600/D6100i | Installation and Operation Guide | 12.0 No Data Received Reports 12.0 No Data Received Figure 16: Conettix Network System Connection Diagram - D9133TTL- Reports E/DX4020 and Bosch Control Panels 12.1 Description If a message is garbled (incorrect checksum or... -
Page 28: Using The Central Station Automation System With The Receiver
The D6600 still 4 – D6600 Receiver sends the standard serial data, but the D6680s 5 – Connection - Host PC COM1 Port to D6600 communicate with each other, convert the data back COM3 Port to the standard RS-232 that the automation computer can interpret, and transmit that data back over the network. -
Page 29: Central Station Tips
Conettix D6600/D6100i | Installation and Operation Guide | 14.0 Central Station Tips 14.0 Central Station Tips Figure 19: Receiver System – Standard/Network Automation 14.1 Back-up Receiver Spare circuit boards and receivers should be available at the central station. Keep a spare kit on hand. -
Page 30: Proper Ground
Conettix D6600/D6100i | Installation and Operation Guide | 14.0 Central Station Tips 14.5 Proper Ground Connect the receivers to an earth ground, not a chassis or electrical ground. Measure the resistance of the receiver ground to another ground. If the meter reads above 2 Ω, check your receiver ground against... -
Page 31: Troubleshooting Guide
Troubleshooting Guide 15.0 Troubleshooting Guide The D6600 consists of several plug-in assemblies that you can easily replace in the field (components and controls on individual assemblies are shown starting in Section 3.0 Card Functions and Locations on page 6). Do not attempt to repair individual assemblies. Return any failed assemblies to Bosch Security Systems, Inc. - Page 32 Check watchdog LED on the inside of the door behind the buzzer cannot be keypad. LED must flash for a running system. A solid light silenced. indicates a faulty system. Reset power cycle of the D6600 if stalled. • •...
- Page 33 PC running D6200 Software is on. This indicates a good network connection. • If using the D6600’s COM4 to connect to the D6680, ensure that Menu Item 6.1.4 COM4 Network Adapter in the D6600 is set to 1. •...
-
Page 34: Specifications
RJ11C Interconnect that can be ordered from your local telephone company. Notice: This equipment has been tested and found to comply with the limits for a Class A (D6600) or Class B (D6100i) digital device, pursuant to part 15 of the FCC Rules. These limits are designed to provide reasonable protection against harmful interference in a residential installation. - Page 35 Two programmable inputs (wire harness included) • Two programmable outputs (wire harness included) • Optional: One RS-232 port (COM1) for the Network Communications expansion option (D6600 only). D6600/D6100i D6600 Listings and Approvals D6600 and D6100i Listings and Approvals Listings and •...
-
Page 36: Service Information
Conettix D6600/D6100i | Installation and Operation Guide | 17.0 Service Information 17.0 Service Information (EMERGENCY DATA SHEET) In a central station emergency, use this information to contact the necessary people and enable Bosch Security Systems, Inc. Customer Service Personnel to help you with your emergency. Ask your supervisor to provide the following information: Supervisor’s Name:... - Page 37 Conettix D6600/D6100i | Installation and Operation Guide | 17.0 Service Information Location of Receiver Ground Wire Connection: _________________________________________________ ____ Location of AC Power for Receiver: _________________________________________________ ____ Location of Telephone Line Jacks: _________________________________________________ ____ Receiver Connected to Computer System?: Yes: _____...
- Page 38 Bosch Security Systems, Inc. 130 Perinton Parkway Fairport, NY 14450-9199 (800) 289-0096 © 2008 Bosch Security Systems, Inc. 4998122704-04...