Tripp Lite B051-000 Owner's Manual
Ip remote access unit
Hide thumbs
Also See for B051-000:
- Owner's manual (65 pages) ,
- Quick start manual (17 pages) ,
- Owner's manual (65 pages)
Table of Contents
Advertisement
Quick Links
Download this manual
See also:
Owner's Manual
FCC Information
This device complies with part 15 of the FCC Rules. Operation is subject to the following two conditions: (1) This device may not cause harmful
interference, and (2) this device must accept any interference received, including interference that may cause undesired operation.
Note: This equipment has been tested and found to comply with the limits for a Class A digital device, pursuant to part 15 of the FCC Rules. These
limits are designed to provide reasonable protection against harmful interference when the equipment is operated in a commercial environment. This
equipment generates, uses, and can radiate radio frequency energy and, if not installed and used in accordance with the instruction manual, may cause
harmful interference to radio communications. Operation of this equipment in a residential area is likely to cause harmful interference in which case
the user will be required to correct the interference at his own expense. The user must use shielded cables and connectors with this equipment. Any
changes or modifications to this equipment not expressly approved by Tripp Lite could void the user's authority to operate this equipment.
RoHS
This product is RoHS compliant.
Package Contents
•
B051-000
•
4 ft. USB KVM Cable Kit
•
4 ft. PS/2 KVM Cable Kit
•
10 in. USB/PS2 Combo Console Cable Kit
•
6 ft. USB 2.0 Virtual Media Cable (5-Pin Mini-B Male to A Male)
12-004 932850-EN.indd 1
Owner's Manual
IP Remote Access Unit
1111 W. 35th Street, Chicago, IL 60609 USA • www.tripplite.com/support
Note: Follow these instructions to ensure proper operation and prevent damage to this device and its connected equipment.
Copyright © 2012 Tripp Lite. All rights reserved. All trademarks are the property of their respective owners.
Model:
B051-000
•
5 ft. External Power Supply (Input: 100-240V, 50/60Hz, 0.5A
Output: 5.3V, 2.4A)
•
Rack Mount Bracket
•
DIN Rail Brackets
•
CD with Software and Owner's Manual
•
Quick Start Guide
1
8/7/2012 11:12:28 AM
Advertisement
Table of Contents
Troubleshooting

Related Manuals for Tripp Lite B051-000


Summary of Contents for Tripp Lite B051-000
-
Page 1: Fcc Information
The user must use shielded cables and connectors with this equipment. Any changes or modifications to this equipment not expressly approved by Tripp Lite could void the user’s authority to operate this equipment. -
Page 2: Table Of Contents
Logging Into the B051-000 . . . . . . . . . . . . . . . . . . -
Page 3: Introduction
Features • Connects to a computer or KVM switch to provide IP remote access. • Up to 32 accounts can access the B051-000 at the same time. A Message Board is provided for use in situations where multiple accounts are •... -
Page 4: Connected Computer/Server Requirements
1280 x 1024 60, 70, 75, 85 1600 x 1200 Supported Operating Systems Compatible with all major operating systems. Supported Browsers Supported browsers for users that remotely log into the B051-000 Browser Version include: Internet Explorer* 6 and higher Chrome 8.0 and higher... -
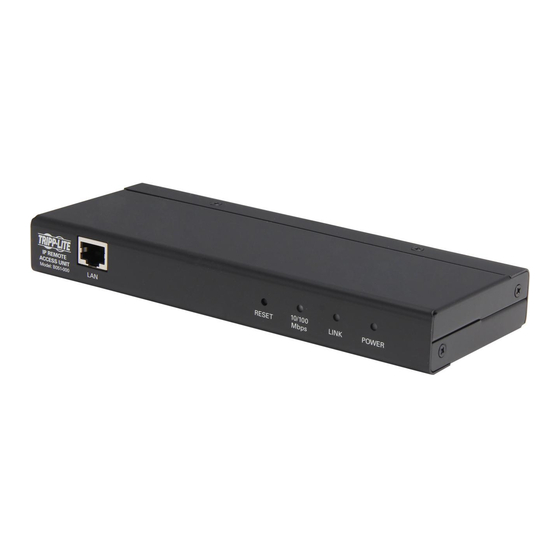
Page 5: Components
PC/KVM Port – The included USB or PS/2 KVM cable kit, which connects a computer or KVM to the B051-000, plugs into the unit here. Console Port – The included USB/PS2 combo console cable kit connects to the unit here. The VGA monitor, and USB or PS/2 keyboard/ mouse connect to the available connectors on the cable kit. -
Page 6: Hardware Setup
• To help protect your system from sudden transient increases and decreases in electrical power, it is recommended that you plug your devices into a Tripp Lite surge suppressor, line conditioner, or uninterruptible power supply (UPS). • When connecting or disconnecting power to hot-pluggable power supplies, observe the following precautions: >... -
Page 7: Stacking
Stacking The B051-000 can be placed on any level surface that can safely support its weight plus the weight of attached cables. When placing the unit on a desktop, remove the backing material from the rubber feet that came with this package and affix them to the bottom panel at the corners. -
Page 8: Rack Mounting
(continued) Rack Mounting The B051-000 comes with both 0U and DIN rail mounting hardware, so that it can be conveniently mounted on a system rack. Note: Diagram shows installation for B051-000-AC but represents installation for the B051-000 as well. To mount the unit using the 0U hardware, follow these steps: To mount the unit using the DIN rail hardware, follow these steps: 1. -
Page 9: Installation
Connect the LAN port on the unit to your network using a standard Cat5e/6 patch cable. Connect the included external power supply to the power jack on the unit, and then plug it into a Tripp Lite Surge Suppressor, UPS or PDU. -
Page 10: Administrator Setup
Network Setup - IP Address Determination If you are an administrator logging in for the first time, you must access the B051-000 in order to give it an IP address to which users can connect. You can do this via Web Browser, the IP Installer utility, or the non-browser Windows or Java Client applications. - Page 11 (See steps 4 through 8 in the Web Browser section) 4. If you are on the same network as the B051-000, the client will locate it and display it in the Device List. In this case, highlight the unit in the device list and click the Login button.
-
Page 12: Logging Into The B051-000
5. Click the Exit button to exit the IP Installer utility. Logging Into the B051-000 The B051-000 IP remote access unit can be accessed in several ways; local console, web browser, non-browser Windows or Java client. This section describes the login procedures for each of these methods. -
Page 13: Web Browser Login
If you are an administrator logging in for the first time, the default username is administrator, 4. If you are on the same network as the B051-000, the client will locate and the default password is password. The four buttons on the right it and display it in the Device List. -
Page 14: Admin Utility
Admin Utility Depending on whether you remotely access the B051-000 via web browser or one of the non-browser applications, the Admin Utility will be displayed differently. In addition, you will only be able to see features and settings that you are given access to by an administrator. For example, if you are not given configuration access, you will not see any of the icons at the top of the screen in the web browser utility, and you will not have access to the non-browser utility at all. -
Page 15: Exit Macro
Under the Exit Macro section is the Telnet/SSH Viewer section, allow you to initiate a remote session. By default, the admin utility is set which provides access to the serial device connected to the B051-000. to auto detect what browser you are using and display the appropriate link. -
Page 16: Log (Browser Only)
(continued) Log (Browser Only) The B051-000 logs all events that take place on it (e.g. login, logout, system reboot, etc.) and writes them to a log file. The web browser Admin Utility contains a Log section, which provides a list of the 512 most current events that took place on the unit. -
Page 17: Device Information
Note: An IPv6 address is included in the Device Information page. This is a default address that is given to the unit, and can be used to access the B051-000 via browser and/or the non-browser clients. It cannot be used to communicate with LDAP, RADIUS and other management devices. -
Page 18: Service Ports
This section allows you to obtain an IP address automatically via DHCP server, or to manually assign one yourself. By default, the B051-000 is • Alternate DNS Server – Enter in the alternate DNS Server address set to have its IP address assigned automatically via DHCP server. If here. -
Page 19: Anms
IP Installer The SMTP Settings section allows you to have notifications of system The B051-000 comes with an IP Installer application that allows Windows events emailed to you via SMTP server. To set up this feature, follow computers to easily view and edit the KVMs network settings. This section the steps below. -
Page 20: Snmp Server
In addition to the log that is built into the web browser Admin Utility, To record all the events that take place on the unit and write them to a the B051-000 comes with an external Windows-based log server that Syslog server, follow the steps below. -
Page 21: Disable Local Authentication
Disable Local Authentication When this checkbox is checked, local authentication of the B051-000 will be disabled, allowing the unit to be accessed only by RADIUS, LDAP, LDAPS or MS Active Directory authentication. This checkbox is activated only when the Enabled checkbox in the RADIUS Settings and/or LDAP Settings sections is checked. -
Page 22: Ldap Settings
To allow authentication and authorization for the B051-000 via LDAP LDAPS, refer to the information in the table, below. or LDAPS, the Active Directory’s LDAP Schema must be extended so that an extended attribute name for the B051-000 – permission – is Entry Description added as an optional attribute to the person class. -
Page 23: Extend And Update The Active Directory Schema
Admin Utility (continued) ANMS (continued) Extend and Update the Active Directory Schema Step 1 - Create a New Attribute: Step 2 - Extend the Object Class With the New Attribute: a) Open Control Panel Administrative Tools Active a) Open Control Panel Administrative Tools Active Directory Schema. - Page 24 Admin Utility (continued) ANMS (continued) e) Select the Attributes tab and click the Add button: Step 3 - Edit Active Directory Users With the Extended Schema: a) Run ADSI Edit. (Installed as part of the Support Tools.) b) Open Domain, and navigate to the cn=users dc=tripplite dc=com node.
-
Page 25: Openldap Server Installation
When the Select Components dialog box appears, select install BDB- the B051-000. In this case, user access rights will be the same as tools and install OpenLDAP-slapd as NT service, as shown in the those that were assigned to them in the B051-000. -
Page 26: Ldap Dit Design And Ldif File
Directory Information Tree (DIT). The nodes in the tree are directory entries, and each entry contains information in attribute-value form. Starting the OpenLDAP Server An example of the LDAP directory tree for the B051-000 is shown in To start the OpenLDAP Server, run slapd (the OpenLDAP Server the figure below: executable file) from the command line. -
Page 27: Dit Creation
(please refer to RFC 2849). The figure 1. Save the new schema file (e.g., B051-000.schema) in the /OpenLDAP/ below illustrates an LDIF file that creates the DIT for the B051-000 schema/ directory. directory tree (shown in the figure in the previous section). -
Page 28: Security
The following pages describe the sections found in the Security page. User Station Filters IP and MAC filters provide a way for you to control access to the B051-000 based on the IP address and/or MAC address of the computer being used to access it. -
Page 29: Login String
Login Failures The Login Failures section allows you to set up the parameters for what The Login String allows the IP address assigned to the B051-000 to be occurs when an account fails to login successfully. To enable the settings more secure by adding extra text to the end of it. -
Page 30: Private Certificate
• When the Disable Authentication checkbox is checked, no authentication procedures are used to check accounts logging into the B051-000. All users will be logged onto the unit simply by entering the assigned IP address, and will be given full access rights. -
Page 31: User Management
Select account that can be created, only a limit on the number of total accounts. You can create up to 64 accounts on the B051-000. • Administrator – This account type has full access to the unit. They can fully access the computer/KVM and serial devices connected to the B051-000, change any and all settings, and add/edit any account type. -
Page 32: Console Management
Admin Utility (continued) User Management (continued) Modifying an Account Deleting an Account To modify an existing account, do the following: To delete an existing account, do the following: 1. Select the desired account from the list on the left side of the User 1. -
Page 33: Enable Dial Back
When you have finished editing the Serial Console settings, click the Apply button at the bottom of the page to save your changes. OOBC In case the B051-000 cannot be accessed via the LAN, it can be accessed with an external modem via the switch’s RS-232 serial port. To enable support for PPP (modem) operation, check the Enable Out of Band Access checkbox. -
Page 34: Enable Dial Out
PPP Modem Access To use the dial out feature, you must establish an account with an Follow the steps below to setup and access the B051-000 via dial- Internet Service Provider (ISP), and use a modem to dial out to your ISP in modem. -
Page 35: Sessions (Browser Only)
(continued) Connection Setup Example (Windows XP) To set up a dial-in connection to the B051-000 under Windows XP, follow the steps below. 1. From the Start menu, select Control Panel ➞ Network Connections 6. In the Connection Availability dialog box, you can select either Anyone’s use or My use only, depending on your preferences, then... -
Page 36: Customization
Allows you to enable/disable operation features of the unit. The available settings are described below. • Enable ICMP – When this box is checked, the B051-000 can be pinged. If it is not checked, the B051-000 cannot be pinged. The default value is enabled. -
Page 37: Date/Time
• Select the Time Zone and City that most closely resembles where the this page. B051-000 is using the drop-down menu at the top of this section. • If your area uses Daylight Savings Time, check the Daylight Savings Time checkbox. -
Page 38: Maintenance
The Maintenance page allows Administrators and Select accounts who have been given Configure permission (See the User Management section in this manual for details), to upgrade the B051-000 firmware, as well as backup and restore the settings of the unit. The settings found in this page are described in the following sections. -
Page 39: Remote Session Operation
Remote Session Operation Depending on whether you login to the B051-000 via web browser or one of the non-browser applications, you will initiate a remote session in different ways. Note: If you are initiating a remote session for the first time, you will be prompted to install an ActiveX Control when using the Windows Client. -
Page 40: Control Panel
When the mouse pointer is not over an icon, the text bars display the video resolution of the selected computer and the IP address of the B051-000. You can drag the control panel to any location on the remote screen by hovering Always on Top / Auto Hide –... - Page 41 Remote Session Operation (continued) Control Panel (continued) Hotkeys Various configuration actions related to the keyboard, video and mouse can be performed via hotkey combinations. The Hotkey setup utility is accessed by clicking on the Hotkey / Macros icon and then clicking on the Hotkeys button at the top of the screen.
-
Page 42: User Macros
Remote Session Operation (continued) Control Panel (continued) User Macros System Macros The System Macros page allows you to add macros to the unit that can be performed automatically upon closing a session. For example, you can create a macro that sends the Winkey-L combination, causing a computer’s login page to come up the next time it is accessed. - Page 43 Remote Session Operation (continued) Control Panel (continued) Video Settings – The Video Settings screen allows you to adjust the placement and picture quality of the remote screen. The quality of the image display has a direct affect on the keyboard and mouse response time.
-
Page 44: Gamma Adjustment
Customize Control Panel page. Message Board – The B051-000 supports multiple user logins, 2. Click and drag the diagonal line at as many points as you wish to which can give rise to access conflicts. To alleviate this problem, achieve the display output you desire. -
Page 45: User List Panel
The following media • The names of all the logged in users appear in the User List panel. are supported via the B051-000 Virtual Media functionality. Select the names of the users that you wish to communicate with Browser and non-Browser Windows Client before sending your message. - Page 46 Note: 1. In order to use the Virtual Media functionality, the USB virtual media cable that came with the B051-000 must be connected from the unit to the computer. 2. When accessing the unit remotely with a Windows Vista or 7 computer, you must run Internet Explorer as an administrator for virtual media to function properly.
- Page 47 Remote Session Operation (continued) Control Panel Control Panel (continued) (continued) 5. Once all media sources are added, and the desired 3 media sources are at the top of the list, click the Mount button to close the dialog box and open the media sources on the remote computer.
-
Page 48: Mac And Linux Considerations
The Mouse Properties Settings data that is being sent, the faster the response time. In particular, the should be set on the computers attached to the B051-000, not the computer Quality and Detect Tolerance settings in the Video Settings screen you are using to access it. - Page 49 • Remote Occupy - Select this option to give exclusive control of the Screen Options – This section allows you to make Full Screen Mode B051-000 to the remote user. The local user is allowed to view the and Keep Screen Size the default settings when a remote session is session, but will not have the ability to control it.
-
Page 50: The Log Server
The Log Server The Windows-based Log Server is an administrative utility that records all the events that take place on selected B051-000 units and writes them to a searchable database. This chapter describes how to install and configure the Log Server. -
Page 51: Configure
The Configure menu consists of three functions: Add, Edit and Delete. Edit Select the Add function when you need to add a new B051-000 to the Select the Edit function to modify the information pertaining to an list of units that the Log Server records events for. -
Page 52: Events
B051-000 excluding the events that resulted from the last search. Server List B051-000 units are listed according to their IP address. Select the unit that you want to perform the search on from this list. You can select more than one unit for the search. -
Page 53: Options
The Log Server (continued) Options Network Retry The Options menu consists of only one function: Network Retry. Network Retry allows you to set the number of seconds that the Log Server should wait before attempting to connect if the previous connection attempt failed. -
Page 54: The Log Server Main Screen - Overview
(List) panel that displays all devices that have been added to the Log The List panel contains the following fields: Server and a lower (Event) panel that displays the log events for the currently selected B051-000. To select a B051-000 in the list, simply Field Description click on it. -
Page 55: Appendix
• Reset the unit by pressing and holding the Reset button on the front of the unit for longer than three seconds. I can’t access the B051-000, even though If the B051-000 is behind a router, the router’s Port Forwarding (also referred to as Virtual Server) feature I have specified the IP address and port must be configured. -
Page 56: Mouse Troubleshooting
AP Windows Client’s Port field. Only B051-000s that match the port number entered into Client this field will show up in the device list • The Enable Device List option must be checked on the Customization page for your B051-000 to show up in the Device List. After upgrading the firmware to my The old version of your .ocx file was not deleted. -
Page 57: Winclient Activex Viewer Troubleshooting
• Under Vista and 7, you must also add the B051-000’s URL to the list of trusted sites. Go to Tools > Internet Options > Security > Trusted Sites > Sites When using Vista or 7, I open the This is due to User Account Control (UAC). -
Page 58: Sun Systems Troubleshooting
Appendix (continued) Sun Systems Troubleshooting Problem Action Video display problems with HD15 • The display resolution should be set to 1024 x 768 @ 60Hz: interface systems (e.g. Sun Blade 1000 Under Text Mode go to OK mode and issue the following commands: servers).* setenv output-device screen:r1024x768x60 reset-all Under XWindow:... -
Page 59: Specifications
Specifications Feature Specification PC/KVM Port HD18 Female PS/2 – USB Console Port HD18 Female RS-232 Port DB9 Male Power DC Jack RJ45 Female Virtual Media USB 5-Pin Mini-B Female Max Video Resolution 1600 x 1200 @ 60Hz; DDC2B Power Consumption DC 5.3V, 6.3W Operating Temperature 0 to 40 C (32 to 104 F) -
Page 60: Warranty Registration
1-Year Limited Warranty TRIPP LITE warrants its products to be free from defects in materials and workmanship for a period of three (3) years from the date of initial purchase. TRIPP LITE’s obligation under this warranty is limited to repairing or replacing (at its sole option) any such defective products. To obtain service under this warranty, you must obtain a Returned Material Authorization (RMA) number from TRIPP LITE or an authorized TRIPP LITE service center.