Table of Contents
Advertisement
Quick Links
FCC Information
This is an FCC Class A product. In a domestic environment this product may cause radio interference in which case the user may be required to
take adequate measures.
This equipment has been tested and found to comply within the limits for a Class A digital device, pursuant to Part 15 of the FCC Rules. These
limits are designed to provide reasonable protection against harmful interference when the equipment is operated in a commercial environment.
This equipment generates, uses and can radiate radio frequency energy and, if not installed and used in accordance with the instruction manual,
may cause harmful interference to radio communications. Operation of this equipment in a residential area is likely to cause harmful interference
in which case the user will be required to correct the interference at their own expense.
RoHS
This product is RoHS compliant.
Package Contents
The B051-000 package consists of:
(1) B051-000 IP Remote Access Unit
(1) USB KVM Cable Kit
(1) PS/2 KVM Cable Kit
Note: Follow these instructions to ensure proper operation and prevent damage to this device and its connected equipment.
Owner's Manual
IP Remote Access Unit
(1) USB – PS/2 Console Connector Kit
(1) USB 2.0 Virtual Media Cable
(1) Power Adapter
Tripp Lite World Headquarters
1111 W. 35th Street, Chicago, IL 60609 USA
www.tripplite.com/support
Copyright © 2009 Tripp Lite. All rights reserved. All trademarks are the property of their respective owners.
Model:
B051-000
1
(1) Rackmounting Kit
(1) Software CD with Owner's Manual
(1) Quick Start Guide
Advertisement
Table of Contents

Related Manuals for Tripp Lite B051-000 IP


Summary of Contents for Tripp Lite B051-000 IP
- Page 1 (1) PS/2 KVM Cable Kit Note: Follow these instructions to ensure proper operation and prevent damage to this device and its connected equipment. Copyright © 2009 Tripp Lite. All rights reserved. All trademarks are the property of their respective owners. Model: B051-000 (1) USB –...
-
Page 2: Table Of Contents
Table of Contents Table of Contents . . . . . . . . . . . . . . . . . . . . . . . . . . . . . . . . . . . . . . . .2 Introduction . - Page 3 Table of Contents ANMS ..........51 RADIUS Settings.
-
Page 4: Introduction
• Remote firmware upgrading. System Requirements • It is recommended that the computers used to access the B051-000 IP Remote Access Unit have at least a Pentium III, 1GHz processor, and that the screen resolution is set to 1024 x 768. -
Page 5: Cables
Note: If the included KVM cable kit is too short, Tripp Lite has P774-Series (PS/2) and P776-Series (USB) KVM Kits available in extended lengths. • A console connector kit is required to connect a local console to the B051-000 IP Remote Access Unit. A USB – PS/2 Console connector kit is included with the unit. -
Page 6: Components
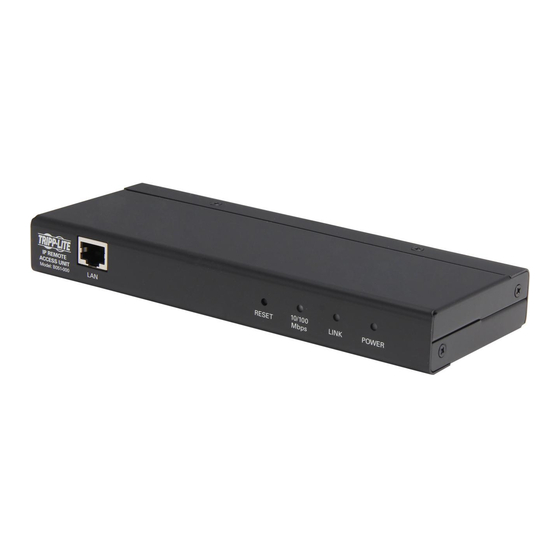
Introduction Components Front View No . Component Description LAN Port The Cat5e/6 cable that connects the B051-000 to a network plugs in here. Reset Switch Pressing and releasing this switch will perform a system reset. Pressing and holding the switch for more than 3 seconds restores the B051-000 to its factory default configuration settings. -
Page 7: Hardware Setup
Make sure that the total of all products plugged into the wall outlet does not exceed 15 amperes. • It is recommended that you plug your device into a Tripp Lite Surge Suppressor, UPS or Line Conditioner to help protect your system from sudden, transient increases and decreases in electrical power. -
Page 8: Setup Instructions
Hardware Setup Safety Instructions (continued) • Do not overload the AC supply branch circuit that provides power to the rack. The total rack load should not exceed 80 percent of the branch circuit rating. • Make sure that all equipment used on the rack – including power strips and other electrical connectors – is properly grounded. •... -
Page 9: Installation
KVM USB port that is strictly a Hub port. 4. Plug a Tripp Lite Cat5e (N001- or N002-Series) or Cat6 (N201- Series) cable into the B051-000 LAN port and then connect the other end to your network jack. -
Page 10: Setting Up An Ip Address
Setting up an IP Address IP Address Determination If you are an administrator logging in for the first time, you need to access the B051-000 in order to give it an IP address that users can connect to. There are three methods to choose from; IP Installer, Browser or AP Windows Client. In each case, the computer you are using to access the B051-000 must be on the same network segment as the unit. -
Page 11: Ap Windows Client
4. After you log out, reset your computer’s IP address to its original value. AP Windows Client For computers running Windows, the B051-000 IP address can be determined using the Windows AP program. Run the Windows Client AP Installer file from the CD that came with the B051-000 and follow the step-by-step instructions. -
Page 12: Browser Login
Setting up an IP Address Browser Login The B051-000 IP Remote Access Unit can be accessed from a browser or via the Windows and/or Java application (AP) program. The next several chapters describe browser-based operations. AP access is discussed in Chapter 9. -
Page 13: Screen Elements
Setting up an IP Address Installing the Certificate (continued) After you have successfully logged in, the B051-000 Main Screen appears: Screen Elements The Main Screen consists of utility icons arranged vertically down the left side of the page, administration icons arranged across the top of the page and a Remote Console Preview with icons to launch the Java Applet and Windows Client displayed in the center. - Page 14 Setting up an IP Address Screen Elements (continued) The active elements of the Remote Console Preview are described in the following table: Icon Function Refresh Clicking Refresh updates the preview of the remote display. Open Windows Clicking the Open Windows Client icon will use a Windows plug-in to access the remote display on your desktop. Client Note: You must be running a Windows operating system to use the Windows Client.
-
Page 15: Administration
Administration The administration utilities, represented by the icons located across the top of the B051-000 web page, are used to configure the B051- 000’s operating environment. This chapter discusses each of them in turn. Note: As you make your configuration changes in each dialog box, click Apply to save them. -
Page 16: Access Ports
IP Installer Settings An IP Installer utility (IPInstaller.exe) is provided on the CD that comes with the B051-000 IP Remote Access Unit. It offers a simple method to ascertain and configure IP related settings for the B051-000. When the IP Installer is invoked, it scans the network for B051-000 devices and displays the ones it finds. -
Page 17: Security
Administration Security The security administration icon is used to control access to the B051-000. Overview • IP and MAC Filters control access to the B051-000 based on the IP and/or MAC addresses of the computers attempting to access the system. If any filters have been configured, they appear in the IP Filter and/or MAC Filter list boxes. -
Page 18: Mac Filtering
Administration IP Filtering (continued) 4. To filter a single IP address, key in the same address as the start IP. To filter a range of addresses, key in the last IP address in the range you wish to filter. 5. After filling in the address, click OK. 6. -
Page 19: Radius Settings
Set the time in seconds that the B051-000 waits for an LDAP or LDAPS server reply before it times out. LDAP Administrator Consult the LDAP / LDAPS administrator to ascertain the appropriate entry for this field. For example, the entry might look like this: cn=LDAPAdmin,ou=b051-000,dc=tripp lite,dc=com LDAP Administrator Key in the LDAP administrator’s password. -
Page 20: Ldap Configuration
Administration LDAP Configuration Active Directory To allow authentication and authorization for the B051-000 via LDAP or LDAPS, the Active Directory’s LDAP Schema must be extended so that an extended attribute name for the B051-000 – permission – is added as an optional attribute to the person class. Authentication refers to determining the authenticity of the person logging in. - Page 21 Administration LDAP Configuration (continued) c) In the right panel, right-click person: Select Properties; the person Properties page comes up with the General tab displayed. Click the Attributes tab. e) Select the Attributes tab and click the Add button: In the list that comes up, select permission, then click OK to complete Step 2 of the procedure.
- Page 22 Administration LDAP Configuration (continued) f) Click Edit to bring up the String Attribute Editor: g) Replace the value shown with the desired B051-000 permission attribute value. (See below for details.) The Permission Attribute Value is made up of two parts; the IP address of the B051-000 a user will access and a string that indicates the access rights the user has on the B051-000 at that IP address.
-
Page 23: Openldap Server
Administration OpenLDAP Server OpenLDAP is an Open source LDAP server designed for UNIX platforms. A Windows version can be downloaded from: http://download.bergmans.us/openldap/openldap-2.2.29/openldap-2.2.29-db-4.3.29-openssl-0.9.8awin32_Setup.exe. OpenLDAP Server Installation After downloading the program, launch the installer, select your language, accept the license and choose the target installation directory. -
Page 24: Customizing The Openldap Schema
Administration Customizing the OpenLDAP Schema The schema that slapd uses may be extended to support additional syntaxes, matching rules, attribute types, and object classes. In the case of the B051-000, the B051-000 User class and the permission attribute are extended to define a new schema. The extended schema file used to authenticate and authorize users logging in to the B051- 000 is shown in the figure, below: LDAP DIT Design and LDIF File... -
Page 25: Using The New Schema
Administration Using the New Schema To use the new schema, do the following: 1. Save the new schema file (e.g., B051-000.schema) in the / OpenLDAP/ schema/ directory. 2. Add the new schema to the slapd.conf file, as shown in the figure, below: Log Server Settings Important transactions that occur on the B051-000, such as logins and internal status messages, are kept in an automatically generated log file. -
Page 26: Customization
Administration User Management (continued) • The Reset button clears all the user profile information in the right panel of the screen. • When you have made all your changes, click Apply. In order for your changes to be saved, the Apply button must be clicked. When editing a user profile, both the Update button and the Apply button must be clicked. -
Page 27: Maintenance
Administration Customization (continued) An explanation of the Customization parameters is given in the table below: Parameter Explanation Timeout If the B051-000 doesn’t receive any input from a computer that is accessing it with the Windows Client or Java Applet for the amount of time specified here, it ends the connection. - Page 28 Administration Maintenance (continued) To perform a backup, do the following: 1. In the Password field, key in a password for the file. Note: Make a note of the password, as you will need it to be able to restore the file.
-
Page 29: The Windows Client
The Windows Client Starting Up To start the Windows Client, log in to the B051-000 and click the Open Windows Client link on the Remote Console Preview panel. Note: The Windows Client will not be available when using Mozilla Firefox. Navigation •... -
Page 30: Sun/Linux
The Windows Client Windows Windows XP / Windows Server 2003: 1. Open the Mouse Properties dialog box (Control Panel → Mouse). 2. Click the Pointer Options tab. 3. Set the mouse speed to the middle position (6 units in from the left). -
Page 31: The Windows Client Control Panel
The Windows Client The Windows Client Control Panel The Windows Client Control Panel located in the top-center of the screen provides utilities to help you control remote KVM operations. The icons in the control panel are described in the table below: Icon Description Click to bring up the Hotkey Setup dialog box. -
Page 32: Video Settings
The Windows Client Hotkey Setup (continued) Action Description Toggle screen mode Toggles the screen display between full screen and windowed modes. Adjust Video Brings up the video setting dialog box. Toggle OSD Toggles the control panel Off and On. Toggle pointer display Toggles the local mouse pointer Off and On, so you can choose to show local and remote mouse pointers at the same time, or only the remote mouse pointer. -
Page 33: Virtual Media
The Windows Client Virtual Media The B051-000’s Virtual Media feature allows a USB 2.0 device (Floppy drive, CDROM, Flash Drive, etc.), connected to a user’s computer/server, to be accessible on a remote computer/server or KVM with a USB Hub port. To implement this redirection feature, do the following: Note: For the Virtual Media feature to work, the included Virtual Media USB cable must be connected between the B051-000 and the... -
Page 34: The Button Bar
The Windows Client The Button Bar The buttons on the Button Bar are toggles. Their actions are described in the table below: Button Function Enable/Disable Chat - When disabled, the message boards. Messages directed to the disabled user are not displayed on the message board. The button is shadowed when chat is disabled. -
Page 35: The Java Applet
The Java Applet The Java Applet makes the B051-000 accessible to all platforms that have Java 2 installed. Java 2 is available for free download from Sun’s Java web site (http://java.sun.com). To access the B051-000 with the Java Applet: Log in to the B051-000 and click the Open Java Applet link in the Remote Console Preview panel. -
Page 36: Sun/Linux
The Java Applet Windows (continued) Windows ME: • Set the mouse speed to the middle position and disable mouse acceleration. (Click the Advanced button to get the dialog box for this.) Windows NT / Windows 98 / Windows 95: • Set the mouse speed to the slowest position. Sun / Linux Open a terminal session and issue the following command: Sun: xset m 1... -
Page 37: The Java Applet Control Panel
The Java Applet The Java Applet Control Panel The Java Applet control panel, located at the bottom right of the screen, provides utilities to help you control remote KVM operations. The icons in the control panel are described in the table below: Icon Description Click to bring up the Hotkey setup dialog box. -
Page 38: Video Settings
The Java Applet Hotkey Setup (continued) Action Description Toggle Screen Toggles the screen display between full screen and windowed modes. Mode Adjust Video Brings up the video setting dialog box. Toggle OSD Toggles the control panel Off and On. Toggle Pointer Toggles the local mouse pointer Off and On, so you can choose to show local and remote mouse pointers Display at the same time, or only the remote mouse pointer. -
Page 39: Grayscale
The Java Applet Video Settings (continued) The meanings of the adjustment options are given in the table below: Option Description Screen Position Adjust the horizontal and vertical position of the remote computer window by clicking the Arrow buttons. Auto-Sync Click Auto-Sync to have the function detect the vertical and horizontal offset values of the remote screen and automatically synchronize it with the local screen. -
Page 40: Ctrl+Alt+Del
The Java Applet Message Board (continued) Compose Panel Type your message into this panel. Click Send, or press [Enter] to post the message to the board. Note: You must select the user from the user list that you want to send the message to. To send a message to all users, simply click All Users in the user list. -
Page 41: The Log File
The Log File The Log File Screen The B051-000 logs all the events that take place on it and writes them to a log file, which is a searchable database. To view the contents of the log file, click the Log icon at the lower left of the page. A screen similar to the one below appears: A maximum of 512 events are kept in the log file. -
Page 42: The Log Server
The Log Server The Windows-based Log Server is an administrative utility that records all the events that take place on selected B051-000 units and writes them to a searchable database. This chapter describes how to install and configure the Log Server. Installation 1. -
Page 43: Events
The Log Server Configure (continued) When you open the Add function the following dialog box will appear: Descriptions of the fields in this dialog box are shown in the table below: Field Description Address This can either be the IP address of the B051-000 or its DNS name (if the network administrator has assigned it a DNS name). This value must be entered into the ANMS settings screen for the B051-000 to communicate with the Log Server. -
Page 44: Options
The Log Server Events (continued) A description of the items from the Search screen is given in the table below: Item Description Search Options New search: When selected, the search is performed on all the events in the database for the selected B051-000. Search last results: This is a secondary search performed on the events that resulted from the last search. -
Page 45: The Log Server Main Screen
The Log Server The Log Server Main Screen The Log Server Main Screen is divided into two main panels; an upper (List) panel that displays all of the B051-000 units that have been added to the Log Server and a lower (Event) panel that displays the log events for the currently selected B051-000. -
Page 46: Ap Operation
AP Operation In addition to the browser based client utilities, the B051-000 also provides stand-alone Windows and Java applications that can be used without a browser. The applications can be found on the B051-000 CD. The Windows Client program is called B051-000winclient.exe; the Java Client program is called iClientJ.jar. -
Page 47: Logging In
AP Operation Logging In Once the B051-000 connects to the unit you specified, a login window appears: Provide a valid username and password and click OK to continue. Note: The default username is administrator; the default password is password. For security purposes, it is strongly recommended that you change these upon accessing the B051-000 for the first time. -
Page 48: Ip Installer Settings
IP Installer Settings An IP Installer utility (IPInstaller.exe) is provided on the CD that comes with the B051-000 IP Remote Access Unit. It offers a simple method to ascertain and configure IP related settings for the B051-000. When the IP Installer is invoked, it scans the network for B051-000 devices and displays the ones it finds. -
Page 49: Ip Address
AP Operation IP Address The B051-000 can either have its IP address assigned dynamically when starting up (DHCP), or it can be given a fixed IP address. • To have an IP address assigned automatically by a DHCP server, select the Obtain an IP address automatically button. Note: If the B051-000 is on a network that uses DHCP to assign network addresses, and you need to ascertain its IP address, contact your system administrator. -
Page 50: Mac Filtering
AP Operation Filtering (continued) IP Filtering To add an IP Filter: 1. Check the IP Filter Enable check box 2. Click Add. A dialog box similar to the one below appears: 3. Type the IP address (or the first IP address in a range of IP addresses) you wish to filter in the dialog box and click OK. -
Page 51: Anms
AP Operation ANMS The Advanced Network Management Settings dialog box allows you to set up login authorization management from an external source. The settings on this page are described below: RADIUS Settings To allow authorization for the B051-000 through a RADIUS server, do the following: 1. -
Page 52: Ldap Authentication Settings
AP Operation LDAP Authentication Settings To allow authentication and authorization for the B051-000 via LDAPS, do the following: 1. Check Enable in the LDAP Authentication Settings section of the ANMS screen. 2. Select either the LDAP or LDAPS radio button. 3. - Page 53 AP Operation LDAP Configuration (continued) Step 2 - Extend the Object Class With the New Attribute: a) Open Control Panel → Administrative Tools → Active Directory Schema. b) In the left panel of the screen that comes up, select Classes. c) In the right panel, right-click person: d) Select Properties, and fill in the General page of the dialog box according to the example below:...
- Page 54 AP Operation LDAP Configuration (continued) d) Right-click on the user’s name and select properties . e) On the Attribute Editor page of the dialog box that appears, select permission from the list. Character Meaning Grants the user administrator privileges, allowing the user to configure the system. Allows the user to access the system via the Windows Client program.
-
Page 55: Openldap Server
AP Operation LDAP Configuration (continued) h) Click OK. When you return to the Attribute Editor page, the permission entry now reflects the new permissions: OpenLDAP Server OpenLDAP is an open source LDAP server designed for UNIX platforms. A Windows version can be downloaded from: http://download.bergmans.us/openldap/openldap-2.2.29/openldap-2.2.29-db-4.3.29-openssl-.9.8awin32_ Setup.exe. -
Page 56: Starting The Openldap Server
AP Operation OpenLDAP Server Configuration An example configuration file is provided in the figure: Starting the OpenLDAP Server To start the OpenLDAP Server, run slapd (the OpenLDAP Server executable file) from the command line. slapd supports a number of command line options, the most important option is the d switch that triggers debug information. -
Page 57: Dit Creation
AP Operation DIT Creation The LDAP Data Interchange Format (LDIF) is used to represent LDAP entries in a simple text format (please refer to RFC 2849). The figure below illustrates an LDIF file that creates the DIT for the B051- 000 directory tree (shown in the figure, above). -
Page 58: User Management
AP Operation User Management This page is used to set up and manage user profiles. It defines the access rights of each user. Up to 64 user profiles can be established An explanation of the user profile items is given in the table below: Item Description Username... -
Page 59: Customization
AP Operation Customization This page allows the Administrator to upgrade the firmware and to set Timeout, Login failure, and Working mode parameters. An explanation of all Customization parameters except Firmware Upgrade is given in the table below. Firmware Upgrade is discussed in the section following this table. -
Page 60: Upgrading The Firmware
AP Operation Upgrading the Firmware New versions of the firmware files can be downloaded from our website as they become available. After downloading the new firmware file, do the following: 1. On the Customization page of the Admin Utility, click the Browse button. 2. -
Page 61: Appendix
Appendix Specifications Function Specification Console Connector HD15 Male Server/KVM Port HD18 Female Modem Connector DB9 Male LAN Port RJ45 Female Power Jack DC Jack for Power Supply Virtual Media Port USB Mini-B Female Reset Switch Semi-Recessed Button on front-panel Power LED Orange Link LED Green... -
Page 62: Troubleshooting
Appendix Troubleshooting General Operation Problem Erratic Operation. The Windows Client link doesn’t appear in the Remote Console Display when I log in with Firefox. The Java Applet Problem Java Applet won’t connect to the B051-000. National language characters don’t appear. There is no Virtual Media icon on my Control Panel. -
Page 63: Mouse Synchronization Tips
Appendix Troubleshooting (continued) The Log Server Problem The Log Server program does not run. Mouse Synchronization Tips Before trying any mouse synchronization procedures, it is always a good idea to ensure that you go to your Mouse Properties Settings and set them according to the following: Windows Note: In order for the local and remote mice to synchronize, you must use the generic mouse driver supplied with the MS operating system. -
Page 64: Sun/Linux
Appendix Sun / Linux Open a terminal session and issue the following command: Sun: xset m 1 Linux: xset m 0 Mouse Sync Mode In the Customization Settings screen there are two mouse sync modes; Automatic and Manual. • Automatic is selected as the default, and will automatically sync the remote and local mouse pointers; however, this feature only supports USB mice on Windows and Mac (G4 or higher) systems. -
Page 65: Warranty & Warranty Registration
Seller will repair or replace the product, in its sole discretion. Service under this Warranty can only be obtained by your delivering or shipping the product (with all shipping or delivery charges prepaid) to: Tripp Lite; 1111 W. 35th Street; Chicago IL 60609; USA. Seller will pay return shipping charges.