Tripp Lite B051-000 Owner's Manual
Ip remote access unit
Hide thumbs
Also See for B051-000:
- Owner's manual (60 pages) ,
- Quick start manual (17 pages) ,
- Owner's manual (65 pages)
Table of Contents
Advertisement
Quick Links
FCC Information
This is an FCC Class A product. In a domestic environment this product may cause radio interference in which case the user may be required to
take adequate measures.
This equipment has been tested and found to comply within the limits for a Class A digital device, pursuant to Part 15 of the FCC Rules. These
limits are designed to provide reasonable protection against harmful interference when the equipment is operated in a commercial environment.
This equipment generates, uses and can radiate radio frequency energy and, if not installed and used in accordance with the instruction manual,
may cause harmful interference to radio communications. Operation of this equipment in a residential area is likely to cause harmful interference
in which case the user will be required to correct the interference at their own expense.
RoHS
This product is RoHS compliant.
Package Contents
The B051-000 package consists of:
(1) B051-000 IP Remote Access Unit
(1) USB KVM Cable Kit
(1) PS/2 KVM Cable Kit
Note: Follow these instructions to ensure proper operation and prevent damage to this device and its connected equipment.
Owner's Manual
IP Remote Access Unit
(1) USB – PS/2 Console Connector Kit
(1) USB 2.0 Virtual Media Cable
(1) Power Adapter
Tripp Lite World Headquarters
1111 W. 35th Street, Chicago, IL 60609 USA
(773) 869-1234 • www.tripplite.com
Copyright © 2009 Tripp Lite. All rights reserved. All trademarks are the property of their respective owners.
Model:
B051-000
1
(1) Rackmounting Kit
(1) Software CD with Owner's Manual
(1) Quick Start Guide
Advertisement
Table of Contents

Related Manuals for Tripp Lite B051-000


Summary of Contents for Tripp Lite B051-000
- Page 1 (1) PS/2 KVM Cable Kit Note: Follow these instructions to ensure proper operation and prevent damage to this device and its connected equipment. Copyright © 2009 Tripp Lite. All rights reserved. All trademarks are the property of their respective owners. Model: B051-000 (1) USB –...
-
Page 2: Table Of Contents
Table of Contents Table of Contents . . . . . . . . . . . . . . . . . . . . . . . . . . . . . . . . . . . . . . . .2 Introduction . - Page 3 Table of Contents ANMS ..........51 RADIUS Settings.
-
Page 4: Introduction
• Remote firmware upgrading. System Requirements • It is recommended that the computers used to access the B051-000 IP Remote Access Unit have at least a Pentium III, 1GHz processor, and that the screen resolution is set to 1024 x 768. -
Page 5: Cables
Introduction Cables • A KVM cable kit is required to connect the B051-000 to a KVM switch or server. (1) PS/2 KVM cable kit and (1) USB KVM cable kit is included with the unit. Note: If the included KVM cable kit is too short, Tripp Lite has P774-Series (PS/2) and P776-Series (USB) KVM Kits available in extended lengths. -
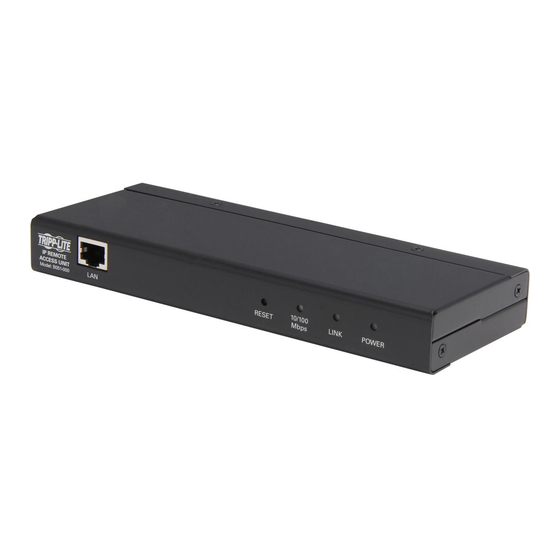
Page 6: Components
Pressing and releasing this switch will perform a system reset. Pressing and holding the switch for more than 3 seconds restores the B051-000 to its factory default configuration settings. Pressing and holding this switch while powering the unit on will restore the factory default firmware version. -
Page 7: Hardware Setup
Make sure that the total of all products plugged into the wall outlet does not exceed 15 amperes. • It is recommended that you plug your device into a Tripp Lite Surge Suppressor, UPS or Line Conditioner to help protect your system from sudden, transient increases and decreases in electrical power. -
Page 8: Setup Instructions
1. Remove the two original screws from the bottom of the unit (near the rear of the unit). 2. Using the screws and bracket provided with the rack mount kit, screw the mounting bracket into the B051-000 – as shown in the diagram below. 3. Screw the bracket into any convenient location on the rack. -
Page 9: Installation
For example, you can use a PS/2 keyboard with a USB mouse. 2. The B051-000 comes with both a PS/2 and a USB KVM cable kit, allowing you to connect to a KVM switch or server with either type of connector. -
Page 10: Setting Up An Ip Address
IP Address Determination If you are an administrator logging in for the first time, you need to access the B051-000 in order to give it an IP address that users can connect to. There are three methods to choose from; IP Installer, Browser or AP Windows Client. In each case, the computer you are using to access the B051-000 must be on the same network segment as the unit. -
Page 11: Ap Windows Client
AP Windows Client, you will need the serial number located on the CD that came with the B051-000. This is not the same as the serial number on the bottom of the unit. When you run the program it... -
Page 12: Browser Login
Setting up an IP Address Browser Login The B051-000 IP Remote Access Unit can be accessed from a browser or via the Windows and/or Java application (AP) program. The next several chapters describe browser-based operations. AP access is discussed in Chapter 9. -
Page 13: Screen Elements
Remote Console: Clicking on this icon when on any screen will take you back to the Remote Console Preview screen. Log: All of the events that take place on the B051-000 are recorded in a log file. If you have access, clicking on this icon will allow you to view the log file. - Page 14 Note: If a user does not have permission to access the Java Applet or Windows Client, the icon will not be available on their screen. B051-000 operation using the Windows Client is discussed in Chapter 5, and operation using the Java Applet is discussed in Chapter 6.
-
Page 15: Administration
Field Explanation To make it easier to manage installations that have more than one B051-000, each one can be given a name. To assign a Device Name name for the B051-000, type the desired name in this field (16 characters max). -
Page 16: Access Ports
If a firewall is being used, the Administrator can specify the port numbers that the firewall will allow (and set the firewall accordingly). Users must specify the port number as part of the IP address when they connect to the B051-000. If an invalid port number (or no port number) is specified, the B051-000 will not be found. -
Page 17: Security
Overview • IP and MAC Filters control access to the B051-000 based on the IP and/or MAC addresses of the computers attempting to access the system. If any filters have been configured, they appear in the IP Filter and/or MAC Filter list boxes. -
Page 18: Mac Filtering
Note: To block a computer from accessing the B051-000, you do not need to filter both its IP address and its MAC address. Any computer blocked by an IP Filter will be denied access to the B051-000, even if the computer is allowed to access the B051-000 under the MAC Filters that are set up. -
Page 19: Radius Settings
4. In the Retries field, set the number of allowed RADIUS retries. 5. In the Shared Secret field, key in the character string that you want to use for authentication between the B051-000 and the RADIUS Server. 6. On the RADIUS server, set the access rights for each user according to the information in the table below:... -
Page 20: Ldap Configuration
To allow authentication and authorization for the B051-000 via LDAP or LDAPS, the Active Directory’s LDAP Schema must be extended so that an extended attribute name for the B051-000 – permission – is added as an optional attribute to the person class. - Page 21 Administration LDAP Configuration (continued) c) In the right panel, right-click person: Select Properties; the person Properties page comes up with the General tab displayed. Click the Attributes tab. e) Select the Attributes tab and click the Add button: In the list that comes up, select permission, then click OK to complete Step 2 of the procedure.
- Page 22 (See below for details.) The Permission Attribute Value is made up of two parts; the IP address of the B051-000 a user will access and a string that indicates the access rights the user has on the B051-000 at that IP address. The following rules apply to the makeup of the permission attribute value entry: •...
-
Page 23: Openldap Server
Administration OpenLDAP Server OpenLDAP is an Open source LDAP server designed for UNIX platforms. A Windows version can be downloaded from: http://download.bergmans.us/openldap/openldap-2.2.29/openldap-2.2.29-db-4.3.29-openssl-0.9.8awin32_Setup.exe. OpenLDAP Server Installation After downloading the program, launch the installer, select your language, accept the license and choose the target installation directory. -
Page 24: Customizing The Openldap Schema
Directory Information Tree (DIT). The nodes in the tree are directory entries, and each entry contains information in attribute- value form. An example of the LDAP directory tree for the B051-000 is shown in the figure, below: DIT Creation The LDAP Data Interchange Format (LDIF) is used to represent LDAP entries in a simple text format (please refer to RFC 2849). -
Page 25: Using The New Schema
Important transactions that occur on the B051-000, such as logins and internal status messages, are kept in an automatically generated log file. In order for the B051-000 to communicate with the computer that the Log Server is installed on, the Log Server MAC Address and Port fields must be filled in. -
Page 26: Customization
Select your own list of permissions. • Clicking on Admin will give the user access to all of the B051-000’s features. The only permission box that will not be checked is the View Only permission. This is because Admin users will have full access to all computers/servers connected to the B051-000. -
Page 27: Maintenance
Enable Device List - If this item is checked, the device will show up in the list of local B051-000 units on the AP Windows Client Connection screen (see The Windows Client Connection Screen, page 11). If it is not checked, it will not show up. It is checked by default. - Page 28 3. Click Save. 4. When asked what you want to do with the file, select Save to disk, and save it in a convenient location. Note: The B051-000 saves all its backup files as B051-000BKUP.conf. If you want to save more than one backup file, simply rename the file to something convenient when you save it.
-
Page 29: The Windows Client
The Windows Client Starting Up To start the Windows Client, log in to the B051-000 and click the Open Windows Client link on the Remote Console Preview panel. Note: The Windows Client will not be available when using Mozilla Firefox. -
Page 30: Sun/Linux
The Windows Client Windows Windows XP / Windows Server 2003: 1. Open the Mouse Properties dialog box (Control Panel → Mouse). 2. Click the Pointer Options tab. 3. Set the mouse speed to the middle position (6 units in from the left). -
Page 31: The Windows Client Control Panel
The Windows Client The Windows Client Control Panel The Windows Client Control Panel located in the top-center of the screen provides utilities to help you control remote KVM operations. The icons in the control panel are described in the table below: Icon Description Click to bring up the Hotkey Setup dialog box. -
Page 32: Video Settings
The B051-000 can redraw the screen every 1 to 99 seconds to eliminate unwanted artifacts and provide a better picture. Select Enable Refresh and enter a number from 1 through 99. The B051-000 will redraw the screen at the interval you specify. This feature is disabled by default. -
Page 33: Virtual Media
To implement this redirection feature, do the following: Note: For the Virtual Media feature to work, the included Virtual Media USB cable must be connected between the B051-000 and the computer/server you wish to access the virtual media on. The USB cable can not be connected to a USB port on a KVM switch that is used for keyboard/mouse functionality. -
Page 34: The Button Bar
Clicking this button sends the Ctrl+Alt+Del signal to the remote system. On-Screen Keyboard The B051-000 supports an on-screen keyboard, available in English, Chinese (Taiwan), Japanese, German, French, Spanish, Korean and Italian. Click on the arrow to the right of the icon to display the list of available languages: After selecting your language, click the icon to bring up the keyboard. -
Page 35: The Java Applet
Java web site (http://java.sun.com). To access the B051-000 with the Java Applet: Log in to the B051-000 and click the Open Java Applet link in the Remote Console Preview panel. 2. After 30 seconds or so, the remote server’s display appears as a window on your desktop. -
Page 36: Sun/Linux
The Java Applet Windows (continued) Windows ME: • Set the mouse speed to the middle position and disable mouse acceleration. (Click the Advanced button to get the dialog box for this.) Windows NT / Windows 98 / Windows 95: • Set the mouse speed to the slowest position. Sun / Linux Open a terminal session and issue the following command: Sun: xset m 1... -
Page 37: The Java Applet Control Panel
The Java Applet The Java Applet Control Panel The Java Applet control panel, located at the bottom right of the screen, provides utilities to help you control remote KVM operations. The icons in the control panel are described in the table below: Icon Description Click to bring up the Hotkey setup dialog box. -
Page 38: Video Settings
[Ctrl + F12 + Del]. Exit remote view Ends the remote connection to the B051-000 and returns to local operation. Configuring the Hotkeys If you find the default Hotkey combinations inconvenient, you can configure your own by following these steps: 1. -
Page 39: Grayscale
The B051-000 can redraw the screen every 1 to 99 seconds to eliminate unwanted artifacts and provide a better picture. Select Enable Refresh and enter a number from 1 through 99. The B051-000 will redraw the screen at the interval you specify. -
Page 40: Ctrl+Alt+Del
Clicking this button sends the Ctrl+Alt+Del signal to the remote system. On-Screen Keyboard The B051-000 supports an on-screen keyboard, available in English, Chinese (Taiwan), Japanese, German, French, Spanish, Korean and Italian. Click on the arrow to the right of the icon to display the list of available languages: After selecting your language, click the icon to bring up the keyboard. -
Page 41: The Log File
The Log File The Log File Screen The B051-000 logs all the events that take place on it and writes them to a log file, which is a searchable database. To view the contents of the log file, click the Log icon at the lower left of the page. A screen similar to the one below appears: A maximum of 512 events are kept in the log file. -
Page 42: The Log Server
The Configure menu consists of three functions; Add, Edit and Delete. Select the Add function when you need to add a new B051-000 to the list of units that the Log Server records events for. Note: You must first add a B051-000 via the Add function before the Log Server can start recording its events. -
Page 43: Events
Delete To delete a B051-000, simply select it from the list and open the Delete function. A dialog box will appear which will display the B051-000’s information and ask you to click OK to delete it. If you want to remove it from the Log Server, click OK. -
Page 44: Options
Server List B051-000 units are listed according to their IP address. Select the unit that you want to perform the search on from this list. You can select more than one unit for the search. If no units are selected, the search is performed on all of them. -
Page 45: The Log Server Main Screen
Recording, and log events are recorded. If the Recording check box is not checked, the field displays Paused, and log events are not recorded. Note: Even if a B051-000 is not currently selected, if its Recording check box is checked, the Log Server will still record its log events. -
Page 46: Ap Operation
If this is the first time that you are running the utility, a dialog box appears requesting you to input your serial number. The serial number can be found on the B051-000’s CD case. Key in the serial number (5 characters per box) and then click OK to bring up the B051-000 Connection Screen. -
Page 47: Logging In
Allows users to change their passwords without Administrator intervention. Password Admin Utility The Administrator Utility provides administrators with a non-browser based method for configuring and controlling B051-000 operations. The Administrator Utility is discussed in the sections that follow. The Administrator Utility The Administrator Utility appears as a notebook with six tabs. -
Page 48: Ip Installer Settings
IP Installer Settings An IP Installer utility (IPInstaller.exe) is provided on the CD that comes with the B051-000 IP Remote Access Unit. It offers a simple method to ascertain and configure IP related settings for the B051-000. When the IP Installer is invoked, it scans the network for B051-000 devices and displays the ones it finds. -
Page 49: Ip Address
To enable IP and/or MAC Filtering, click the IP Filter Enable and/or MAC Filter Enable checkbox. There are a maximum of 100 filters allowed for each. • If the include button is checked, all the addresses within the filter range are allowed access to the B051-000; all other addresses are denied access. -
Page 50: Mac Filtering
Note: To block a computer from accessing the B051-000, you do not need to filter both its IP address and its MAC address. Any computer blocked by an IP Filter will be denied access to the B051-000, even if the computer is allowed to access the B051-000 under the MAC Filters that are set up. -
Page 51: Anms
4. In the Retries field, set the number of allowed RADIUS retries. 5. In the Shared Secret field, key in the character string that you want to use for authentication between the B051-000 and the RADIUS Server. 6. On the RADIUS server, set the access rights for each user according to the information in the table below:... -
Page 52: Ldap Authentication Settings
636. 5. In the Timeout field: Set the time in seconds that the B051-000 waits for an LDAP or LDAPS server reply before it times out. 6. In the LDAP Administrator DN field, set the ‘root’ point for the LDAP manager to bind to the server. - Page 53 AP Operation LDAP Configuration (continued) Step 2 - Extend the Object Class With the New Attribute: a) Open Control Panel → Administrative Tools → Active Directory Schema. b) In the left panel of the screen that comes up, select Classes. c) In the right panel, right-click person: d) Select Properties, and fill in the General page of the dialog box according to the example below:...
- Page 54 User6 v;10.0.0.166&;10.0.0.164&c,j 1. User has View Only rights on all B051-000 units administered by the LDAP server, except for the ones with IP addresses of 10.0.0.166 and 10.0.0.164. 2. User has no access rights on the B051-000 with an IP address of 10.0.0.166.
-
Page 55: Openldap Server
AP Operation LDAP Configuration (continued) h) Click OK. When you return to the Attribute Editor page, the permission entry now reflects the new permissions: OpenLDAP Server OpenLDAP is an open source LDAP server designed for UNIX platforms. A Windows version can be downloaded from: http://download.bergmans.us/openldap/openldap-2.2.29/openldap-2.2.29-db-4.3.29-openssl-.9.8awin32_ Setup.exe. -
Page 56: Starting The Openldap Server
Directory Information Tree (DIT). The nodes in the tree are directory entries, and each entry contains information in attribute- value form. An example of the LDAP directory tree for the B051-000 is shown in the figure, below: (continued) -
Page 57: Dit Creation
Using the New Schema To use the new schema, do the following: 1. Save the new schema file (e.g., B051-000.schema) in the / OpenLDAP/ schema/ directory. 2. Add the new schema to the slapd.conf file, as shown in the figure,... -
Page 58: User Management
Select your own list of permissions. • Clicking on Admin will give the user access to all of the B051-000’s features. The only permission box that will not be checked is the View Only permission. This is because Admin users will have full access to all computers/servers connected to the B051-000. -
Page 59: Customization
Reset on Exit box. To have the changes take effect, log out and then log back in again. A wait of approximately 30 to 60 seconds is necessary before logging in following the reset. Note: If the B051-000’s performance degrades, reset it by putting a check in the Reset on Exit box, and then log out / log in. -
Page 60: Upgrading The Firmware
The AP Java Client The Java Client is provided to make the B051-000 accessible to all platforms. Systems that have JRE 6 Update 3 or higher installed can connect. If you don’t already have Java, it is available for free download from Sun’s Java web site (http://java.sun.com). -
Page 61: Appendix
Note: If you are the only user on this computer, this dialog box won’t appear. 7. In the Phone Number to dial dialog box, key in the phone number of the modem connected to the B051-000 (be sure to include country and area codes, if necessary), then click Next. -
Page 62: Troubleshooting
The local and remote mouse pointers do not sync. Resolution • If the B051-000 is connected to a KVM switch, make sure to power on the switch before powering on the B051-000. • Press and hold the Reset button for longer than three seconds. -
Page 63: Mouse Synchronization Tips
Appendix Troubleshooting (continued) The Log Server Problem The Log Server program does not run. Mouse Synchronization Tips Before trying any mouse synchronization procedures, it is always a good idea to ensure that you go to your Mouse Properties Settings and set them according to the following: Windows Note: In order for the local and remote mice to synchronize, you must use the generic mouse driver supplied with the MS operating system. -
Page 64: Sun/Linux
Appendix Sun / Linux Open a terminal session and issue the following command: Sun: xset m 1 Linux: xset m 0 Mouse Sync Mode In the Customization Settings screen there are two mouse sync modes; Automatic and Manual. • Automatic is selected as the default, and will automatically sync the remote and local mouse pointers; however, this feature only supports USB mice on Windows and Mac (G4 or higher) systems. -
Page 65: Warranty Registration
Appendix WARRANTY REGISTRATION Visit www.tripplite.com/warranty today to register the warranty for your new Tripp Lite product. You’ll be automatically entered into a drawing for a chance to win a FREE Tripp Lite product!* * No purchase necessary. Void where prohibited. Some restrictions apply. See website for details.