Tripp Lite B051-000 Quick Start Manual
Ip remote access unit
Hide thumbs
Also See for B051-000:
- Owner's manual (65 pages) ,
- Quick start manual (9 pages) ,
- Owner's manual (60 pages)
Table of Contents
Advertisement
Quick Links
Download this manual
See also:
Owner's Manual
Quick Start Guide
IP Remote Access Unit
Model:
B051-000
Package Contents
• B051-000
• 4 ft. USB KVM Cable Kit
• 4 ft. PS/2 KVM Cable Kit
• 10 in. USB/PS2 Combo Console Cable Kit
• 6 ft. USB 2.0 Virtual Media Cable (5-Pin Mini-B Male to A Male)
• 5 ft. External Power Supply (Input: 100-240V, 50/60Hz, 0.5A, Output: 5.3V, 2.4A)
• Rack Mount Bracket
• DIN Rail Brackets
• CD with Software and Owner's Manual
• Quick Start Guide
1111 W. 35th Street, Chicago, IL 60609 USA • www.tripplite.com/support
Copyright © 2012 Tripp Lite. All rights reserved. All trademarks are the property of their respective owners.
1
12-003 932851-EN.indd 1
8/7/2012 8:59:38 AM
Advertisement
Table of Contents

Related Manuals for Tripp Lite B051-000


Summary of Contents for Tripp Lite B051-000
- Page 1 • CD with Software and Owner’s Manual • Quick Start Guide 1111 W. 35th Street, Chicago, IL 60609 USA • www.tripplite.com/support Copyright © 2012 Tripp Lite. All rights reserved. All trademarks are the property of their respective owners. 12-003 932851-EN.indd 1 8/7/2012 8:59:38 AM...
-
Page 2: Remote Console Computer Requirements
• For the non-browser Windows Client, at least 25 MB of memory must be available after installation Connected Computer/Server Requirements Computers/servers to be connected to the B051-000 must have the following: • VGA, SVGA or Multisync port • For USB Connections: Type A USB port and USB host controller •... -
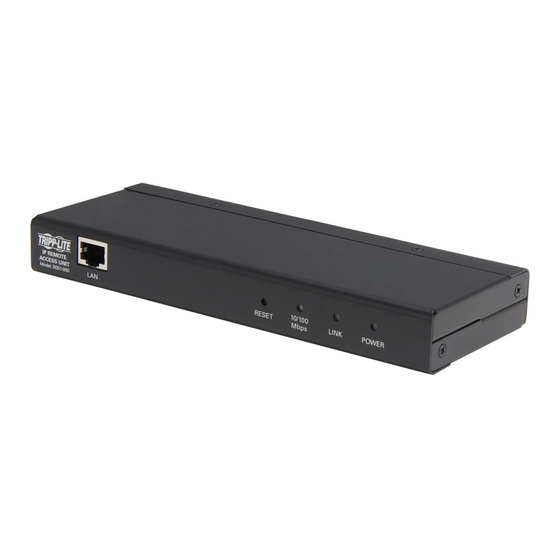
Page 3: Front View
The included power adapter connects to the unit here. Virtual Media Port The included USB 2.0 device cable connects here when using the Virtual Media feature. The KVM cable kit that connects the B051-000 to a KVM switch PC/KVM Port or server connects to the unit here. -
Page 4: Rack Mounting
B051-000 – as shown in the diagram below. DIN Rail Mounting To mount the B051-000 on a DIN rail: 1. Screw the mounting bracket to the back of the B051-000 as described in Steps 1 and 2 of the Rack Mounting Section. -
Page 5: Installation
Connect the included external power supply to the power jack on the unit, and then plug it into a Tripp Lite Surge Suppressor, UPS or PDU. Power on your installation, starting with the B051-000, and then the computer or KVM switch, and then any other connected devices. -
Page 6: Administrator Setup
Network Setup - IP Address Determination If you are an administrator logging in for the first time, you must access the B051-000 in order to give it an IP address to which users can connect. You can do this via Web Browser, the IP Installer utility, or the non-browser Windows or Java Client applications. - Page 7 Administrator Setup Network Setup - IP Address Determination continued 4. Click on the Network icon at the top of the page to bring up the Network Settings page. 5. By default, the Obtain IP address automatically [DHCP] checkbox is checked. To set a fixed IP address, check the Set IP address manually [Fixed IP] check box in the IPv4 or IPv6 settings section, depending on your network.
- Page 8 The CD that comes with the product includes Windows and Java Client applications that allow you to remotely access the B051-000 and its Admin Utility without using a web browser. The applications function the same, but the Windows Client is designed for Windows computers, whereas the Java client is designed for either Windows or non-Windows computers.
- Page 9 Network Setup - IP Address Determination continued 4. If you are on the same network as the B051-000, the client will locate it and display it in the Device List. In this case, highlight the unit in the device list and click the Login button.
- Page 10 Administrator Setup Network Setup - IP Address Determination continued 6. Click the Admin Utility button to open the non-browser client Admin Utility. The non-browser Admin Utility contains most of the features that are contained in the browser version, but it is presented in a different format. (See the Admin Utility section in the Owner’s Manual for details on the difference between the browser and non-browser versions.) 7.
- Page 11 IP Installer utility. 2. Select the B051-000 from the Device List. Note: If the list is empty, or your device doesn’t appear, click the Enumerate button to refresh the Device List. If there is more than one device in the list, use the MAC address on the bottom of your unit to determine the desired device.
-
Page 12: Local Console Login
Explorer as an administrator. (See Virtual Media section in the Owner’s Manual for details) 1. Open your browser and enter the IP address of the B051-000 as given to you by your system administrator. Note: For security purposes, a login string may have been set by the administrator. -
Page 13: Non-Browser Login
The CD that comes with the product includes Windows and Java Client applications that allow you to remotely access the B051-000 and its Admin Utility without using a web browser. The applications function the same, but the Windows Client is designed for Windows computers, whereas the Java client is designed for either Windows or non- Windows computers. - Page 14 Non-Browser Login continued 4. If you are on the same network as the B051-000, the client will locate it and display it in the Device List. In this case, highlight the unit in the device list and click the Login button. If you are not on the same network as the unit, it will not be displayed in the list.
-
Page 15: Warranty
Seller will repair or replace the product, in its sole discretion. Service under this Warranty can only be obtained by your delivering or shipping the product (with all shipping or delivery charges prepaid) to: Tripp Lite; 1111 W. - Page 16 1111 W. 35th Street, Chicago, IL 60609 USA • www.tripplite.com/support 12-003 • 932851 Rev C 12-003 932851-EN.indd 16 8/7/2012 8:59:48 AM...