NETGEAR RN12P1210-100NAS - ReadyNAS 3200 RN12P1210 NAS Server Hardware Manual
Readynas rack-mount storage systems
Hide thumbs
Also See for RN12P1210-100NAS - ReadyNAS 3200 RN12P1210 NAS Server:
- Installation manual (2 pages)

Related Manuals for NETGEAR RN12P1210-100NAS - ReadyNAS 3200 RN12P1210 NAS Server


Summary of Contents for NETGEAR RN12P1210-100NAS - ReadyNAS 3200 RN12P1210 NAS Server
- Page 1 ReadyNAS Rack-Mount Storage Systems Hardware Manual Models: 1500 2100 3100 3200 4200 v1 4200 v2 350 East Plumeria Drive San Jose, CA 95134 June 2011 202-10848-02...
-
Page 2: Technical Support
To improve internal design, operational function, and/or reliability, NETGEAR reserves the right to make changes to the products described in this document without notice. NETGEAR does not assume any liability that may occur due to the use or application of the product(s) or circuit layout(s) described herein. -
Page 3: Table Of Contents
Table of Contents Chapter 1 Getting Started System Shutdown..........6 Factory Settings . - Page 4 NETGEAR ReadyNAS Rack-Mount Storage Systems Chapter 5 Maintenance Disks............39 Previously Formatted Disks .
-
Page 5: Chapter 1 Getting Started
Getting Started Congratulations on your purchase of a NETGEAR® ReadyNAS® rack-mount storage unit. ReadyNAS Rack-Mount Storage Systems Hardware Manual describes the physical features of ReadyNAS rack-mount storage products. This chapter includes the following sections: • System Shutdown • Factory Settings... -
Page 6: System Shutdown
NETGEAR ReadyNAS Rack-Mount Storage Systems System Shutdown You can shut down your unit in these ways: • Using the Power button: • Preferred shutdown. Press the Power button two times to initiate a graceful shutdown. • Forced shutdown. If the unit is hung, press the Power button and hold for 5 seconds to force shutdown. -
Page 7: Chapter 2 Readynas 1500 And 2100
ReadyNAS 1500 and 2100 This chapter describes the physical features of the ReadyNAS1500 and 2100. It includes the following sections: • Front Panel • Rear Panel • Status Information • Boot Menu • Rack-Mount Setup • Technical Specifications... -
Page 8: Front Panel
NETGEAR ReadyNAS Rack-Mount Storage Systems Front Panel The following figure shows the front panel of the ReadyNAS 1500 and 2100. Figure 1. Front panel 1. Drive bays 2. Control panel 3. Mounting bracket The following figure shows the control panel in more detail. - Page 9 NETGEAR ReadyNAS Rack-Mount Storage Systems Each drive bay features a latch that releases a pop-out tray handle, as shown in the following figure. Figure 3. Disk tray handle and release latch 1. Disk tray lock 2. Disk release latch 3. Disk tray handle...
-
Page 10: Rear Panel
NETGEAR ReadyNAS Rack-Mount Storage Systems Rear Panel The following figure shows the rear panel of the of the ReadyNAS 1500 and 2100. Figure 4. Rear panel 1. X-Change system module thumb screw 2. System exhaust fans 3. Power switch 4. Power cable socket 5. -
Page 11: Status Information
NETGEAR ReadyNAS Rack-Mount Storage Systems Status Information You can obtain information about the status of your ReadyNAS 1500 or 2100 by reviewing the indicators listed in the following table. Table 2. Status information Indicator Description USB status LED The USB status LED has these states: •... -
Page 12: Boot Menu
• Tech support. Boots into a low-level diagnostic mode. Use the tech support boot mode only when instructed to do so by a NETGEAR technical support representative. • Skip volume check. After a system crash, the system tries to scan and fix the volume via a file system check. - Page 13 NETGEAR ReadyNAS Rack-Mount Storage Systems To access the boot menu: Power off your unit. Using a straightened paper clip, press and hold the Reset button. Press the Power button to power up the unit. Continue to press the Reset button until all the LEDS except the disk activity LED illuminate.
-
Page 14: Rack-Mount Setup
NETGEAR ReadyNAS Rack-Mount Storage Systems Rack-Mount Setup Use the rack-mount hardware included with your ReadyNAS1500 or 2100 to install it in a rack. Read the Rack-Mount Precautions section in Appendix A. Considerations Keep the following considerations in mind as you install your unit: •... -
Page 15: Technical Specifications
NETGEAR ReadyNAS Rack-Mount Storage Systems Technical Specifications The following table lists the technical specifications for the ReadyNAS 1500 and 2100. Note that the 1500 does not support iSCSI. Table 3. Technical specifications Feature Specification Electrical Power supplies (PSU) 220W server-rated AC power supply... -
Page 16: Chapter 3 Readynas 3100
ReadyNAS 3100 This chapter describes the physical features of the ReadyNAS 3100. It includes the following sections: • Front Panel • Rear Panel • Status Information • Boot Menu • Rack-Mount Setup • Technical Specifications... -
Page 17: Front Panel
NETGEAR ReadyNAS Rack-Mount Storage Systems Front Panel This following figure shows the front panel of the ReadyNAS 3100. Figure 5. Front panel 1. Drive bays with disk status LEDs 2. USB port 3. Control panel The following figure shows the control panel in more detail. -
Page 18: Rear Panel
NETGEAR ReadyNAS Rack-Mount Storage Systems Each drive bay features a latch that releases a pop-out tray handle, as shown in the following figure. Figure 7. Disk tray handle and release latch 1. Disk tray handle 2. Disk tray release latch... -
Page 19: Status Information
NETGEAR ReadyNAS Rack-Mount Storage Systems Status Information You can obtain information about the status of your unit by reviewing the indicators listed in the following table. Table 4. Status information Indicator Description Power LED The power LED has these states: •... -
Page 20: Boot Menu
• Tech support. Boots into a low-level diagnostic mode. Use the tech support boot mode only when instructed to do so by a NETGEAR technical support representative. • Skip volume check. After a system crash, the system tries to scan and fix the volume via a file system check. - Page 21 NETGEAR ReadyNAS Rack-Mount Storage Systems To access the boot menu: Power off your unit. Press and hold the Reset button. Press the Power button to power up the unit. Ignore the first blink of the fan LED when power is turned on. Watch for the fan LED to turn on and stay on.
-
Page 22: Rack-Mount Setup
NETGEAR ReadyNAS Rack-Mount Storage Systems Rack-Mount Setup Use the rack-mount hardware included with your ReadyNAS 3100 to install it in a rack. Read Rack-Mount Precautions section in Appendix A. Considerations Keep the following considerations in mind as you install your unit: •... - Page 23 NETGEAR ReadyNAS Rack-Mount Storage Systems To install the system into a rack: Read these instructions in their entirety before you begin. Locate the ReadyNAS shipping carton and remove the rack-mounting kit. Extend the rail assembly by pulling it outward.
- Page 24 NETGEAR ReadyNAS Rack-Mount Storage Systems Attach the chassis to the rack, as follows: a. Extend the ball shuttle to the very front. b. Align the rails and push the chassis in. c. Secure the handles to the outer rails with screws.
-
Page 25: Technical Specifications
NETGEAR ReadyNAS Rack-Mount Storage Systems Technical Specifications The following table lists the technical specifications for the ReadyNAS 3100. Table 5. Technical specifications Feature Specification Electrical Power supplies (PSU) Two 450W server rated AC power supplies Input 100-240V AC, 50/60Hz Power consumption... -
Page 26: Chapter 4 Readynas 3200, 4200 V1, 4200 V2
ReadyNAS 3200, 4200 v1, 4200 v2 This chapter describes physical features of the ReadyNAS 3200, 4200 v1, and 4200 v2. It includes the following topics: • Front Panel • 3200 Rear Panel • 4200 Rear Panel • Status Information • Boot Menu •... -
Page 27: Front Panel
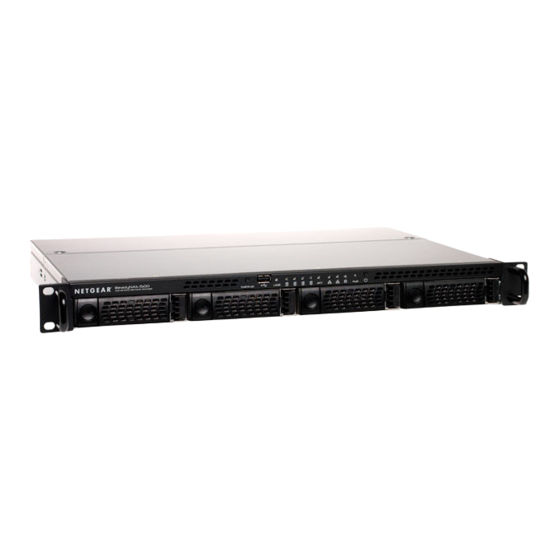
NETGEAR ReadyNAS Rack-Mount Storage Systems Front Panel This following figure shows the front panel of the 3200 and 4200. Figure 9. Front panel 1. Drive bays with disk status LEDs 2. Control panel The following figure shows the control panel in more detail. - Page 28 NETGEAR ReadyNAS Rack-Mount Storage Systems Each drive bay features a latch that releases the pop-out tray handle, as shown in the following figure. Figure 11. Disk tray handle and release latch 1. Disk tray handle 2. Disk tray release latch...
-
Page 29: 3200 Rear Panel
NETGEAR ReadyNAS Rack-Mount Storage Systems 3200 Rear Panel This following figure shows the rear panel of the 3200. Figure 12. 3200 rear panel 1. Power supplies 2. PS2 keyboard and mouse ports 3. USB ports 4. RS232 console port 5. VGA monitor port 6. -
Page 30: 4200 Rear Panel
NETGEAR ReadyNAS Rack-Mount Storage Systems 4200 Rear Panel This following figure shows the rear panel of the 4200. Figure 13. 4200 rear panel 1. Power supplies 2. PS2 keyboard and mouse ports 3. USB ports 4. RS232 console port 5. VGA monitor port 6. -
Page 31: Status Information
NETGEAR ReadyNAS Rack-Mount Storage Systems Status Information You can obtain information about the status of your unit by reviewing the indicators listed in the following table. Table 6. Status indicators Indicator Description Power LED The LED has these states: • On. The unit is powered on. -
Page 32: Boot Menu
• Tech support. Boots into a low-level diagnostic mode. Use the tech support boot mode only when instructed to do so by a NETGEAR technical support representative. • Skip volume check. After a system crash, the system tries to scan and fix the volume via a file system check. - Page 33 NETGEAR ReadyNAS Rack-Mount Storage Systems To access the boot menu: Power off your unit. With a straightened paper clip, press and hold the Reset button. Press the Power button to power on the unit. Continue to press the Reset button until the power diagnostic LED and the fan LED are both lit.
-
Page 34: Rack-Mount Setup
NETGEAR ReadyNAS Rack-Mount Storage Systems Rack-Mount Setup Use the rack-mount hardware included with your ReadyNAS 3200 or 4200 to install it in a rack. Read the Rack-Mount Precautions section in Appendix A. DANGER: A unit with installed drives can weigh more than 80 pounds. To avoid injury or damage to the equipment, perform the rack mount installation with appropriate assistance. -
Page 35: Installation
NETGEAR ReadyNAS Rack-Mount Storage Systems Installation Read these instructions in their entirety before you begin. Locate the shipping carton, remove the rack-mounting kit, and prepare to work with it. The rack-mounting kit contains two rail assemblies. Each assembly consists of two sections: •... - Page 36 NETGEAR ReadyNAS Rack-Mount Storage Systems Use the provided mounting screws to mount the inner rails to the system chassis, as follows: a. Fasten the backs of the outer rails to the rack with screws. b. Press the release to extend the rails.
-
Page 37: Technical Specifications
NETGEAR ReadyNAS Rack-Mount Storage Systems Technical Specifications The following table lists the technical specifications for the ReadyNAS 3200 and 4200. Table 7. Technical specifications Feature Specification Electrical Power supplies (PSU) Two 700W server rated AC power supplies Input 100-240V AC, 50/60Hz... -
Page 38: Chapter 5 Maintenance
Maintenance This chapter describes how to perform maintenance activities like adding disks and replacing disks and system components. It includes the following topics: • Disks • System Components... -
Page 39: Disks
Disks Use only supported disks in your ReadyNAS storage system. If you use non-supported disks, NETGEAR technical support will not provide assistance. For a list of supported disks, see the NETGEAR Hardware Compatibility List at http://www.readynas.com/hard_disk_hcl. Previously Formatted Disks You must take care when using previously formatted disks in your ReadyNAS unit, as described in the following table. -
Page 40: Failed Disk Notification
Each disk bay includes a failed disk LED that turns amber when its disk fails. NETGEAR recommends replacing a failed disk with the same disk model. Contact the disk vendor and arrange to have the disk replaced if the disk is still under warranty. A disk RMA from the vendor requires that you provide the serial number of the disk. - Page 41 NETGEAR ReadyNAS Rack-Mount Storage Systems Pull out the disk dray and place a disk in the tray. Assemble the disk tray. Make sure that the hard disk connectors face the interior of the disk bay when you reassemble the disk.
- Page 42 NETGEAR ReadyNAS Rack-Mount Storage Systems Pull out the disk tray and place a disk in the tray. Assemble the disk tray. Make sure that the hard disk connectors face the interior of the disk bay when you reassemble the disk.
-
Page 43: Replacing A Disk
NETGEAR ReadyNAS Rack-Mount Storage Systems Replacing a Disk In the case of a failed disk, the unit provides email alerts and status messages about the need to replace a disk. ReadyNAS supports hot-swap bays, so you do not need to power down your unit when replacing a disk. - Page 44 NETGEAR ReadyNAS Rack-Mount Storage Systems Reassemble the disk tray. Make sure that the hard disk connectors face the interior of the disk bay when you reassemble the disk tray. Slide the disk tray back into the unit and secure the handle.
-
Page 45: System Components
NETGEAR ReadyNAS Rack-Mount Storage Systems Reassemble the disk tray. Make sure that the hard disk connectors face the interior of the disk bay when you reassemble the disk tray. Slide the disk tray back into the unit and secure the handle. -
Page 46: Individual Components
NETGEAR ReadyNAS Rack-Mount Storage Systems Individual Components On the 3100, 3200, and 4200, you replace power supplies, fans, and batteries individually. Replacing a Power Supply If either of the two power supply modules fails, the other module takes the full load and allows the system to continue operation without interruption. -
Page 47: Replacing A Fan
NETGEAR ReadyNAS Rack-Mount Storage Systems Lift the top cover from the chassis to gain full access to the inside of the system. WARNING! Ensure that the chassis cover is in place when the system is operating to allow proper cooling. Out-of-warranty damage to the system can occur if you do not strictly follow this practice. -
Page 48: Replacing The Onboard Battery
Replacing the Onboard Battery Replace the battery with the same or an equivalent type recommended by NETGEAR only. Dispose of used batteries according to the manufacturer’s instructions. DANGER: Installing the onboard upside down, which reverses its polarities, creates a danger of explosion. -
Page 49: Appendix A Warnings And Precautions
Warnings and Precautions This appendix contains safety warnings and precautions for the ReadyNAS 1500, 2100, 3100, 3200, and 4200. It includes the following sections: • Safety Warnings • Electrical Safety Precautions • General Safety Precautions • Electrostatic Discharge (ESD) Precautions •... -
Page 50: Safety Warnings
NETGEAR ReadyNAS Rack-Mount Storage Systems Safety Warnings The equipment is certified for installation only by trained personnel, according to the installation instructions provided with each unit. The socket outlet shall be installed near the equipment and shall be easily accessible. -
Page 51: General Safety Precautions
NETGEAR ReadyNAS Rack-Mount Storage Systems General Safety Precautions Follow these rules to ensure general safety: • Keep the area around the ReadyNAS clean and free of clutter. • The ReadyNAS weighs approximately 82 pounds when fully loaded. When lifting the system, two people at either end should lift slowly with their feet spread out to distribute the weight. -
Page 52: Rack-Mount Precautions
NETGEAR ReadyNAS Rack-Mount Storage Systems • Do not let components or PCBs come into contact with your clothing, which might retain a charge even if you are wearing a wrist strap. • Handle a board by its edges only; do not touch its components, peripheral chips, memory modules, or contacts. -
Page 53: Appendix B Notification Of Compliance
Notification of Compliance Regulatory Compliance Information This section includes user requirements for operating this product in accordance with National laws for usage of radio spectrum and operation of radio devices. Failure of the end-user to comply with the applicable requirements may result in unlawful operation and adverse action against the end-user by the applicable National regulatory authority. - Page 54 NETGEAR ReadyNAS Rack-Mount Storage Systems FCC Declaration Of Conformity We, NETGEAR, Inc., 350 East Plumeria Drive, San Jose, CA 95134, declare under our sole responsibility that the NETGEAR ReadyNAS Rack-Mount Storage Systems complies with Part 15 of FCC Rules. Operation is subject to the following two conditions: •...
-
Page 55: European Union
NETGEAR ReadyNAS Rack-Mount Storage Systems European Union The NETGEAR ReadyNAS complies with essential requirements of EU EMC Directive 2004/108/EC and Low Voltage Directive 2006/95/EC as supported by applying the following test methods and standards: • EN55022: 2006 / A1: 2007 •... -
Page 56: Index
Index disks, supported drive bay airflow 1500 1500 2100 2100 3100 3100 3200 3200 4200 4200 electrical safety battery, replacing electrostatic discharge boot menu email alerts 1500 2100 3100 3200 4200 factory settings failed disk email alert circuit overload fan LED 1500 fan, replacing 2100... - Page 57 NETGEAR ReadyNAS Rack-Mount Storage Systems inside access setup location 1500 2100 3100 3200 mechanical loading 4200 1500 2100 SFP PCIe card 3100 side panel 3200 socket outlet 4200 status information 1500 2100 3100 operating temperature 3200 1500 4200 2100 supported disks...