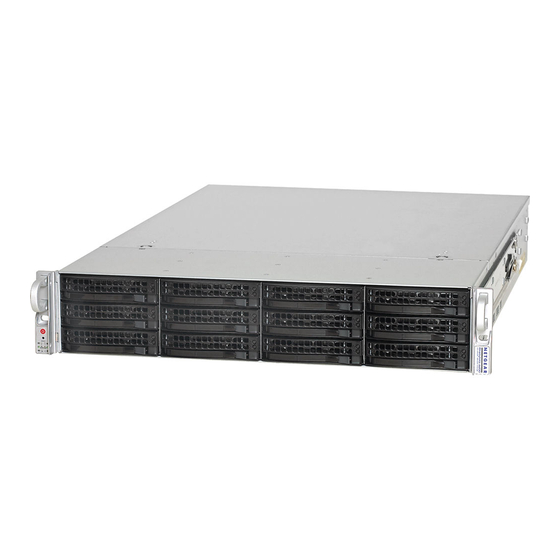
NETGEAR RN12P0610 - ReadyNAS 3200 Software Manual
Network attached storage system
Hide thumbs
Also See for RN12P0610 - ReadyNAS 3200:
- Installation manual (2 pages) ,
- Hardware manual (40 pages) ,
- Installation manual (2 pages)

Related Manuals for NETGEAR RN12P0610 - ReadyNAS 3200


Summary of Contents for NETGEAR RN12P0610 - ReadyNAS 3200
- Page 1 ReadyNAS 3200 Software Manual NETGEAR, Inc. 350 East Plumeria Drive San Jose, CA 95134 USA 202-10551-01 v1.0 June 2009...
-
Page 2: Technical Support
In the interest of improving internal design, operational function, and/or reliability, NETGEAR reserves the right to make changes to the products described in this document without notice. NETGEAR does not assume any liability that may occur due to the use or application of the product(s) or circuit layout(s) described herein. -
Page 3: Table Of Contents
Contents About This Manual Conventions and Formats ....................vii Software Manual Revision History ...................viii Chapter 1 Getting Acquainted What is the ReadyNAS 3200? ..................1-1 The Benefits of X-RAID2 ....................1-2 Initial Setup and Default Login ..................1-2 The RAIDar Setup Utility ....................1-3 The FrontView Management Console ................1-4 Chapter 2 Managing Your ReadyNAS 3200 Customizing Network Settings ..................2-1... - Page 4 Clock, System Time, and NTP Options ..............2-23 Alerts, Alert Contacts, Alert Settings, SNMP, and SMTP ........2-23 Language Settings ....................2-27 Updating ReadyNAS 3200 Firmware ..............2-28 Configuration Backup ....................2-29 Chapter 3 Managing User Access Understanding Share Security Access Modes ...............3-1 User Security Mode ....................3-2 Domain Security Mode .....................3-4 Setting Up User and Group Accounts ................3-5 Managing Groups .....................3-6...
- Page 5 Backing Up to the Web with the ReadyNAS Vault Service ...........4-14 Chapter 5 Optimizing Performance and Maintaining the System Performance ........................5-1 Adding a UPS .........................5-2 Power Management .......................5-3 Power Timer ......................5-3 Configuring UPS Battery Low Shutdown ..............5-3 Wake-On-LAN ......................5-3 Viewing System Status ....................5-4 Health ........................5-4 Logs .........................5-5 System Shutdown and File System Check ..............5-6...
- Page 6 Contents v1.0, June 2009...
-
Page 7: About This Manual
About This Manual The NETGEAR® ReadyNAS 3200 Software Manual describes how to configure and manage a ReadyNAS 3200 system. The information in this manual is intended for readers with intermediate computer and networking skills. Conventions and Formats The conventions, formats, and scope of this manual are described in the following paragraphs: •... -
Page 8: Software Manual Revision History
ReadyNAS 3200 Software Manual Software Manual Revision History Version Publication Part Number Description Number Date 202-10551-01 June 2009 First publication viii About This Manual v1.0, June 2009... -
Page 9: Getting Acquainted
Its fail-safe features include dual redundant Gigabit Ethernet ports, support for RAID 0, 1, 5, and 6 plus hot spare, and NETGEAR’s proprietary X-RAID2 automatic volume expansion. You can also allocate iSCSI target volumes on a ReadyNAS 3200. -
Page 10: The Benefits Of X-Raid2
Follow the instructions in the NETGEAR Installation Guide that came with your unit to install it. An electronic copy of the installation guide is on the product CD, on the NETGEAR web site, and on http://readynas.com. For a list of supported disks, go to http://www.readynas.com/hcl. -
Page 11: The Raidar Setup Utility
ReadyNAS 3200 Software Manual The RAIDar Setup Utility The RAIDar utility enables easy setup and management of all your ReadyNAS units. Figure 1-1 It discovers the units in the network, and makes it easy to see the status of the units, and connect to the FrontView management console you use to manage any ReadyNAS. -
Page 12: The Frontview Management Console
ReadyNAS 3200 Software Manual The FrontView Management Console The FrontView management console operates in two modes: Setup Wizard mode, and Advanced Control mode. When the unit is in its factory default state, FrontView opens in Setup Wizard mode. Figure 1-2 Use the wizard to perform the initial configuration of the unit. - Page 13 ReadyNAS 3200 Software Manual At the bottom of the screen is the status bar including the date button on the left which, when clicked takes you to the Clock screen. The status lights to the right give a quick glimpse of the system status.
- Page 14 ReadyNAS 3200 Software Manual Getting Acquainted v1.0, June 2009...
-
Page 15: Managing Your Readynas 3200
ReadyNAS 3200 Software Manual Chapter 2 Managing Your ReadyNAS 3200 Setting up and managing the ReadyNAS 3200 Network Attached Storage System in your network is described in this chapter. This chapter contains the following sections: • “Customizing Network Settings” • “Updating the Admin Password”... -
Page 16: Ethernet Interfaces
IP Assignment. Select either Use values from a DHCP server or Use values below. – If you elect to assign the IP address using Use values from a DHCP server, NETGEAR advises that you set the lease time on the DHCP server/router to a value of at least a day. - Page 17 ReadyNAS 3200 Software Manual • MTU. In some network environments, changing the default MTU value can fix throughput problems. NETGEAR advises that you leave the default setting otherwise. Figure 2-3 Teaming/Failover In this section, you can select the desired bonding mode. Network teaming provides a way to aggregate the two network interfaces into a single logical teamed, or bonded, interface.
- Page 18 ReadyNAS 3200 Software Manual Note: To get the full performance benefit of an option, provision servers with dual Ethernet interfaces, and verify that the LAN switch supports the feature that a ReadyNAS teaming option may require. A mismatch between the LAN switch and a ReadyNAS teaming option could degrade the throughput of the ReadyNAS.
- Page 19 ReadyNAS 3200 Software Manual VLAN Settings (Virtual Local Area Network) In this section, you can specify whether to allow devices residing on different segments of a LAN to appear in the same segment or, conversely, to allow devices on the same switch to behave as through they belong to a different LAN.
-
Page 20: Global Network Settings
ReadyNAS 3200 Software Manual Global Network Settings Figure 2-7 Hostname The Hostname you specify is used to advertise the ReadyNAS 3200 on your network. You can use the hostname to address the ReadyNAS 3200 in place of the IP address when accessing the ReadyNAS 3200 from Windows, or over OS X using SMB. -
Page 21: Wins
ReadyNAS 3200 Software Manual If you selected the DHCP option in the Ethernet or Wireless tab, the Domain Name Server fields are automatically populated with the DNS settings from your DHCP server. If you selected the Static option, you can manually specify the IP addresses of the DNS servers and the domain name here. -
Page 22: Route: A Manual Routing Table
ReadyNAS 3200 Software Manual Select the Enable DHCP service check box if you want the ReadyNAS 3200 device to act as a DHCP server. This is convenient in networks where DHCP service is not already available. Note: These options are available only if this device is not already using a DHCP address. Enabling DHCP service on a network already utilizing another DHCP server will result in conflicts. - Page 23 ReadyNAS 3200 Software Manual this password is kept in a safe place. Anyone who obtains this password can change or erase the data on the ReadyNAS. Figure 2-11 Note: In User or Domain security mode, you can use the admin account to log in to a Windows share, and perform maintenance on any file or folder in that share.
-
Page 24: Selecting Services For Share Access
ReadyNAS 3200 Software Manual Selecting Services for Share Access Figure 2-12 Three types of services are available: Standard File Protocols, Discovery Services, and Installed Add-ins such as streaming services. These different services are explained in the following sections. Standard File Protocols The standard file protocols are common file-sharing services that allow your workstation clients to transfer files to and from the ReadyNAS 3200 using built-in file manager-over-network file protocols supported by the client operating system. - Page 25 ReadyNAS 3200 Software Manual • AFP (Apple File Protocol). Mac OS 9 and OS X works best using this protocol as it handles an extensive character set. However, in mixed PC and Mac environments, it is advisable to use CIFS/SMB, unless enhanced character set support is necessary on the Mac.The ReadyNAS 3200 supports AFP 3.1.
-
Page 26: Discovery Services
ReadyNAS 3200 Software Manual Discovery Services Bonjour and UPnP discovery services are included with theReadyNAS 3200. Additional services that you download and install from www.readynas.com are listed in the Add-ons tab page. Figure 2-13 • Bonjour service provides a simple way of discovering various services on the ReadyNAS 3200. -
Page 27: Understanding Volume Management
ReadyNAS 3200 Software Manual Understanding Volume Management The ReadyNAS 3200 family offers two RAID volume technologies: Flex-RAID, utilizing the industry-standard RAID levels 0, 1, 5 and 6; and X-RAID2, the NETGEAR-patented expandable RAID technology. Figure 2-14 Your system comes preconfigured with X-RAID2. However, you can switch between the two modes through a factory default reset process described in the ReadyNAS 3200 Hardware Manual.”... -
Page 28: Volume Management For Flex-Raid
ReadyNAS 3200 Software Manual – Each disk can be replaced, one by one, then rebuilt; after the last disk is replaced, another data volume using the newly added capacity can be configured. • X-RAID2: – One-volume technology, but supports volume expansion, either with the addition of more disks or the replacement of an existing disk with larger capacity disks. - Page 29 ReadyNAS 3200 Software Manual You are asked to confirm your intention by typing DELETE VOLUME. Figure 2-16 Adding a Volume After deleting the volume, the Add Volume tab lists the available configurable space on the hard disks. All the disks are selected by default. You can specify a hot spare disk if you wish. A hot spare remains in standby mode and automatically regenerates the data from a failed disk from the volume.
- Page 30 ReadyNAS 3200 Software Manual 3. Specify the reserve space for a snapshot. Next, select the percentage of the volume you wish to allocate for snapshots. You can specify 0 if you wish to disable snapshot capability, or you can specify a percentage in 5 percent increments from 5 to 50 percent. The percentage represents the amount of data you think changes while the snapshot is active.
-
Page 31: Volume Management For X-Raid2
ReadyNAS 3200 Software Manual Notice that the disk on Channel 4 that we did not configure is listed in the Available Disks section. We can add this disk as a hot spare by clicking Make hot spare. Figure 2-18 We can also remove a disk from the volume by clicking Remove. The volume will still be available but in a non-redundant state. - Page 32 ReadyNAS 3200 Software Manual Adding More Disks At a certain point, you will want more capacity. With typical RAID volumes, you have to back up your data to another system (with enough space), add a new disk, reformat your RAID volume, and restore your data back to the new RAID volume.
-
Page 33: Iscsi Target Volumes
ReadyNAS 3200 Software Manual iSCSI Target Volumes The iSCSI target service enables you to create one or more iSCSI target volumes on the ReadyNAS. The iSCSI (Internet SCSI) protocol allows clients called initiators to send SCSI commands to SCSI storage devices called targets on remote servers. It is a popular Storage Area Network (SAN) protocol, allowing organizations to consolidate storage into data center storage arrays while providing hosts such as databases and web servers with the illusion of locally-attached disks. -
Page 34: Usb Volumes
ReadyNAS 3200 Software Manual To enable iSCSI support, click Create iSCSI Target, and enter the desired name of the target and the capacity you wish to reserve for this target device. Maximum capacity is slightly less than the full free space on the ReadyNAS. If you wish to enable authentication for access, enable CHAP authentication and specify the user name and password. - Page 35 ReadyNAS 3200 Software Manual To the right of the access icons are command options. The following commands are available: Disconnect This option prepares the USB partition for disconnection by correctly unmounting the file system. In most cases, you can safely disconnect the device without first unmounting; however, the Disconnect command ensures that any data still in the write cache is written out to the disks and that the file system is properly closed.
-
Page 36: Adjusting System Settings
ReadyNAS 3200 Software Manual USB Volume Name and Access Rights Persistence Across Mount/Dismounts The ReadyNAS 3200 attempts to remember the name as long as there is a unique ID associated with the USB device so that the next time the device is connected, the same share name(s) will be available. -
Page 37: Clock, System Time, And Ntp Options
ReadyNAS 3200 Software Manual System settings include clock, alert, performance, language, firmware update, configuration backup/restore, power, and shutdown settings. Clock, System Time, and NTP Options An accurate time setting on the Clock screen is required to ensure proper file timestamps. You can access the Clock screen by selecting System >... - Page 38 ReadyNAS 3200 Software Manual Some e-mail addresses can be tied to a mobile phone. This is a great way to monitor the device when you are away from your desk. Settings This ReadyNAS 3200 device has been preconfigured with mandatory and optional alerts for various system device warnings and failures.
- Page 39 5. Click Apply to save your settings. When you have saved the SNMP settings on the ReadyNAS 3200, you can import the NETGEAR SNMP MIB to your SNMP client application. The NETGEAR MIB can be obtained from the included Installation CD or downloaded from the NETGEAR Support site at http://www.netgear.com/support.
- Page 40 ReadyNAS 3200 Software Manual SMTP The ReadyNAS 3200 device has a built-in e-mail message transfer agent (MTA) that is set up to send alert e-mail messages from the device. Some corporate environments, however, might have a firewall that blocks untrusted MTAs from sending out messages. If you were unable to receive the test message from the Alerts Settings tab, it might have been blocked by the firewall.
-
Page 41: Language Settings
ReadyNAS 3200 Software Manual Language Settings The Language Setting screen offers the option of setting the ReadyNAS 3200 device to the appropriate character set for file names. Figure 2-27 For example, selecting Japanese allows you to share files with Japanese names in Windows Explorer. -
Page 42: Updating Readynas 3200 Firmware
To use the Remote option, select Update from the main menu and then click the Remote tab. Click Check for Updates to check for updates on the NETGEAR update server. Figure 2-29... -
Page 43: Configuration Backup
ReadyNAS 3200 Software Manual When prompted, click Perform System Update. Warning: Do not click the browser Refresh button during the update process. After the download completes, you will be prompted to reboot the system. Updating from a Local Drive When the ReadyNAS 3200 is not connected to the Internet, or Internet access is blocked, you can download an updated RAIDiator firmware image from http://www.readynas.com and upload that... - Page 44 ReadyNAS 3200 Software Manual restore all your settings from the configuration backup. Or back up a known good working configuration before you make changes so that you can easily revert to the good configuration is the changes are problematic. Figure 2-30 Click Backup then Select which category of configuration files to backup, then click the “Download configuration archive”...
-
Page 45: Managing User Access
Chapter 3 Managing User Access The topics in this chapter cover setting up and managing the ReadyNAS 3200 Network Attached Storage System in your network. This chapter contains the following sections: • “Understanding Share Security Access Modes” • “Setting Up User and Group Accounts” •... -
Page 46: User Security Mode
ReadyNAS 3200 Software Manual Select the most appropriate option based on the required level of security and your current network authentication scheme. • User. User security mode is the recommended selection for the small and medium-size office or workgroup environments. This mode allows you to set up share access restrictions based on user and group accounts. - Page 47 ReadyNAS 3200 Software Manual generate the private home share is controlled in the Accounts/Preferences tab, and you can disable it if you wish. Note: Private user shares are accessible only by users using CIFS (Windows) or AFP (Mac), and FTP/S protocols. To set up the ReadyNAS 3200 for this security mode, you need the following information: •...
-
Page 48: Domain Security Mode
ReadyNAS 3200 Software Manual Domain Security Mode If you choose the Domain security mode option, you need to create a trusted relationship with the domain controller or the active directory server (ADS) that will act as the authentication server for the ReadyNAS 3200 device. -
Page 49: Setting Up User And Group Accounts
ReadyNAS 3200 Software Manual You can elect to have the ReadyNAS 3200 automatically auto-detect the domain controller, or you can specify the IP address. Sometimes auto-detect fails, and you need to supply the IP address of the domain controller to join the domain. If you have a large number of users in your domain, you may want to clear the Display users from trusted domains... -
Page 50: Managing Groups
ReadyNAS 3200 Software Manual Managing Groups To add a new group: 1. Select Manage Groups from the drop-down menu in the upper right corner. Figure 3-5 2. Select the Add Group tab if it is not already selected. You can add up to five groups at a time. If you expect to have just one big set of users for one group, you can forego adding a new group and accept the default users group. - Page 51 ReadyNAS 3200 Software Manual You can view or change your groups by clicking the alphabetical index tab, or click All to list all groups. If you wish to add a large number of groups, select Import group list from the pull-down menu, and browse to locate the file containing the group list.
-
Page 52: Managing Users
ReadyNAS 3200 Software Manual Managing Users To manage user accounts: 1. Select Manage Users from the drop-down menu. Figure 3-6 2. Click the Add User tab to add a new user. You can add up to five users at a time. For each user, add the following information: •... - Page 53 ReadyNAS 3200 Software Manual If you wish to add a large number of users, select Import user list from the pull-down menu and browse to locate the file containing the group list. You can upload a CSV (Comma Separated Value) formatted file containing the user account information. The format of the file is: name1,password1,group1,email1,uid1,quota1 name2,password2,group2,email2,uid2,quota2 name3,password3,group3,email3,uid3,quota3...
-
Page 54: Setting Accounts Preferences
ReadyNAS 3200 Software Manual Setting Accounts Preferences You can set various account defaults by selecting Preferences option from the pull-down menu. Figure 3-7 Changing User Passwords There are two ways in which user passwords can be changed in the User security mode. The first way is for the administrator to change the passwords by selecting Security >... -
Page 55: Managing Shares
ReadyNAS 3200 Software Manual In Share and Domain security mode, the Password tab does not appear. Note: User passwords in Domain mode must be set on the domain or ADS server. Managing Shares Shares enable you to organize the information stored on a volume, and administer who has access to that information. -
Page 56: Managing Shares
ReadyNAS 3200 Software Manual 2. Select Add Shares. Enter the share name and description. Figure 3-10 Note: Enabling Public Access means the Guest account has access to the share. Once you finish adding the shares, refer to Appendix B, “Share Access from MAC and Linux Systems”... - Page 57 ReadyNAS 3200 Software Manual The columns to the left of the Delete check box represent the services that are currently available. The access icons in those columns summarize the status of the service and the access rights to the share for each of the services. Move the mouse pointer over the access icons to view the access settings.
- Page 58 ReadyNAS 3200 Software Manual Share Access Restriction. If you wish to limit share access to particular users and/or groups, you can enter their names in the Read-only users, Read-only groups, Write-enabled users, and Write-enabled group fields. The names must be valid accounts, either on the network storage or on the domain controller.
- Page 59 ReadyNAS 3200 Software Manual Figure 3-13 Recycle Bin. The ReadyNAS 3200 can have a Recycle Bin for each share for Windows users. The Enable Recycle Bin option is shown at the bottom of the CIFS screen. When this check box is selected, whenever you delete a file, the file gets inserted into the Recycle Bin folder in the share rather than being permanently deleted.
- Page 60 ReadyNAS 3200 Software Manual others (that is, everyone). Permission for newly created folders is read/write for everyone. If the default does not satisfy your security requirement, you can change it here. Figure 3-15 Opportunistic locking (often referred to as oplocks) enhances CIFS performance by allowing files residing on the NAS to be cached locally on the Windows client, thus eliminating network latency when the files are constantly accessed.
- Page 61 ReadyNAS 3200 Software Manual Advanced Options The Advanced Options tab offers advanced low-level file manipulation options that can affect file access through all file protocol interfaces. Care should be taken before you use these options as anything that changes ownership and permissions might not be easily reversible. Figure 3-17 Advanced Share Permission.
-
Page 62: Share Access From A Web Browser
ReadyNAS 3200 Software Manual Share Access from a Web Browser To access the same share using a Web browser, enter http://<ipaddr> in the browser address bar. You can use https if you want a secure encrypted connection. You will be prompted to log in. Figure 3-18 Log in with a valid user name and password. -
Page 63: Share Access Via Ftp/Ftps
ReadyNAS 3200 Software Manual One useful application for a Web share is to set up an internal company website. You can copy HTML files to the Web share using Windows, Mac, NFS, or HTTP. When you set HTTP access to read-only, html files, including index.htm and index.html, can be viewed using any web browser. -
Page 64: Remote Access
ReadyNAS 3200 Software Manual Remote Access You can remotely access your ReadyNAS 3200 from the Internet via the ReadyNAS remote feature, or via the FTP and HTTP protocols. This section provides instructions for enabling remote access to your ReadyNAS 3200. ReadyNAS Remote ReadyNAS Remote is a web based service that enables drag &... - Page 65 ReadyNAS 3200 Software Manual 2. Click the link in the ReadyNAS Remote client software to create a ReadyNAS Remote account.A popup notice displays upon successful registration with the ReadyNAS Remote web service. Figure 3-22 3. Use FrontView to enable the ReadyNAS Remote feature, and identify the ReadyNAS Remote accounts that you will permit to access your ReadyNAS shares.
-
Page 66: Remote Ftp Access
ReadyNAS 3200 Software Manual 4. Use the ReadyNAS Remote client to log in to the ReadyNAS. Figure 3-24 You can now drag and drop files between your desktop and the ReadyNAS as though you were on the ReadyNAS LAN. Remote FTP Access 1. - Page 67 ReadyNAS 3200 Software Manual • Authentication mode: There are two authentication modes: • Anonymous: No login information required for FTP users. • User: Users will need an account configured on the ReadyNAS from either user or domain security mode. • Allow upload resumes: This option allows users to finish uploading a file to the FTP share if the connection had been previously interrupted.
-
Page 68: Remote Http Access
ReadyNAS 3200 Software Manual Remote HTTP Access 1. Go to Services > Standard File Protocols and enable FTP. Figure 3-27 Note: HTTPS cannot be disabled - Frontview requires it. • HTTP – Redirect default web access to this share: Advanced configuration option allowing hosting of user created HTTP web page on the ReadyNAS. - Page 69 ReadyNAS 3200 Software Manual – SSL key host: This field lets you configure the hostname used for the ReadyNAS to generate its SSL certificate, and then create a new SSL certificate. It is advised users update this field to match the current IP address of the ReadyNAS and then generate a new SSL certificate to avoid future certificate errors from their web browser.
-
Page 70: Enabling Rsync And Specifying Rsync Rights
ReadyNAS 3200 Software Manual Enabling Rsync and Specifying Rsync Rights Enable rsync at the bottom of the Services > Standard File Protocols page to display the rsync icon next to each share. Click the rsync icon to view the rsync configuration options. Select the Default Access rights, and assign a user name and password. -
Page 71: Securing Your Data
Chapter 4 Securing Your Data This chapter explains how to back up the data from your ReadyNAS. • “Configuring Backup Jobs” • “MAC OS X Time Machine Backup” • “Backing Up the ReadyNAS to a USB Drive” • “Backing Up to the Web with the ReadyNAS Vault Service” Configuring Backup Jobs The Backup Manager integrated with the ReadyNAS 3200 allows the ReadyNAS 3200 to act as a powerful backup appliance. - Page 72 ReadyNAS 3200 Software Manual To create a new backup job, select Add a New Backup Job and follow the 4-step procedure. Figure 4-1 Step 1 – Select Backup Source A USB device appears as a share, so if you want to back up a USB device, select a share name. If you want to back up data from a remote source, select from one of the following: •...
- Page 73 ReadyNAS 3200 Software Manual • Remote Rsync server. Select this if you wish to perform backups from a rsync server. Rsync was originally available for Linux and other flavors of UNIX, but has lately become popular under Windows and Mac for its efficient use of incremental file transfers. This is the preferred backup method between two ReadyNAS devices.
- Page 74 ReadyNAS 3200 Software Manual The following are some path examples: • Examples of an FTP path: ftp://myserver/mypath/mydir ftp://myserver/mypath/mydir/myfile • Examples of a website path: http://www.mywebsite.com http://192.168.0.101/mypath/mydir • Examples of a Windows or remote NAS path: \\myserver\myshare \\myserver\myshare\myfolder \\192.168.0.101\myshare\myfolder • Examples of an NFS path: myserver:/mypath 192.168.0.101:/mypath/myfolder •...
- Page 75 ReadyNAS 3200 Software Manual Step 2 – Select Backup Destination The Step 2 process is almost identical to Step 1 except that you are now specifying the backup destination. If you selected a remote backup source, you need to select a public or a private home share on the ReadyNAS 3200 (either the source or destination must be local to the ReadyNAS 3200).
- Page 76 ReadyNAS 3200 Software Manual Figure 4-4 Step 4 – Choose Backup Options In this last step, you can set up how you want backups to be performed. To set up a backup schedule: 1. Schedule a full backup. Select when you want full backups to be performed. You can elect to do this just the first time, every week, every 2 weeks, every 3 weeks, every 4 weeks, or every time this backup job is invoked.
-
Page 77: Viewing The Backup Schedule
ReadyNAS 3200 Software Manual destination as doing so can delete your source files for good. It is safer to not select this option unless your device is running low on space. Do experiment with a test share to make sure you understand this option. -
Page 78: Viewing The Backup Log
ReadyNAS 3200 Software Manual 3. Click Delete to permanently remove the job. 4. Click Go to manually start the backup job. The status changes when the backup starts, when an error is encountered, or when the job has finished. 5. Select the View Log link to check a detailed status of the backup. 6. -
Page 79: Mac Os X Time Machine Backup
ReadyNAS 3200 Software Manual MAC OS X Time Machine Backup The ReadyNAS can be used as a backup destination for your OS X Time Machine. After enabling the Time Machine option, use the “Change Disk...” option from Time Machine Preferences to select this ReadyNAS. - Page 80 ReadyNAS 3200 Software Manual increases beyond offline hours. Snapshots allow backups to occur without the need to take your systems offline. Figure 4-8 Snapshots also can be used as temporary backups. For example, if a file on the NAS device becomes infected with a virus, the uninfected file can be restored from a prior snapshot taken before the attack.
- Page 81 ReadyNAS 3200 Software Manual • If you specify a start and end time of 00:00, ReadyNAS will take one snapshot at midnight. A start time of 00:00 and an end time of 23:00 will set snapshots to be taken between midnight and 11 pm the next day at the interval you specify. Once you save the snapshot schedule, the time of the next snapshot is displayed.
- Page 82 ReadyNAS 3200 Software Manual You can also specify how long a snapshot should last. If you will be using snapshots for backups, you can schedule the snapshot to last slightly longer than the expected duration of the backup. Having an active snapshot can affect the write performance to the ReadyNAS 3200, so deactivating it when it is not needed might be advantageous in write- intensive environments.
-
Page 83: Backing Up The Readynas To A Usb Drive
ReadyNAS 3200 Software Manual After the snapshot is taken, if changes on the volume exceed this reserved space, the snapshot is invalidated and can no longer be used. Note: Changes that occupy space in the reserved snapshot space include new file creation, modifications, and deletions;... -
Page 84: Backing Up To The Web With The Readynas Vault Service
ReadyNAS 3200 Software Manual On the ReadyNAS 3200, the Backup button is associated with the USB Port at the front of the system. By default, the Backup button copies the data from the Backup share onto the USB disk connected to the USB port at the front of the device. Be mindful of performance impact to users when backup jobs are run. -
Page 85: Optimizing Performance And Maintaining The System
Chapter 5 Optimizing Performance and Maintaining the System This chapter discuses how to optimize the performance of and maintain your ReadyNAS. • “Performance” • “Adding a UPS” • “Power Management” • “Viewing System Status” • “System Shutdown and File System Check” •... -
Page 86: Adding A Ups
ReadyNAS 3200 Software Manual Note that some of the settings suggest that you utilize an Uninterruptible Power Supply (UPS) before enabling that option: • Select Enable disk write cache if you want to allow disk write requests to be acknowledged by the disk before data is written out to the platter. -
Page 87: Power Management
ReadyNAS 3200 Software Manual Power Management The ReadyNAS 3200 offers power timer (time off/time on), UPS event, and wake-on-LAN power management options to reduce system power consumption, both while the system is in use and when it is not in use. Power Timer The ReadyNAS 3200 can be scheduled to power off and power back on (on certain models) automatically. -
Page 88: Viewing System Status
ReadyNAS 3200 Software Manual Viewing System Status The Status menu contains links to the Health screen and Logs screen that provide system status information. Health The Health screen displays the status of each disk, and the fan, temperature, and UPS status in detail. -
Page 89: Logs
ReadyNAS 3200 Software Manual Figure 5-4 To recalibrate the fan, click Recalibrate. Logs Select Status > Logs to access the Clear Logs screen. The Clear Logs screen provides information about the status of management tasks, including a timestamp. Figure 5-5 The Download All Logs link is available in case you need to analyze low-level log information. -
Page 90: System Shutdown And File System Check
ReadyNAS 3200 Software Manual System Shutdown and File System Check The Shutdown Options screen offers the option to either power off or reboot the ReadyNAS 3200 device. You also have the option of performing either a full file system check or a quota check on the next boot. - Page 91 ReadyNAS 3200 Software Manual These two options are available: • Select Disk Scrubbing with Auto Parity Fix to detect and correct potential data corruption by actively searching disks for unreadable and mismatched blocks. This procedure should be scheduled for off-peak usage periods. •...
- Page 92 ReadyNAS 3200 Software Manual Optimizing Performance and Maintaining the System v1.0, June 2009...
-
Page 93: Appendix A Default Settings
ReadyNAS 3200 Software Manual Appendix A Default Settings You can use the reset all settings to their factory defaults, according to the instructions in ReadyNAS Hardware Manual. Table A-1. ReadyNAS 3200 Default Configuration Settings Feature Default Login User Login URL when the ReadyNAS https://192.168.168.168 3200 is not connected to a DHCP server Admin User Name (case sensitive) - Page 94 ReadyNAS 3200 Software Manual Default Settings v1.0, June 2009...
-
Page 95: Share Access From Mac And Linux Systems
ReadyNAS 3200 Software Manual Appendix B Share Access from MAC and Linux Systems This appendix presents examples of how shares on the ReadyNAS device can be accessed by the various MAC operating systems. MAC OS X To access the same share over AFP with OS X, select Network from the Finder Go > Network menu. -
Page 96: Afp Over Bonjour
ReadyNAS 3200 Software Manual AFP over Bonjour To access the AFP share advertised over Bonjour on Mac OS X, select Network from the Finder Go menu to see a listing of available networks. Figure B-2 Open the My Network folder to display the ReadyNAS hostname. Figure B-3 Enter the user name and password you wish to use to connect to the ReadyNAS. -
Page 97: Afp Over Appletalk
ReadyNAS 3200 Software Manual Figure B-4 From the Volumes field, select the share you want to access and click OK. AFP over AppleTalk If you chose to advertise your AFP service over AppleTalk, a listing of available networks is displayed. Figure B-5 Open the My Network folder to display the ReadyNAS hostname. - Page 98 ReadyNAS 3200 Software Manual Figure B-6 Select Guest and click Connect. Then, select the share you want to connect to and click OK. Figure B-7 In Share security mode, you need to specify only the user name and password—if you have set up a password for your share.
-
Page 99: Mac
ReadyNAS 3200 Software Manual MAC OS 9 To access the same share under Mac OS 9, select Connect to Server from the Finder menu, choose the NAS device entry from the AppleTalk section, and click Connect. Figure B-8 When you are prompted to log in, enter the share name and password if the ReadyNAS is configured for Share security mode, otherwise enter a valid user account and password otherwise, and click Connect. - Page 100 ReadyNAS 3200 Software Manual Figure B-10 You should see the same files in the share that you do in Windows Explorer. Figure B-11 Share Access from MAC and Linux Systems v1.0, June 2009...
-
Page 101: Accessing Shares From Linux/Unix
ReadyNAS 3200 Software Manual Accessing Shares from Linux/Unix To access this share from a Linux or Unix client where backup is the share name, you will need to mount the share over NFS by entering: mount <ipaddr>:/<backup /backup> Running the ls command in the mounted path displays the share content. Figure B-12 Note: The ReadyNAS does not support NIS as it is unable to correlate NIS information with CIFS logins. - Page 102 ReadyNAS 3200 Software Manual Share Access from MAC and Linux Systems v1.0, June 2009...
-
Page 103: Appendix C X-Raid2 And Raid
ReadyNAS 3200 Software Manual Appendix C X-RAID2 and RAID This appendix introduces the main benefits of X-RAID2, and provides an overview of RAID. The ReadyNAS 3200 supports both X-RAID2 and Flex-RAID mode. Flex-RAID mode enables a more standard RAID configuration, whereas the proven second generation X-RAID2 mode is an auto- expandable RAID technology that is available only on ReadyNAS and is the default configuration on the ReadyNAS 3200. -
Page 104: Easy Volume Expansion
ReadyNAS 3200 Software Manual Whenever you add or replace a disk, the ReadyNAS will initialize it, scanning to make sure the disk is good. Once added, ReadyNAS will synchronize the new disk with the original disk. Depending on the disk size, the synchronization may take anywhere from 30 minutes to several hours. -
Page 105: Raid Basics
ReadyNAS 3200 Software Manual physical disks are set up to use RAID technology, they are said to be in a RAID array. This array distributes data across multiple disks, but the array is seen by the computer user and operating system as one single disk. - Page 106 ReadyNAS 3200 Software Manual RAID can involve significant computation when reading and writing information. With traditional “real” RAID hardware, a separate controller does this computation. In other cases the operating system or simpler and less expensive controllers require the host computer's processor to do the computing, which reduces the computer's performance on processor-intensive tasks.
-
Page 107: Index
Index Numerics adding new 4-1 configuring 4-1 1100 backup editing 4-8 USB 4-14 options 4-6 scheduling 4-5, 4-7 Backup Log 4-8 Backup Manager 4-1 accessing shares FTP/FTPS 3-19 Bonjour Linux/Unix B-7 2-12 MAC OS X B-1 AFP B-2 over MAC OS 9 B-5 Rsync 3-26 Web browser 3-18 CA UniCenter 2-24... - Page 108 ReadyNAS 3200 Software Manual DNS Settings 2-6 hot spare 2-17 domain HP OpenView 2-24 security mode 3-4 Hypertext Transfer Protocol. See HTTP. security options 3-2 HTTP 2-11 HTTPS with SSL encryption 2-11 Enable WebDAV support 3-25 EXT3 2-21 import users user accounts 3-9 IP address Factory Default Settings 2-29...
- Page 109 ReadyNAS 3200 Software Manual NFS server display option, domain mode 3-14 backup jobs 4-2 fine-tuning 3-12 managing 3-11 setting access in Domain Mode 3-13 clock 2-23 Shutdown 5-6 SMART+Self-Monitoring, Analysis and Reporting Technology. See SMART+. Organization Unit. See OU. SMB 2-10 OU 3-4 SMTP 2-26 Snapshots 4-9...
- Page 110 ReadyNAS 3200 Software Manual flash device 2-21 formats, EXT3 2-21 formats, FAT32 2-21 shares 2-19, 2-20 storage 2-20 USB storage partitions 2-20 user accounts, creating 3-2 security mode 3-2 security options 3-2 user accounts import users 3-9 managing 3-8 setting up 3-5 VLAN settings 2-5 support enabling 2-5...
- Page 111 ReadyNAS 3200 Software Manual Index-5 v1.0, June 2009...
- Page 112 ReadyNAS 3200 Software Manual Index-6 v1.0, June 2009...
- Page 113 ReadyNAS 3200 Software Manual Index-7 v1.0, June 2009...
- Page 114 ReadyNAS 3200 Software Manual Index-8 v1.0, June 2009...