Panasonic KV-S1015C Operating Manual
Operating instructions
Hide thumbs
Also See for KV-S1015C:
- Manual (14 pages) ,
- Specification (2 pages) ,
- Operating manual (67 pages)
Table of Contents
Advertisement
These instructions contain information on operating the scanner. Before reading these instructions, please read
the Safety Guide and the Quick Reference Guide enclosed with this unit.
Please carefully read these instructions and the enclosed Safety Guide and Quick Reference Guide.
Keep all documentation in a safe place for future reference.
Operating Manual
Document Scanner
KV-S1026C
Model No.
KV-S1015C
Advertisement
Table of Contents

Related Manuals for Panasonic KV-S1015C


Summary of Contents for Panasonic KV-S1015C
- Page 1 Document Scanner KV-S1026C Model No. KV-S1015C These instructions contain information on operating the scanner. Before reading these instructions, please read the Safety Guide and the Quick Reference Guide enclosed with this unit. Please carefully read these instructions and the enclosed Safety Guide and Quick Reference Guide.
-
Page 2: About The Documentation
Documents Separation Sheet – Image Capture Plus is a Panasonic original application for configuring advanced scanning settings. The edition of Image Capture Plus included with KV-S1015C does not support high-compression PDFs or searchable PDFs. Presto! PageManager 9 is an application for scanning, sharing and organizing documents. The edition of Presto! PageManager 9 ®... -
Page 3: System Requirements
Introduction System Requirements Computer PC/AT or compatible machine with a DVD-ROM drive ® Intel Core™2 Duo 1.8 GHz or higher ® Interface USB 2.0 Note • For details about the system requirements, refer to [Read me first] in the Software / Manual DVD-ROM. •... - Page 4 Consumables • Roller exchange kit (Part No.: KV-SS058) for the KV-S1026C • Roller exchange kit (Part No.: KV-SS059) for the KV-S1015C n Optional Accessories • Roller cleaning paper (Part No.: KV-SS03) For details, see "Replacement Parts and Optional Units" (page 50).
- Page 5 Panasonic Model Number: KV-S1026C KV-S1015C Responsible Party: Panasonic Corporation of North America One Panasonic Way Secaucus, NJ 07094 U.S.A. Telephone No.: 1-800-726-2797 This device complies with Part 15 of the FCC Rules. Operation is subject to the following two conditions:...
-
Page 6: Table Of Contents
Table of Contents Table of Contents Before You Start ..................8 For Your Safety .........................8 Safety Information (For United Kingdom only) ............11 Precautions ........................11 Installation ....................14 Check the Accessories ....................14 Location of Controls .......................15 Main Unit ........................15 Control Panel and LED Indicators ..................17 Installing the Unit ......................19 Installing Software ......................23 Software Installation and Connection ................23... - Page 7 Table of Contents Index......................63 Operating Manual...
-
Page 8: Before You Start
Before You Start Before You Start For Users For Your Safety To prevent severe injury and loss of life, read this WARNING section carefully before using the unit to ensure proper and safe operation of your unit. • This section explains the graphic symbols used in this manual. -
Page 9: Roller Cleaning Paper
Before You Start Ensure that the plug connection is free of The roller cleaning paper may be harmful dust. In a damp environment, a to sensitive skin. Please use protective contaminated connector can draw a gloves. significant amount of current that can Do not use the roller cleaning paper near generate heat, and eventually cause fire a heater or open flame. - Page 10 Before You Start Operating Safeguards CAUTION If the unit falls down or gets damaged, turn the unit off, and unplug the power cord. Otherwise, it may cause fire or electric shock. Power Do not place any liquids or heavy items on The unit should be used only with the the unit.
-
Page 11: Safety Information (For United Kingdom Only)
Do not write or stick paper on the front and/or back A replacement fuse cover can be purchased from your of CD-ROM. local Panasonic dealer. • Do not touch the data side of the CD-ROM. When handling the CD-ROM, be careful not to leave IF THE FITTED MOLDED PLUG IS UNSUITABLE FOR fingerprints or otherwise damage the CD-ROM. - Page 12 • Currency refer to the Material Safety Data Sheet (MSDS). • Bank notes and checks Please ask your Panasonic sales company about • Bank and government bonds, and securities obtaining the Material Safety Data Sheet. • Passports, licenses, official or private documents, identification cards, and the like KEEP AWAY FROM FIRE.
- Page 13 Before You Start Security Notice The management of documents and scanned data is the responsibility of the user. In particular, pay attention to the following points. • Make sure you have the same number of pages for important documents both before and after scanning, and take care not to leave any pages in the scanner.
-
Page 14: Installation
Two power cords may be included. Use the Power cord power cord appropriate for where you use the unit. AC adaptor Panasonic AC adaptor PJSWC0004 USB cable — Mixed batch card guide It is pre-installed and fixed to the unit. -
Page 15: Location Of Controls
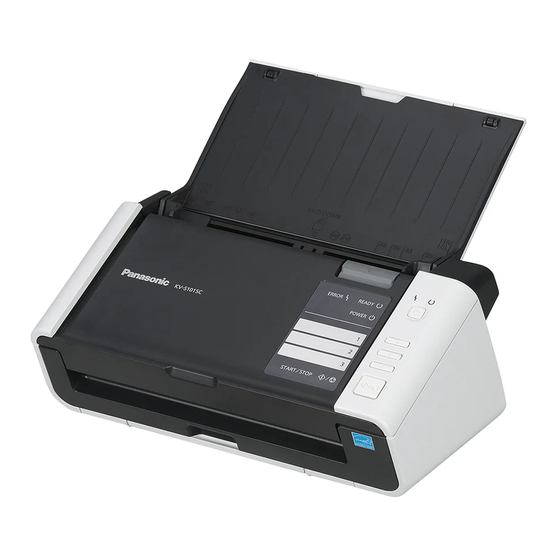
Installation Location of Controls Main Unit Front Document guides Mixed batch card guide Useful when scanning business cards (page 37). Door open button Used to open the ADF door. ADF door Exit tray Exit extension tray Exit stopper Exit support Used if paper curls and cannot be fed properly when scanning thin paper (page 35). - Page 16 Installation Rear Power connector Security slot Use a commercially available security cable. USB connector Operating Manual...
-
Page 17: Control Panel And Led Indicators
Installation Control Panel and LED Indicators (Red) Turns on when an error occurs. (Green) Shows the scanner’s status. Power button ( ) Press the power button for more than one second to turn the scanner off. Skip button (KV-S1026C only) If you press this button when a double feed occurs, the document that was detected as a double feed will be scanned, and scanning will continue. -
Page 18: About Led
Installation About LED A LED (Red) B LED (Green) Status Power is off. Ready or Scanning Blink (Fast) Warming up Blink (Slow) Sleep Blink (2 times Double feed detected error consecutively) Error Blink (Slow) Caution If no operation is performed for 30 minutes or longer, the scanner will be turned OFF automatically. The time until the scanner turns OFF can be changed with the User Utility. -
Page 19: Installing The Unit
Installation Installing the Unit About the installation location Notice • Do not connect the scanner to a computer before installing the software. • Do not move the unit immediately from a cold place to a warm place. It may cause dew. In order to ensure proper operation, install the unit maintaining the proper distances from surrounding objects, as shown in the following illustration. - Page 20 Installation Remove all packing tape. Set the feed tray. Open the feed tray. Pull out the feed extension tray. Note • If the length of the document is short (e.g., a card or a business card), you may be able to scan the document without opening the feed tray.
- Page 21 Installation Set the exit tray. Pull out the exit tray. Open the feed extension tray. Open the exit stopper. Operating Manual...
- Page 22 Installation Connect the AC adaptor (A) and the power cord (B). • Connect the power cord to the AC adaptor. • Connect the AC adaptor to the scanner. • Plug into the AC outlet. AC adaptor Power cord To AC outlet Notice •...
-
Page 23: Installing Software
Installation Installing Software Software Installation and Connection The software on the enclosed Software / Manual DVD-ROM can be installed on your computer. You can select from the 3 installation methods below, depending on your needs. Complete: Install all the drivers, applications, utilities and Operation Manual. All Drivers &... - Page 24 Installation Select the desired installation methods from the "Software" list on the left side of the screen. • If you selected [Complete] or [All Drivers & Utilities], continue to step 7. If you selected [Custom], continue to step 6. If you selected [Custom] for the installation type in step 5, select the item that you want to install. Follow the instructions on the screen.
- Page 25 Installation Press the power button (A) to turn ON the scanner power. • The LED (green) will flash and then turn on. • If the device driver is installed, follow the hardware wizard’s on-screen instructions to complete installation. If you are using Windows Vista or Windows 7, this will be performed automatically. Note •...
-
Page 26: Viewing Operation Manual And Help Installed
On the [Start] menu, point to [All Programs], [Panasonic], [Image Capture Plus], and then select [Image Capture Plus Help]. For User Utility On the [Start] menu, point to [All Programs], [Panasonic], [Scanner Tools], and then select [User Utility Help]. For Presto! PageManager 9 On the [Start] menu, point to [All Programs], [NewSoft], [Presto! PageManager 9.XX Standard]... -
Page 27: Starting Up Scanner Applications Automatically
Installation Starting Up Scanner Applications Automatically Single Touch Scan Settings You can configure settings so that the application starts up automatically "when a document is placed on the scanner’s feed tray" ("place to scan") and "when a single touch scan button (1-3) is pressed". Setting the application to start up Set whether an application will automatically start up and select under which conditions it will start up in the Scan Button Setting Tool. - Page 28 Installation Check that the "Disable device events" checkbox is unchecked. • If the checkbox is checked, uncheck it. Click [OK]. Restart the computer. Operating Manual...
-
Page 29: Deleting Installed Software
Select the item that you want to uninstall. • The software is displayed with the program names below: Software Program Name Device driver Panasonic Document Device Driver X.XX TWAIN KV-S1026C KV-S1015C TWAIN Driver ISIS KV-S1026C ISIS Driver Image Capture Plus... -
Page 30: Operation
(2.8–100 in.) Paper thickness for Feeding: KV-S1026C: 20–209 g/m² KV-S1015C: 40–209 g/m² • The height of all the documents on the tray should be less than 5 mm. This compares to 50 sheets (80 g/m² or 20 lb.) of new paper. -
Page 31: Unacceptable Documents
Operation Unacceptable Documents The following types of documents may not scan properly: • Curled, wrinkled or folded documents Documents must also meet the following conditions. Curl Feeding direction Less than 5 mm (0.2 in.) Folding Feeding direction Less than 5 mm (0.2 in.) •... -
Page 32: Notes About Documents For Scanning
Operation Notes about documents for scanning • Documents may not be able to be scanned due to poor paper quality, even if the thickness is within the specified limits. If a paper jam or double feeding occurs, try scanning again after doing the following: –... -
Page 33: Scanning Documents
Operation Scanning Documents Notice • Make sure to remove paper clips and staples from documents before scanning. Failing to do so can damage the unit, document, or both. • Before feeding, ensure that the document is not creased or folded. If the document is creased or folded, a paper jam or damage to the document may occur. - Page 34 Operation Adjust the document guides (A) slightly larger than the actual size of the documents. Carefully align the documents. • The documents feed better when the leading edges are aligned slantwise as shown in the illustration. Operating Manual...
- Page 35 Operation Place the documents on the feed tray with the side to be scanned facing down. • Set the leading edge of documents as shown in the illustration (A). Note • Place the documents as shown in the illustration. • The height of all the documents on the tray should be less than 5 mm.
- Page 36 Operation Adjust the document guides (A) to the size of the documents to be scanned. Open your scanning application and scan the documents. • For details about the application, refer to the help of each application. • You can also start up applications automatically to scan documents (Single Touch Scan). For details about Single Touch Scan settings, see "Single Touch Scan Settings"...
-
Page 37: Mixed Batch Card Guide
Operation Mixed Batch Card Guide No adjustment to the document guide is required when using the mixed batch card guide. The mixed batch card guide prevents a card from skewing when scanning paper documents and a card simultaneously. The mixed batch card guide is attached to the scanner during shipping. If you remove the mixed batch card guide, keep it in a safe place. -
Page 38: Using Separation Sheets
Operation Using Separation Sheets By using separation sheets, you can change the folder directory for saving the scanned documents in the middle of scanning. If you scan using a separation sheet between documents, the document following the separation sheet will be saved in a different folder. Print out separation sheets from the Software / Manual DVD-ROM. -
Page 39: About Printing Separation Sheets
Operation About Printing Separation Sheets • Print the control sheet at the specified size; do not enlarge or reduce the size. • When printing the control sheet, make sure that the pattern is 25 mm (1 in.) from the top of the page and centered horizontally. -
Page 40: Care And Maintenance
Care and Maintenance Clearing Paper Jams If a paper jam occurs, the message "A paper jam has occurred" and an error code (Uxx) is displayed in the User Utility application. Remove the jammed sheet according to the following instructions. Remove all documents from the feed tray. Press the door open button (A), and open the ADF door (B). - Page 41 Care and Maintenance • If the document is jammed in the exit area, pull it forward as shown in the illustration. Close the ADF door. • Push both sides of the ADF door down slowly until it clicks into place. Operating Manual...
-
Page 42: Cleaning The Scanner
Care and Maintenance Cleaning the Scanner Outside of the Scanner Notice • Do not use thinner, benzine, or cleaners containing abrasives or surfactants, for cleaning the outside of the scanner. • Clean the scanner at least once a month. Press and hold the power button for one second or more to turn off the scanner power. Clean the cover with a soft cloth. -
Page 43: Inside Of The Scanner
Only use the roller cleaning paper to clean the rollers. • For details about the roller cleaning paper, please refer to the Material Safety Data Sheet (MSDS). Please ask your Panasonic sales company about obtaining the Material Safety Data Sheet. Note •... -
Page 44: Cleaning The Rollers
Care and Maintenance Cleaning the Rollers Press and hold the power button for one second or more to turn off the scanner power. Press the door open button (A), and open the ADF door (B). Open the paper feed roller cover (A). Operating Manual... - Page 45 Care and Maintenance Use the separately sold roller cleaning paper (KV-SS03) to remove the dirt from the surface of all rollers. • When wiping off dirt from the roller surface, hold the roller to prevent it from rotating. Wipe the roller from one end to the other in the direction indicated by the arrow, all the way around.
- Page 46 Care and Maintenance Use the roller cleaning paper to clean the surface of the double feed prevention roller. • Wipe the roller from one end to the other (in the direction of the arrow) all the way around them, as shown in the illustration.
- Page 47 Care and Maintenance Use the roller cleaning paper to clean the surface of the free rollers (A). • Wipe the rollers from one end to the other (in the direction of the arrow) all the way around them, as shown in the illustration. Close the ADF door.
-
Page 48: Cleaning The Scanning Glass, Reference Area, And Double Feed Detectors
Care and Maintenance Cleaning the Scanning glass, Reference area, and Double feed detectors Notice • Do not use the roller cleaning paper for cleaning the scanning glass, reference area, or double feed detectors. Press and hold the power button for one second or more to turn off the scanner power. Press the door open button (A), and open the ADF door (B). - Page 49 Care and Maintenance Remove dust on the double feed detectors (A) with a cotton swab. Close the ADF door. • Push both sides of the ADF door down slowly until it clicks into place. Operating Manual...
-
Page 50: Replacement Parts And Optional Units
Roller exchange kit KV-SS058 For KV-S1026C • Replacement Paper feed roller (1 piece) Parts • Double feed prevention roller KV-SS059 For KV-S1015C (1 piece) Optional See "About the roller cleaning paper Roller cleaning paper KV-SS03 Units (sold separately)" (page 43). Note •... -
Page 51: Replacing Parts
Replacement Parts and Optional Units Replacing Parts If double feeding or paper jam occurs frequently even after cleaning the roller (page 44), please call your dealer to order a roller exchange kit, and replace the double feed prevention roller, and paper feed roller. Replacing the Rollers Press and hold the power button for one second or more to turn off the scanner power. - Page 52 Replacement Parts and Optional Units Remove the double feed prevention roller (A). Take out the new double feed prevention roller in the roller exchange kit. Install the new double feed prevention roller into the metal holder with the longer groove facing to the right-side (rear view).
- Page 53 Replacement Parts and Optional Units Close the double feed prevention roller cover (A) firmly. Notice • Be sure to close the double feed prevention roller cover until it clicks into place. Open the paper feed roller cover (A). Operating Manual...
- Page 54 Replacement Parts and Optional Units Remove the paper feed roller (A). Take out the new paper feed roller in the roller exchange kit. Install the new paper feed roller with the gear on the left side. Operating Manual...
- Page 55 Replacement Parts and Optional Units Close the paper feed roller cover firmly. Notice • Make sure to close both sides of the paper feed roller cover until they click into place. • After installing the paper feed roller, confirm that the paper feed roller can rotate in the feeding direction.
-
Page 56: Appendix
Appendix Troubleshooting If a problem occurs while the scanner is being used, check the following items and check the scanner status with User Utility. If the unit still malfunctions, turn it OFF, unplug the power cord from the AC outlet, and call for service. - Page 57 Appendix Symptom Possible Cause Remedy The rollers are dirty. Clean the rollers. (page 44) The paper feed roller, or double feed Replace the paper feed roller or prevention roller have become worn double feed prevention roller. down. (page 51) Right and left sides of the document Flatten the document (page 33) and to be scanned are not the same in load it again after reducing the pages.
- Page 58 Appendix Symptom Possible Cause Remedy The color of the scanned document is extremely The settings of the computer monitor Adjust the computer monitor settings. different from the original are wrong. document. Dark spots or noise appear on The scanning glass is dirty. Clean the scanning glass.
-
Page 59: Repacking Instructions
Appendix Repacking Instructions It is highly recommended that you keep the original carton and ALL packing materials. If you need to transport or ship the scanner, please follow these instructions. Note • Improper repacking of the scanner may result in a service charge to repair the scanner. •... - Page 60 Appendix Pack the scanner with the AC adaptor, power cord, USB cable, DVD-ROM, Safety Guide and Quick Reference Guide. AC adaptor USB cable Safety Guide and Quick Reference Guide Software / Manual DVD-ROM Power cord Operating Manual...
-
Page 61: Specifications
Appendix Specifications Item KV-S1026C KV-S1015C Scanning face Duplex Color CIS (600 dpi) Scanning method Background: Black 216 mm (8.5 in.) Scanning size Simplex Simplex Letter: 30 pages/min. Letter: 20 pages/min. A4: 30 pages/min. A4: 20 pages/min. Binary Duplex Duplex Letter: 60 images/min. -
Page 62: Operating Environment
Appendix Item KV-S1026C KV-S1015C Feed tray capacity 50 sheets (80 g/m² New Paper) Exit tray capacity 50 sheets (80 g/m² New Paper) Life 300,000 sheets Scanning Roller replacement 100,000 sheets Clean the rollers, sensors, and scanning glass once a week Maintenance or every 2,000 sheets scanned. - Page 63 Index Index Maintenance Mixed batch card guide AC adaptor ADF door Operating Environment Card Paper jams Check the accessories Power button Cleaning Power connector Cleaning outside of the scanner Power consumption Cleaning the rollers Power cord 14, 60 Scanning glass, reference area, and Double feed Power requirements detectors Precautions...
- Page 64 Information on Disposal for India For the purpose of recycling to facilitate effective utilization of resources, please return this product to a nearby authorized collection center, registered dismantler or recycler, or Panasonic service center when disposing of this product. Please see the Panasonic website for further information on collection centers, etc.