
Related Manuals for Electrolux EOC5651CAX


Summary of Contents for Electrolux EOC5651CAX
- Page 1 ....................EOC5651CA EN OVEN USER MANUAL...
-
Page 2: Table Of Contents
ENVIRONMENT CONCERNS ........... . 39 WE’RE THINKING OF YOU Thank you for purchasing an Electrolux appliance. You’ve chosen a product that brings with it decades of professional experience and innovation. Ingenious and stylish, it has been designed with you in mind. -
Page 3: Safety Information
ENGLISH SAFETY INFORMATION Before the installation and use of the appli- • The sides of the appliance must stay ad- ance, carefully read the supplied instruc- jacent to appliances or to units with the tions. The manufacturer is not responsible same height. -
Page 4: Pyrolytic Cleaning
– be careful when you remove or install the accessories. WARNING! • Discoloration of the enamel has no effect Risk of injury, burns or electric on the performance of the appliance. It is shock or explosion. not a defect in the sense of the warranty law. -
Page 5: Internal Light
ENGLISH • Read carefully all the instructions for Py- rolytic cleaning. INTERNAL LIGHT • The type of light bulb or halogen lamp used for this appliance, is only for house- hold appliances. Do not use it for house lighting. WARNING! Risk of electrical shock. -
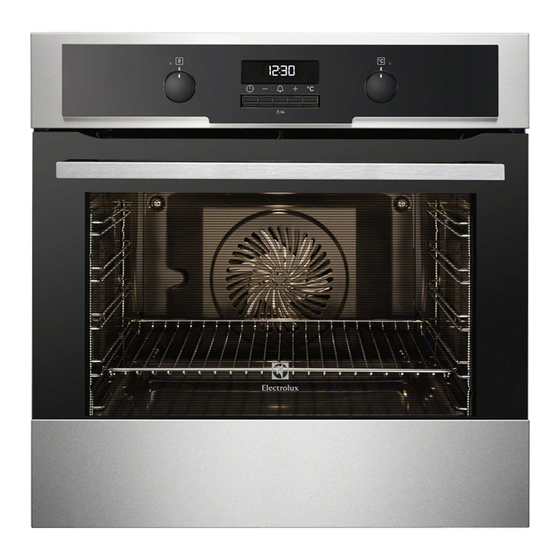
Page 6: Product Description
PRODUCT DESCRIPTION Control panel Knob for the oven functions Power lamp / symbol Electronic programmer Knob for the temperature Power lamp Socket for the core temperature sen- Heating element Lamp Rear wall heating element Bottom heat Shelf support, removable... - Page 7 ENGLISH Core temperature sensor To measure how far the food is cooked. Telescopic runners For shelves and trays.
-
Page 8: Before First Use
BEFORE FIRST USE WARNING! Refer to "Safety information" chap- ter. INITIAL CLEANING • Remove all parts from the appliance. • Clean the appliance before first use. Refer to chapter "Care and Clean- ing". SETTING THE TIME After the first connection to the mains, all symbols in the display are on for some sec- onds. -
Page 9: Daily Use
ENGLISH DAILY USE WARNING! To deactivate the appliance, turn the Refer to "Safety information" chap- knob for the oven functions to the off ter. position ("0") . Knob symbol, indicator or lamp To use the appliance, press the control (depends on the model - refer knob. -
Page 10: Fast Heat Up Function
10 www.electrolux.com Oven function Application Pyro Cleaning To activate the automatic pyrolytic cleaning of the oven. This function burns off residual dirt in the oven. The oven heats up to approximately 500 °C. An acoustic signal sounds when the FAST HEAT UP FUNCTION appliance is at the set temperature. -
Page 11: Clock Functions
ENGLISH CLOCK FUNCTIONS SYM- FUNCTION DESCRIPTION MINUTE MINDER To set a countdown time. This function has no effect on the operation of the oven. You can set the MI- NUTE MINDER at any time, also when the appliance is off. TIME OF DAY To set, change or check the time of day. - Page 12 12 www.electrolux.com You cannot use the Count Up Tim- er when Duration or End function operates.
-
Page 13: Using The Accessories
ENGLISH USING THE ACCESSORIES WARNING! Press to save the new core tem- Refer to "Safety information" chap- perature, or wait 10 seconds for the ter. setting to be saved automatically. The new default core temperature is dis- played during the next use of the core CORE TEMPERATURE SENSOR temperature sensor. -
Page 14: Inserting The Oven Accessories
14 www.electrolux.com INSERTING THE OVEN ACCESSORIES The deep pan and the wire shelf have side edges. These edges and the shape of the guide-bars are a special device to prevent the cookware from slipping. Installing the wire shelf and the deep pan together Put the wire shelf on the deep pan. -
Page 15: Roasting Pan
ENGLISH INSERTING THE WIRE SHELF AND THE DEEP PAN TOGETHER Put the wire shelf on the deep pan. Put the wire shelf and the deep pan on the tele- scopic runners. TRIVET AND GRILL- / ROASTING PAN WARNING! Be careful when you remove the accessories from a hot appliance. -
Page 16: Additional Functions
16 www.electrolux.com ADDITIONAL FUNCTIONS activate or deactivate the Control CHILD LOCK Lock). The Child Lock prevents an accidental op- If the oven has Pyro Cleaning func- eration of the appliance. tion and the function operates, the Activating and deactivating the Child door is locked. -
Page 17: Helpful Hints And Tips
ENGLISH HELPFUL HINTS AND TIPS • With longer baking times, you can deac- INNER SIDE OF THE DOOR tivate the oven approximately 10 minutes In some models, on the inner side of before the end of the baking time and the door you can find: then use the residual heat. - Page 18 18 www.electrolux.com Type of bak- Oven func- Shelf position Temperature Time (min.) tion °C Apple pie / Ap- Conventional 70 - 90 ple pie (2 tins Cooking Ø20 cm, diag- onally off set) Cheesecake Conventional 170 - 190 60 - 90 Cooking 1) Preheat the oven.
- Page 19 ENGLISH Type of bak- Oven func- Temperature Shelf position Time (min.) tion °C Fruit flans (made with yeast dough / Conventional 35 - 55 sponge mix- Cooking ture) Fruit flans True Fan made with 160 - 170 40 - 80 Cooking short pastry Yeast cakes...
- Page 20 20 www.electrolux.com Type of bak- Oven func- Temperature Shelf position Time (min.) tion °C Conventional Rolls 10 - 25 190 - 210 Cooking Small cakes / True Fan Small cakes 20 - 35 Cooking (20 per tray) Small cakes /...
-
Page 21: Tips On Baking
ENGLISH True Fan Cooking Type of bak- Temperature Shelf position Time (min.) in °C 2 levels 3 levels Puff pastries 1 / 4 30 - 50 170 - 180 Rolls 1 / 4 30 - 55 Small cakes / Small cakes 1 / 4 25 - 40 (20 per tray) -
Page 22: Roasting With Turbo Grilling
22 www.electrolux.com Oven func- Temperature Dish Shelf position Time (min.) tion °C Conventional Lasagne 180 - 200 25 - 40 Cooking Turbo Grilling Vegetables au or True Fan 160 - 170 15 - 30 gratin Cooking Baguettes top- Turbo Grilling... - Page 23 ENGLISH Pork Oven Shelf posi- Tempera- Time Type of meat Quantity function tion ture °C (min.) Shoulder / Turbo Grill- Neck / Ham 1 - 1.5 kg 160 - 180 90 - 120 joint Chop / Spare Turbo Grill- 1 - 1.5 kg 170 - 180 60 - 90 750 g - 1...
- Page 24 24 www.electrolux.com Poultry Type of Quantity Oven func- Shelf posi- Tempera- Time (min.) meat tion tion ture °C Poultry por- 200 - 250 g Turbo Grill- 200 - 220 30 - 50 tions each Half chicken 400 - 500 g...
-
Page 25: Pizza Setting
ENGLISH Fast Grilling Time (min.) Food to be grilled Shelf position 1st side 2nd side Burgers / Burgers 8 - 10 6 - 8 Pork fillet 10 - 12 6 - 10 Sausages 10 - 12 6 - 8 Fillet / Veal steaks 7 - 10 6 - 8 1 - 3... - Page 26 26 www.electrolux.com Defrosting Further defrost- Dish Comment time (min.) ing time (min.) Put the chicken on an upturned saucer placed Chicken, 1000 g 100 - 140 20 - 30 on a large plate. Turn halfway through. Meat, 1000 g 100 - 140 20 - 30 Turn halfway through.
-
Page 27: Core Temperature Sensor Table
ENGLISH Vegetables Cooking time un- Temperature in Continue to cook Preserve til simmering °C at 100°C (min.) (min.) 160 - 170 50 - 60 5 - 10 Carrots Cucumbers 160 - 170 50 - 60 Mixed pickles 160 - 170 50 - 60 5 - 10 Kohlrabi / Peas /... - Page 28 28 www.electrolux.com Food Food Core Temperature °C Rib / Fillet steak: well done 70 - 75 Pork Food Food Core Temperature °C Shoulder / Ham / Neck joint of pork 80 - 82 Chop (saddle) / Smoked pork loin 75 - 80...
-
Page 29: Care And Cleaning
ENGLISH CARE AND CLEANING WARNING! Remove the worst dirt manually. Refer to "Safety information" chap- Set the Pyrolytic cleaning function. Re- ter. fer to "Oven functions". When flashes, press Notes on cleaning: set the necessary procedure: • Clean the front of the appliance with a –... -
Page 30: Shelf Supports
30 www.electrolux.com SHELF SUPPORTS Removing the shelf supports You can remove the shelf supports to clean the side walls. Pull the front of the shelf support away from the side wall. Pull the rear end of the shelf support away from the side wall and remove it. -
Page 31: Cleaning The Oven Door
ENGLISH CLEANING THE OVEN DOOR Removing the door and the glass panels You can remove the oven door and the in- ternal glass panels to clean it. The number of glass panels is different for different models. WARNING! Be careful when you remove the door from the appliance. -
Page 32: What To Do If
32 www.electrolux.com WHAT TO DO IF… WARNING! Refer to "Safety information" chap- ter. Problem Possible cause Remedy The appliance does not The appliance is deactiva- Activate the appliance. heat up. ted. The appliance does not The clock is not set. - Page 33 ENGLISH Problem Possible cause Remedy The display shows an er- There is an electrical fault. • Deactivate the appli- ror code that is not on this ance with the house list. fuse or the safety switch in the fuse box and acti- vate it again.
-
Page 34: Installation
34 www.electrolux.com INSTALLATION WARNING! The built-in unit must meet the sta- Refer to "Safety information" chap- bility requirements of DIN 68930. ter. min. 3 mm 560 min. 530 min. 590 min. - Page 35 ENGLISH alternativ 100 max. R1200 mm H05VV-F H05RR-F min. 1600 mm 90 º 2x3,5x25...
-
Page 36: Great Britain & Ireland - Guarantee/Customer Service
Force Centre you will need to give the fol- months of the date of the purchase this lowing details: Your name, address and Electrolux appliance or any part thereof is postcode, your telephone number, clear proved to be defective by reason only of... - Page 37 ENGLISH European Guarantee: This appliance is guaranteed by Electrolux in each of the countries listed at the back of this user manual, for the period specified in the ap- pliance guarantee or otherwise by law. If you move from one of these countries to...
- Page 38 38 www.electrolux.com WWW.ELECTROLUX.COM Albania +35 5 4 261 450 Rr. Pjeter Bogdani Nr. 7 Tirane Belgique/België/Bel- ++32-2-7162444 Raketstraat 40, 1130 Brussel/ gien Bruxelles Česká republika +420 261 302 261 Budějovická 3, Praha 4, 140 21 Danmark +45 70 11 74 00...
-
Page 39: Environment Concerns
ENGLISH Slovensko +421 2 32 14 13 34-5 Electrolux Slovakia s.r.o., Electrolux Domáce spotrebiče SK, Galvaniho 17/ B, 821 04 Bratislava Suomi www.electrolux.fi Sverige +46 (0)771 76 76 76 Electrolux Service, S:t Göransga- tan 143, S-105 45 Stockholm Türkiye +90 21 22 93 10 25 Tarlabaşı... - Page 40 892948844-A-512011...