Table of Contents
Advertisement
Quick Links
Advertisement
Table of Contents

Related Manuals for Electrolux EOC5654AAX


Summary of Contents for Electrolux EOC5654AAX
- Page 1 EOC5654AAX EOC5654AOX Oven User Manual...
-
Page 2: Table Of Contents
14. ENERGY EFFICIENCY.................. 37 WE’RE THINKING OF YOU Thank you for purchasing an Electrolux appliance. You’ve chosen a product that brings with it decades of professional experience and innovation. Ingenious and stylish, it has been designed with you in mind. So whenever you use it, you can be safe in the knowledge that you’ll get great results every time. -
Page 3: Safety Information
ENGLISH SAFETY INFORMATION Before the installation and use of the appliance, carefully read the supplied instructions. The manufacturer is not responsible for any injuries or damage that are the result of incorrect installation or usage. Always keep the instructions in a safe and accessible location for future reference. -
Page 4: Safety Instructions
Always use oven gloves to remove or put in • accessories or ovenware. Before carrying out any maintenance, disconnect the • appliance from the power supply. Ensure that the appliance is switched off before • replacing the lamp to avoid the possibility of electric shock. - Page 5 ENGLISH be replaced, this must be carried out by our Authorised Service Centre. Cabinet width 560 mm • Do not let mains cables touch or Cabinet depth 550 (550) mm come near the appliance door or the niche below the appliance, especially Height of the front of 594 mm when it operates or the door is hot.
- Page 6 The earth cord (green / yellow cable) – do not keep moist dishes and must be 2 cm longer than phase and food in the appliance after you neutral cables (blue and brown cables). finish the cooking. – be careful when you remove or 2.3 Use...
- Page 7 ENGLISH • If you use an oven spray, follow the operation to a well ventilated safety instruction on it's packaging. area. • Do not clean the catalytic enamel (if • Small pets can also be highly applicable) with any kind of detergent. sensitive to the localized temperature changes in the vicinity of all Pyrolytic 2.5 Pyrolytic cleaning...
-
Page 8: Installation
3. INSTALLATION WARNING! Refer to Safety chapters. 3.1 Building In min. 550 min. 560 min. 550 min. 560... -
Page 9: Product Description
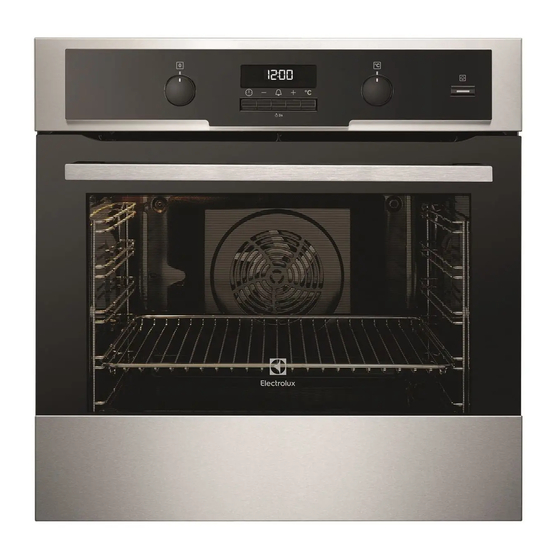
ENGLISH 3.2 Securing the oven to the cabinet 4. PRODUCT DESCRIPTION 4.1 General overview Control panel Knob for the heating functions Power lamp / symbol Display Control knob (for the temperature) Temperature indicator / symbol Plus Steam Socket for the core temperature sensor Heating element Lamp... -
Page 10: Control Panel
5. CONTROL PANEL 5.1 Buttons Sensor field / Button Function Description CLOCK To set a clock function. MINUS To set the time. MINUTE To set the MINUTE MINDER. Hold the MINDER button for more than 3 seconds to acti‐... -
Page 11: Daily Use
ENGLISH Accessories can become hotter than 3. Set the function , press: Plus usual. The oven can emit an odour and Steam . Set the maximum smoke. Make sure that the airflow in the temperature. room is sufficient. 4. Let the oven operate for 15 minutes. 5. - Page 12 7.3 Setting a heating function Oven func‐ Application 1. Turn the knob for the heating tion functions to select a heating function. 2. Turn the control knob to select the This function is de‐ temperature. signed to save energy The lamp turns on when the oven during cooking.
-
Page 13: Clock Functions
ENGLISH 7.5 Fast Heat Up CAUTION! Do not refill the cavity The fast heat up decreases the heat up embossment with water time. during cooking or when the oven is hot. Do not put food in the oven 2. Put food in the oven and close the when the Fast heat up oven door. - Page 14 When the set Duration time ends the Clock func‐ Application signal sounds for 2 minutes. tion time setting flash in the display. The oven turns off automatically. 00:00 If you do not set any 4. Press any button or open the oven...
-
Page 15: Using The Accessories
ENGLISH 8.6 Setting the MINUTE After 90% of the set time the signal sounds. MINDER 5. When the set time ends the signal Minute minder can be both set when the sounds for 2 minutes. "00:00" and oven is turned on and off. flash in the display. - Page 16 The signal sounds for 2 minutes. 5. Press any button or open the oven door to stop the signal. 6. Remove the plug of the core temperature sensor from the socket. Remove the meat from the oven.
-
Page 17: Additional Functions
ENGLISH 9.3 Telescopic Runners 2. Put the wire shelf on the telescopic runners and carefully push them into Keep the installation the oven. instructions for the telescopic runners for future use. °C With telescopic runners you can put in and remove the shelves more easily. CAUTION! Do not clean the telescopic runners in the dishwasher. -
Page 18: Hints And Tips
When you turn the knob for the oven functions, the oven stops. When you turn off the oven while the (°C) Function Lock is on, the Function Lock 120 - 195 switches automatically to the Child Lock. Refer to "Using the Child Lock". - Page 19 ENGLISH If you use two baking trays at the same time, keep one empty level between Food Tem‐ Time them. pera‐ (min) ture Cooking meat and fish (°C) Use a deep pan for very fatty food to prevent the oven from stains that can be Pizza 10 - permanent.
- Page 20 Use 200 ml of water. Food Time (min) Food Tempera‐ Time ture (°C) (min) Rice 15 - 25 Roast beef 50 - 60 Vegetables 15 - 25 Chicken 60 - 80 Roasting Roast pork 65 - 80 Use the glass baking dish.
- Page 21 ENGLISH Food Top / Bottom Heat True Fan Cooking Time Com‐ (min) ments Tempera‐ Shelf po‐ Tempera‐ Shelf po‐ ture (°C) sition ture (°C) sition Small 150 - 160 20 - 30 In a bak‐ cakes - ing tray one lev‐ Small 140 - 150 2 and 4...
- Page 22 Food Top / Bottom Heat True Fan Cooking Time Com‐ (min) ments Tempera‐ Shelf po‐ Tempera‐ Shelf po‐ ture (°C) sition ture (°C) sition Rich fruit 110 - 120 In a 24 cm cake cake mould Victoria 2 (left and...
- Page 23 ENGLISH Food Top / Bottom Heat True Fan Cooking Time Com‐ (min) ments Tempera‐ Shelf po‐ Tempera‐ Shelf po‐ ture (°C) sition ture (°C) sition 180 - 190 180 - 190 25 - 40 In a mould Lasagne Cannello‐ 180 - 190 180 - 190 25 - 40 In a mould...
- Page 24 Food Top / Bottom Heat True Fan Cooking Time Com‐ (min) ments Tempera‐ Shelf po‐ Tempera‐ Shelf po‐ ture (°C) sition ture (°C) sition Hare 150 - 200 Cut in pieces Pheasant 90 - 120 Whole Fish Food Top / Bottom Heat...
- Page 25 ENGLISH To calculate the roasting time multiple the time given in the table below by the Food Tempera‐ Time (min) centimetres of thickness of the fillet. ture (°C) Saddle of 160 - 180 40 - 60 Food Tempera‐ Time (min) lamb, 1 - 1.5 ture (°C) Roast beef...
- Page 26 Food Accessories Temperature Shelf po‐ Time (min) (°C) sition Sweet rolls, 12 baking tray or dripping 20 - 30 pieces Rolls, 9 pieces baking tray or dripping 30 - 40 Pizza, frozen, wire shelf 10 - 15 0.35 kg...
- Page 27 ENGLISH Food Accessories Temperature Shelf po‐ Time (min) (°C) sition Poached vege‐ baking tray or dripping 35 - 45 tables, 0.4 kg Vegetarian pizza pan on wire shelf 25 - 30 omelette Vegetables, baking tray or dripping 25 - 30 mediterrean 0.7 kg 11.8 Defrost...
- Page 28 Food Temperature (°C) Time (h) Vegetables for sour 60 - 70 5 - 6 Mushrooms 50 - 60 6 - 8 Herbs 40 - 50 2 - 3 Fruit Food Temperature Time (h) Shelf position (°C) 1 position 2 positions...
- Page 29 ENGLISH Food Function Acces‐ Shelf Tem‐ Time (min) Comments sories posi‐ pera‐ tion ture (°C) Small True Fan Baking 150 - 20 - 35 Put 20 small cake Cooking / tray cakes per one Fan Cook‐ baking tray. Small True Fan Baking 2 and 150 -...
-
Page 30: Care And Cleaning
Food Function Acces‐ Shelf Tem‐ Time (min) Comments sories posi‐ pera‐ tion ture (°C) Toast Grilling Wire max. 2 - 3 minutes Preheat the oven 4 - 6 shelf first side; 2 - 3 for 3 minutes. pieces minutes sec‐... - Page 31 ENGLISH Use maximum 6% vinegar without CAUTION! any additives. Remove all accessories and 2. Let the vinegar dissolve the residual removable shelf supports. limestone at the ambient temperature for 30 minutes. Do not start the Pyrolysis if 3. Clean the cavity with warm water and you did not fully close the a soft cloth.
- Page 32 To stop pyrolysis before it is completed, turn the knob for the oven functions to the off position. 6. When pyrolysis is completed, the display shows the time of day. The oven door stays locked. 7. When the oven is cool again, the door unlocks.
- Page 33 ENGLISH Check for the symbol / printing on the side of the glass panel, each of the glass panels looks different to make the disassembly and assembly easier. When installed correctly the door trim clicks. 6. Put the door on a soft cloth on a stable surface.
-
Page 34: Troubleshooting
3. Replace the lamp with a suitable 300 4. Install the glass cover. °C heat-resistant lamp. 13. TROUBLESHOOTING WARNING! Refer to Safety chapters. 13.1 What to do if... Problem Possible cause Remedy You cannot activate or op‐ The oven is not connected Check if the oven is cor‐... - Page 35 ENGLISH Problem Possible cause Remedy The display shows "C2". You want to start the Pyrol‐ Remove the core tempera‐ ysis or Defrost function, but ture sensor plug from the you did not remove the socket. core temperature sensor plug from the socket. The display shows "C3".
- Page 36 Problem Possible cause Remedy You want to activate the The Plus Steam button is Press the Plus Steam but‐ cleaning function, but the pressed in. ton again. display shows "C4". The water in the cavity em‐ The temperature is too low. Set the temperature at bossment does not boil.
-
Page 37: Energy Efficiency
ENGLISH 14. ENERGY EFFICIENCY 14.1 Product Information Sheet Product information according to EU 65-66/2014 Supplier's name Electrolux EOC5654AAX 949499815 Model identification EOC5654AOX 949499814 Energy Efficiency Index 81.2 Energy efficiency class Energy consumption with a standard load, con‐ 0.93 kWh/cycle ventional mode Energy consumption with a standard load, fan- 0.69 kWh/cycle... - Page 38 Keep food warm When you use this function the lamp Choose the lowest possible temperature automatically turns off after 30 seconds. setting to use residual heat and keep a You may turn on the lamp again but this meal warm. The residual heat indicator action will reduce the expected energy or temperature appears on the display.
- Page 39 ENGLISH...
- Page 40 www.electrolux.com/shop...