Table of Contents
Advertisement
Quick Links
Advertisement
Table of Contents

Related Manuals for Electrolux EOC5651CAX


Summary of Contents for Electrolux EOC5651CAX
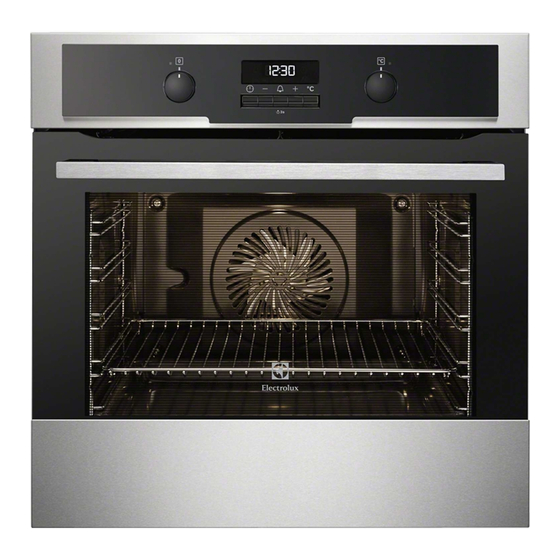
- Page 1 EOC5651CAX EOC5651WOX Oven User Manual...
-
Page 2: Table Of Contents
12. ENERGY EFFICIENCY.................. 35 WE’RE THINKING OF YOU Thank you for purchasing an Electrolux appliance. You’ve chosen a product that brings with it decades of professional experience and innovation. Ingenious and stylish, it has been designed with you in mind. So whenever you use it, you can be safe in the knowledge that you’ll get great results every time. - Page 3 ENGLISH responsible for any injuries or damages that are the result of incorrect installation or usage. Always keep the instructions in a safe and accessible location for future reference. 1.1 Children and vulnerable people safety This appliance can be used by children aged from 8 •...
-
Page 4: Safety Instructions
Ensure that the appliance is switched off before • replacing the lamp to avoid the possibility of electric shock. Do not use a steam cleaner to clean the appliance. • Do not use harsh abrasive cleaners or sharp metal •... - Page 5 ENGLISH • Always use a correctly installed • Be careful when you open the shockproof socket. appliance door while the appliance is • Do not use multi-plug adapters and in operation. Hot air can release. extension cables. • Do not operate the appliance with wet •...
- Page 6 • Read carefully all the instructions for the housing unit or the floor. Do not Pyrolytic cleaning.
-
Page 7: Product Description
ENGLISH • Cut off the mains electrical cable WARNING! close to the appliance and dispose of Risk of electrical shock. • Remove the door catch to prevent • Before replacing the lamp, disconnect children or pets from becoming the appliance from the power supply. trapped in the appliance. -
Page 8: Before First Use
To measure how far the food is cooked. Trivet Telescopic runners For roasting and grilling. For shelves and trays. Use the trivet only with the Grill- / Roasting pan. Core temperature sensor 4. BEFORE FIRST USE WARNING! Refer to "Care and cleaning"... - Page 9 ENGLISH 5.2 Activating and deactivating 1. Turn the knob for the oven functions to select an oven function. the appliance 2. Turn the knob for the temperature to select a temperature. It depends on the model if 3. To deactivate the appliance turn the your appliance has lamps, knobs for the oven functions and knob symbols or...
- Page 10 Oven function Application Turbo Grilling To roast larger meat joints or poultry with bones on one shelf position. Also to make gratins and to brown. Pyrolysis To activate the automatic pyrolytic cleaning of the oven. This function burns off residual dirt in the oven.
-
Page 11: Clock Functions
ENGLISH 5.7 Heat-up indicator one. The bars show that the oven temperature increases or decreases. When you activate an oven function, the bars in the display come on one by 6. CLOCK FUNCTIONS 6.1 Clock functions table Clock function Application TIME OF DAY To show or change the time of day. -
Page 12: Using The Accessories
6.4 Setting the END an acoustic signal sounds for 2 minutes. and time setting flash in the display. 1. Set an oven function. The appliance deactivates. 2. Press again and again until 7. Press any button to stop the acoustic starts to flash. - Page 13 ENGLISH 3. Put the plug of the core temperature Every time you put the core sensor into the socket on the front of temperature sensor in the the appliance. socket, you need to set the core temperature time again. You cannot select the duration and end time.
- Page 14 7.3 Telescopic runners - inserting the accessories With the telescopic runners you can put in and remove the shelves more easily. CAUTION! Do not clean the telescopic runners in the dishwasher. Do not lubricate the telescopic runners. CAUTION! Deep pan:...
-
Page 15: Additional Functions
ENGLISH 2. Put the deep pan into the oven on the necessary shelf position. You can use the trivet to grill flat dishes in large quantities and to toast. 1. Put the trivet into the deep pan so that the supports of the wire shelf point down. -
Page 16: Hints And Tips
8.2 Using the Function Lock if the temperature in the oven is more than 40 °C. Turn the knob for the You can activate the Function Lock temperature left or right to show the oven function only when the appliance temperature. - Page 17 ENGLISH 9.2 Baking • Cakes and pastries at different heights do not always brown equally • Your oven may bake or roast at first. If this occurs, do not change differently to the appliance you had the temperature setting. The before.
- Page 18 9.4 Baking on one level: Baking in tins Food Function Temperature Time (min) Shelf position (°C) Ring cake / True Fan 150 - 160 50 - 70 Brioche Cooking Madeira cake / True Fan 140 - 160 70 - 90...
- Page 19 ENGLISH Food Function Temperature Time (min) Shelf position (°C) Bread (rye Top / Bottom 1. 20 1. 230 bread): Heat 2. 30 - 60 2. 160 - 180 1. First part of baking pro‐ cedure. 2. Second part of bak‐ ing proce‐...
- Page 20 Biscuits Food Function Temperature Time (min) Shelf position (°C) Short pastry True Fan Cook‐ 150 - 160 10 - 20 biscuits Short bread / True Fan Cook‐ 20 - 35 Short bread / Pastry stripes Short bread / Top / Bottom...
- Page 21 ENGLISH Food Function Temperature Time (min) Shelf position (°C) Lasagne Top / Bottom 180 - 200 25 - 40 Heat Vegetables au Turbo Grilling 160 - 170 15 - 30 gratin Baguettes top‐ True Fan Cook‐ 160 - 170 15 - 30 ped with mel‐...
- Page 22 Food Temperature Time (min) Shelf position (°C) 2 positions 3 positions Biscuits made 80 - 100 130 - 170 1 / 4 with egg white, meringues Macaroons 100 - 120 40 - 80 1 / 4 Biscuits made 160 - 170...
- Page 23 ENGLISH Food Temperature (°C) Time (min) Shelf position Piroggen (Russian 15 - 25 180 - 200 version of calzone) 1) Preheat the oven. 2) Use a deep pan. 9.8 Roasting • To prevent the meat juices or fat from burning onto the pan, put some liquid •...
- Page 24 Food Quantity Function Tempera‐ Time (min) Shelf posi‐ (kg) ture (°C) tion Chop / Spare 1 - 1.5 Turbo Grill‐ 170 - 180 60 - 90 Meatloaf 0.75 - 1 Turbo Grill‐ 160 - 170 50 - 60 Pork knuckle 0.75 - 1...
- Page 25 ENGLISH Food Quantity Function Tempera‐ Time (min) Shelf posi‐ (kg) ture (°C) tion Half chicken 0.4 - 0.5 Turbo Grill‐ 190 - 210 35 - 50 each Chicken, 1 - 1.5 Turbo Grill‐ 190 - 210 50 - 70 poulard Duck 1.5 - 2 Turbo Grill‐...
- Page 26 Fast Grilling Food Time (min) Shelf position 1st side 2nd side Burgers / Burgers 8 - 10 6 - 8 Pork fillet 10 - 12 6 - 10 Sausages 10 - 12 6 - 8 Fillet / Veal steaks...
- Page 27 ENGLISH Frozen ready meals Food Function Temperature Time (min) Shelf position (°C) Frozen pizza Top / Bottom as per manu‐ as per manu‐ Heat facturer’s in‐ facturer’s in‐ structions structions Top / Bottom 200 - 220 as per manu‐ French fries Heat or Turbo facturer’s in‐...
- Page 28 • Put no more than six one-litre • When the liquid in the jars starts to preserve jars on the baking tray. simmer (after approximately 35 - 60 • Fill the jars equally and close with a minutes with one-litre jars), stop the clamp.
- Page 29 ENGLISH Food Temperature Time (h) Shelf position (°C) 1 position 2 positions Vegetables for 60 - 70 5 - 6 1 / 4 sour Mushrooms 50 - 60 6 - 8 1 / 4 Herbs 40 - 50 2 - 3 1 / 4 Fruit Food...
-
Page 30: Care And Cleaning
Food Food core temperature (°C) Saddle of mutton 80 - 85 Roast lamb / Leg of lamb 70 - 75 Game Food Food core temperature (°C) Saddle of hare 70 - 75 Leg of hare 70 - 75 Whole hare... - Page 31 ENGLISH Option Description If the oven is not very dirty. Time of the proce‐ dure: 1 h 30 min. If you cannot Install the shelf supports in the opposite easily re‐ sequence. move the dirt. Time of The retaining pins on the the proce‐...
- Page 32 10.5 Removing and installing the door You can remove the door and the internal glass panels to clean it. The number of glass panels is different for different models. WARNING! Be careful when you remove 9. Clean the glass panel with water and the door from the appliance.
-
Page 33: Troubleshooting
ENGLISH 10.6 Replacing the lamp Put a cloth on the bottom of the interior of the appliance. It prevents damage to the lamp glass cover and the cavity. WARNING! Danger of electrocution! Disconnect the fuse before 2. Clean the glass cover. you replace the lamp. - Page 34 Problem Possible cause Remedy The oven does not heat The fuse is blown. Make sure that the fuse is the cause of the malfunc‐ tion. If the fuse is blown again and again, contact a qualified electrician. The lamp does not oper‐...
-
Page 35: Energy Efficiency
......... Serial number (S.N.) ......... 12. ENERGY EFFICIENCY 12.1 Product Fiche and information according to EU 65-66/2014 Supplier's name Electrolux EOC5651CAX Model identification EOC5651WOX Energy Efficiency Index 103.5 Energy efficiency class Energy consumption with a standard load, con‐ 0.99 kWh/cycle... - Page 36 Residual heat during the cooking. If a programme with the Duration or End Time selection is activated and the Use metal dishes to improve energy cooking time is longer than 30 minutes, saving.
- Page 37 ENGLISH...
- Page 38 www.electrolux.com...
- Page 39 ENGLISH...
- Page 40 www.electrolux.com/shop...