Table of Contents
Advertisement
User's Guide (Basic Operations)
• Be sure to read the "Safety Precautions" on page E-2 and "Operating Precautions" on page
E-6 before trying to use this projector.
• This manual covers only basic operations, including how to set up the projector, basic projector
operations, and how to replace the lamp. For more detailed information, see the User's Guide
(UsersGuide_English.pdf) on the CD-ROM that comes with the projector.
Contents
Safety Precautions .....................................E-2
Operating Precautions ...............................E-6
Lamp Handling Precautions ...................... E-6
Lamp Replacement Precautions ............... E-6
Other Precautions ..................................... E-7
Unpacking ...................................................E-9
General Guide ...........................................E-10
Remote Controller General Guide ........... E-12
Preparing the Remote Controller............. E-12
Getting Ready ...........................................E-14
Setting Up the Projector .......................... E-14
Setup Precautions ................................... E-15
• DLP is a registered trademark of Texas Instruments Incorporated of the United States.
• Microsoft, Windows, Windows Vista, and PowerPoint are registered trademarks or trademarks
of Microsoft Corporation in the United States and other countries.
• Apple and Macintosh are registered trademarks of Apple Inc. of the United States.
• Adobe and Reader are registered trademarks of Adobe Systems Incorporated.
• XGA is a registered trademark of IBM Corporation of the United States.
• Other company and product names may be registered trademarks or trademarks of their
respective owners.
• The contents of this User's Guide are subject to change without notice.
• Copying of this manual, either in part or its entirety, is forbidden. You are allowed to use this
manual for your own personal use. Any other use is forbidden without the permission of CASIO
COMPUTER CO., LTD.
• CASIO COMPUTER CO., LTD. shall not be held liable for any lost profits or claims from third
parties arising out of the use of this product or this manual.
• CASIO COMPUTER CO., LTD. shall not be held liable for any loss or lost profits due to loss of
data caused by malfunction or maintenance of this product, or any other reason.
• The sample screens shown in this manual are for illustrative purposes only, and appear
differently from the screens actually produced by the product.
Turning On the Projector ......................... E-20
Turning Off the Projector ......................... E-22
Projector Basics .......................................E-23
Selecting the Input Source ...................... E-23
Adjusting the Projected Image ................ E-23
Adjusting the Volume Level..................... E-24
Keystone Correction (KEYSTONE)......... E-25
Using the Setup Menu ..............................E-26
User Maintenance.....................................E-27
Cleaning the Projector............................. E-27
Reattaching the Lens Cover.................... E-28
Replacing the Lamp ................................ E-29
Troubleshooting .......................................E-34
Indicators................................................. E-34
Projector Troubleshooting ....................... E-38
Specifications ...........................................E-40
E-1
English
Advertisement
Table of Contents
Troubleshooting

Related Manuals for Casio SC-210


Summary of Contents for Casio SC-210
-
Page 1: Table Of Contents
• CASIO COMPUTER CO., LTD. shall not be held liable for any loss or lost profits due to loss of data caused by malfunction or maintenance of this product, or any other reason. -
Page 2: Safety Precautions
Safety Precautions Thank you for selecting this CASIO product. Be sure to read these “Safety Precautions” before trying to use it. After reading this User’s Guide, keep it in a safe place for future reference. About safety symbols Various symbols are used in this User’s Guide and on the product itself to ensure safe use, and to protect you and others against the risk of injury and against material damage. - Page 3 Be sure to leave all internal inspection, to turn it off and unplug it from the adjustment, and repair up to your original power outlet. Failure to do so creates dealer or authorized CASIO service center. the risk of electric shock. ● Dropping and impact ●...
-
Page 4: Battery Precautions
Be sure to leave all internal inspection, adjustment, and repair up Warning to your original dealer or authorized CASIO Service Center. Never allow the remote controller to Misuse of a battery can cause it to leak and become wet. Water creates the risk of stain the area around it, or to explode, fire and electric shock. -
Page 5: Lamp Precautions
The lamp becomes very hot during risk of fire and breakdown. Contact your use, creating the risk of burn injury. original dealer or authorized CASIO service Turn off the projector. After the center once a year about having the interior POWER/STANDBY indicator changes to of the projector cleaned. -
Page 6: Operating Precautions
Operating Precautions Lamp Handling Precautions Continued use of a lamp that has passed its lamp life increases the risk of Caution the lamp rupturing. Replace the lamp with a new one as soon as possible after the replacement message appears. Never touch the glass of the lamp with your fingers. -
Page 7: Other Precautions
Operating Precautions Other Precautions This projector is made of precision components. Failure to observe the following precautions can result in inability to correctly save data and malfunction. ● Never use or store the projector in the following locations. Doing so creates the risk of malfunction of and damage to the projector. - Page 8 Operating Precautions ● Even if your projector is still within the warranty period, you will be charged for repair if a problem is due to running the projector non-stop for very long periods (like 24 hours) or if the projector was set up and used without following the “Setup Precautions” on page E-15 of this manual.
-
Page 9: Unpacking
Unpacking As you unpack the projector, check to make sure that all of the items listed below are present. DATA PROJECTOR Remote Controller Test Battery (CR2025) (YT-35) (Loaded in remote controller.) AC Power Cord Special AV Cable Mini D-Sub Cable •... -
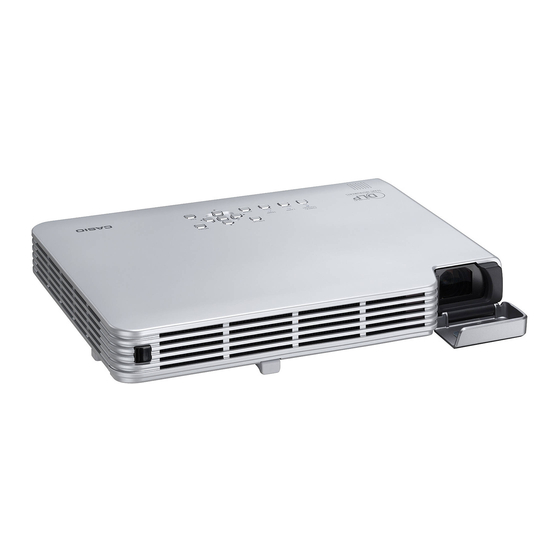
Page 10: Projector Features And Main Functions
Projector Features and Main Functions Slim and compact: B5 file size and a mere 32 mm slim (at thinnest part). Compact enough to install or use just about anywhere. Wide projection range, from a minimum of 0.84 meters: Wide angle 2X zoom allows projection even when projector-to-screen distance is severely limited. - Page 11 General Guide * The projector’s enter key does not have anything printed on it. When you see [ENTER] in this manual, it means you should press the projector’s enter key or the [ENTER] key of the remote controller. Never look into the lens while the projector is turned on. Never allow the intake and exhaust vents to become blocked, and make sure there is at least 30 cm (11.8 inches) clearance around the projector.
-
Page 12: Remote Controller General Guide
General Guide Remote Controller General Guide Remote control signal emitter [INPUT] key CLASS 1 LED PRODUCT [AUTO] key ] (Power) key [BLANK] key – [ZOOM ] [ZOOM ] keys [FREEZE] key [FOCUS [VOLUME] key [FOCUS ] keys [COLOR MODE] key M +] [D-ZOO –] k... -
Page 13: Replacing The Remote Controller Battery
General Guide Replacing the Remote Controller Battery Before you can use the remote controller for the first time, you need to load the battery that comes with it. RISK OF EXPLOSION IF BATTERY IS REPLACED BY AN INCORRECT Caution TYPE. DISPOSE OF USED BATTERIES ACCORDING TO THE INSTRUCTIONS. -
Page 14: Getting Ready
Getting Ready Setting Up the Projector Locate the projector on a desk, table, or stand that is firm and level. Make sure to allow sufficient space around the sides and back of the projector for proper ventilation. The following illustrations show how the projector should be oriented for optimum projection relative to the screen. -
Page 15: Setup Precautions
Getting Ready Setup Precautions Note that the condition of the environment where you use the projector greatly affects its performance. Make sure that the following are the conditions of projector setup whenever you use it. Use a conveniently located power outlet that you can reach easily when you need to unplug the projector. -
Page 16: Adjusting The Projector Elevation Angle
Getting Ready Adjusting the Projector Elevation Angle You can change the elevation angle of the projector in a range of 0 to 12 degrees. You can also make fine adjustments to the left and right side elevation angle when necessary. To change the projector elevation angle Lift up the front of the projector and press the release button. -
Page 17: Connecting A Computer To The Projector
Getting Ready Connecting a Computer to the Projector You can use the projector to project an image of analog RGB output from a computer. Always turn off the projector and the computer before connecting them. Take care so the volume level of the computer is not set too high. Projector AV terminal COMPUTER terminal... -
Page 18: Connecting To A Component Video Output Device
Getting Ready Connecting to a Component Video Output Device Some video devices are equipped with a component video output terminal. You can use an optionally available component video cable (YK-3) to connect the COMPUTER terminal of the projector to the component video output terminal of a video device. Always turn off the projector and the video device before connecting them. -
Page 19: Connecting A Usb Device To The Projector (Usb Port Equipped Models Only
This means you can include PowerPoint data in your presentations without having to lug a computer along everywhere you go. * CASIO COMPUTER CO., LTD. makes no guarantees concerning the operation of any particular USB memory device. Wireless Adapter (YW-2) Connecting a YW-2 Wireless Adapter to your projector makes it possible to wirelessly transmit computer images to the projector. -
Page 20: Turning On The Projector
Use a conveniently located power outlet that you can reach easily when you need to unplug the projector. If you need more information about the power supply, contact your original dealer or authorized CASIO service center. To turn on the projector Use the bundled AC power cord to plug Power supply connector the projector into a power outlet. -
Page 21: Direct Power On
Getting Ready If the Eco Mode is turned on, the LAMP indicator will light green when warm up starts. If the projector is hot when you plug the AC power cord into a power outlet, it will go into a cool down state. The cool down state is indicated by the POWER/STANDBY indicator flashing orange. -
Page 22: Turning Off The Projector
Getting Ready Turning Off the Projector When you turn off the projector, the lamp goes out and the projector goes into a cool down state. Note that you will not be able to turn the projector back on again while it is cooling down. -
Page 23: Projector Basics
Projector Basics For detailed information about projection operations, see the User’s Guide on the CD-ROM that comes with the projector. For details about connecting USB devices to the XJ-SC215/XJ-S37/XJ-S47/XJ-S57 projector and procedures you need to perform to project images from a USB device, see “USB Function Guide”... -
Page 24: Adjusting The Volume Level
Projector Basics Adjusting the Volume Level You can use the remote controller keys to adjust the volume level of the audio that is output from the projector’s speaker. To adjust the volume level On the remote controller, press the [VOLUME] key. This causes the [Volume] screen to appear on the projected image. -
Page 25: Keystone Correction (Keystone
Projector Basics Keystone Correction (KEYSTONE) When the projector is at an angle to the screen it is projecting on, the projected image may have different length top and bottom edges. This phenomenon is called, “keystoning”. This projector comes with functions for automatic as well as manual keystone correction, which provides a regularly shaped projected image. -
Page 26: Using The Setup Menu
Using the Setup Menu Pressing the [MENU] key while an image is being projected displays the setup menu on the projected image. The setup menu can be used to configure a variety of different projector settings. Use the cursor keys to select and configure settings, and the [ENTER] key to register them. -
Page 27: User Maintenance
User Maintenance Cleaning the Projector Periodically clean the projector exterior, lens, intake vents, and exhaust vents on a regular basis. Always make sure that the projector has cooled sufficiently before cleaning it. If the projector is turned on, perform the following steps before cleaning it. Turn off the projector. -
Page 28: Reattaching The Lens Cover
User Maintenance Reattaching the Lens Cover Use the following procedure to replace the lens cover if it should accidentally become detached from the projector. Insert the nub ( ) of the left tab of the lens cover into the depression ( ) of the tab under the lens. -
Page 29: Replacing The Lamp
User Maintenance Replacing the Lamp Continued use of a lamp that has passed its lamp life increases the risk Caution of the lamp rupturing. Replace the lamp with a new one as soon as possible after the replacement message appears. The light source lamp is a consumable item. - Page 30 Should the lamp break, take care to avoid personal injury on the glass fragments. Never try to replace a broken lamp on your own. Be sure to contract your original dealer or authorized CASIO service center to request replacement. The lamp contains mercury. Dispose of old lamps in accordance with the rules and regulations of your local jurisdiction.
-
Page 31: To Replace The Lamp
User Maintenance To replace the lamp When replacing the lamp, use the special screwdriver that comes with the replacement lamp. The projector does not come with a screwdriver. Turn off the projector and unplug its AC Loosen the three screws indicated by power cord. -
Page 32: Resetting The Lamp Time
User Maintenance Insert the new lamp cartridge as far as it will go, as shown in the illustration. After inserting the lamp cartridge, stow Take care to avoid touching the lamp the ribbon as shown in the illustration in (glass) and the mirrors inside the step 5. -
Page 33: To Reset The Lamp Time After Exceeding The Lamp Life
User Maintenance To reset the lamp time after exceeding the lamp life If you use the existing lamp until its life is exceeded, you will not be able to turn on the projector even after you replace the lamp with a new one. Perform the following procedure to initialize the lamp time in this case, which will make it possible to turn on the projector. -
Page 34: Troubleshooting
Troubleshooting Indicators The status of the indicators lets you know the current operational status of the projector. This section provides details about indicators. “POWER” in the following table stands for the “POWER/STANDBY” indicator. TEMP indicator LAMP indicator POWER/STANDBY indicator Normal Operation Indicators When this indicator: Is this: It means this:... - Page 35 The back on. projector will turn off. If the error occurs again when you turn power back on, contact your retailer or nearest authorized CASIO Service Center. POWER : Amber flashing Power has turned off automatically due to a system problem.
- Page 36 Message : A system problem and turn the projector back on. has occurred. Normal If the error occurs again when you turn power back on, projection is not contact your retailer or nearest authorized CASIO Service possible. Center. POWER : Green steady Press the [ESC] key to clear the warning message.
- Page 37 Next, reconnect the power cord and turn projector power back on. If the error occurs again when you turn power back on, contact your retailer or nearest authorized CASIO Service Center. POWER : Amber flashing...
-
Page 38: Projector Troubleshooting
Troubleshooting Indicator/Error Message Description and Required Action POWER : Amber flashing The allowable life for the lamp has been exceeded, and the Red steady projector will not turn on. Replace the lamp following the steps “ TEMP : – under Replacing the Lamp”... - Page 39 (power) key, unplug the AC power cord and wait for at least 10 minutes. Then plug the power cord back in and turn the projector back on again. If normal operation does not resume after you perform the above steps, take the projector to your retailer or authorized CASIO Service Center. E-39...
-
Page 40: Specifications
*2: Audio (stereo) input/output and video input, 3.5 mini jack × 1 CASIO COMPUTER CO., LTD. makes no guarantees concerning the operation or suitability of any USB device that you connect to the projector’s USB port. Specifications are subject to change without notice.