
Related Manuals for D-Link DVC-1000


Summary of Contents for D-Link DVC-1000
- Page 1 (Patent Pending) Broadband VideoPhone Manual Building Networks for People v2.0 DVC-1000...
-
Page 2: Table Of Contents
Using a Telephone with the DVC-1000 ... 13 Using the DVC-1000 ... 14 Using the Configuration Menu ... 19 Using the DVC-1000 with Routers, Gateways or Modems ... 33 Troubleshooting ... 39 Frequently Asked Questions ... 47 Glossary of Terms ... 50 Technical Specifications ... -
Page 3: Introduction
The previously complicated process of conducting a video conference is simplified with the i2eye DVC- 1000. Since the DVC-1000 is a stand-alone device, you do not need a computer to video conference over the Internet. The i2eye DVC-1000 is such a revolutionary leap in technology that D-Link calls it a VideoPhone. -
Page 4: Package Contents
Standard Composite RCA Audio / Video Cable Cat 5 RJ-45 Ethernet Cable Note: Using a power supply with a different voltage than the one included with the DVC-1000 will cause damage and void the warranty for this product. System Requirements... -
Page 5: Features & Benefits
Stand-alone operation - No computer needed Uses broadband cable/DSL or network connections for high-quality video H.323 Internet video-conferencing standard compliant Easy to use Use your existing broadband network Easy Setup Wizard Picture-in-Picture view or full-screen view Remote control included Speed Dialing Advanced video and audio privacy protection Built-in Caller ID Auto mapping of IP Address... -
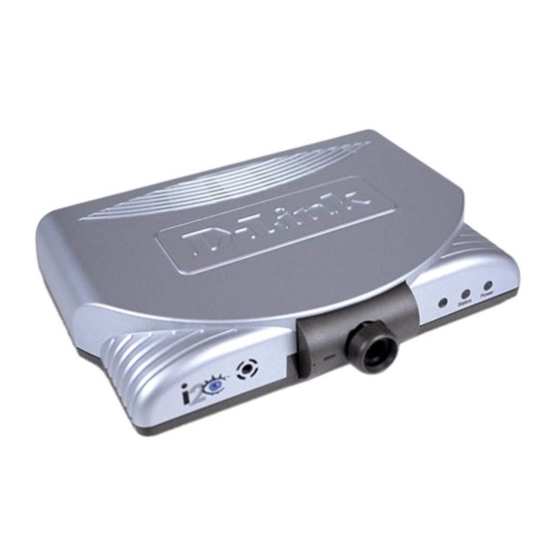
Page 6: Leds
Back, right. Steady green light indicates the network Link Status connection is good. Back, left. Steady or blinking yellow light indicates the Activity i2eye Call Monitor Link Status LED Location and Activity DVC-1000 is transmitting data. i2eye DVC-1000 has the Status Power DVC-1000 is ON. -
Page 7: Getting Started
BEFORE YOU BEGIN! Read Using the DVC-1000 with Routers, Gateways or Broadband Modems on page 33 in this manual if you are using the DVC-1000 VideoPhone with a Router, Gateway or Broadband Modem. The DVC-1000 needs to be set-up before use. Use the Quick Installation Guide (included with the DVC-1000) to perform the hardware in- stallation. - Page 8 Remote Control Layout Use the arrow keys along with the ENTER, CANCEL and number keys to enter information in the Setup Wizard screen. The * (asterisk--sometimes called a “star” key) is used to enter a “.” (period also called a “dot”.) When entering alphanumeric information, the left arrow key performs a backspace,...
-
Page 9: Using The Onscreen Keyboard
The DVC-1000 uses a keyboard that appears on-screen to enter words or al- phanumeric characters into the Setup Wizard screens. When the cursor is located in a setup screen that requires characters to be entered, press the ENTER key to bring up the on-screen keyboard. -
Page 10: Using The Setup Wizard
The following descriptions of the Setup Wizard screens will help you understand the purpose and procedures for providing the required information. Welcome Screen The first screen that displays on the initial startup is the Wecome Screen. This screen explains what information is needed to complete the setup and also explains how to use the remote control to navigate through the... - Page 11 DNS will be set automatically. IP Address, Subnet mask, Gateway If necessary, enter each of these settings for the DVC-1000. You will be able to obtain the IP Address, subnet mask and gateway address from your router configuration settings, ISP or network administrator.
- Page 12 DNS (Domain Naming System) Screen If you entered an IP address in the Network Address screen (described on the previous page) you will see the screen for setting DNS server addresses. The DNS screen asks for information regarding the Domain Name System (DNS) server.
-
Page 13: Using A Telephone With The Dvc-1000
Speakerphone Mode on the DVC-1000 to share the audio with others. This can all be controlled by the re- mote control. When the phone is picked up, the microphone is muted. -
Page 14: Using The Dvc-1000
Self/Remote button on the remote control. Status Icons The Status Icons appear only briefly at startup. The DVC-1000 uses icons to indicate its status. The icons display on the top right side of the Main Screen. If an icon is displayed, this indicates the operation is not complete. The icon will disappear after the operation completes. - Page 15 Answering an Incoming VideoPhone call Just like a regular phone call, picking up the telephone handset will answer the DVC-1000 VideoPhone. You may also use the remote control to answer by pressing the ENTER key when the “Answer” button on the screen is highlighted in a dialog box.
- Page 16 Handset Pick up the telephone handset. The DVC-1000 VideoPhone senses the phone is off the hook and a prompt appears on the screen asking you to either enter a phone number or press # key to select the speed dial list.
-
Page 17: Speakerphone Mode
Speakerphone Mode The DVC-1000 has a Speakerphone Mode if the call needs to be shared with more than one person, or when it is desirable to talk without using the telephone handset. In Speakerphone Mode, the speaker on the television and the microphone in the DVC-1000 VideoPhone are used. - Page 18 Entering Phone Numbers Phone numbers may be entered in the following formats (the dash is entered automatically): 1-949-555-1212: The 1 is required if you are calling outside your local area. 555-1212: Will work only within the local area code. The local area code is specified in the Settings > Personal Info screen. Entering IP Addresses Valid entry for the IP address field would include: 205.104.32.20 (Dials a VideoPhone, or other H.323 videoconferencing...
-
Page 19: Using The Configuration Menu
Main Screen After starting the DVC-1000 VideoPhone, the Main Screen is displayed. The self-view image should be displaying in the larger window. The following buttons reside on the main screen: Set up a speed dial list and choose from several methods of Dial - placing a call to other VideoPhones. - Page 20 Using the Configuration Menu (continued) Main Screen > Dial Mom and Dad D-Link Grandma Mary The Dial screen contains the speed dial list as well as buttons to manage the Speed Dial List and make manual VideoPhone calls This list contains up to 10 Speed Dial entries. Click the Speed Dial List - Add button to add to this list.
- Page 21 Main Screen > Dial (continued) Add - Close - If this Warning screen appears, an invalid IP Address has been entered. Please correct the IP Address and try again. To add a Speed Dial entry, enter a name and a number (or address) using the remote’s number pad or the on- screen keyboard.
- Page 22 Click this button to view the connection details. Items such as video and audio formats and call rates will be displayed. The connection details can be viewed only while the DVC-1000 VideoPhone is on a call.
- Page 23 DNS address, public IP Address, as well as the desired network speed. DVC-1000 will look for system updates each time it starts up. Update - This setting allows you to search for an update manually.
- Page 24 - Automatically adjust video contrast - Select this checkbox to allow the DVC-1000 to automatically accept any incoming call. If this checkbox is not selected and a call is received, a dialog will appear that will ask if the receiver wants to accept the incoming call.
- Page 25 Main Screen >Settings > Personal Information Enter your name here. When a call is placed from your Name- VideoPhone, the name you enter will be displayed as a Caller ID on the remote end of the call. Unless the VideoPhone you call has auto-answer turned on, the party you wish to call will decide whether or not to accept your call based on this name.
- Page 26 Main Screen > Settings > Network Address Public IP Speed Controls how the DVC-1000 obtains an IP Address. Allows you to enter a primary and secondary DNS address. This screen controls how a Public IP Address is obtained. If the Public IP button is “greyed out” it means that your network is unable to obtain an IP Address.
- Page 27 Click OK to save the changes and restart the system. The DVC-1000 VideoPhone will attempt to obtain the IP Address from the DHCP server. When this is checked (the default), the other settings on this screen are automatically grayed.
- Page 28 Main Screen > Settings > Network > DNS Enter the Primary Internet DNS (Domain Name System). Primary DNS - These are Internet server addresses that you should be able to obtain from your router configuration settings, ISP or network administrator. Enter the Secondary DNS address if you have one.
- Page 29 Your router will usually have a Network Address Translation (NAT) mode installed. The NAT affects the IP address of the DVC-1000 and any other devices sharing your Internet Connection. See the glossary on page 44 for a description of a NAT.
- Page 30 Main Screen > Settings > Network > Network Speed The Network Speed screen offers you the option of selecting the speed that is the best match for your current network or connection. Change the settings by selecting the send or receive Change button and select the value desired by moving the selection up or down in the list box.
- Page 31 Set Defaults will restore all settings to factory defaults. This will erase all speed dial entries that have been added. If you select Check Now for an Update then the DVC-1000 will check for an update. If an update is found the following message will appear.
- Page 32 Using the Configuration Menu (continued) Main Screen > Privacy Audio Privacy - Video Privacy - Do not Disturb - Audio Privacy prevents the audio on your side from being sent to the remote caller. No one on the other end of the VideoPhone call will be able to hear you if this setting is checked, although they can see you.
-
Page 33: Using The Dvc-1000 With Routers, Gateways Or Modems
34 - page 38 to learn how to open ports on routers. In the DI-614+ configuration utility, go to the Advanced>Applications screen and check the D-Link DVC-1000 box in the Special Applications list. No other port configuration is needed with the D-Link DI-614+ and DI-604 with the firmware upgrades. - Page 34 The router or gateway that you are using may be different from the example shown on the following pages. However, the general procedure for opening ports will be similar. (If you do not have a D-Link router, look for Virtual Server, Firewall Rules, Port Forwarding, Advanced or Firewall in your router’s configuration utility.)
- Page 35 Opening Ports on Your Routers and Gateways (continued) How to open ports on a router A total of 7 ports must be opened for the DVC-1000 to work with most routers or firewalls. To open these ports, please do the following: A.
- Page 36 Under Schedule, Click Always Click Apply to complete You have now completed the opening of the 7 ports. Your DVC-1000 is ready to use with your router or gateway! (Important: Not all routers and gateways are the same; please refer to your...
- Page 37 Using an Ethernet cable, connect the modem’s Ethernet port to the applicable WAN port on the hub. Once that is done, you can plug the PC and DVC-1000 Video Phone into any other available port.
- Page 38 Broadband Modem Only This section applies only in the instance that the broadband connection is used exclusively with the DVC-1000 Video phone and there are no PCs or other devices connected to the broadband modem.) Recommended Procedure: Many ISPs act as DHCP servers and dynamically assign a public IP address whenever the modem requests one.
-
Page 39: Troubleshooting
If you are calling someone who has an endpoint besides a DVC-1000 VideoPhone, you will have to make direct IP calls to them. If the far side has a DVC-1000 VideoPhone and you cannot connect to them via the directory service, they are probably not registered. - Page 40 Troubleshooting (continued) 4. Telephone or televison produces an off-hook signal. Telephone is off the hook. Hang up the phone. 5.Telephone or television produces a fast busy signal. Person you are trying to call is not registered with the directory service. Call the person using direct IP or wait until the person is registered with the directory service.
- Page 41 Troubleshooting (continued) 9. No video in a call. Video cables are not plugged in correctly. Ensure that your video cables are correctly plugged into the TV. Make sure that the TV is set for video input. Consult your TV manual for reference. Incorrect network speeds.
- Page 42 Troubleshooting (continued) 11. Video freezes during a call. Far side muted their video. If the far side mutes their video you will not be able to see him or her. Network is congested. Give the VideoPhone a couple of minutes to try to recover, or disconnect the call and try again at a later time.
- Page 43 Troubleshooting (continued) VideoPhone is not functioning properly behind NAT. Go to Settings/Network/Public IP. Select “Auto detect public IP Address.” If the VideoPhone is unable to detect the public IP Address, it should be entered manually using “Use specific IP Address.” The public IP Address is given to you by either your ISP or your network administrator.
- Page 44 Troubleshooting (continued) 16. Error Displays on main screen. VideoPhone cannot obtain public IP Address (Router’s address). See “VideoPhone cannot obtain IP Address automatically” section below. 17. VideoPhone cannot obtain IP Address automatically Not properly connected to a DHCP server. Check connection to LAN, by verifying a link light on the back of the VideoPhone.
- Page 45 Troubleshooting (continued) 20. VideoPhone is not connected to the Internet. Ethernet cable is not properly plugged into the VideoPhone. Ensure that the RJ-45 cable is properly plugged into the back of the VideoPhone. A steady green light on the Ethernet port indicates a valid link has been made. Invalid DNS entries.
- Page 46 Troubleshooting (continued) 22. VideoPhone does not boot up. Video is not being displayed on television. Ensure that the video and audio cables are plugged in correctly to both the VideoPhone and television. The television should be set for video input. Consult your television user manual for support. The VideoPhone doesn’t have power or is not turned on.
-
Page 47: Frequently Asked Questions
D-Link LDAP Directory Service. Can I use the DVC-1000 with a computer and monitor instead of a Yes. The DVC-1000 can be used with a computer and monitor instead of a TV. - Page 48 Can I use the DVC-1000 with a non-D-Link directory service? No. The DVC-1000 is designed to automatically connect to the D-Link Directory Service. This is a free service and is available to anyone with a DVC-1000.
- Page 49 Frequently Asked Question (continued) What devices can I connect to with the DVC-1000? With the DVC-1000 you can connect to any hardware or software that is H.323 compatible. If you are not sure if your hardware or software is H.323 compatible, please contact the manufacturer/developer.
-
Page 50: Glossary Of Terms
DSL is ADSL (Asymmetrical Digital Subscribers Line) where the download speed is usually much higher than the upload speed. Ethernet: The port on the back of the DVC-1000 VideoPhone that is used to send and receive data over a network. - Page 51 Most NAT devices have firewall capabilities. QCIF (Quarter Common Intermediate Format): An intermediate video format. QCIF resolution is 176x144. The DVC-1000 VideoPhone will send QCIF-sized video only if the remote endpoint cannot decode CIF.
- Page 52 DVC-1000 VideoPhone in addition to UDP. UDP (User Datagram Protocol): The Internet protocol most commonly used by the DVC-1000 VideoPhone to send and receive audio and video data. WAN (Wide Area Network): A network that is designed to span large...
-
Page 53: Technical Specifications
Up to 30fps Video Up to 30fps CIF (352 x 288 pixels), QCIF (176 x 144) Picture-In-Picture (PIP) Automatic brightness control DVC-1000 Robust Video Audio Telephone interface- Full Duplex Audio Echo cancellation Voice only to and from Voice over IP endpoints... - Page 54 IP-based network including Ethernet, Token Ring, Cable, DSL, Frame, FDDI,T-1 and ATM LAN Fixed IP with subnet mask, DNS and gateway or DHCP Physical DVC-1000 VideoPhone: height x depth x width 1.50" (38mm) x 6.08" (155mm) x 8.07" (205mm) Weight: 14 oz. (.398kg)
-
Page 55: Contacting Technical Support
You can find the most recent software and user documentation on the i2eye website. D-Link provides free technical support for customers within the United States and Canada for the duration of the warranty period on this product. U.S. and Canadian customers can contact D-Link technical support through our web site or by phone. -
Page 56: Warranty And Registration
D-Link’s sole obligation shall be to repair or replace the defective Hardware during the Warranty Period at no charge to the original owner or to refund at D-Link’s sole discretion. Such repair or replacement will be rendered by D-Link at an Authorized D-Link Service Office. The replacement Hardware need not be new or have an identical make, model or part. - Page 57 D-Link may reject or return any product that is not packaged and shipped in strict compliance with the foregoing requirements, or for which an RMA number is not visible from the outside of the package. The product owner agrees to pay D-Link’s reasonable handling and return shipping charges for any product...
- Page 58 D-Link Corporation/D-Link Systems, Inc., as stipulated by the United States Copyright Act of 1976. Contents are subject to change without prior notice.