
Related Manuals for Samsung BQ1VD6T131


Summary of Contents for Samsung BQ1VD6T131
- Page 1 BQ1VD6T131 Built-in Oven user manual imagine the possibilities Thank you for purchasing this Samsung product. Please register your product at www.samsung.com BQ1VD6T131-XEU_00382R-EN.indd 1 2011-07-04 3:36:08...
-
Page 2: Using This Manual
• In the event of a fault or damage to the appliance, do not attempt to operate it. • Repairs should be performed by a licensed technician only. Improper repair may result in considerable danger to you and others. If your oven needs repair, contact a SAMSUNG Service Centre or your dealer. -
Page 3: Disposal Instructions
To protect the environment, it is important that old appliances are disposed of in the correct manner. • The appliance must not be disposed of with household rubbish. • You can obtain information about collection dates and public refuse disposal sites from your local refuse department or council. BQ1VD6T131-XEU_00382R-EN.indd 3 safety instructions_3 2011-07-04 3:36:09... -
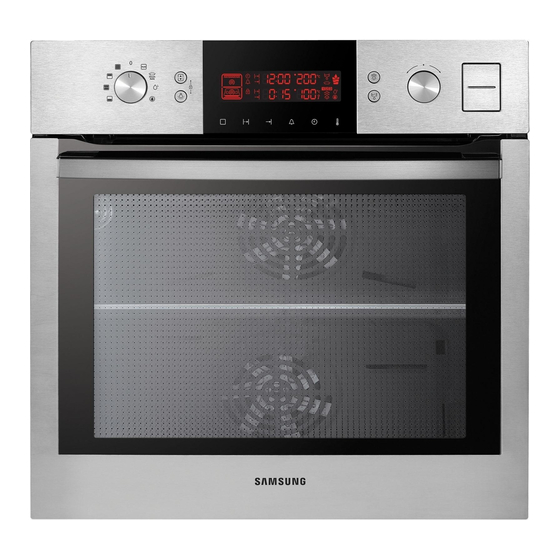
Page 4: Oven Controls
Your new Samsung oven comes with a lot of accessories that should become very helpful during the preparation of different meals. CAUTION: Be sure to attach the accessory correctly to the shelf. Trays need to have at least 2 cm space towards the bottom of the oven, otherwise the enamel surface could be damaged. -
Page 5: Test Dishes
Drippping tray (to catch drippings) *Beef Burgers: Preheat the empty oven for 15 minutes using Large Grill function. BQ1VD6T131-XEU_00382R-EN.indd 5 Warning : When you are moving the steam container by hand, be careful not to drop the steam container for your safety. - Page 6 Suggested temperature : 200 °C Convection The heat generated by the convection is shared evenly in the oven by fans. This function should be used for frozen dishes and baking. Suggested temperature : 170 °C 6_test dishes BQ1VD6T131-XEU_00382R-EN.indd 6 Shelf Cooking Temp. level mode (°C)
-
Page 7: Single Mode
SINGLE MODE set function | 02 Press Function key, function figure will blink. BQ1VD6T131-XEU_00382R-EN.indd 7 With the Single mode, you can choose from all oven functions. All functions are available with single mode. The single mode allows the traditional usage of the oven. -
Page 8: Twin Cooking
| 06 Press Function key, lower function figure will blink. 8_twin cooking BQ1VD6T131-XEU_00382R-EN.indd 8 Depending on the selected twin cooking mode, you can choose from these functions: 03 | set upper function Press Function key, upper function figure will blink. -
Page 9: Steam Cooking
TIME TO DESCALE STEAM ASSIST AUTO COOK BQ1VD6T131-XEU_00382R-EN.indd 9 available mode Be sure to use steam container for steam cook. The steam container has to be placed on shelf level 1. Do not use steam container for steam assist cook. - Page 10 NOTE : After performing the steam cooking, please open the door to allow the oven cavity to dry. 10_steam cooking BQ1VD6T131-XEU_00382R-EN.indd 10 1. Insert Steam Container for steam cook. Use the Steam container on shelf level 1 only and ensure that the steam container is positioned so that it touches the rear wall of the oven cavity.
-
Page 11: Steam Cooking Guide
(coalfish, hake, rose fish) fillet of salmon Whole fish (Trout, perch, gilthead) Mussels chicken breast Boiled eggs BQ1VD6T131-XEU_00382R-EN.indd 11 Shelf level Accessory Steam container Steam container Steam container Steam container Steam container Steam container... - Page 12 (1.0-1.2 kg) roast chicken (1.0-1.2 kg) Oven fish (trout, perch, gilthead) small chocolate cakes roll of frozen apple pie 12_steam cooking BQ1VD6T131-XEU_00382R-EN.indd 12 Steam assist Shelf level Accessory mode Baking tray Mode 3 / 180 °C Baking tray Mode 1 / 190 °C Baking tray Mode 3 / 180 °C...
-
Page 13: Time Setting
EnD TiME set End time | 01 Press End time key, end time figure will blink. BQ1VD6T131-XEU_00382R-EN.indd 13 To apply or modify settings in Twin cooking mode, choose the compartment. Turn Selector knob, set time. Turn Selector knob, apply specific setting. -
Page 14: Change Temperature
TOnE signal To activate or deactivate the tone signal, press and hold the Time and the End time key for 3 seconds. 14_settings BQ1VD6T131-XEU_00382R-EN.indd 14 02 | confirm changed time Turn Selector knob. Press End time or Cooking time key, time figure will blink. -
Page 15: Child Lock
Select the desired recipe by turning Selector knob. Warning : Do not use steam container with steam assist auto cook mode. BQ1VD6T131-XEU_00382R-EN.indd 15 Lower lamp is optional. NOTE : If you don’t stop draining, oven decides proper time for draining water and automatically stop draining. -
Page 16: Single Oven Auto Cook Programmes
0.6-0.8 A-12 roll of turkey 0.6-0.8 0.9-1.1 A-13 steamed fish 0.5-0.7 0.8-1.0 16_automatic cooking BQ1VD6T131-XEU_00382R-EN.indd 16 Shelf Recommendation Level Big grid Put frozen pizza in the middle of the big grid. Baking tray Distribute frozen oven chips evenly on the baking tray. - Page 17 1.0-1.2 1.3-1.5 pizza A-25 yeast dough 0.3-0.5 fermentation 0.6-0.8 BQ1VD6T131-XEU_00382R-EN.indd 17 Shelf Level Dripping tray Put fishes head to tail on the small grid. First setting is for 2 fishes, the second with small setting is for 4 fishes. The programme...
- Page 18 Vegetable gratin S-12 roast Beef S-13 roast pork S-14 roast chicken S-15 roast fish 18_automatic cooking BQ1VD6T131-XEU_00382R-EN.indd 18 Weight/ Shelf Accessory Level 0.3-0.8 Big grid Put dough into bowl. 0.2-0.4 Baking tray Put 4-8 ready to bake dough rolls side by side on baking paper.
- Page 19 Food item S-01 small chocolate cakes S-02 pasta gratin S-03 roast lamb S-04 roast Duck Breast S-05 roast salmon filet BQ1VD6T131-XEU_00382R-EN.indd 19 Shelf Weight/kg Accessory Level 0.4-0.8 Baking tray 0.4-0.6 Big grid 1.0-1.2 Dripping tray with small grill 0.3-0.4 Dripping tray...
- Page 20 S-04 upper frozen chicken wings lower frozen puff pastry snacks S-05 upper chicken pieces lower clafoutis 20_automatic cooking BQ1VD6T131-XEU_00382R-EN.indd 20 Weight/ Shelf Accessory Level 0.4-0.5 Baking tray 0.3-0.4 Dripping tray with small grill 0.4-0.6 Dripping tray with small grill 0.4-0.6 Baking tray 0.4-0.6...
-
Page 21: Installation And Maintenance
The oven is earthed via the ( oven is connected to the mains with a plug, this plug must remain accessible after the oven is installed. Samsung will take no responsibility for accidents that originate from a missing or faulty earth connection. -
Page 22: Troubleshooting
SOLUTION Turn oven off and remove food. Allow oven to cool before using it again. Call your local SAMSUNG Customer Care Centre. Insert divider for upper, twin and lower mode. Remove divider for single mode. -
Page 23: Cleaning And Care
• Leave the oven door ajar at 15 ° after cleaning to allow the interior enamel surface to dry thoroughly. BQ1VD6T131-XEU_00382R-EN.indd 23 2. Pour 400 ml (3/4 pint) of 3. Close oven door. - Page 24 Important : When you start descaling, proceed all descaling 6 steps. If you do not, you must restart the descaling process from the beginning to use the steam cooking function again. 24_cleaning & care BQ1VD6T131-XEU_00382R-EN.indd 24 DISPLAY ICON, steam cooking function is available for 2 hours Descaling product 125 ml + 1 L drinking water Drain remaining water inside oven.
-
Page 25: Rapid Drying
• Wipe the surface gently with a soft clean cloth or micro fiber cloth and a mild window cleaning detergent. accessory Wash the accessory after every use and dry it with a kitchen towel. If necessary, lay in warm soapy water for about 30 minutes for easier cleaning. BQ1VD6T131-XEU_00382R-EN.indd 25 cleaning & care_25 2011-07-04 3:36:20... -
Page 26: Door Glass Removal
The Door-Glass is different from 2 EA to 4 EA model by model. When assembly the inner glass 1, put printing to direction below. 26_cleaning & care BQ1VD6T131-XEU_00382R-EN.indd 26 70 ° 2. Close the door by approximately 70 °. With both... - Page 27 2. When cleaning has been done, lift the top of the heater back to its original level and turn the nut circular clockwise. ATTACHING: Repeat steps 1and 2 in reverse order. BQ1VD6T131-XEU_00382R-EN.indd 27 2. Rotate the side runner by 3. Pull and remove the side approximately 45º...
-
Page 28: Bulb Exchange
• Protect the oven light bulb and the glass cap by laying a cloth on the bottom of the oven compartment. • Bulbs can be purchased from the SAMSUNG Service Centre. rear oven lamp 1. Remove cap by turning anticlockwise and remove the metal ring, the sheet ring and clean the glass cap. - Page 29 BQ1VD6T131-XEU_00382R-EN.indd 29 2011-07-04 3:36:22...
- Page 30 30_cleaning & care BQ1VD6T131-XEU_00382R-EN.indd 30 2011-07-04 3:36:22...
- Page 31 BQ1VD6T131-XEU_00382R-EN.indd 31 2011-07-04 3:36:22...
- Page 32 261 03 710 NETHERLANDS 0900-SAMSUNG (0900-7267864) (€ 0,10/Min) NORWAY 815-56 480 PORTUGAL 80820-SAMSUNG (726-7864) SPAIN 902 - 1 - SAMSUNG (902 172 678) SWEDEN 0771 726 7864 (SAMSUNG) SWITZERLAND 0848 - SAMSUNG (7267864,CHF 0.08/min) 0330 SAMSUNG (7267864) EIRE 0818 717100 BQ1VD6T131-XEU_00382R-EN.indd 32...