Table of Contents
Advertisement
Quick Links
MODEL G0441HEP
3 HP DUAL-FILTRATION HEPA
CYCLONE DUST COLLECTOR
MANUAL INSERT
(For owner's manual revised October, 2013)
The Model G0441HEP is the same machine as the Model G0441 except for the dual-filtration HEPA filter
system and the included stand. Except for the differences noted in this insert, all other content in the Model
G0440/G0441 owner's manual applies to this machine.
: To reduce the risk of serious injury, you MUST read and understand this insert—and
the entire Model G0440/G0441 manual—BEFORE assembling, installing, or operating this machine!
If you have any further questions about this manual insert or the differences between the Model G0441HEP
and the Model G0441, contact our Technical Support at (570) 546-9663 or email techsupport@grizzly.com.
COPYRIGHT © FEBRUARY, 2015 BY GRIZZLY INDUSTRIAL, INC. REVISED JANUARY, 2018 (AB)
WARNING: NO PORTION OF THIS MANUAL MAY BE REPRODUCED IN ANY SHAPE
OR FORM WITHOUT THE WRITTEN APPROVAL OF GRIZZLY INDUSTRIAL, INC.
(FOR MODELS MANUFACTURED SINCE 01/15) #BB17235 PRINTED IN TAIWAN
V1.01.18
Advertisement
Table of Contents

Related Manuals for Grizzly G0441HEP


Summary of Contents for Grizzly G0441HEP
- Page 1 (For owner's manual revised October, 2013) The Model G0441HEP is the same machine as the Model G0441 except for the dual-filtration HEPA filter system and the included stand. Except for the differences noted in this insert, all other content in the Model G0440/G0441 owner's manual applies to this machine.
- Page 2 MACHINE DATA SHEET Customer Service #: (570) 546-9663 · To Order Call: (800) 523-4777 · Fax #: (800) 438-5901 MODEL G0441HEP 3 HP DUAL‐FILTRATION HEPA CYCLONE DUST COLLECTOR Product Dimensions: Weight................................514 lbs. Width (side-to-side) x Depth (front-to-back) x Height............. 60-3/4 x 33 x 107-1/2 in.
- Page 3 The information contained herein is deemed accurate as of 2/5/2018 and represents our most recent product specifications. Model G0441HEP PAGE 2 OF 3 Due to our ongoing improvement efforts, this information may not accurately describe items previously purchased. Model G0441HEP (Mfd. Since 01/15)
- Page 4 " ........2 P. Vacuum Hose 1 ⁄ " x 98" ......1 Q. Collection Drum Vacuum Ring ....1 R. Cyclone Vacuum Tube ....... 1 S. Vacuum Hose Clips ........2 Figure 1. Model G0441 inventory. Model G0441HEP (Mfd. Since 01/15)
- Page 5 "-16 ........3 Figure 3. Contents of stand box. —Hex Bolts ⁄ "-18 x 1" ......8 —Lock Nuts ⁄ "-16 ........8 —Flat Washers ⁄ " ........16 — Vacuum Hose Clips ........ 2 Model G0441HEP (Mfd. Since 01/15)
- Page 6 " hex bolts, (32) ⁄ " Legs flat washers, and (16) ⁄ "-16 lock nuts (see x 24 Figure 4)—only finger-tighten for now. Figure 6. Lower legs attached to stand assembly. Model G0442HEP/G0601HEP (Mfd. Since 01/15) Model G0441HEP (Mfd. Since 01/15)
- Page 7 Figure 10, with (12) ⁄ "-18 x ⁄ " hex bolts, (12) ⁄ " flat washers, and (12) ⁄ "- 18 lock nuts. Intake Barrel x 12 Figure 10. Securing blower on intake barrel. Model G0441HEP (Mfd. Since 01/15)
- Page 8 (8) lock nuts. or rocking. Collector Mounting Bracket Figure 14. Lifting the assembly upright. Figure 12. Collector mounting brackets attached to intake assembly. Model G0442HEP/G0601HEP (Mfd. Since 01/15) Model G0441HEP (Mfd. Since 01/15)
- Page 9 Rubber Gasket HEPA Filter Assembly U-Shaped Clips Figure 18. Attaching HEPA filter assembly to blower housing. 19. Follow assembly Steps 14–21 in Owner's Figure 16. Securing vacuum hose to stand legs. Manual to assemble collection drum. Model G0441HEP (Mfd. Since 01/15)
- Page 10 ⁄ " hex nuts, and (16) ⁄ " flat washers (see Figure 22). Adapter Gasket Wall-Mount Adapter Figure 22. Attaching wall-mount adapter. Figure 20. G0441HEP filter system completely installed. -10- Model G0442HEP/G0601HEP (Mfd. Since 01/15) Model G0441HEP (Mfd. Since 01/15)
- Page 11 HEPA Filter Assembly Rubber Gasket Figure 24. Attaching HEPA filter assembly to wall-mount adapter. Follow assembly Steps 14–21 in Owner's Manual to assemble collection drum. Figure 26. G0441HEP wall-mount filter system completely installed. -11- Model G0441HEP (Mfd. Since 01/15)
- Page 12 Main 1-10 232A 230-3 6 118 230-2 228-1 230-1 230-5 230-4 107 108 BUY PARTS ONLINE AT GRIZZLY.COM! -12- Model G0442HEP/G0601HEP (Mfd. Since 01/15) Model G0441HEP (Mfd. Since 01/15) Scan QR code to visit our Parts Store.
- Page 13 230-5 P0441HEP230-5 HEPA FILTER BOTTOM PLATE P0441HEP053 COLLECTION DRUM 35GAL P0441HEP231 DRUM LID PVC RUBBER SEAL 2M P0441HEP054 DRUM CLAMP 232A P0441HEP232A HEPA FILTER KIT BUY PARTS ONLINE AT GRIZZLY.COM! -13- Model G0441HEP (Mfd. Since 01/15) Scan QR code to visit our Parts Store.
- Page 14 P0441HEP305 READ MANUAL LABEL 2W X 3.3H P0441HEP313 RETURN RED HANDLE LABEL P0441HEP306 GLASSES/RESPIRATOR DC LABEL P0441HEP314 GRIZZLY PUTTY TOUCH-UP PAINT P0441HEP307 MOTOR WARNING LABEL P0441HEP315 GRIZZLY.COM LABEL P0441HEP308 MOTOR SPEC LABEL -14- Model G0442HEP/G0601HEP (Mfd. Since 01/15) Model G0441HEP (Mfd. Since 01/15)
- Page 15 DESCRIPTION PT27326001 WALL MOUNT ADAPTER PT23726005 HEX BOLT 3/8-16 X 1 PT27326002 PT23726006 FLAT WASHER 3/8 SWITCH MOUNTING BRACKET PT27326003 INTAKE BARREL BRACE, EXTENDED PT23726007 HEX NUT 3/8-16 PT27326004 OUTLET GASKET 326 X 226MM -15- Model G0441HEP (Mfd. Since 01/15)
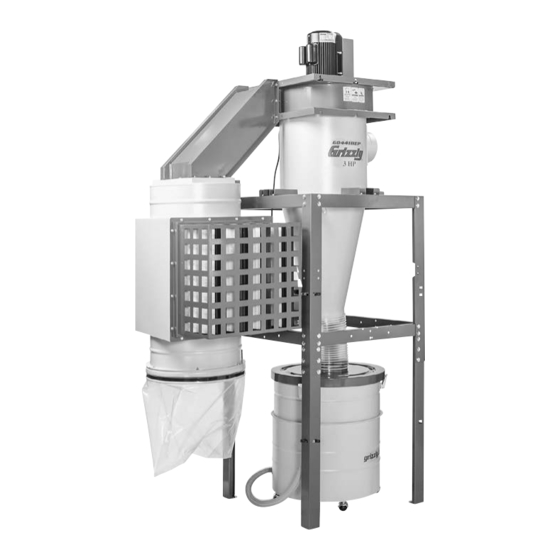
- Page 17 Model G0441 Shown With Optional Stand COPYRIGHT © APRIL, 2005 BY GRIZZLY INDUSTRIAL, INC. REVISED OCTOBER, 2013 (TS) WARNING: NO PORTION OF THIS MANUAL MAY BE REPRODUCED IN ANY SHAPE OR FORM WITHOUT THE WRITTEN APPROVAL OF GRIZZLY INDUSTRIAL, INC.
- Page 18 This manual provides critical safety instructions on the proper setup, operation, maintenance, and service of this machine/tool. Save this document, refer to it often, and use it to instruct other operators. Failure to read, understand and follow the instructions in this manual may result in fire or serious personal injury—including amputation, electrocution, or death.
-
Page 19: Table Of Contents
Table of Contents INTRODUCTION ..........2 SECTION 4: DESIGNING THE SYSTEM ..26 Machine Description ........2 General ............26 Contact Info............ 2 Duct Material ..........26 Manual Accuracy ........... 2 Metal Duct ..........27 Identification ........... 3 Flexible Duct ..........27 G0440 Machine Data Sheet ...... -
Page 20: Introduction
Before contacting, please get the serial number and manufacture date of your machine. This will help us help you faster. Grizzly Technical Support 1203 Lycoming Mall Circle Muncy, PA 17756 Manufacture Date Phone: (570) 546-9663 Email: techsupport@grizzly.com... -
Page 21: Identification
Identification Blower Motor Housing Inlet Canister Port Filter Assembly Remote Magnetic Switch Optional Stand Vacuum Hose Collection Drum Figure 1. Identification (Model G0441 shown with optional stand). To reduce the risk of serious injury when using this machine, read and understand this entire... -
Page 22: G0440 Machine Data Sheet
MACHINE DATA SHEET Customer Service #: (570) 546-9663 · To Order Call: (800) 523-4777 · Fax #: (800) 438-5901 MODEL G0440 2 HP CYCLONE DUST COLLECTOR Product Dimensions: Weight................................287 lbs. Width (side-to-side) x Depth (front-to-back) x Height..............59 x 38 x 93-1/2 in. Footprint (Length x Width)....................... - Page 23 Main Specifications: Operation Dust Collector Type......................Two-Stage (Cyclone) Approved Dust Types..........................Wood Filter Type..........................Pleated Cartridge Airflow Capacity......................1354 CFM @ 2.5 in. SP Max Static Pressure (at 0 CFM)......................10.4 in. Main Inlet Size............................. 7 in. Inlet Adapter Included............................ No Machine Collection Capacity At One Time..................
-
Page 24: G0441 Machine Data Sheet
G0441 Machine Data Sheet MACHINE DATA SHEET Customer Service #: (570) 546-9663 · To Order Call: (800) 523-4777 · Fax #: (800) 438-5901 MODEL G0441 3 HP CYCLONE DUST COLLECTOR Product Dimensions: Weight................................347 lbs. Width (side-to-side) x Depth (front-to-back) x Height............. 60-1/4 x 38-1/2 x 109 in. Footprint (Length x Width)....................... - Page 25 Main Specifications: Operation Dust Collector Type......................Two-Stage (Cyclone) Approved Dust Types..........................Wood Filter Type..........................Pleated Cartridge Airflow Capacity......................1654 CFM @ 2.0 in. SP Max Static Pressure (at 0 CFM)......................14.2 in. Main Inlet Size............................. 8 in. Inlet Adapter Included............................ No Machine Collection Capacity At One Time.......................
-
Page 26: Section 1: Safety
SECTION 1: SAFETY For Your Own Safety, Read Instruction Manual Before Operating This Machine The purpose of safety symbols is to attract your attention to possible hazardous conditions. This manual uses a series of symbols and signal words intended to convey the level of impor- tance of the safety messages. - Page 27 INTENdEd usAGE. Only use machine for its machine in good working condition. A machine intendedpurposeandnevermakemodifications that is improperly maintained could malfunction, not approved by Grizzly. Modifying machine or leadingtoseriouspersonalinjuryordeath. using it differently than intended may result in ChECK dAMAGEd PARTs. Regularly inspect...
-
Page 28: Additional Safety For Dust Collectors
Additional Safety for Dust Collectors INTENDED USE. This dust collector is designed SUSPENDED DUST PARTICLES AND IGNITION SOURCES. DO NOT operate the dust collector in for collecting wood dust and chips from wood- working machines. DO NOT use it to collect areas where explosion risks are high. -
Page 29: Section 2: Power Supply
SECTION 2: POWER SUPPLY Availability Circuit Requirements Before installing the machine, consider the avail- A power supply circuit includes all electrical ability and proximity of the required power supply equipment between the breaker box or fuse panel circuit. If an existing circuit does not meet the in the building and the machine. -
Page 30: Connection Type
Connection Type Grounding Instructions A permanently connected (hardwired) power sup- In the event of a malfunction or breakdown, ply is typically installed with wires running through grounding provides a path of least resistance mounted and secured conduit. A disconnecting for electrical current to reduce the risk of electric means, such as a locking switch (see following shock. -
Page 31: Section 3: Setup
SECTION 3: SETUP Unpacking This machine presents serious injury hazards Your machine was carefully packaged for safe to untrained users. Read transportation. Remove the packaging materials through this entire manu- from around your machine and inspect it. If you al to become familiar with discover any damage, please call us immediately the controls and opera- at (570) 546-9663 for advice. -
Page 32: G0440 Inventory
G0440 Inventory The following is a list of items shipped with your machine. Before beginning setup, lay these items out and inventory them. If any non-proprietary parts are missing (e.g. a nut or a washer), we will gladly replace them; or for the sake of expediency, replacements can be obtained at your local hardware store. -
Page 33: G0441 Inventory
G0441 Inventory The following is a description of the main compo- nents shipped with your machine. Lay the compo- nents out to inventory them. Inventory: (Figure 3) A. Intake Cylinder ........... 1 B. Cyclone Funnel .......... 1 C. Intake Barrel ..........1 D. -
Page 34: Site Considerations
Site Considerations Weight Load Physical Environment Refer to the Machine Data Sheet for the weight The physical environment where the machine is of your machine. Make sure that the surface upon operated is important for safe operation and lon- which the machine is placed will bear the weight gevity of machine components. -
Page 35: Wall Mounting
Wall Mounting Wood Framed Walls, G0440 = Lag Bolts = Lag Bolts, Countersunk Before mounting, make sure you locate your dust 36" collector away from any open flames or potential ignition sources, as fine dust can easily ignite. ⁄ " If you are mounting your dust collector to a wood framed wall, you must build and install the wall 2x12 Board... -
Page 36: Materials Needed For Concrete/Masonry Wall
Copy the mounting hole layout pattern from the motor housing (see Figures 7–8) to your Top Row Mounting Hole Height wall mounting board, making sure the Top Row Mounting Hole Height is correct for your dust collector. Use these measurements for hole placement when mounting the Model G0440. -
Page 37: Assembly
Assembly Attach the intake cylinder to the bottom of the housing, as shown in Figure 11, using (4) ⁄ "-18 x ⁄ " hex bolts and (4) ⁄ " flat wash- ers. Note: Because this part of the dust collector will not be accessible after assembly, con- HEAVY LIFT! sider using medium strength thread locking... - Page 38 Place the intake barrel brace in position Attach the cyclone funnel to the intake barrel and mark the location of the mounting holes with a barrel gasket between them, as shown (shown in Figure 13) with a small pencil, nail, in Figure 15, using (12) ⁄...
- Page 39 11. Attach the outlet port and filter L-braces to 12. Mount the filter to the L-braces with the brace the blower housing with the outlet gasket gaskets between them, as shown in Figure between the outlet port and the housing, as 19, using (4) ⁄...
- Page 40 b. Connect the gray flexible hose from b. Attach the 8" x 5" gray flexible hose the outlet port to the canister adapter between the canister adapter and and secure it in place with the two 7" the muffler with two 8" hose clamps, hose clamps, as shown in Figure 21.
- Page 41 Note—For the Model G0441 Only: If you plan to keep your machine under an 8' ceil- ing, skip Step 15. 15. Model G0441: Connect the upper and lower collection drums together and secure them with the included metal clamp and provided fasteners, as shown in Figure 25.
- Page 42 18. Insert the rubber seal over the top lip of the 20. Move the collector drum under the dust col- collection drum rim. Pay special attention lector and connect it to the cyclone funnel to the direction of the seal, as shown in the with the clear flexible hose and the two 9"...
-
Page 43: Test Run
Test Run 22. Fit the plastic canister collection bag over the bottom of the canister filter and clamp in place with the metal bag clamp, as shown in Figure 32. Once the assembly is complete, test run your machine to make sure it runs properly and is ready for regular operation. -
Page 44: Section 4: Designing The System
The dust collector is capable of collecting dust from up to three machines running simultaneously. Grizzly offers a complete line of dust collection accessories for setting up a sta- Plastic duct generates static tionary system. -
Page 45: Metal Duct
However, the cost of specifically Another disadvantage is the rough internal seams designed flexible duct can vary greatly. Grizzly and crimped ends that unavoidably increase static offers polyethylene hose, which is well suited for pressure loss. -
Page 46: System Design
Line Duct Our Workshop Planner will allow you to quickly and easily design and print a basic shop layout. Don't worry, non-Grizzly brand machines can be substituted with Grizzly machines for layout pur- Figure 38. Efficient duct layout. poses. Note: After you're finished, make sure to save your layout for later modification. -
Page 47: Step 4. Determine Required Cfms
Directional changes should be kept to a mini- If the machine does not have a built-in dust port, mum. The more directional change fittings use the following table to determine which size of you use directly increases the overall resis- dust port to install. -
Page 48: Determining Main Line Duct Size
Experiment with different combinations of blast gates open/closed to find the best results for your system. Determining Main Line Duct Size Write your determined branch line sizes on your drawing, as shown in the following Figure. The general rule of thumb for a main line duct is that the velocity of the airflow must not fall below 3500 FPM. -
Page 49: Multiple Dust Ports
Multiple Dust Ports Duct Approximate Approximate Dia. Static Pressure Static Pressure If your machine has multiple dust ports, add the Loss Per Foot of Loss Per Foot total CFM given for each dust port size from Rigid Pipe of Flex Pipe the table provided in the earlier subsection, Main Branch... - Page 50 STATIC PRESSURE (Inch/H2O) Elbows/Branches Figure 49. CFM for static pressure loss of line 6" 45˚ Y-Branch ........ 0.329 2 HP GRIZZLY DUST COLLECTOR PERFORMANCE RESULTS connected to a dust collector & router. 4" 45˚ Elbow ........0.225 Max CFM Max SP...
-
Page 51: Example Materials List
Description Model Quantity 10.0 11.0 STATIC PRESSURE (Inch/H2O) 6" Rigid Pipe at 20' G7364 2 HP GRIZZLY DUST COLLECTOR PERFORMANCE RESULTS 4" Rigid Pipe at 10' G6162 Max CFM Max SP Volts Inlet Impeller 4" Flex Hose at 5'... -
Page 52: System Grounding
System Grounding Be sure that you extend the bare copper wire down all branches of the system. Do not forget to connect the wires to each other with wire nuts when two branches meet at a “Y” or “T” connec- Since plastic hose is abundant, relatively inex- tion. -
Page 53: Section 5: Operations
OMMEND that you read books, trade maga- zines, or get formal training before begin- ning any projects. Regardless of the con- tent in this section, Grizzly Industrial will not be held liable for accidents caused by lack of training. -35-... -
Page 54: Section 6: Accessories
(2) 5' straight pipes, (2) adjustable nipples, (1) risk, only install accessories recommended branch, and (1) 60˚ elbow. for this machine by Grizzly. NOTICE Refer to the newest copy of the Grizzly Catalog for other accessories available for this machine. H7499—Stand for G0440 H7509—Stand for G0441... - Page 55 G6163—4" Clamp W1039—Universal Adapter G7343—5" Clamp This seven step adapter provides a multitude G7361—6" Clamp of dust collection reducing options. Simply H5228—7" Clamp cut away unneeded steps with a hacksaw. H5238—8" Clamp Outside diameter step sizes include 1", 2", H5253—9" Clamp 2.5", 3", 4", 5", and 6".
-
Page 56: Section 7: Maintenance
SECTION 7: MAINTENANCE Cleaning Filter Always disconnect power to the machine before Your new cyclone dust collector has a gentle performing maintenance. brush system inside the filter for cleaning. This Failure to do this may brush system is controlled by the red and black result in serious person- handles shown in Figure 61. -
Page 57: Removing/Replacing Filter
Follow the instructions below to perform this procedure. When replacing the filter for the G0440 ask for part number P0440032V2-4. For the G0441, ask for part number P04410032V2-4 from Grizzly at 800-523-4777. Canister Tools Needed Base Open-End Wrench 10mm ........ - Page 58 Carefully lift the filter out of the canister Re-insert a filter into the canister assembly. assembly, as shown in Figure 65. Note: Make sure the bristles of the brush are straight to ensure efficient cleaning of the filter when needed. 10.
-
Page 59: Section 8: Service
SECTION 8: SERVICE Review the troubleshooting and procedures in this section to fix or adjust your machine if a problem devel- ops. If you need replacement parts or you are unsure of your repair skills, then feel free to call our Technical Support at (570) 546-9663. -
Page 60: Section 9: Wiring
Technical source. Support at (570) 546-9663. The photos and diagrams included in this section are best viewed in color. You can view these pages in color at www.grizzly.com. -42- Model G0440/G0441 (Mfg. Since 03/12) -
Page 61: G0440 Wiring Diagram
G0440 Wiring Diagram 220V Motor Ground 1-PHASE 220 VAC DISCONNECT SWITCH (as recommended) OL_NO 220V Circuit Board 13NO NHD C-12D 14NO NHD NTH-14 ON/OFF Switch 220V Magnetic Contactor Switch and Overload Relay READ ELECTRICAL SAFETY -43- Model G0440/G0441 (Mfg. Since 03/12) ON PAGE 42! -
Page 62: G0441 Wiring Diagram
G0441 Wiring Diagram 220V Motor Ground 1-PHASE 220 VAC DISCONNECT SWITCH (as recommended) OL_NO 220V Circuit Board 13NO NHD C-18D 14NO ON/OFF NHD NTH-25 Switch 220V Magnetic Contactor Switch and Overload Relay READ ELECTRICAL SAFETY -44- Model G0440/G0441 (Mfg. Since 03/12) ON PAGE 42! -
Page 63: G0440/G0441 Electrical Components
G0440/G0441 Electrical Components CONNECTION 220V Motor Wiring Figure 67. Motor wiring. Figure 68. Motor wiring schematic. Magnetic Switch Contactor Circuit Board Overload Relay Junction Box Figure 69. G0441 magnetic switch assembly. READ ELECTRICAL SAFETY -45- Model G0440/G0441 (Mfg. Since 03/12) ON PAGE 42! -
Page 64: Section 10: Parts
3V3-2 3V3-3 Grizzly Cyclone Induction Motor Connections: 28-1 OUTPUT DUTY HEAT 62V2 VOLT WEIGHT CLASS DATE PHASE SER. NO. Manufactured for Grizzly in Taiwan 44V2 32V3-1 32V3 32V2-2 32V2-3 32V2-4 72V2 32V2-3 52V2A 51V2 32V2-5 34V2 52V2 -46- Model G0440/G0441 (Mfg. Since 03/12) - Page 65 P0440021 OUTLET GASKET 306 X 226MM 72V2 P0440072V2 MACHINE ID LABEL CSA V2.01.12 P0440022 OUTLET PORT P0440073 MODEL NO/HP/GRIZZLY LABEL (LARGE) P0440023 HEX BOLT 5/16-18 X 1 P0440074 MODEL NO/HP/GRIZZLY LABEL (SMALL) P0440024 FLAT WASHER 5/16 P0440077 EXT TOOTH WASHER 3/8...
-
Page 66: G0441 Main
3V3-3 27A-2 Grizzly Cyclone Induction Motor 28-1 Connections: OUTPUT DUTY HEAT 68V2 VOLT WEIGHT CLASS DATE PHASE SER. NO. Manufactured for Grizzly in Taiwan 32V3-1 44V2 32V3 32V2-2 53V2A 32V2-3 32V2-4 32V2-3 78V2 51V3 32V2-5 34V2 107 108 53V2 -48-... - Page 67 ELECTRICITY LABEL P0441023 HEX BOLT 5/16-18 X 1 78V2 P0441078V2 MACHINE ID LABEL CSA V2.01.12 P0441024 FLAT WASHER 5/16 P0441079 MODEL NO/HP/GRIZZLY LABEL (LARGE) P0441025 HEX NUT 5/16-18 P0441080 MODEL NO/HP/GRIZZLY LABEL (SMALL) P0441026 HOSE CLAMP 8" P0441083 MUFFLER 8"...
- Page 68 -50- Model G0440/G0441 (Mfg. Since 03/12)
- Page 69 Would you recommend Grizzly Industrial to a friend? _____ Yes _____No Would you allow us to use your name as a reference for Grizzly customers in your area? Note: We never use names more than 3 times. _____ Yes _____No 10.
- Page 70 FOLD ALONG DOTTED LINE Place Stamp Here GRIZZLY INDUSTRIAL, INC. P.O. BOX 2069 BELLINGHAM, WA 98227-2069 FOLD ALONG DOTTED LINE Send a Grizzly Catalog to a friend: Name_______________________________ Street_______________________________ City______________State______Zip______ TAPE ALONG EDGES--PLEASE DO NOT STAPLE...
-
Page 71: Warranty And Returns
WARRANTY AND RETURNS Grizzly Industrial, Inc. warrants every product it sells for a period of 1 year to the original purchaser from the date of purchase. This warranty does not apply to defects due directly or indirectly to misuse, abuse, negligence, accidents, repairs or alterations or lack of maintenance.